# In depth shader breakdown
## Advanced intro
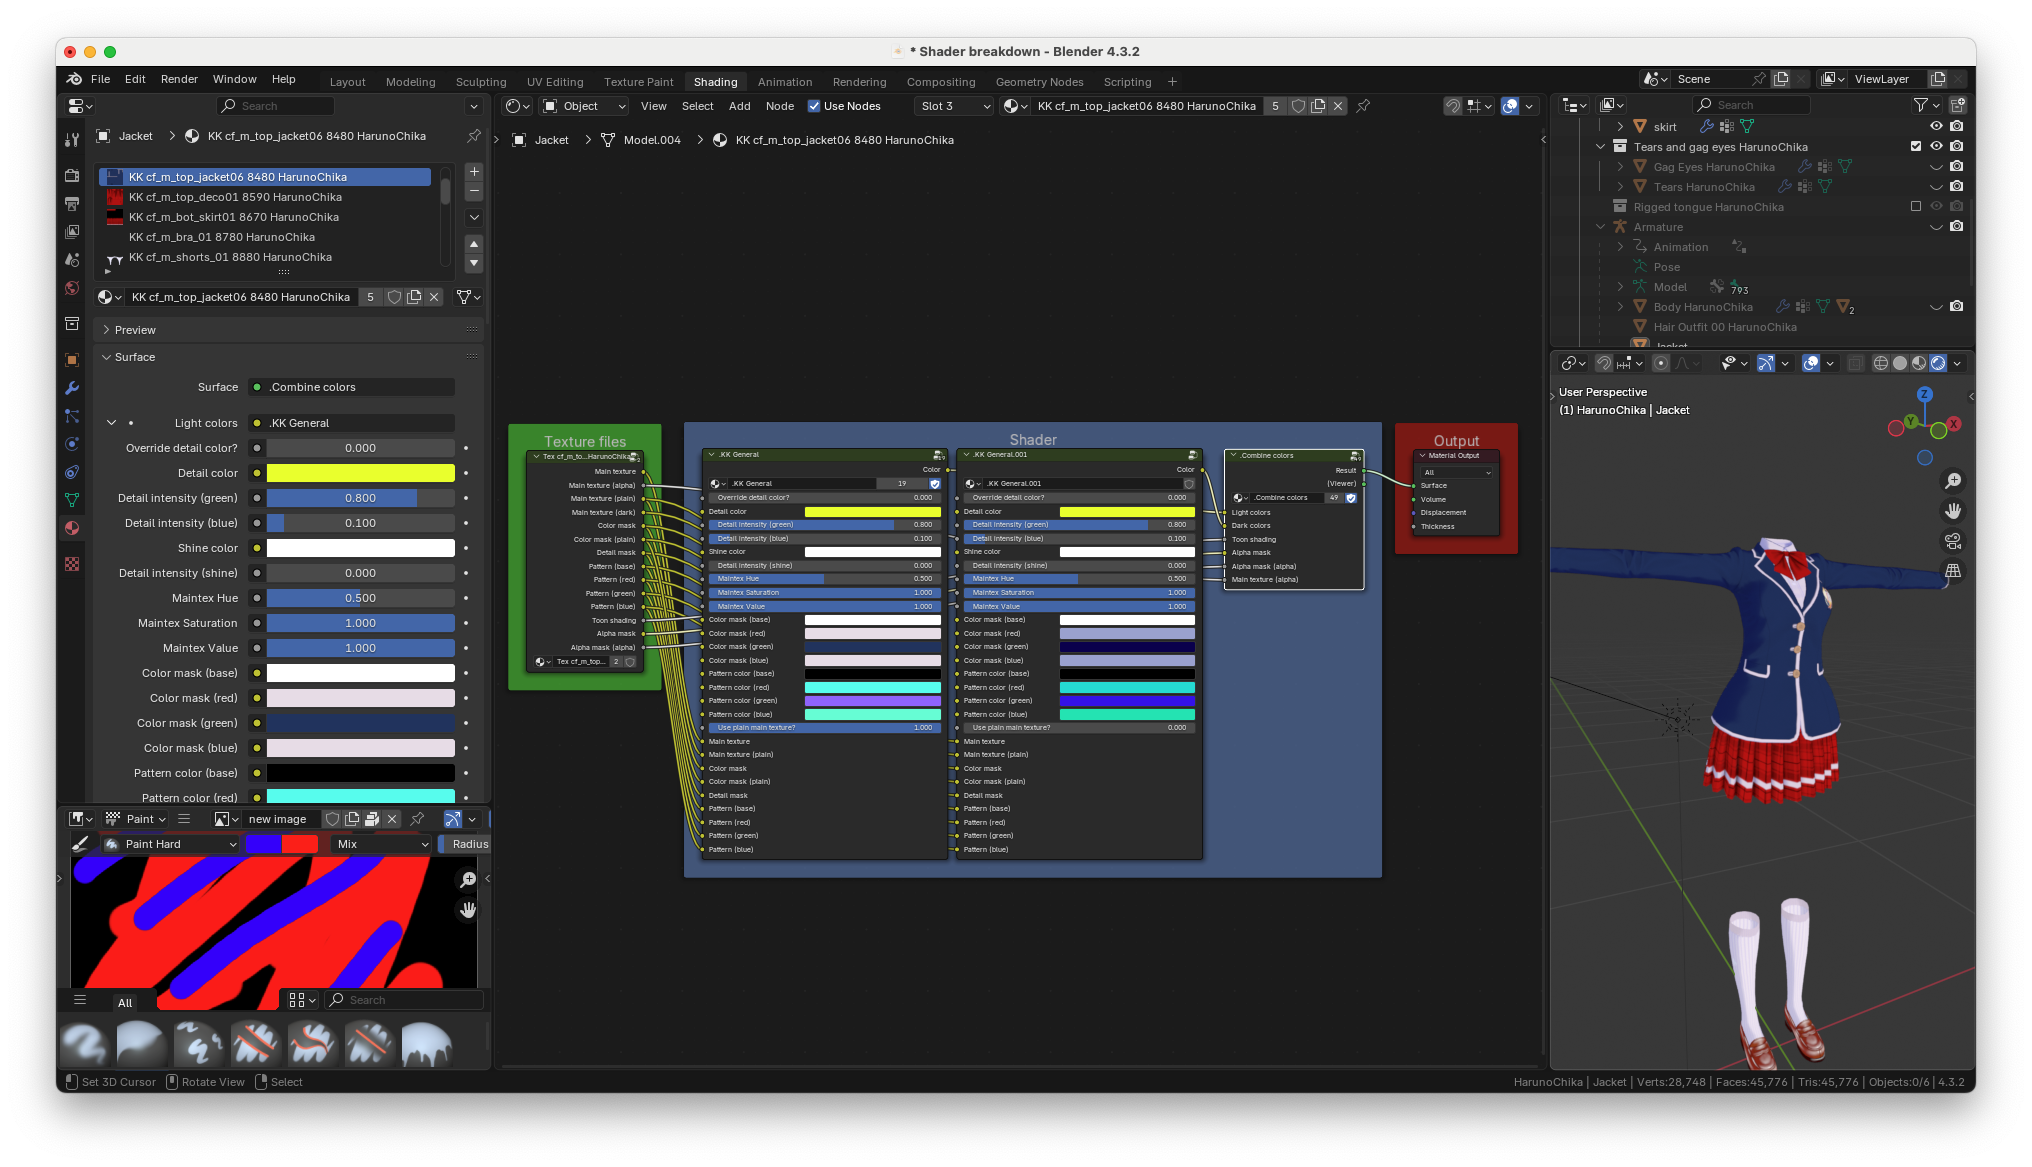
This page will take a look at the three main node groups in detail.
Namely, the texture files group, the KK general group and the combine
colors group. It will also examine the sub-groups inside of each node
group.
## Enabling Node Wrangler
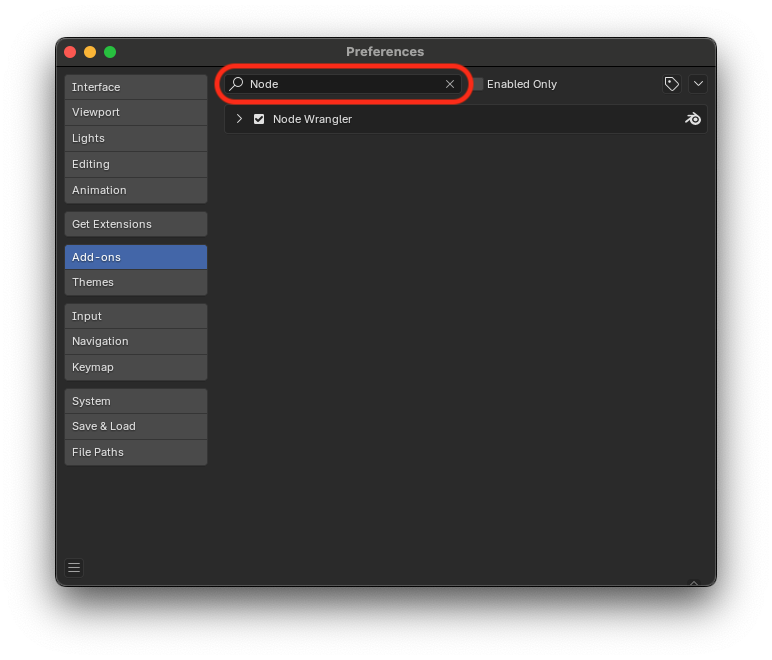
Let's take a quick detour and enable node wrangler. This add-on is
invaluable for debugging node groups. In the blender add-on window
search for Node Wrangler and enable it
## Texture files group
Let's start with the texture files group. Open it by clicking the icon
on the top right of the group
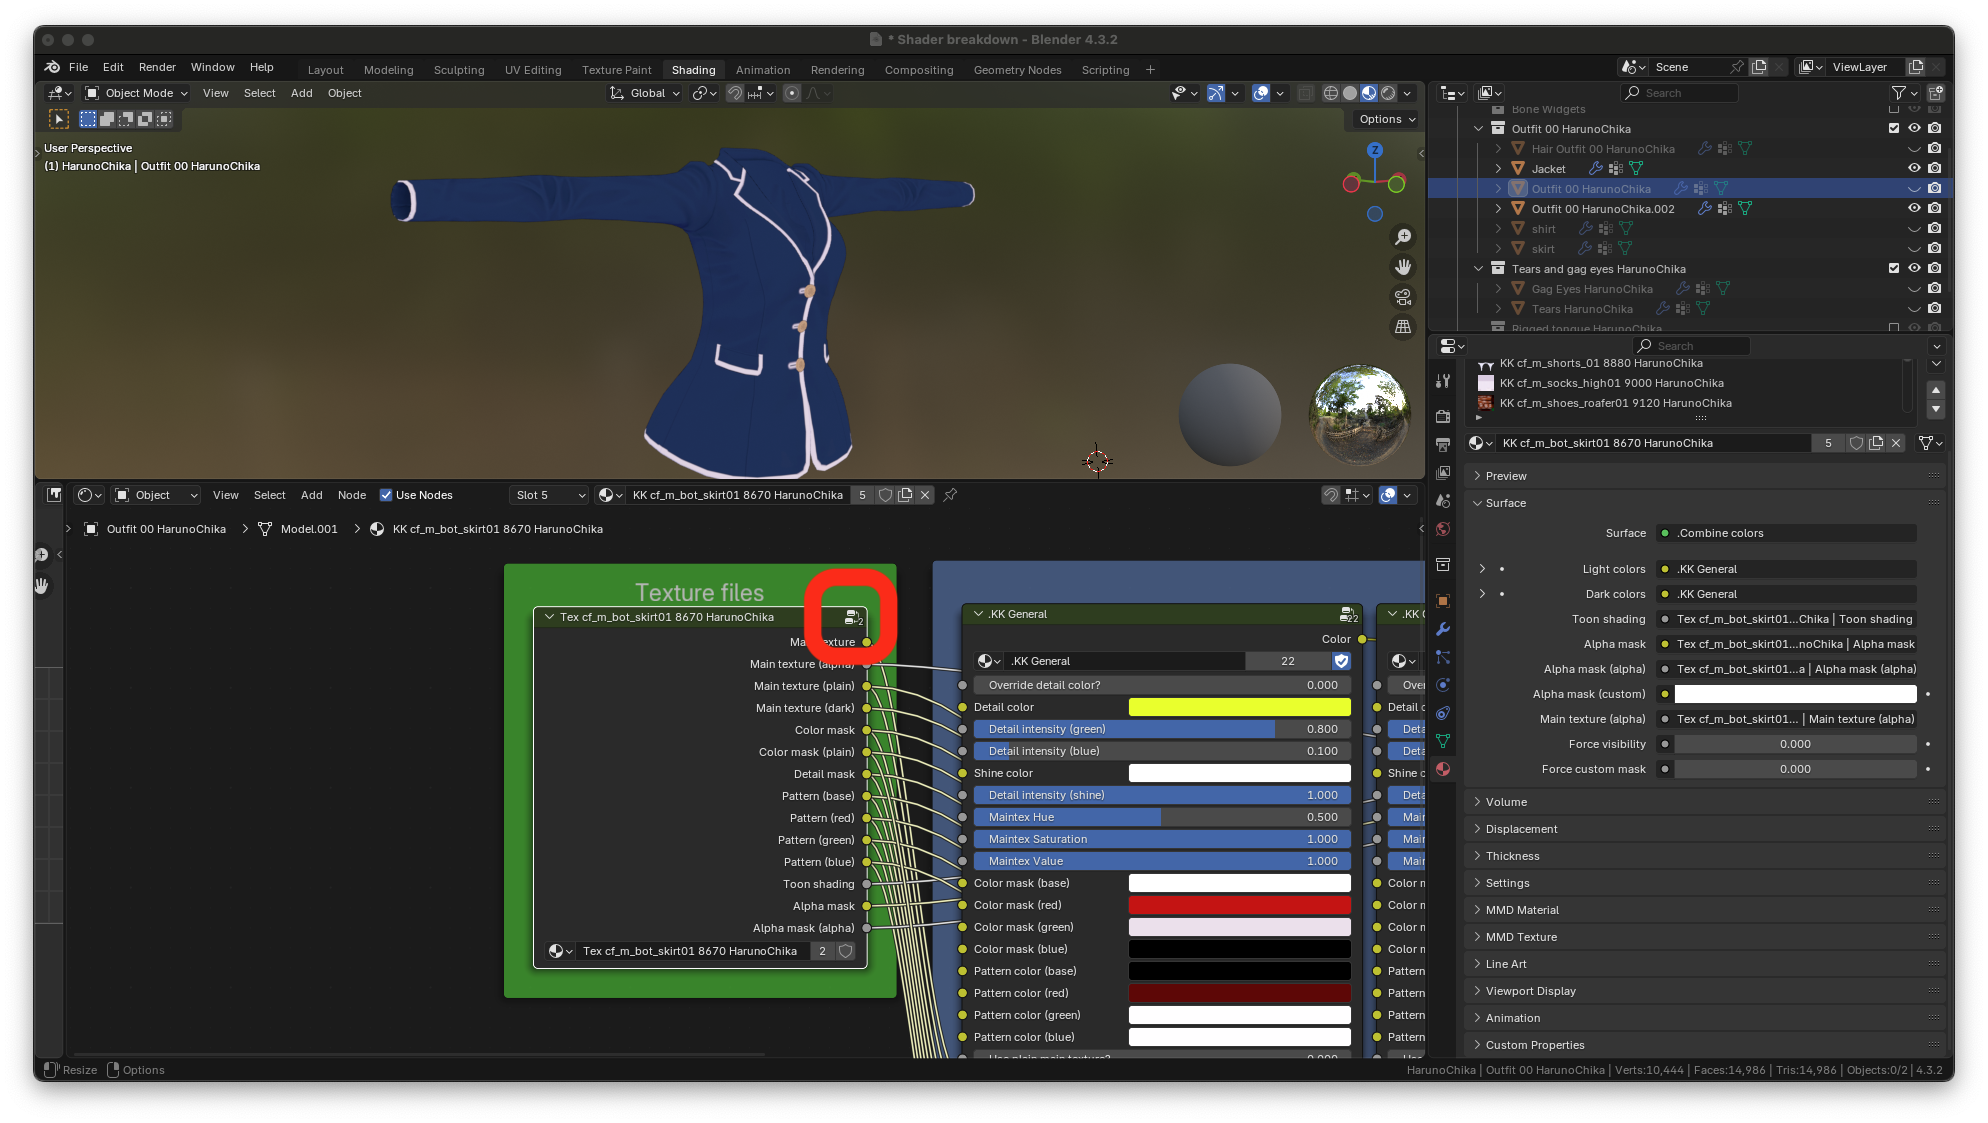
Here's the texture files group.
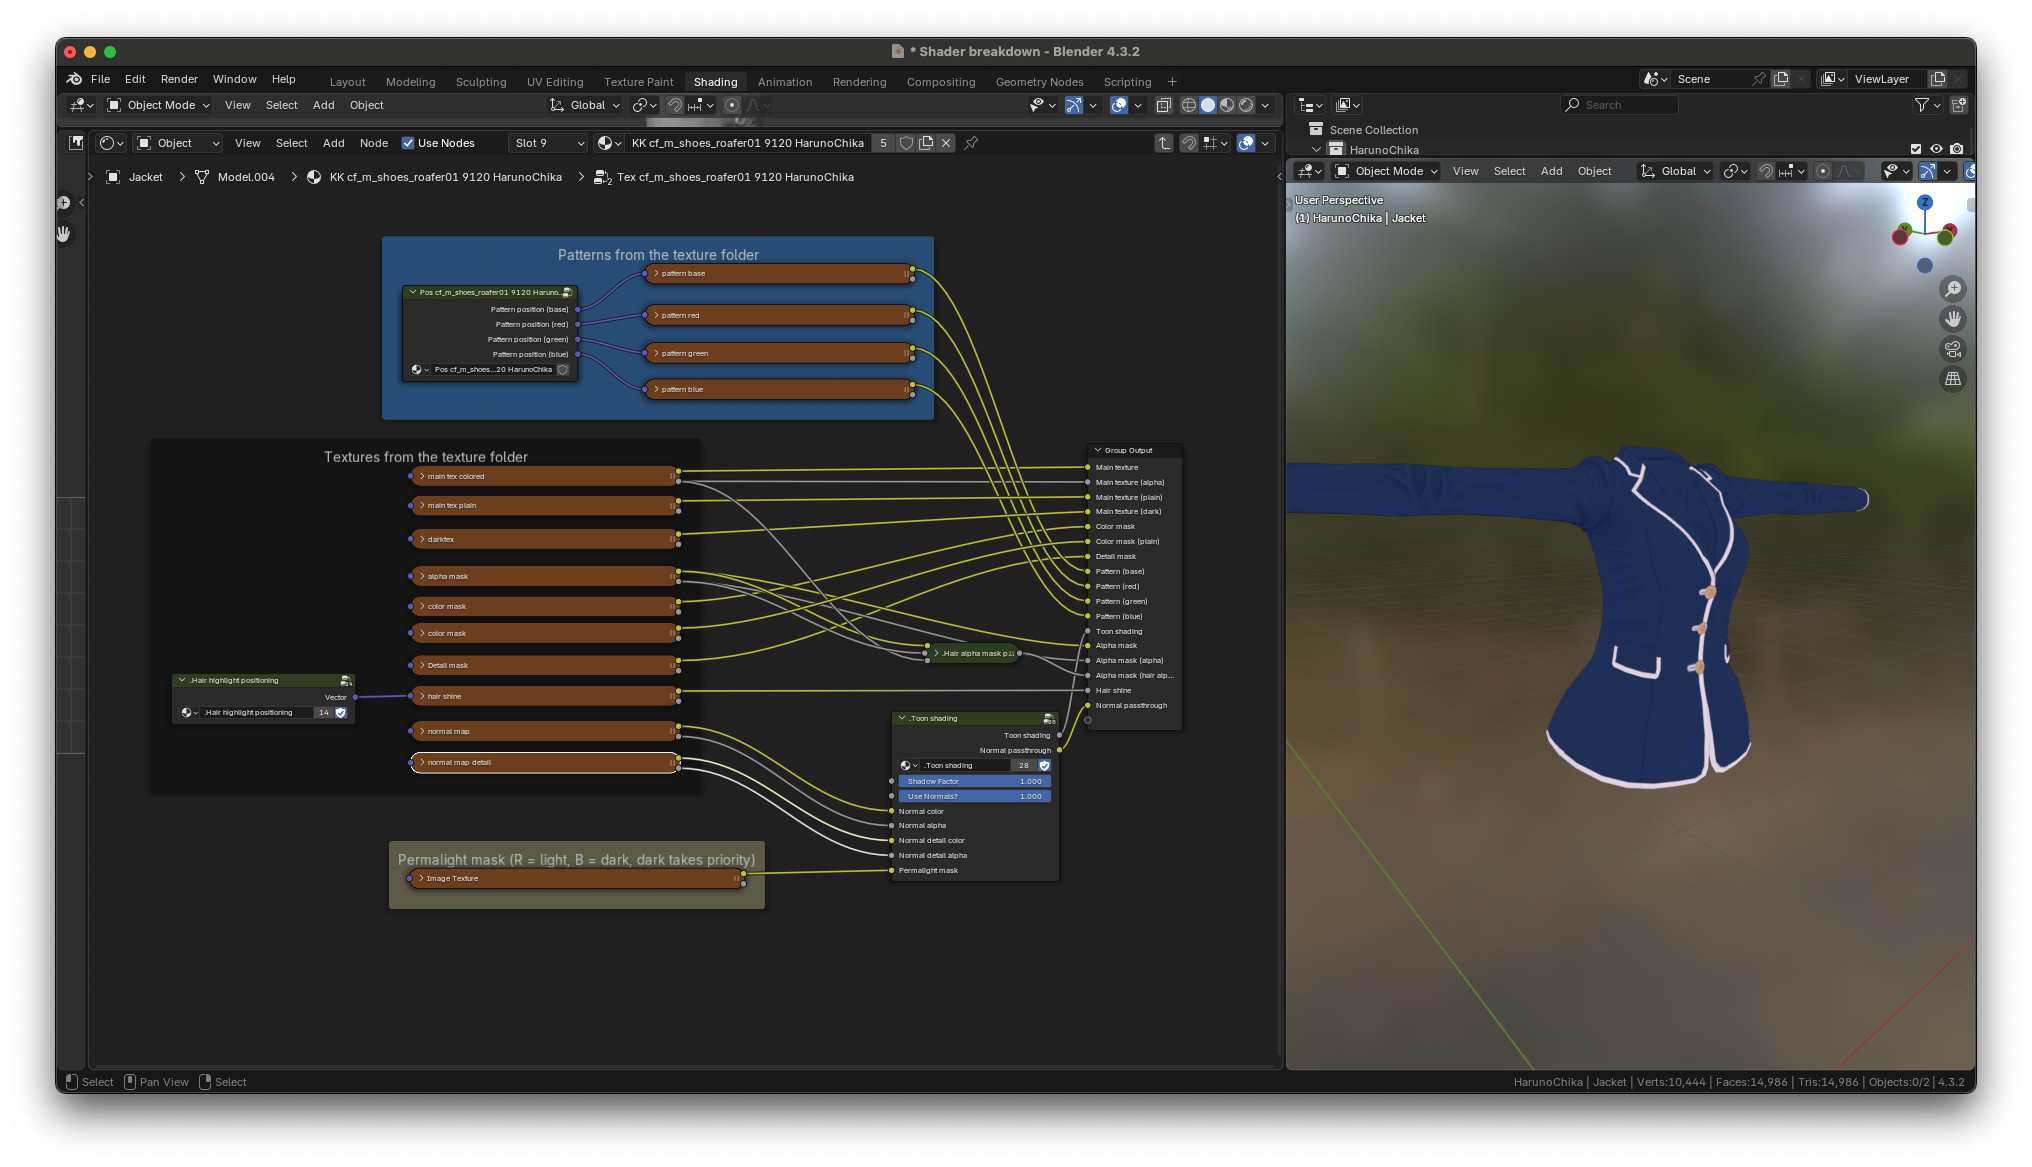
Each piece of clothing can have multiple textures that go with it. Each
texture file from the export folder is loaded into each outfit material
in blender. For example, the jacket CM.png from the export folder...
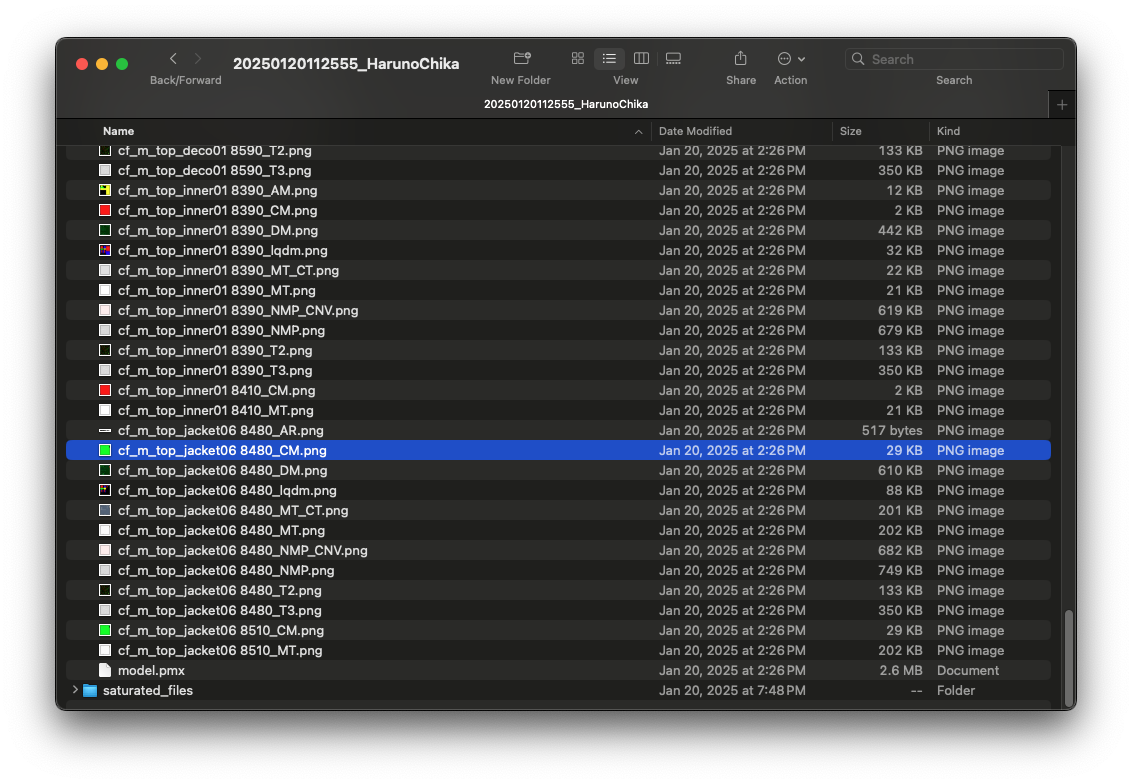
Is loaded into the corresponding jacket CM image node in blender
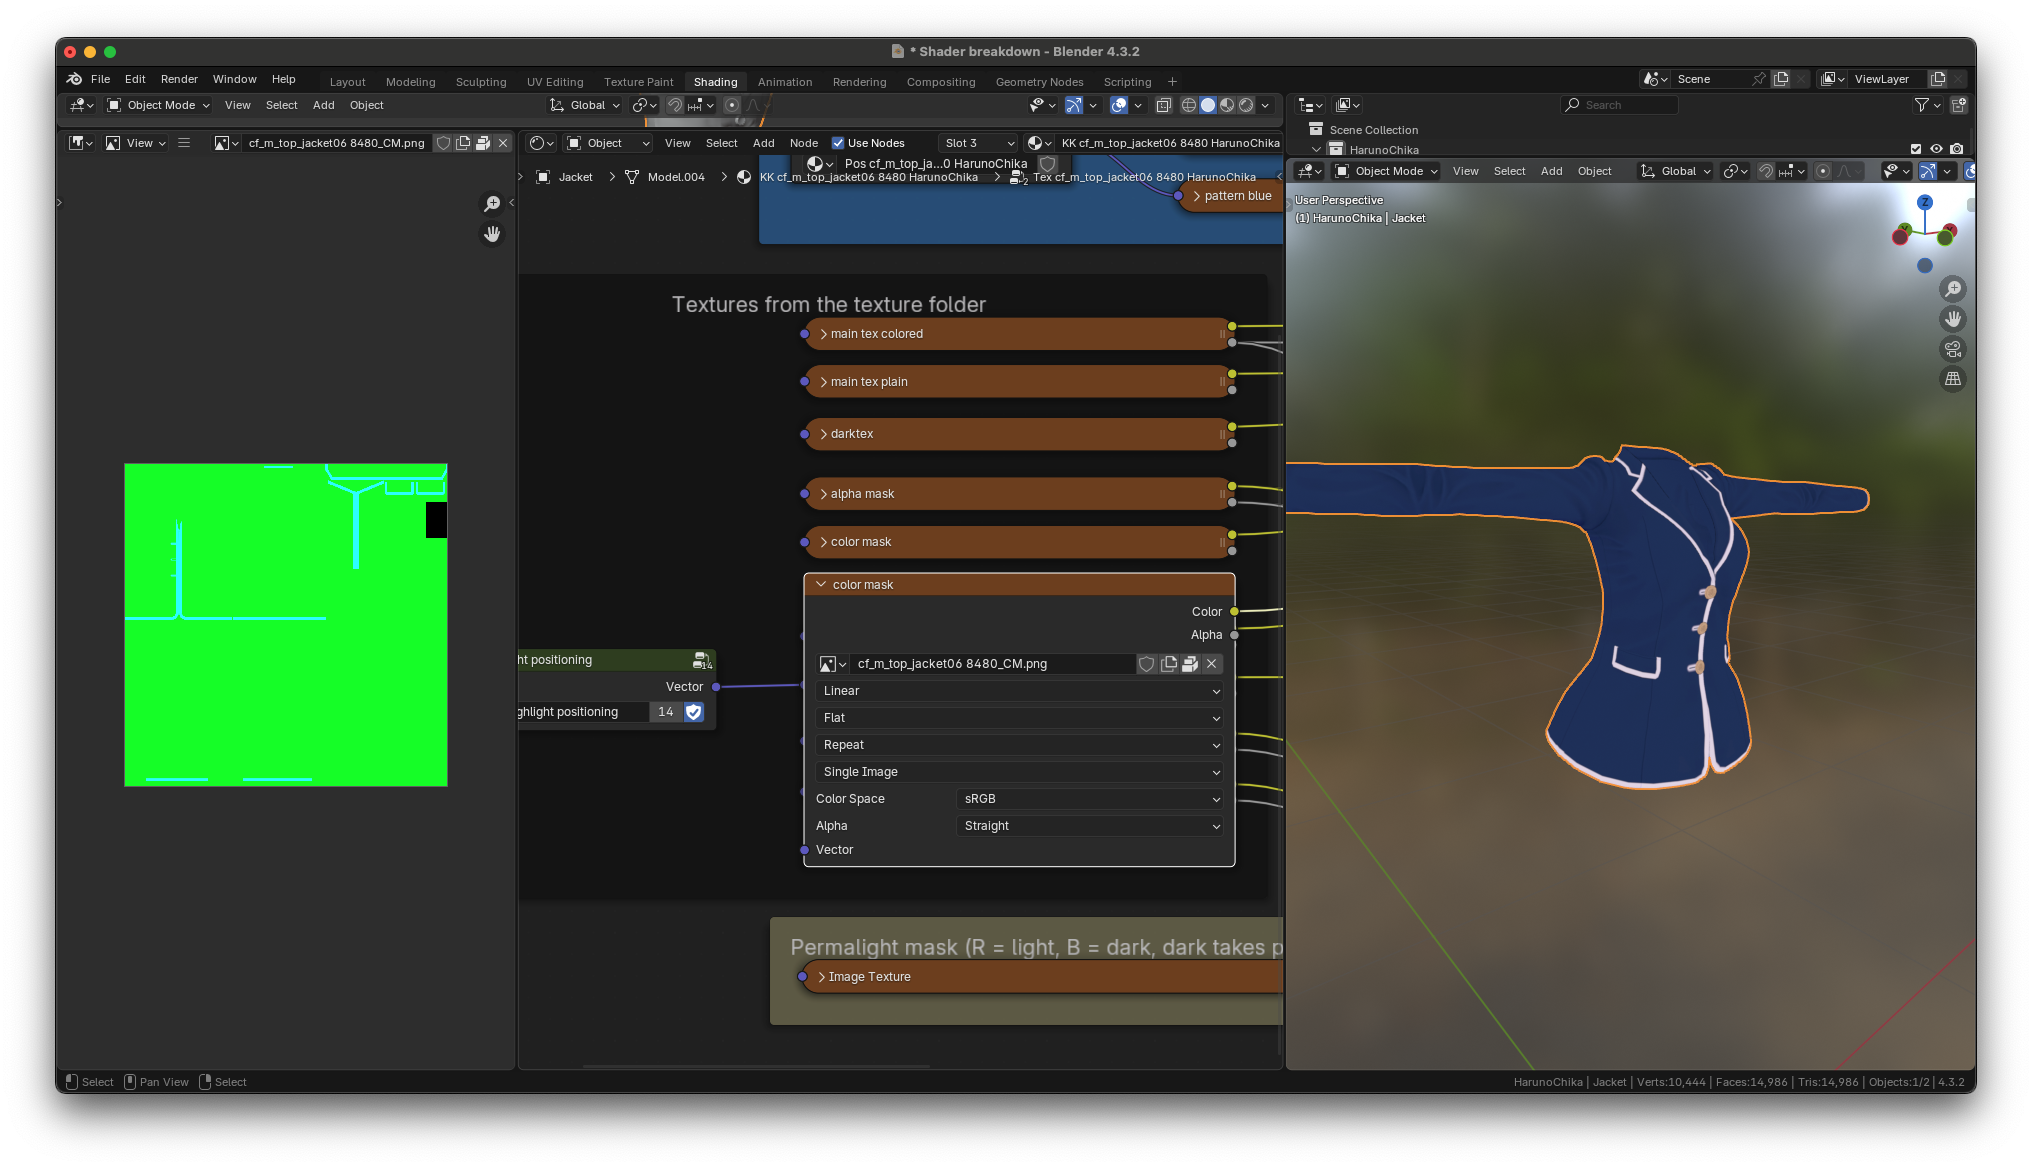
## Pattern slots
There's a lot of textures, so let's start at the top and work our way
to the bottom. The pattern files are loaded up here.
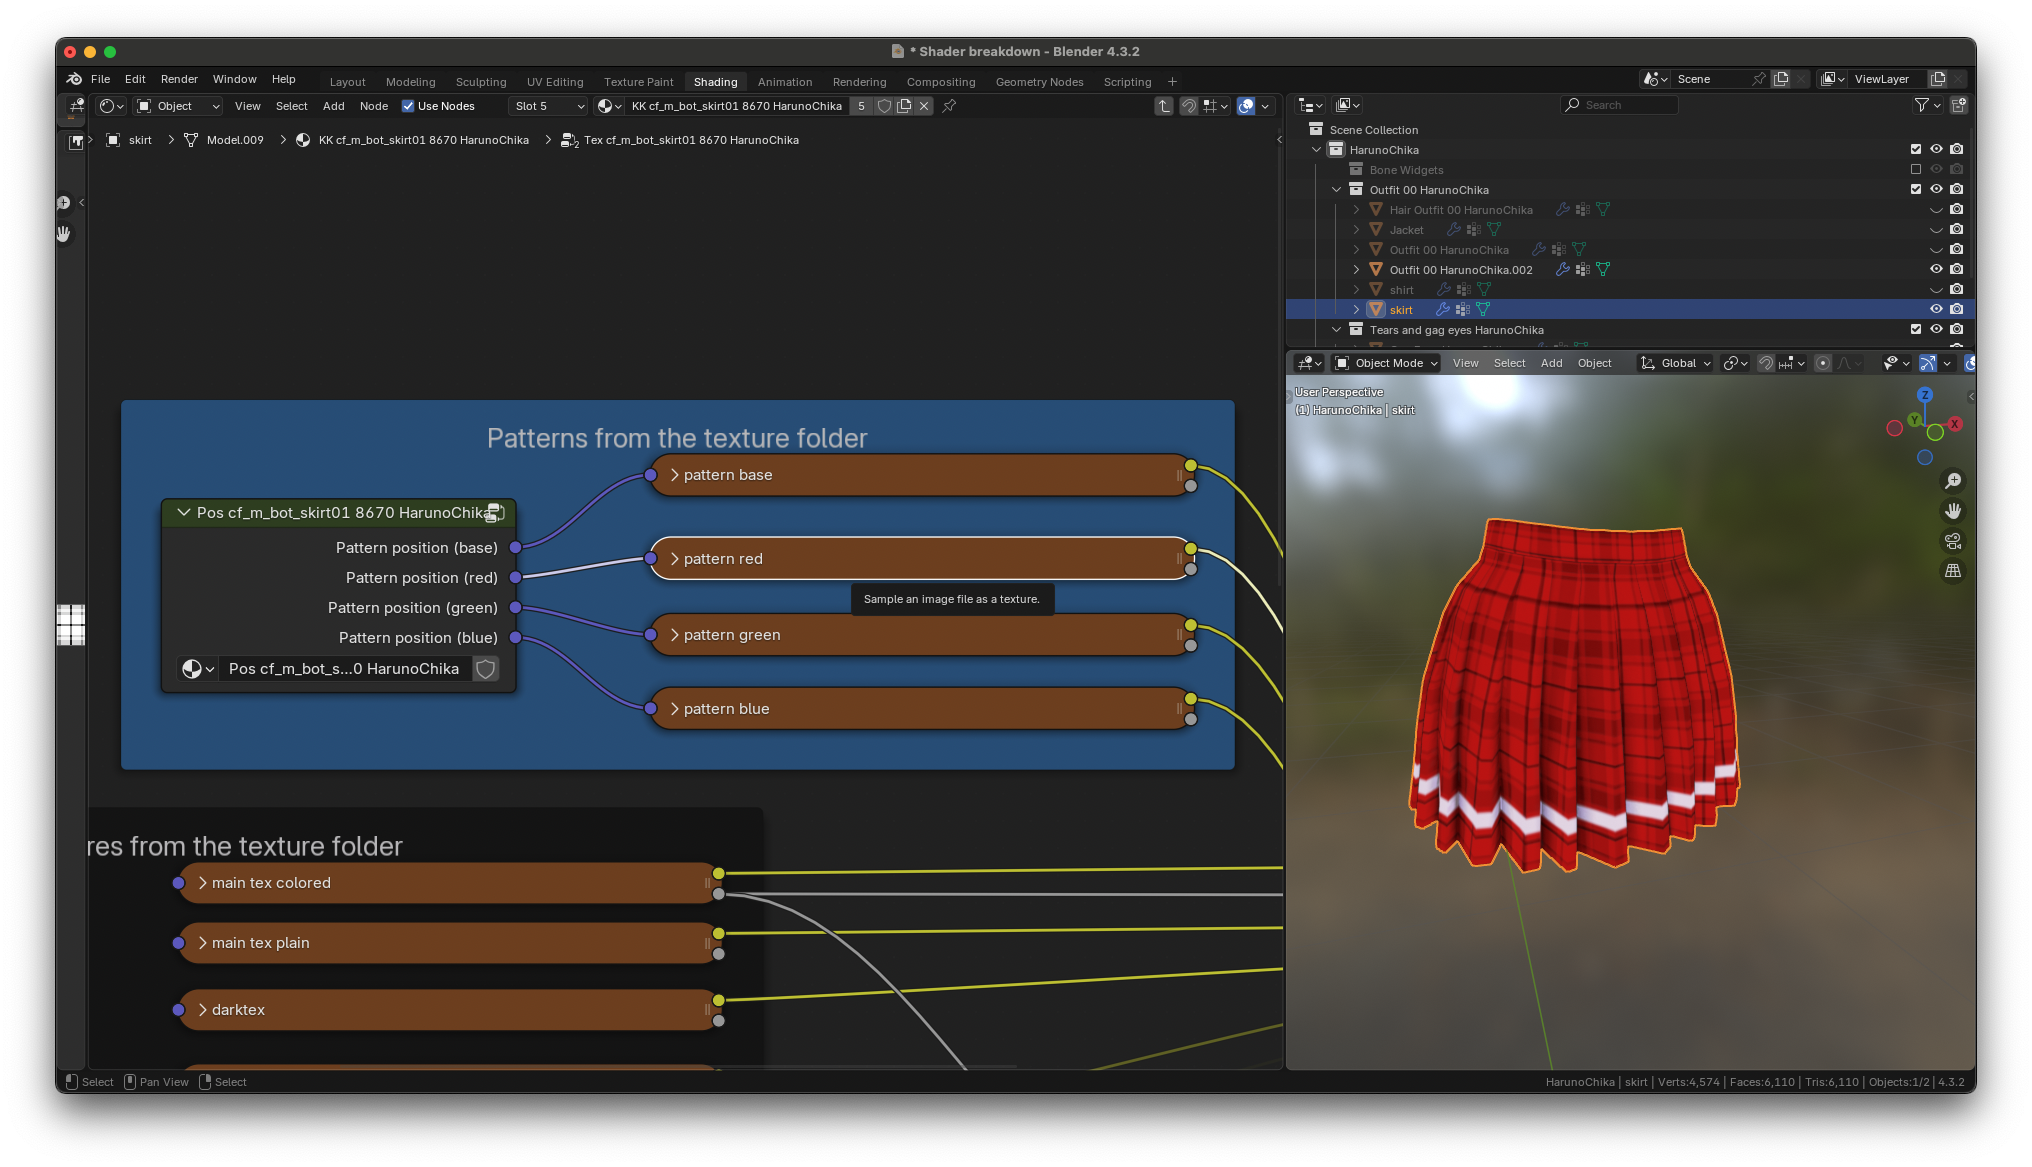
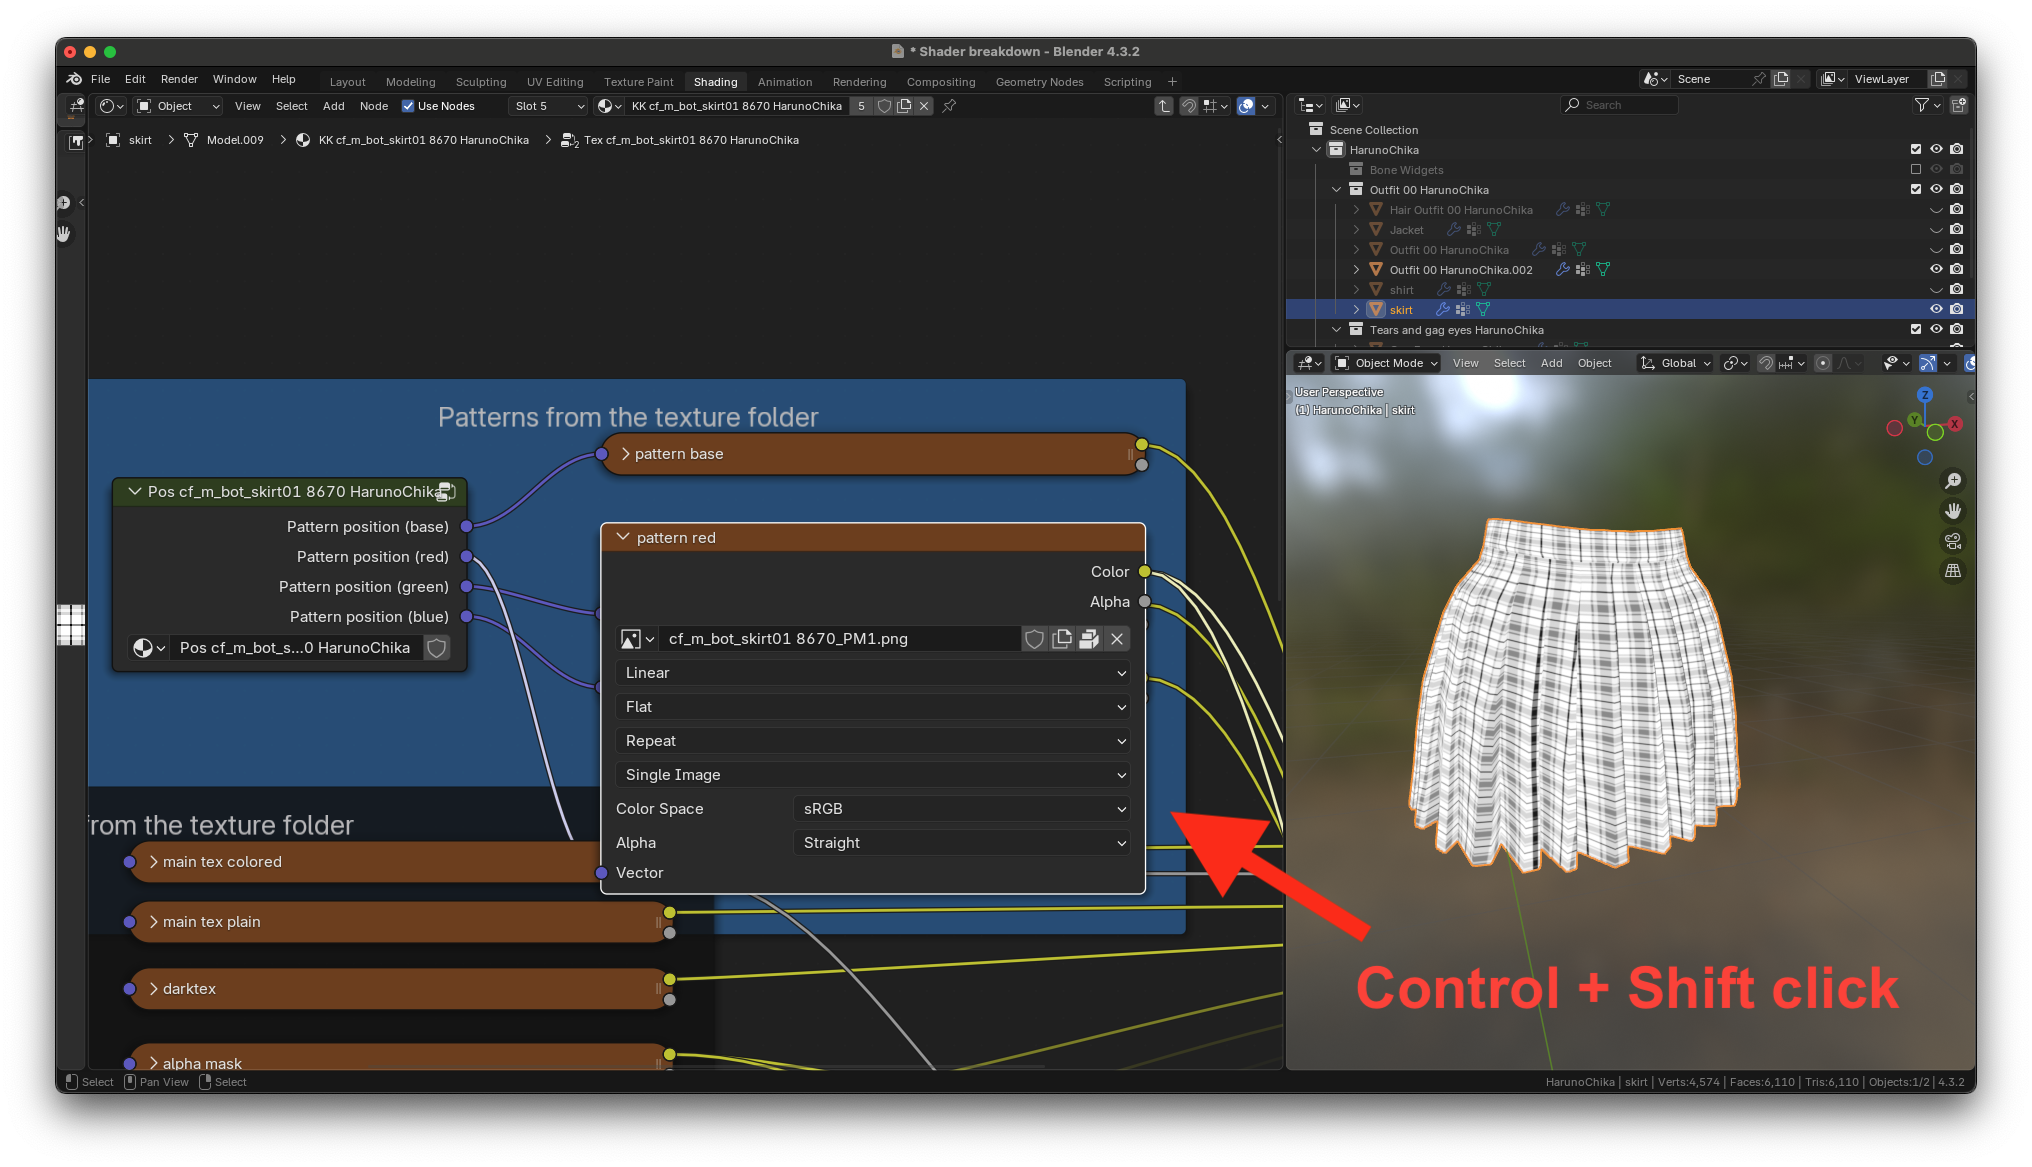
The skirt only has one pattern (PM1.png) and it's loaded into the
pattern red slot.
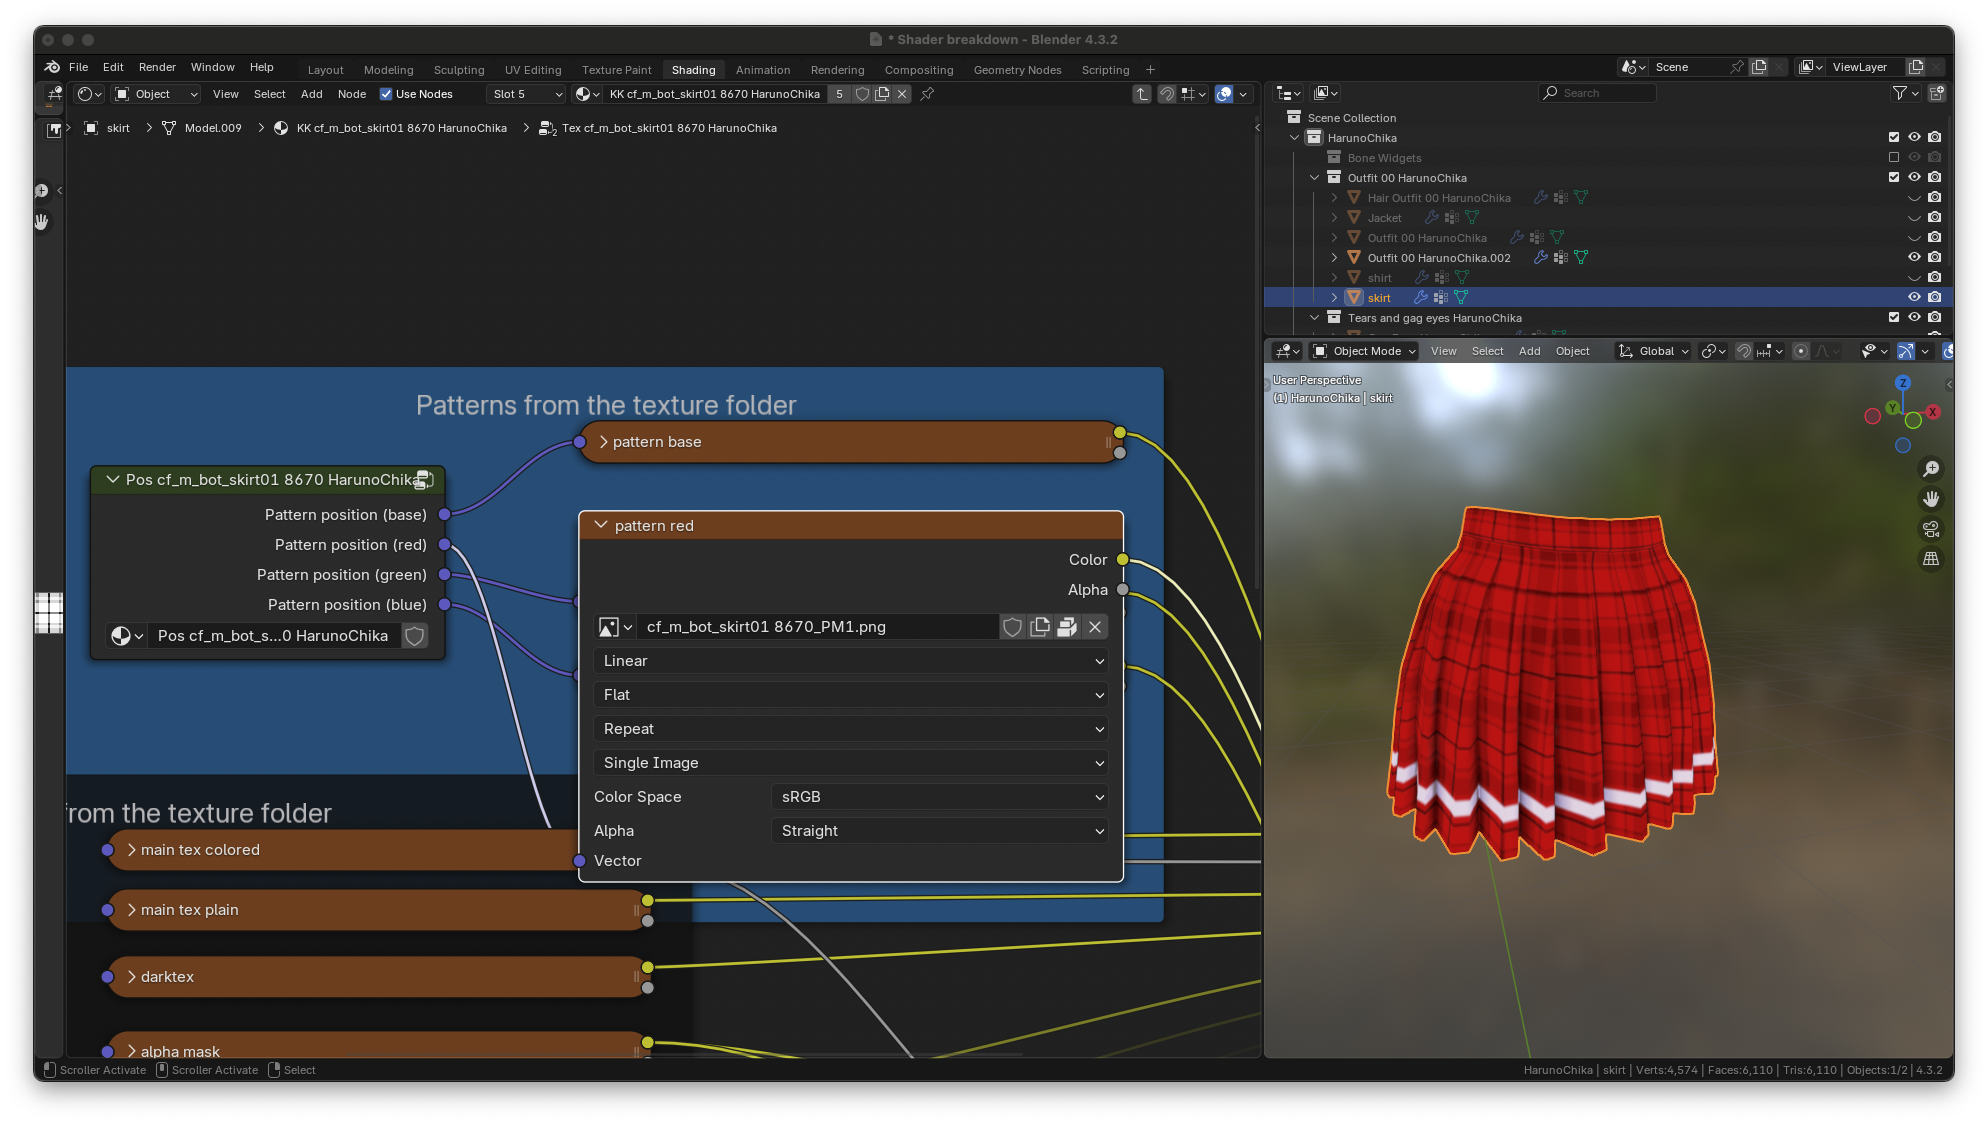
if you enabled node wrangler, you can see what the pattern looks like by
Control + Shift clicking the image node
# Positioning with the Scale Vector group
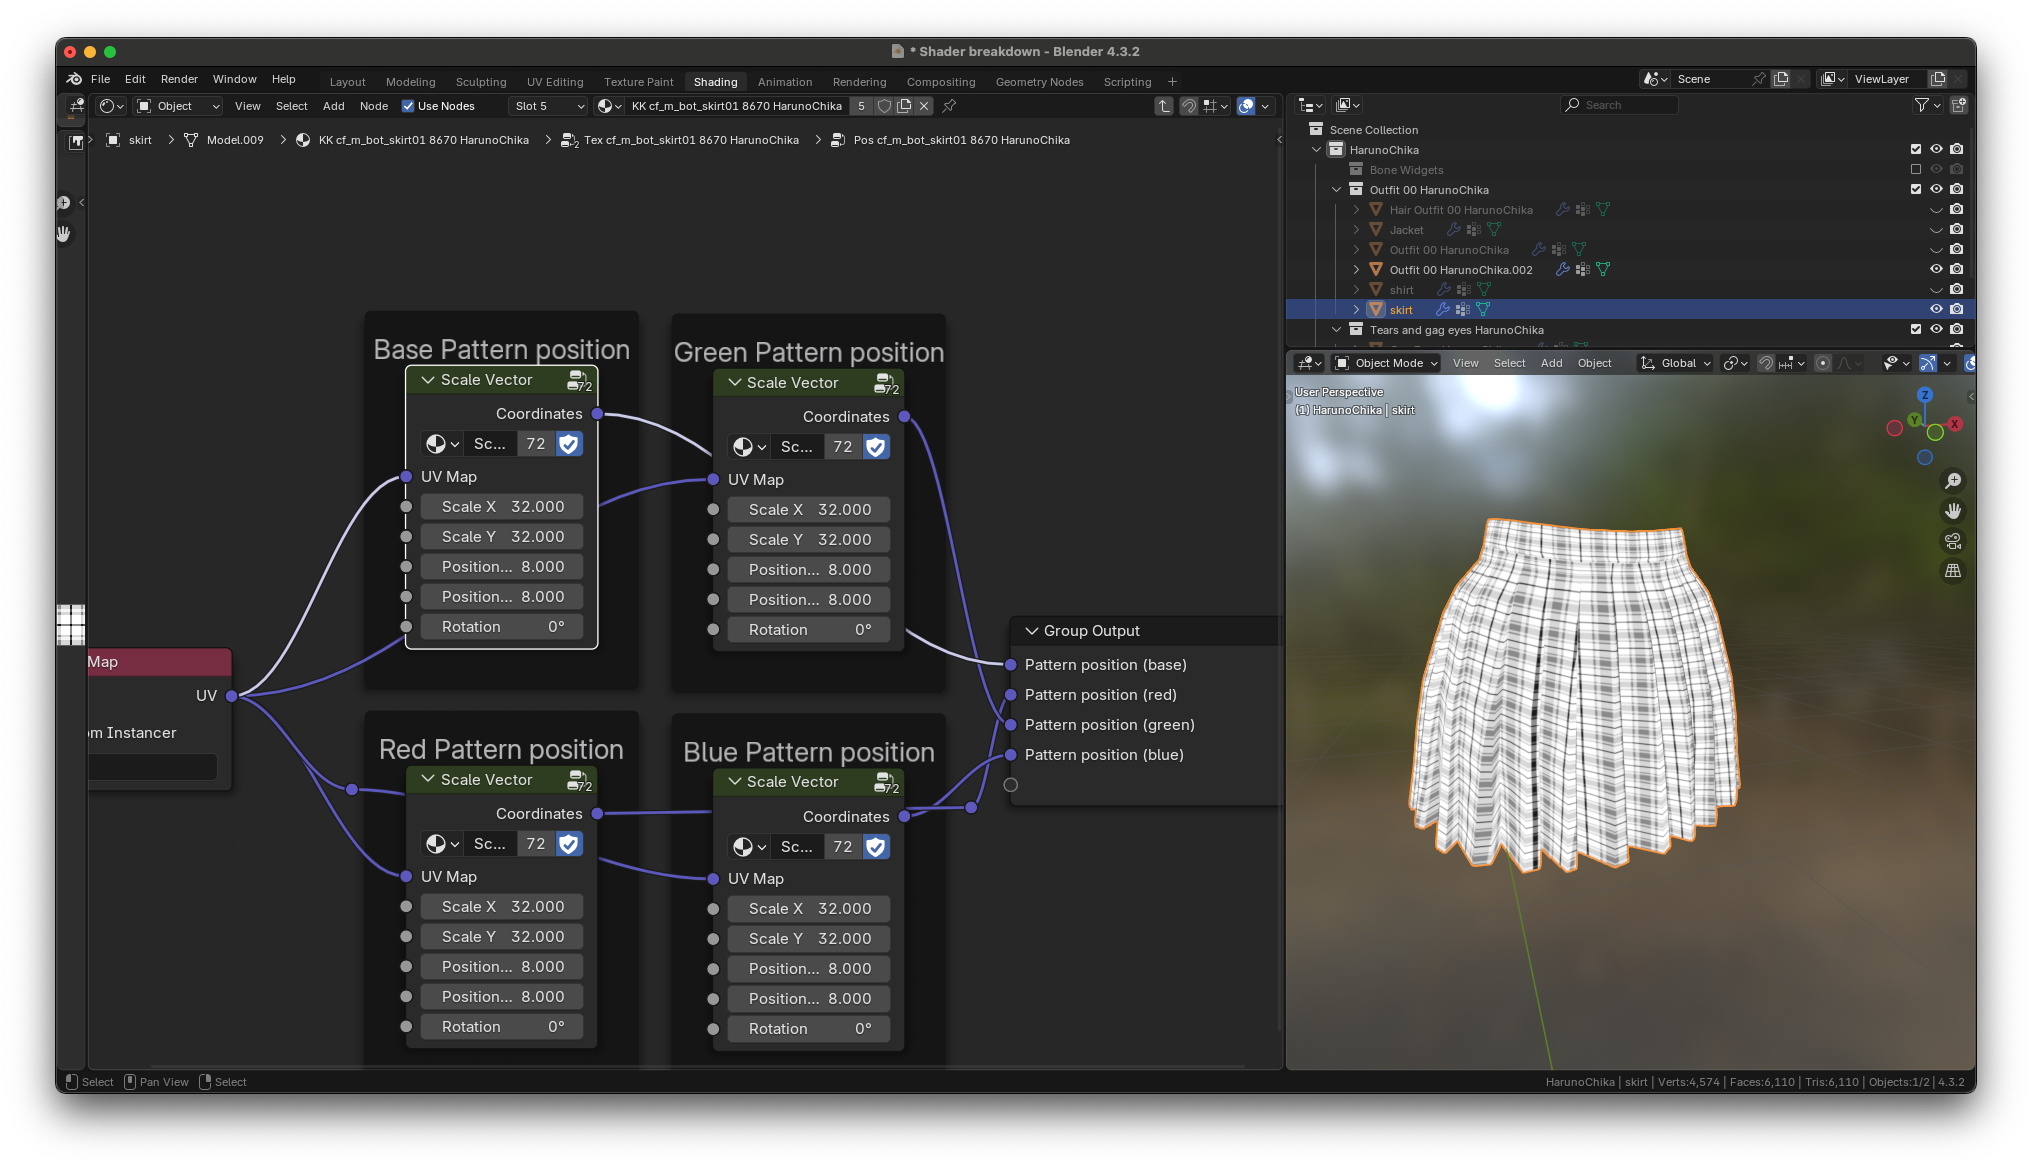
the pattern scale and positioning can be controlled by opening the
position node group to the left of the image nodes.
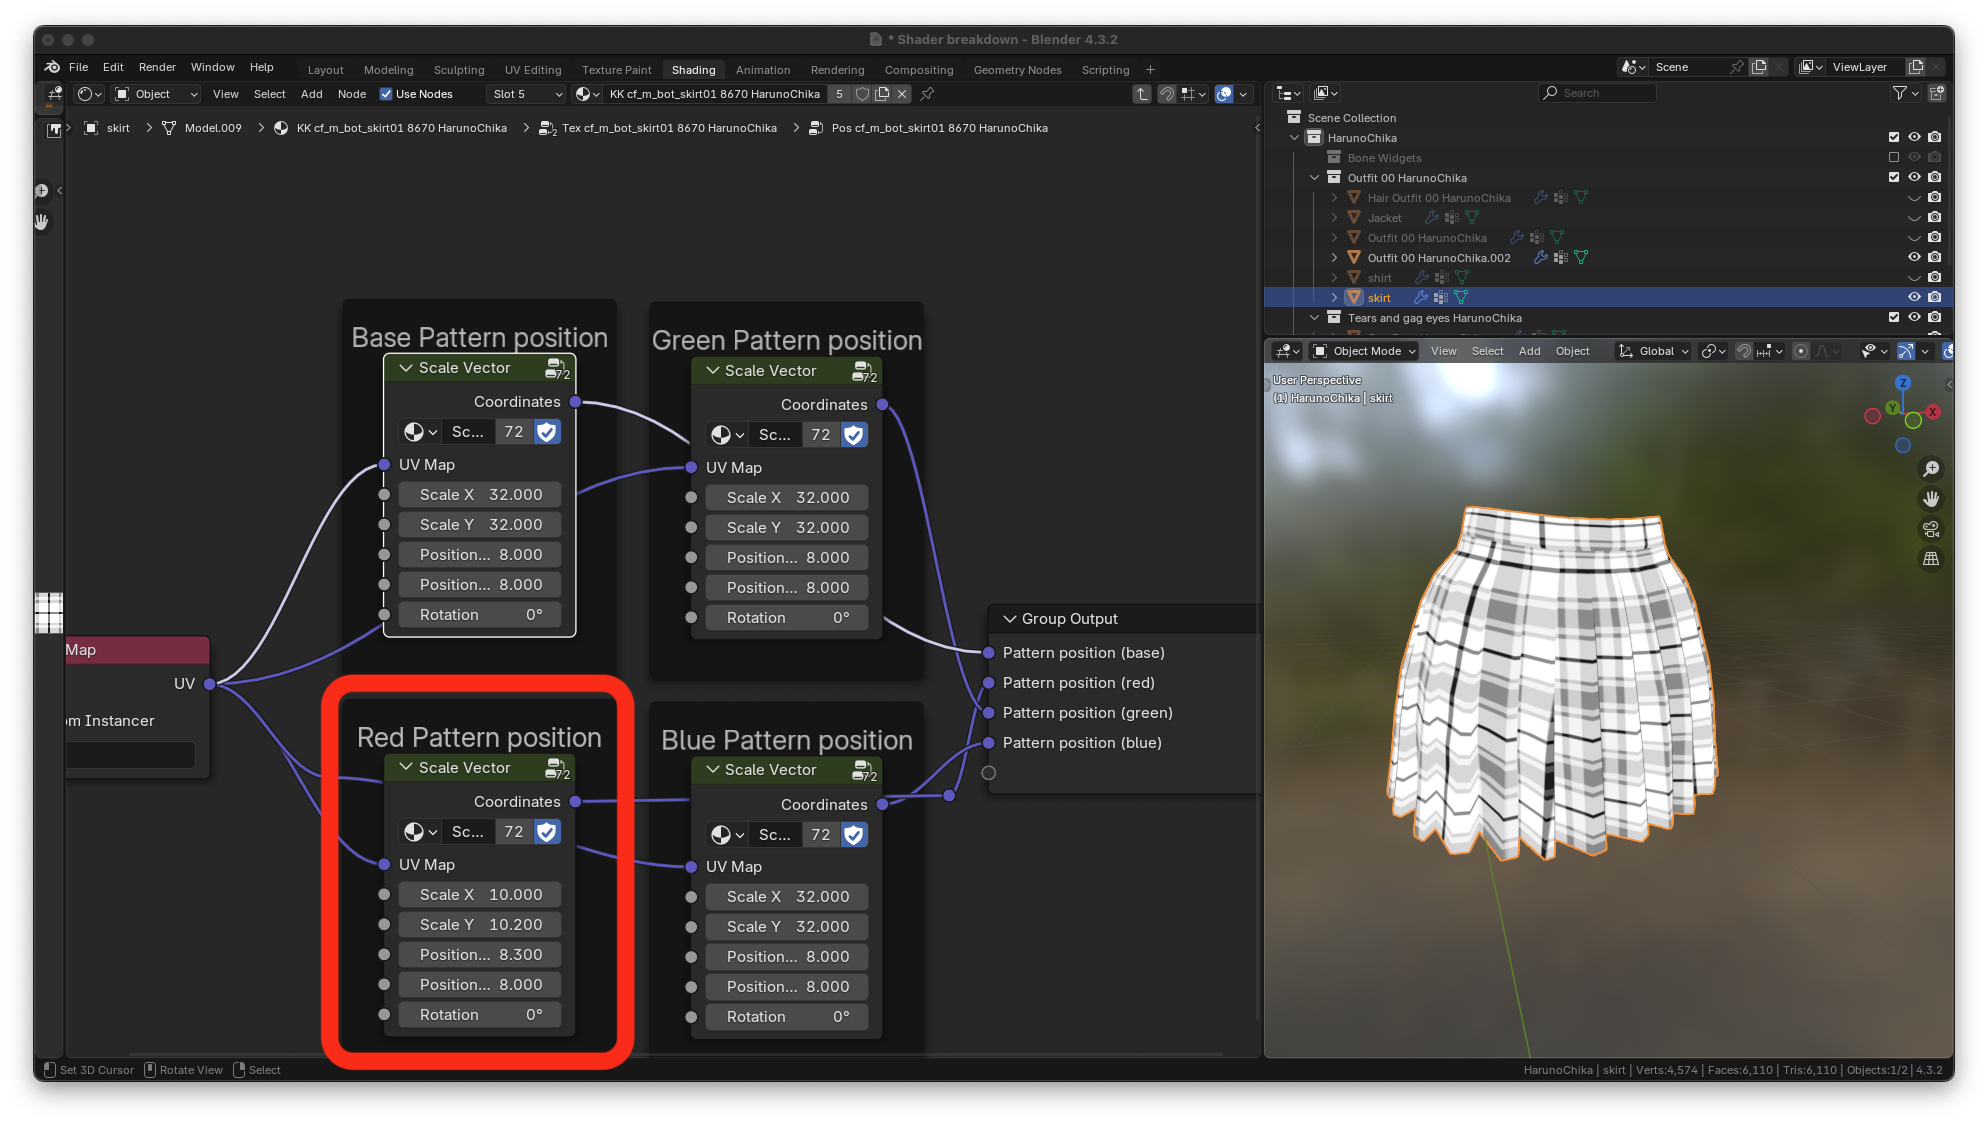
this is what the red pattern looks like after being scaled and shifted.
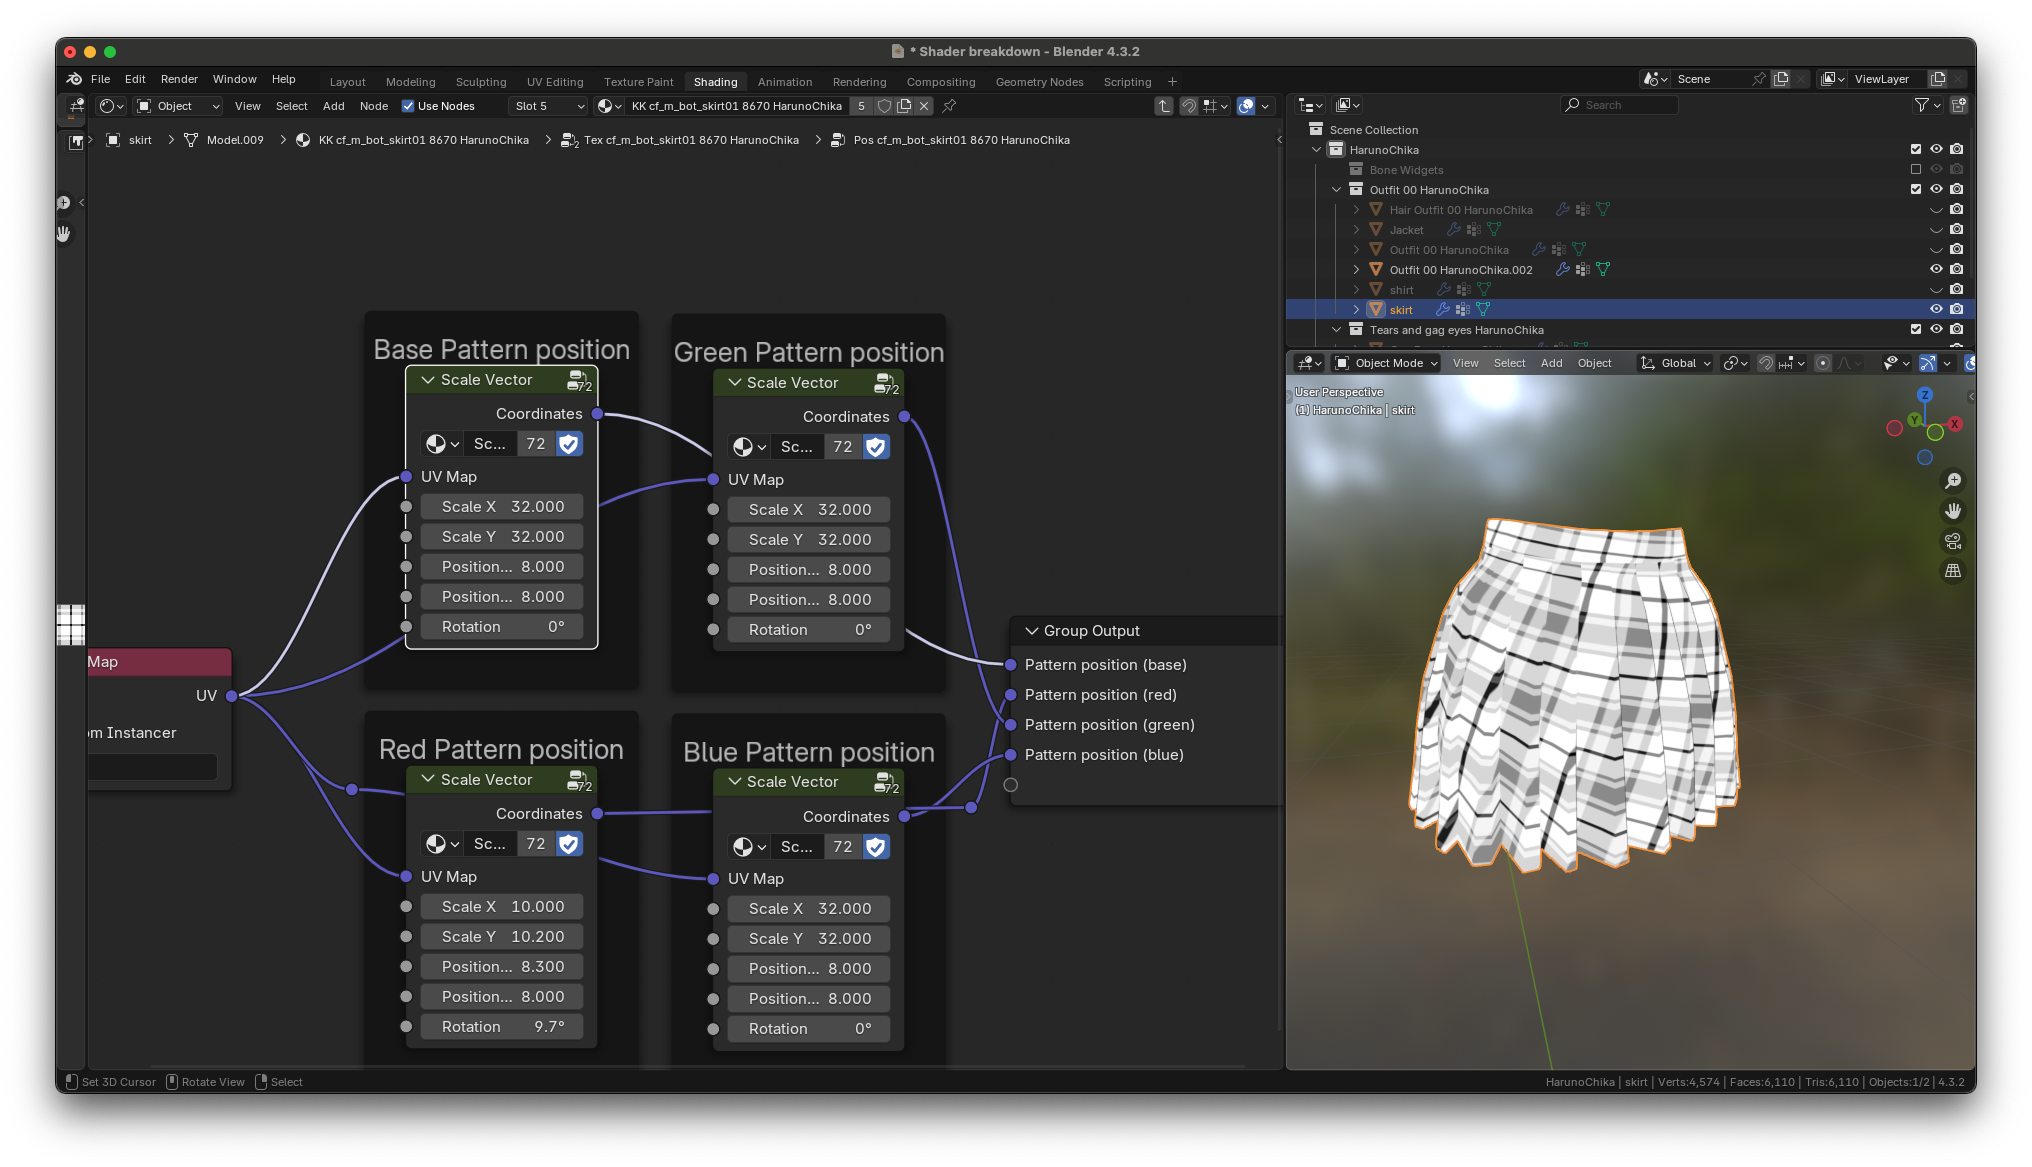
most things you can position can also be rotated using the rotation
slider
# One more example of the Scale Vector group
It can be a little hard to see how the scale vector group works with patterns, so let's also check out the positioning group in the eye material. Here's what the eyes look like at their default scale. If you're having difficulty locating the thing you're positioning on the 3D model, recall that you can preview what the material looks like in the materials tab.
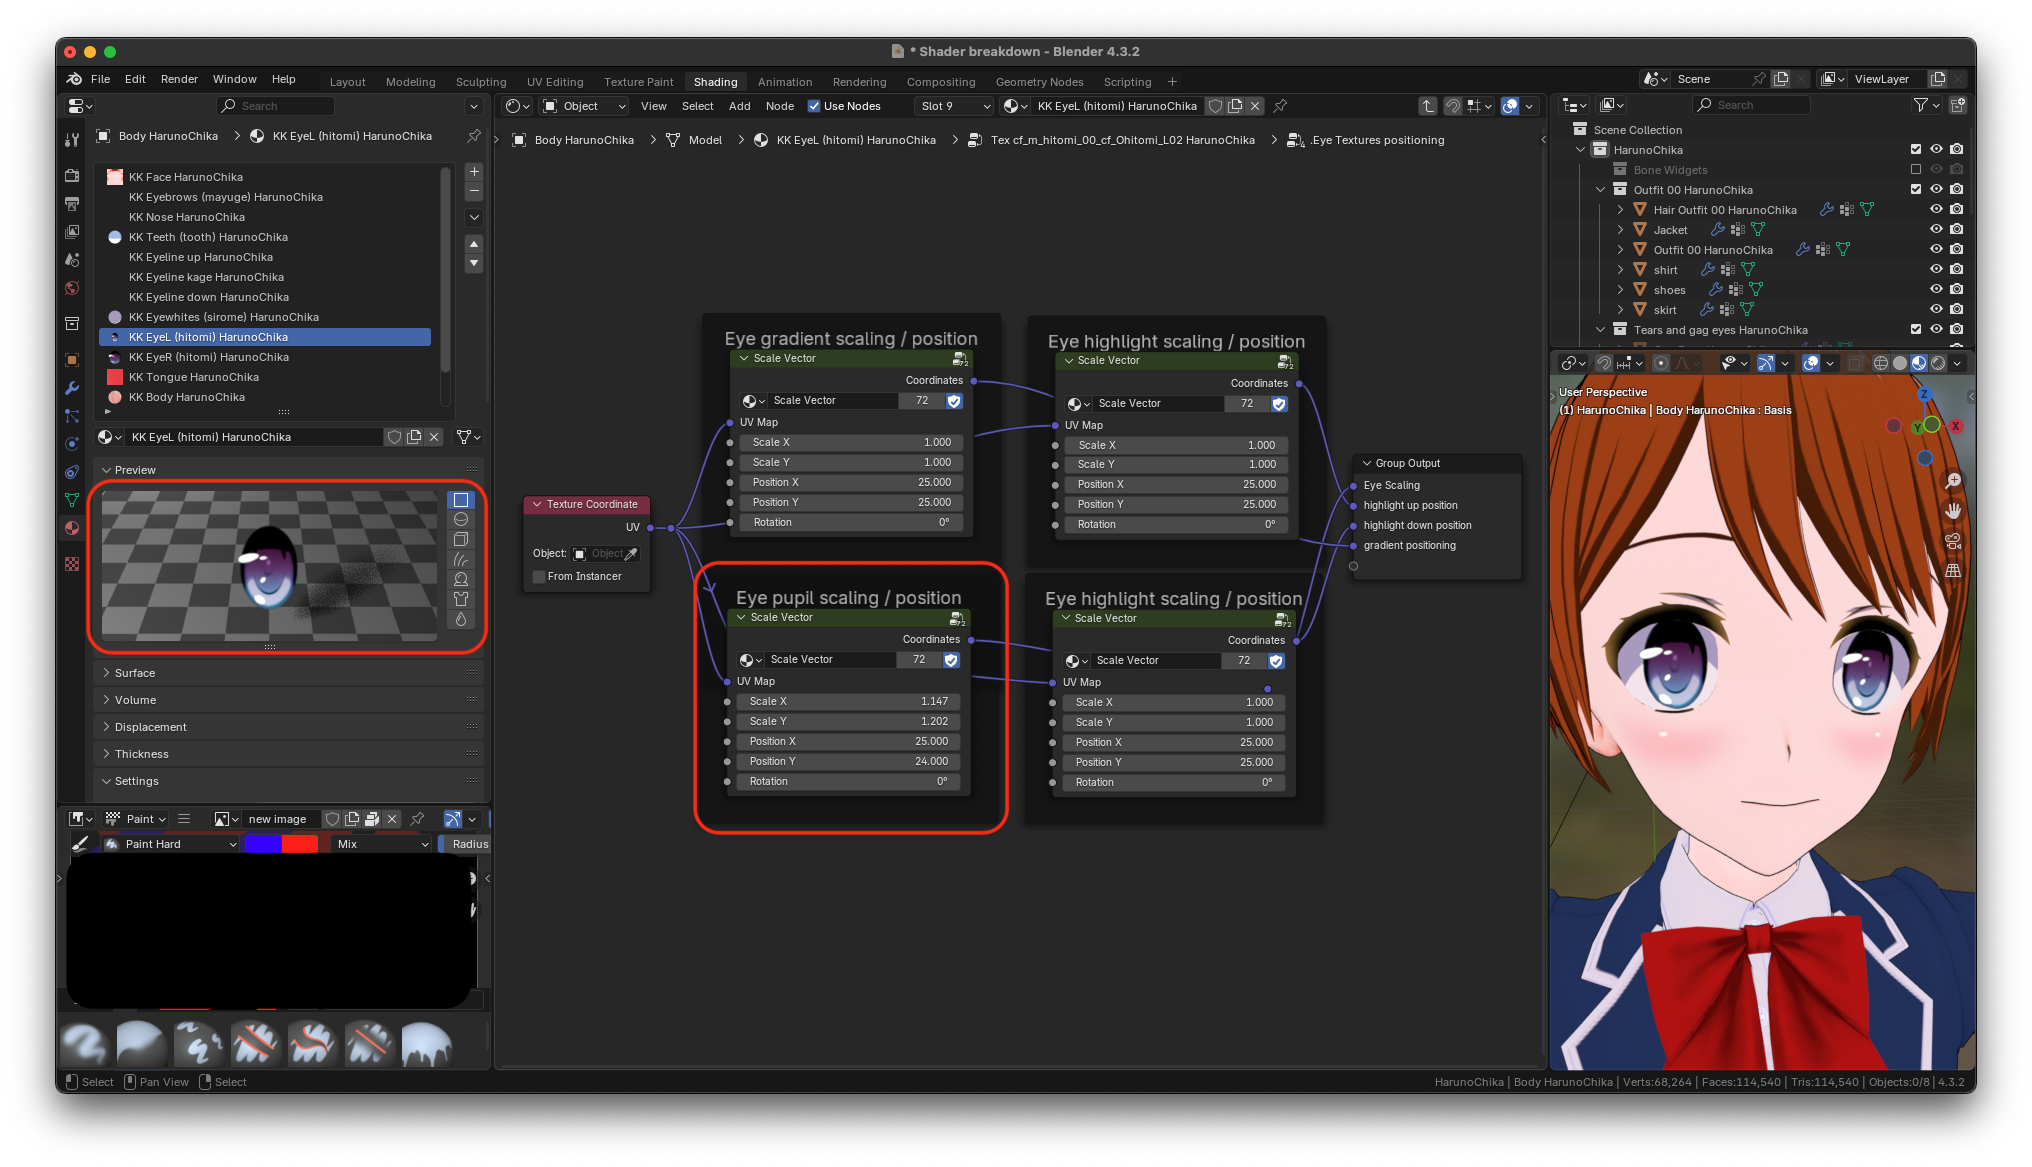
Here's what the eyes look like when they're scaled down.
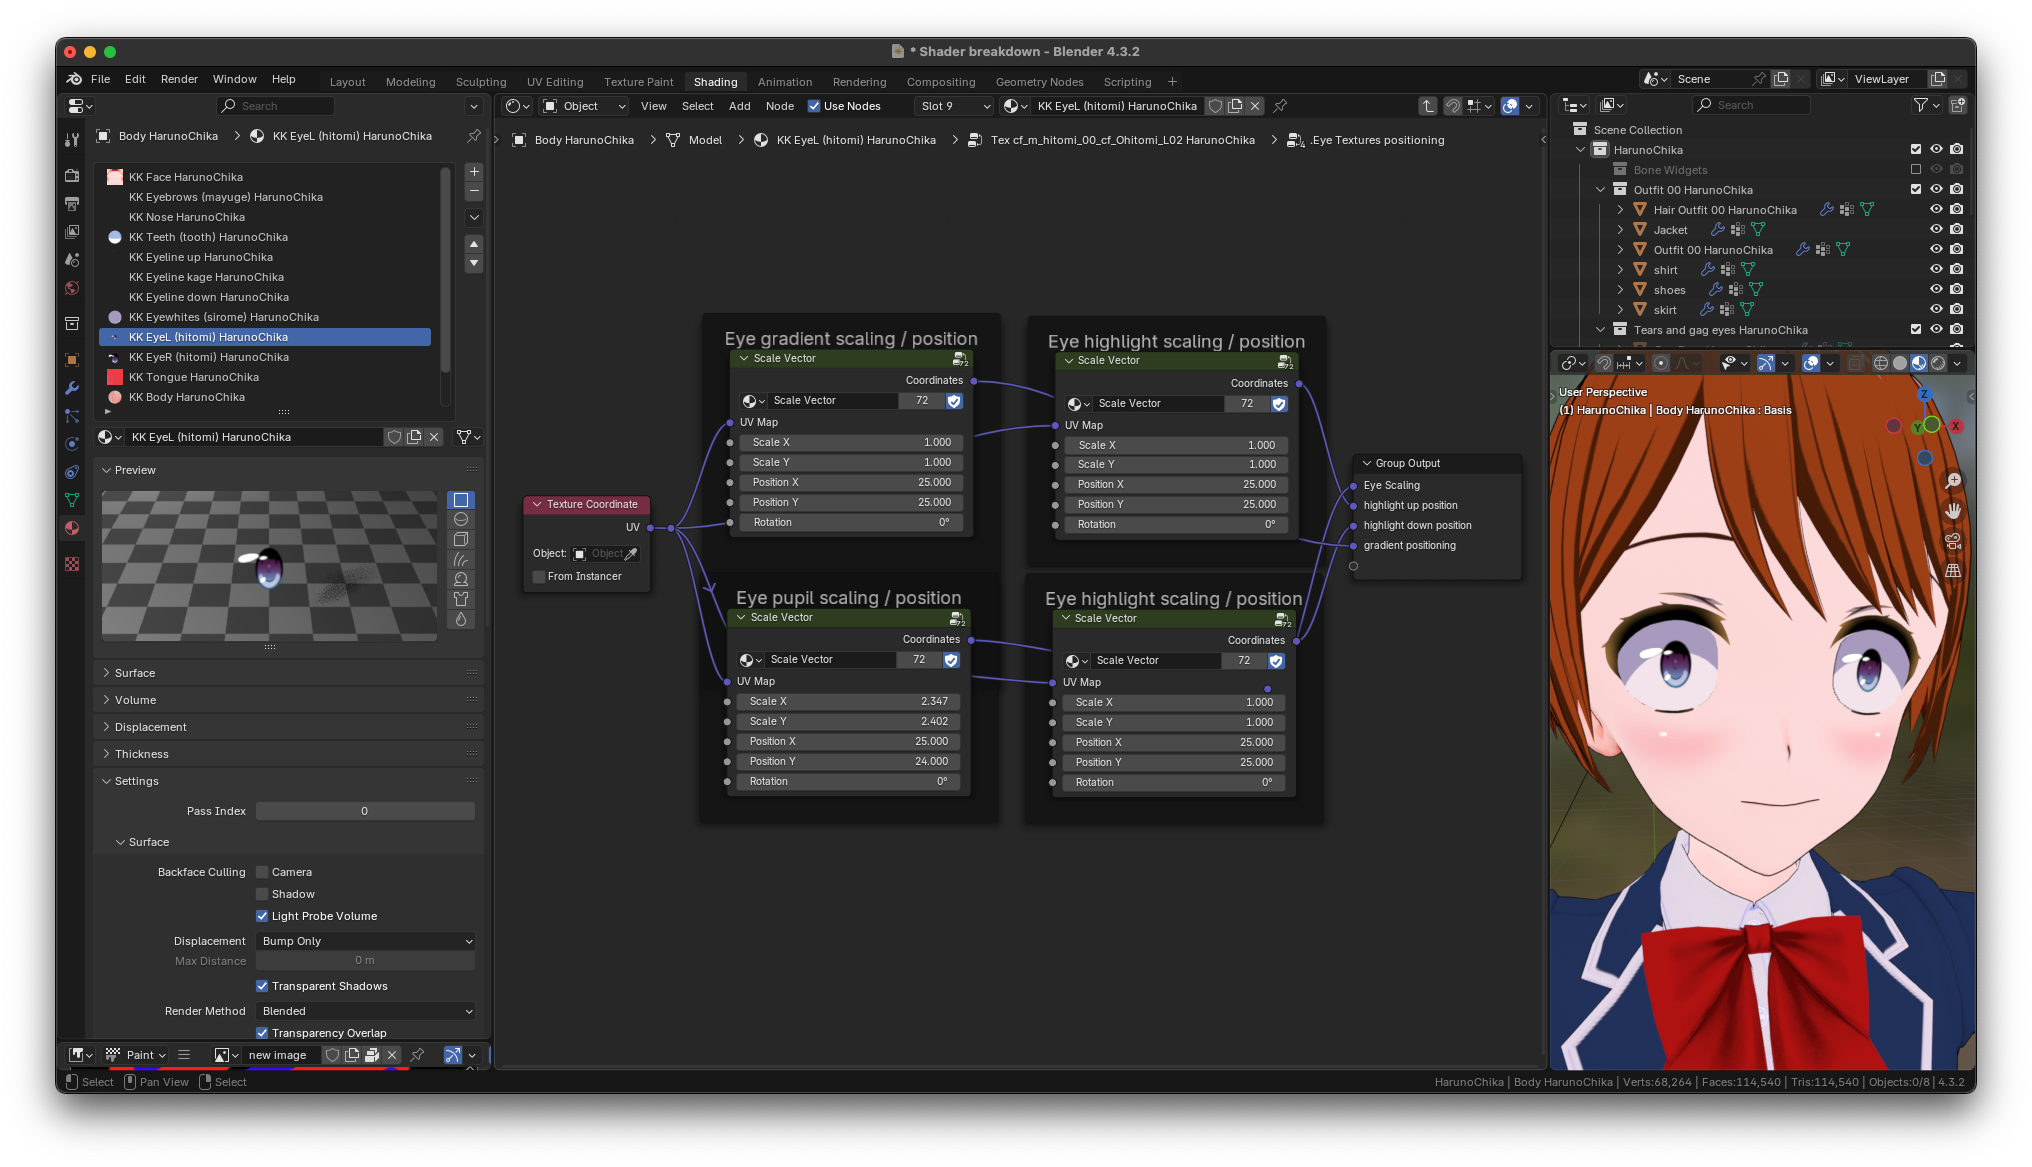
Here's what the eyes look like when they're scaled down, moved to the right, and rotated 90°
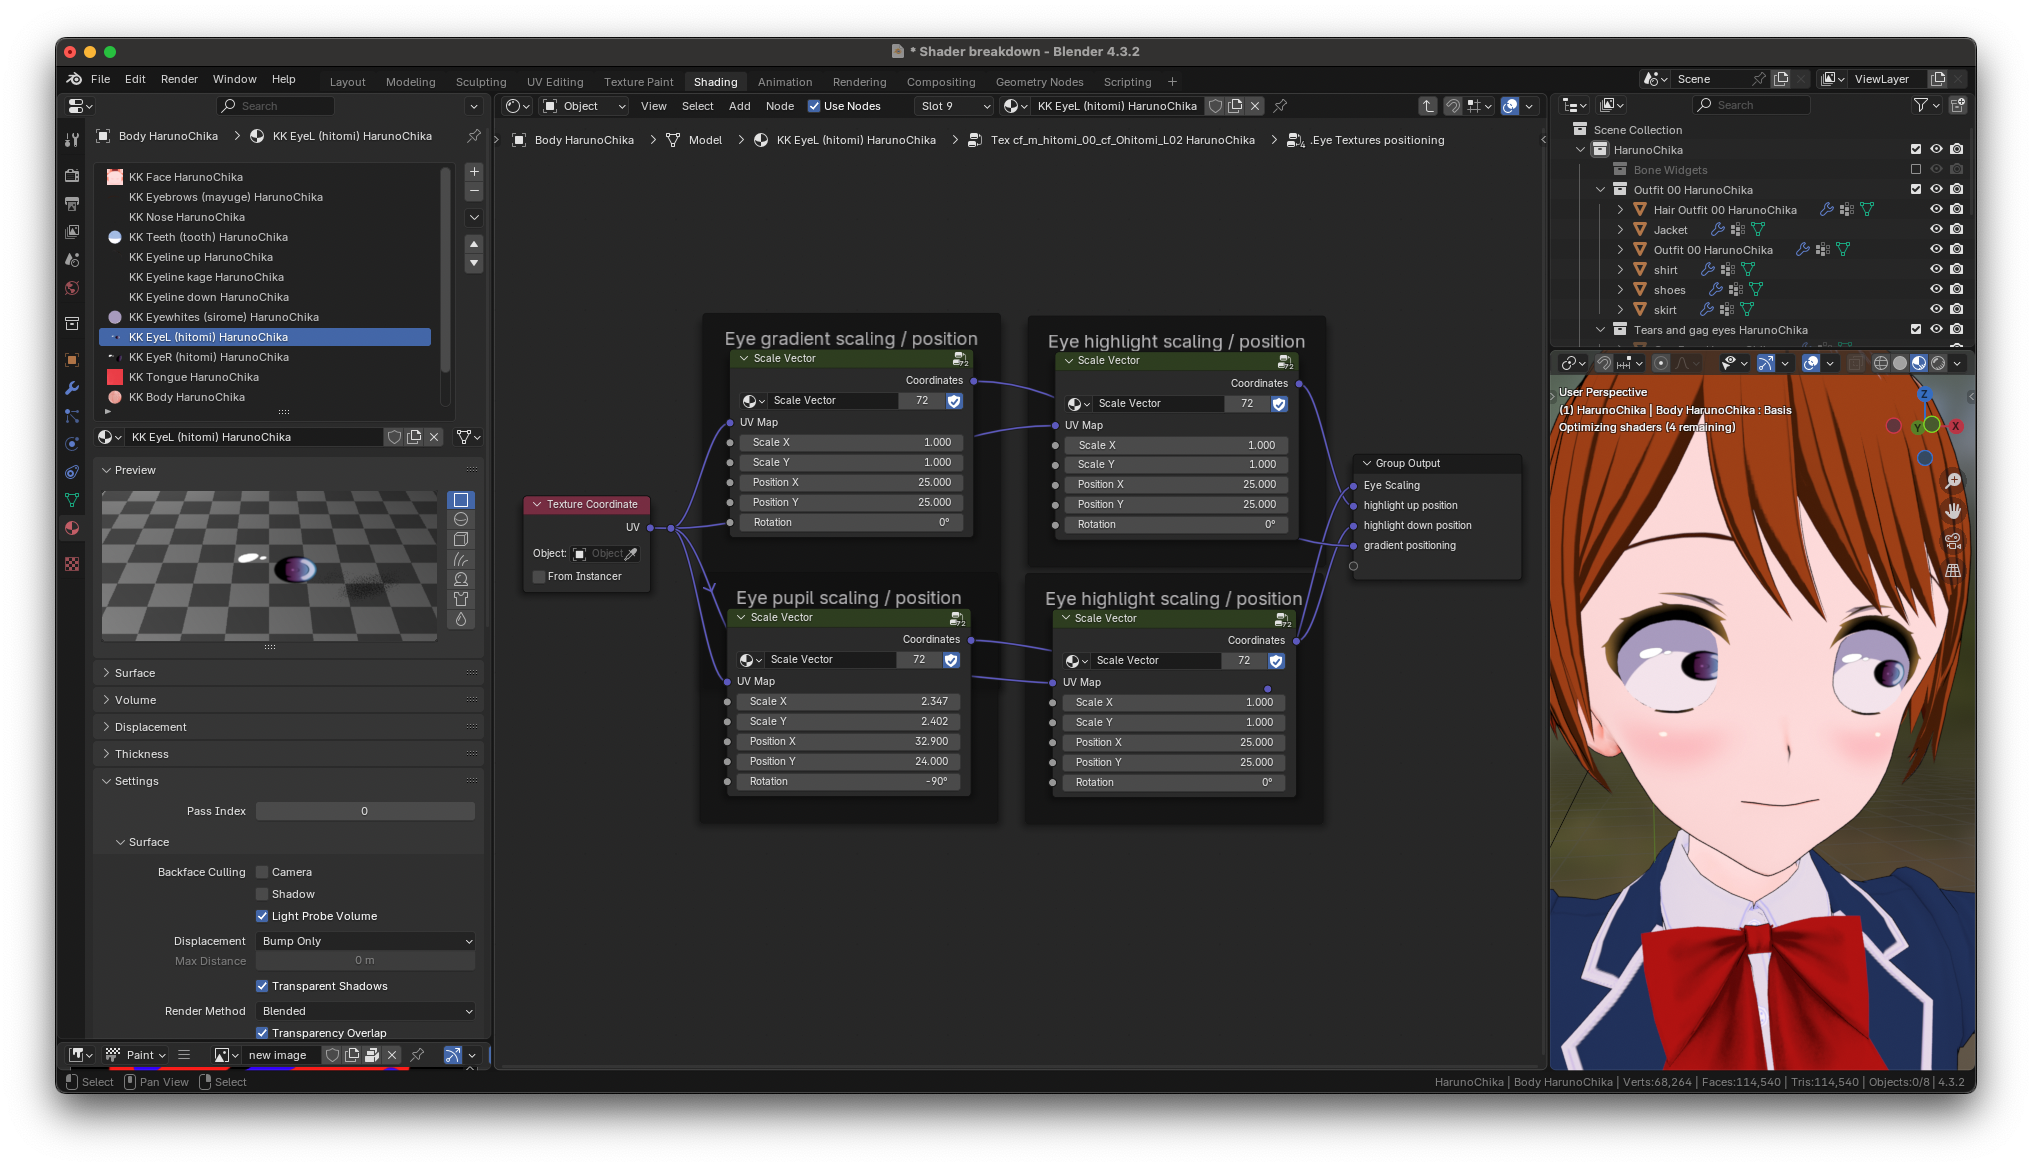
## Colored main texture, plain main texture and dark main texture slots
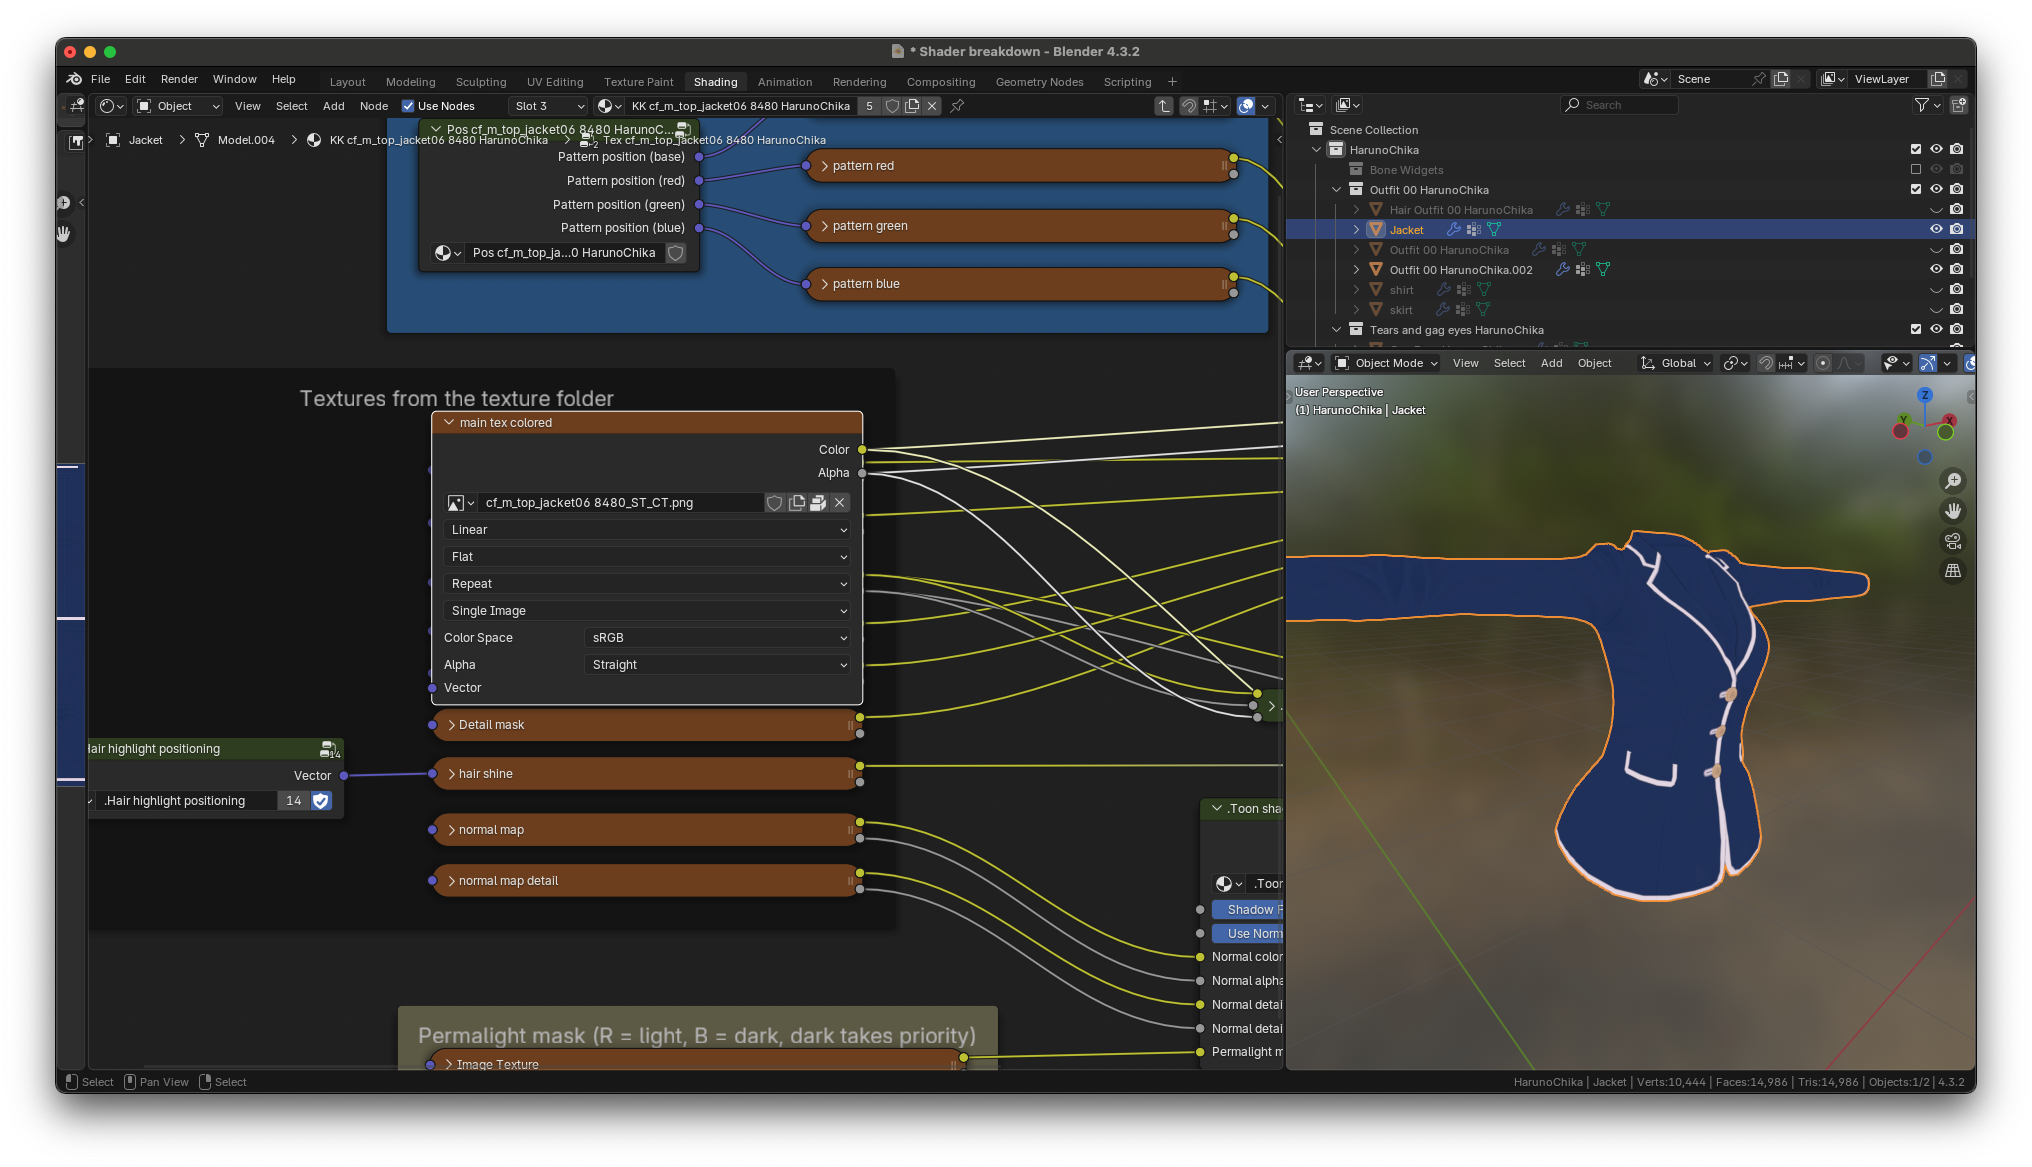
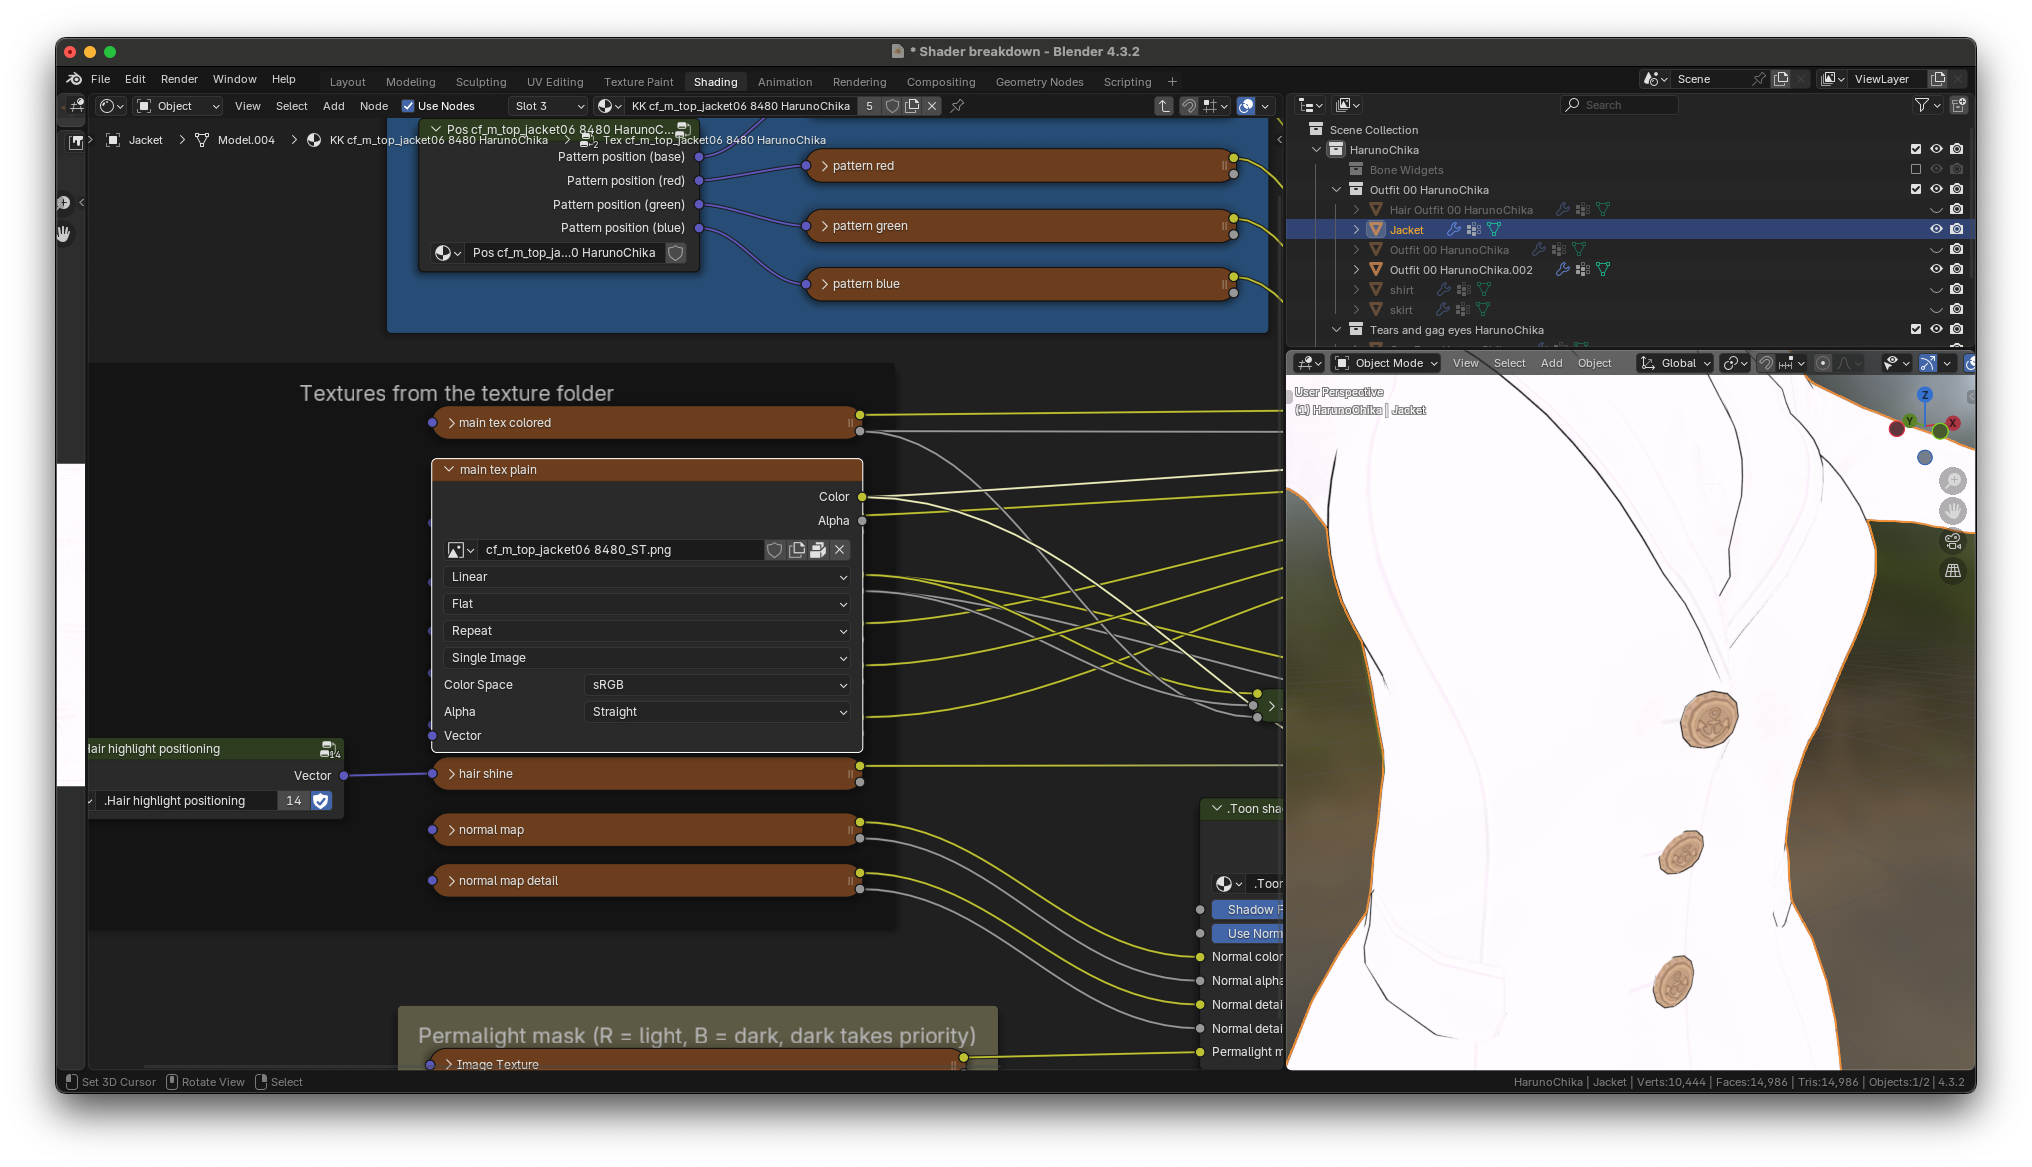
let's move onto the rest of the textures in the group now. here's what
the main texture looks like when the image node has been control shift
clicked. this is the **colored** main texture of the outfit. We'll take a look at this more in depth later on.
here's what the plain main texture looks like. this is the **uncolored** main texture
of the outfit. notice that some features like
the buttons are still fully textured
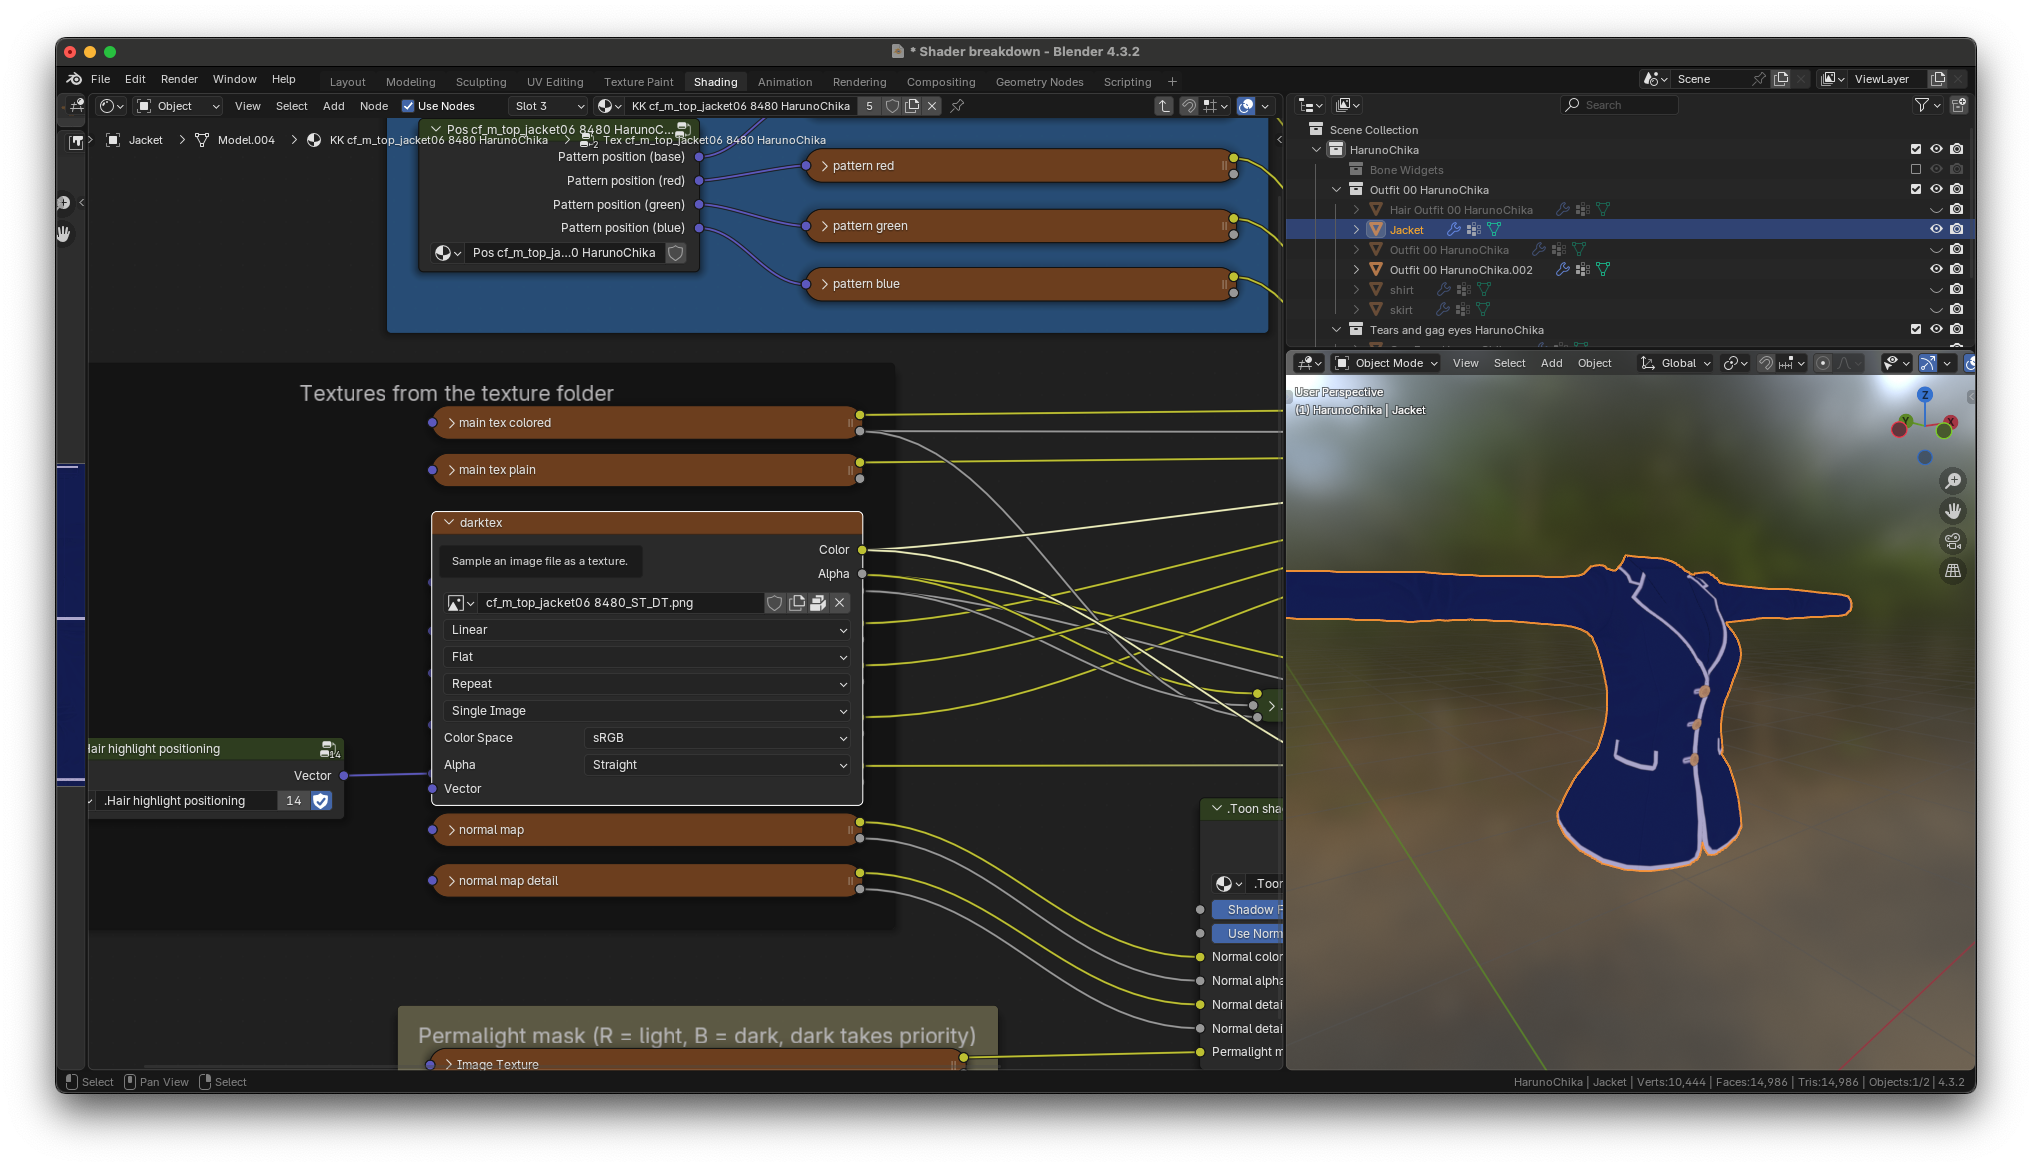
here's what the dark main texture looks like. KKBP automatically
generates a dark version of the colored main texture and loads it into
this slot.
## Alpha mask slots
If a piece of clothing has an alpha mask. It'll be loaded into this
slot. here's what an alpha mask can look like
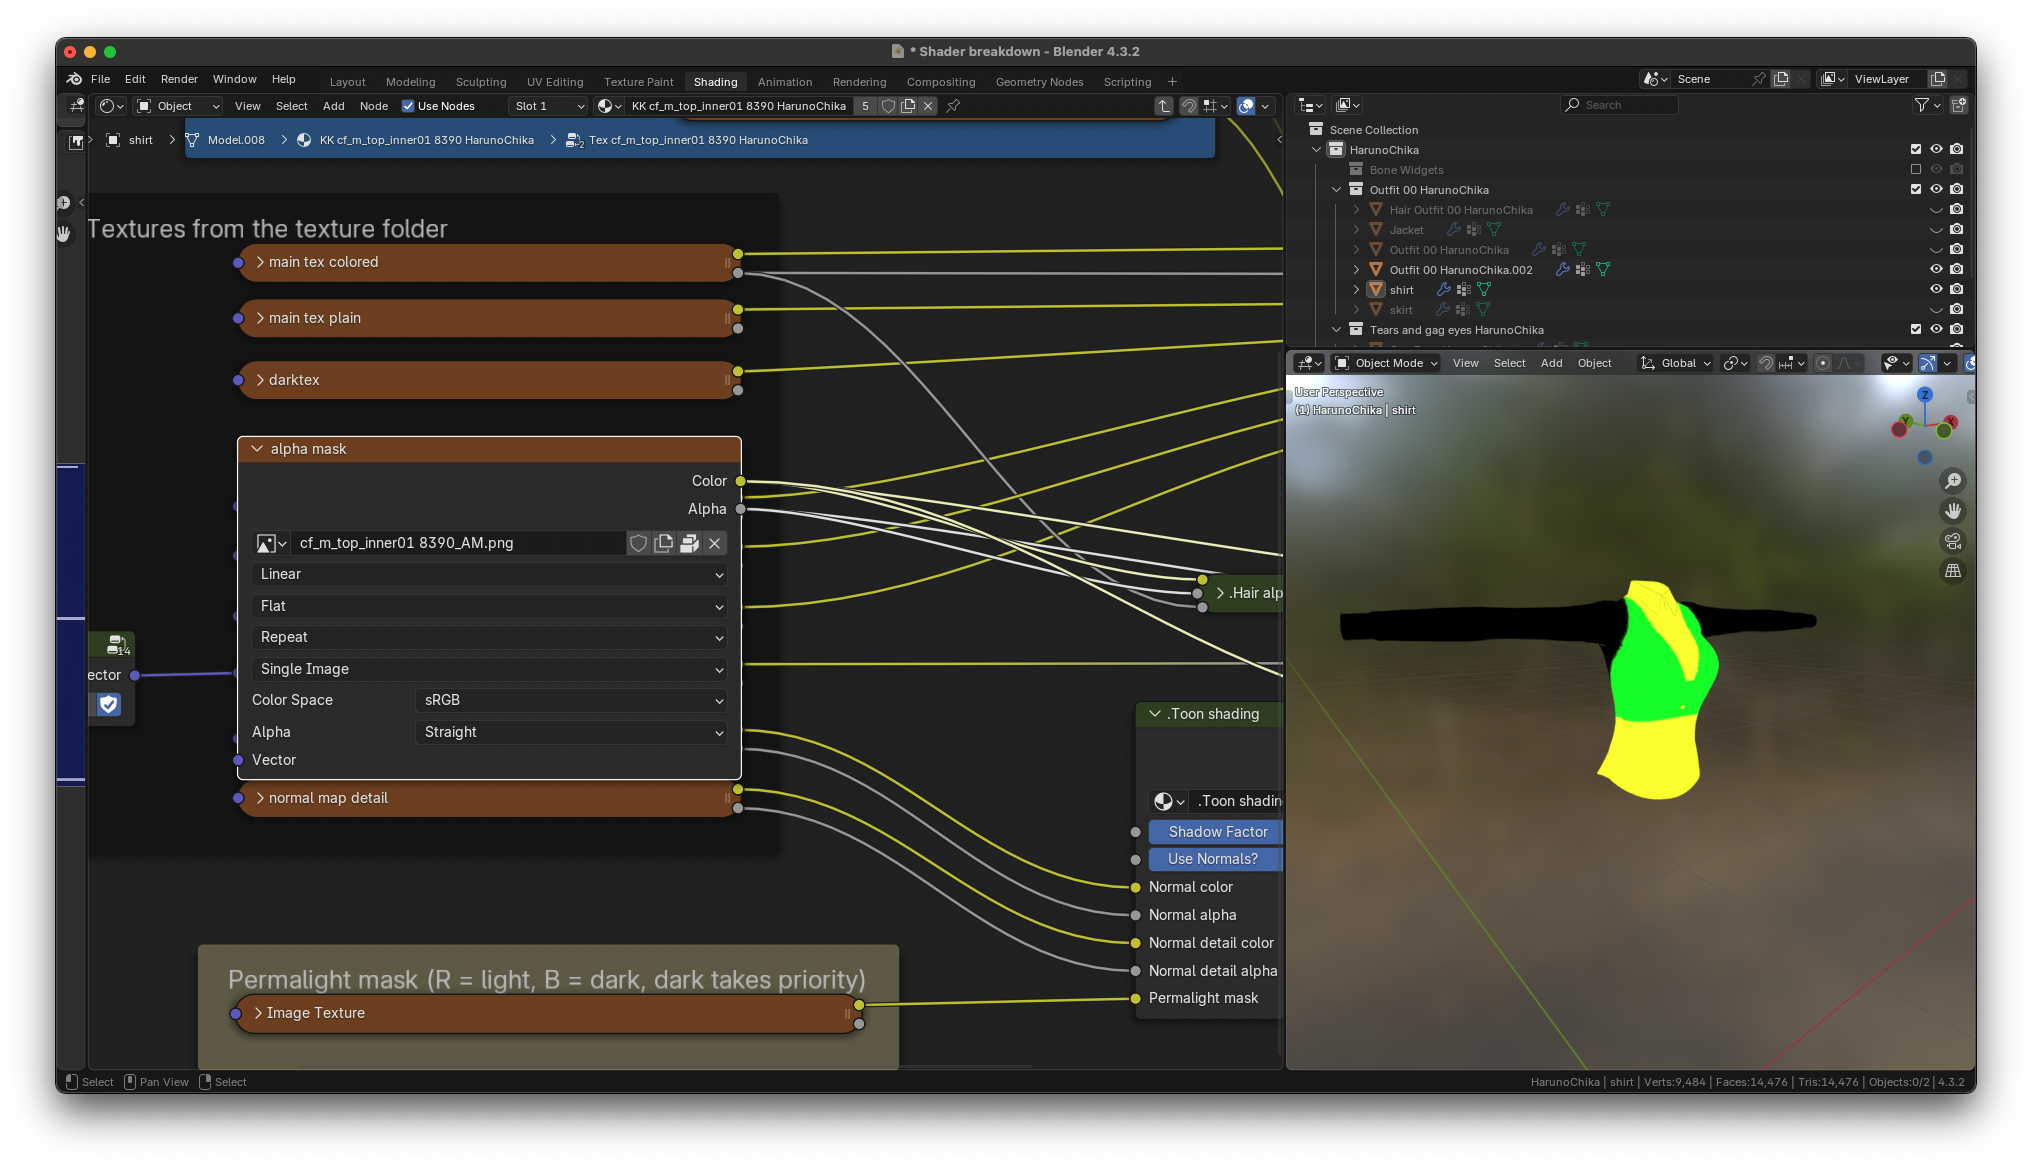
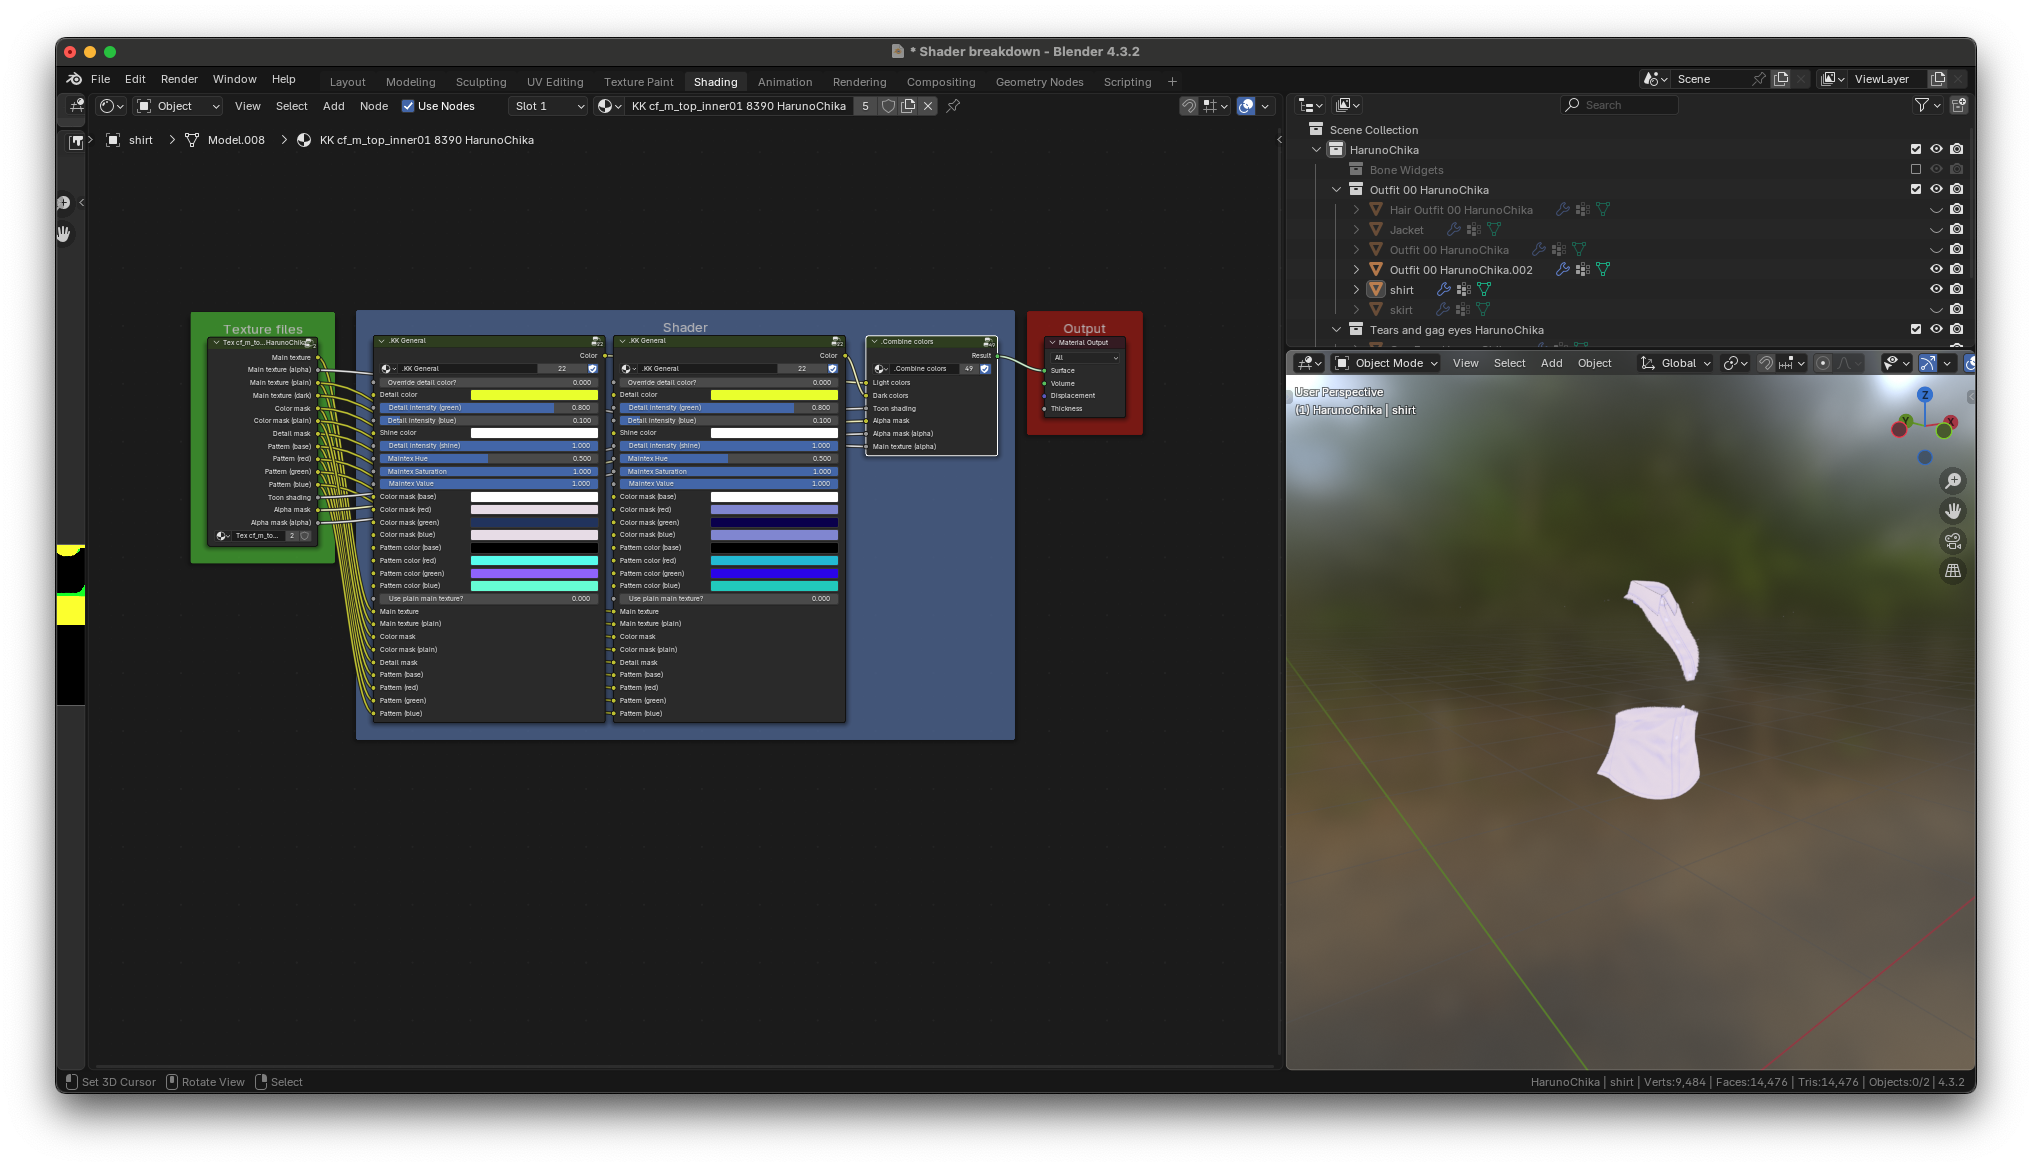
Look familiar? This is what the complete material looked like. The
visible portions match up with the yellow portions of the alpha mask
## Color masks slots
there are two slots for the color mask. the top slot is used for
materials that are supposed to be partially or fully transparent. the
bottom slot is used for fully opaque clothing. fully opaque clothing is
not supposed to have a color mask, but the KKBP exporter exports one
anyway. Some materials will look incorrect if a color mask is loaded
into an opaque clothing material so that's why there's two slots. A
list of in game shaders that are identified as opaque are listed below
Koikano/main_clothes_opaque', 'Shader
Forge/main_opaque', 'xukmi/MainOpaquePlus',
'xukmi/MainOpaquePlusTess', 'Shader Forge/main_opaque2', 'Shader
Forge/main_opaque_low'
We'll be taking a look at both color masks but for right now here's what
the bottom color mask looks like
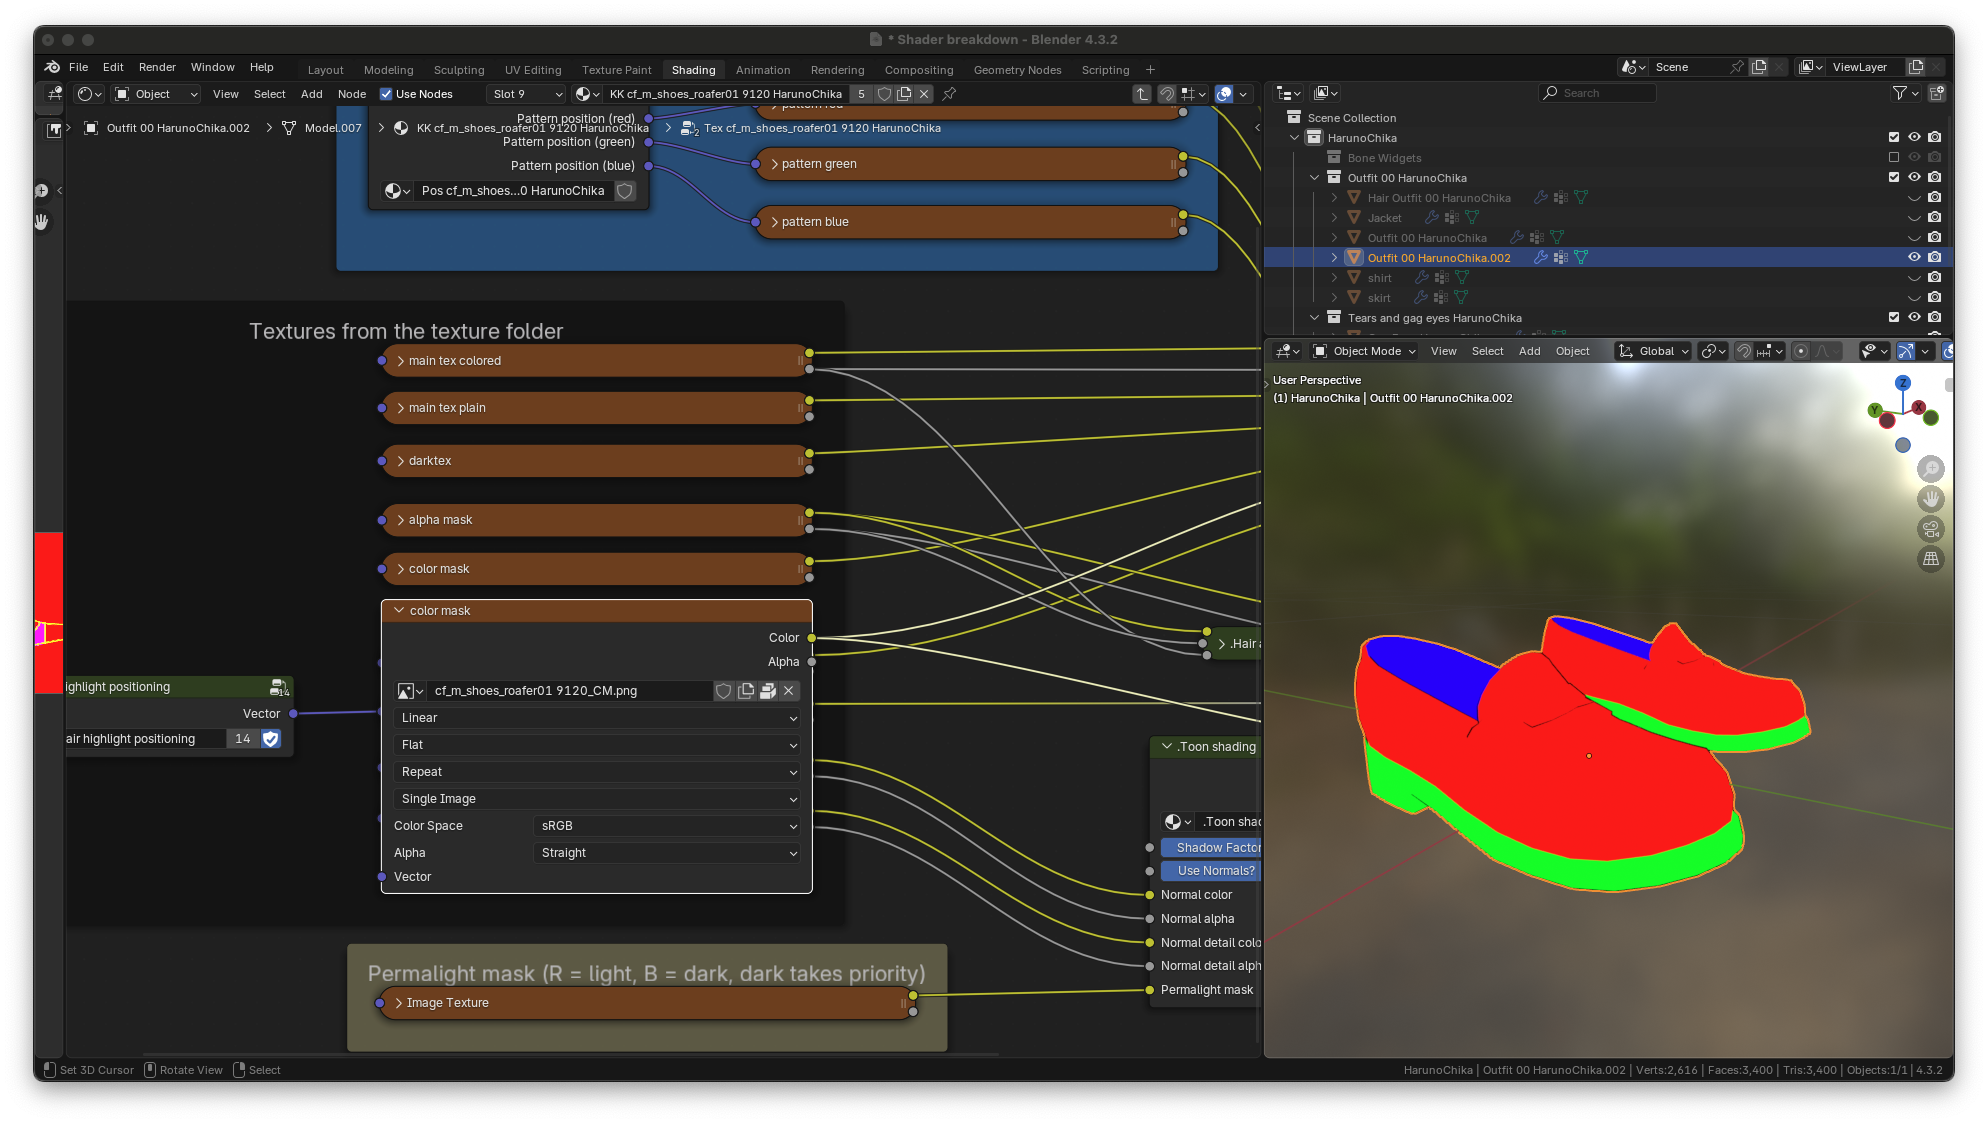
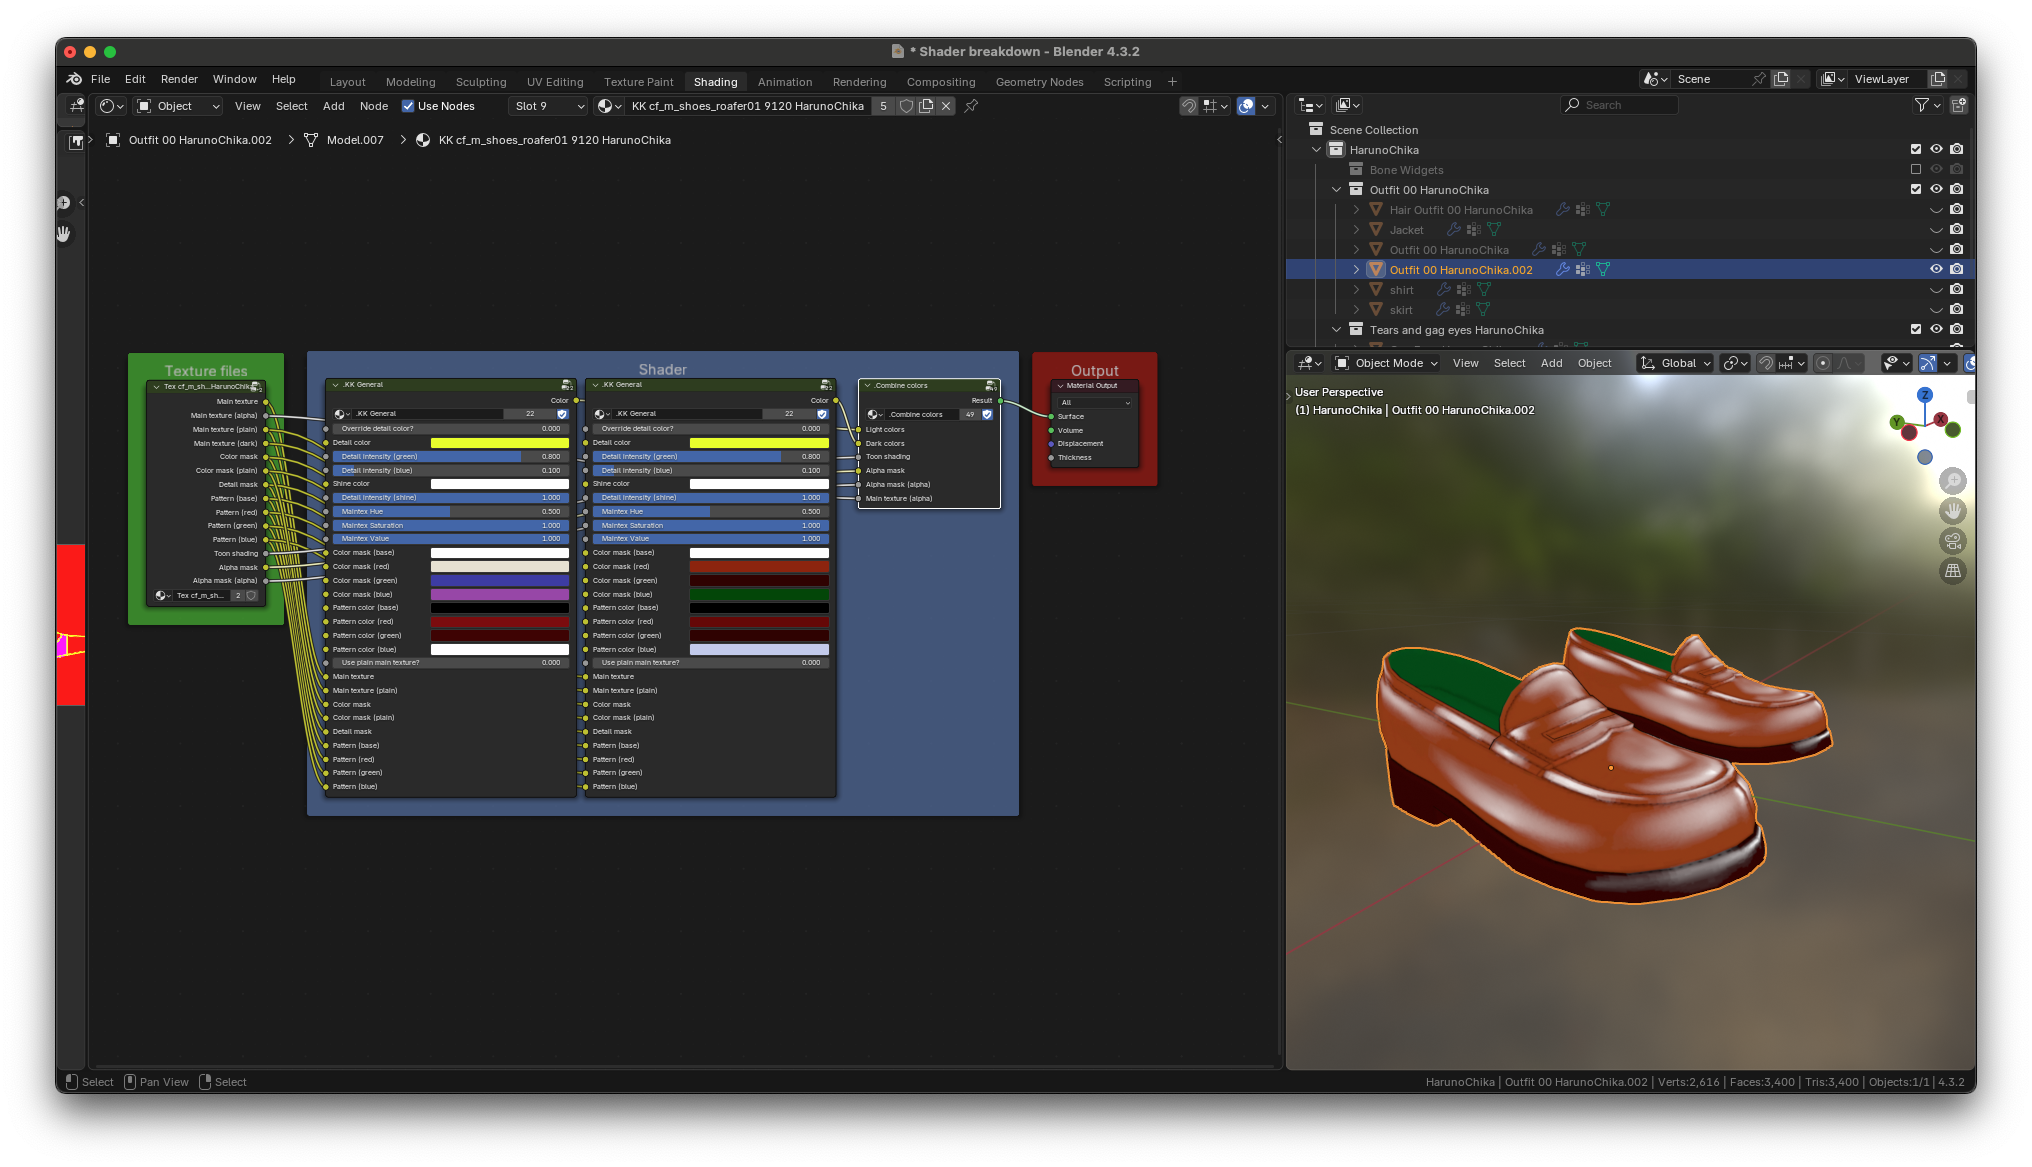
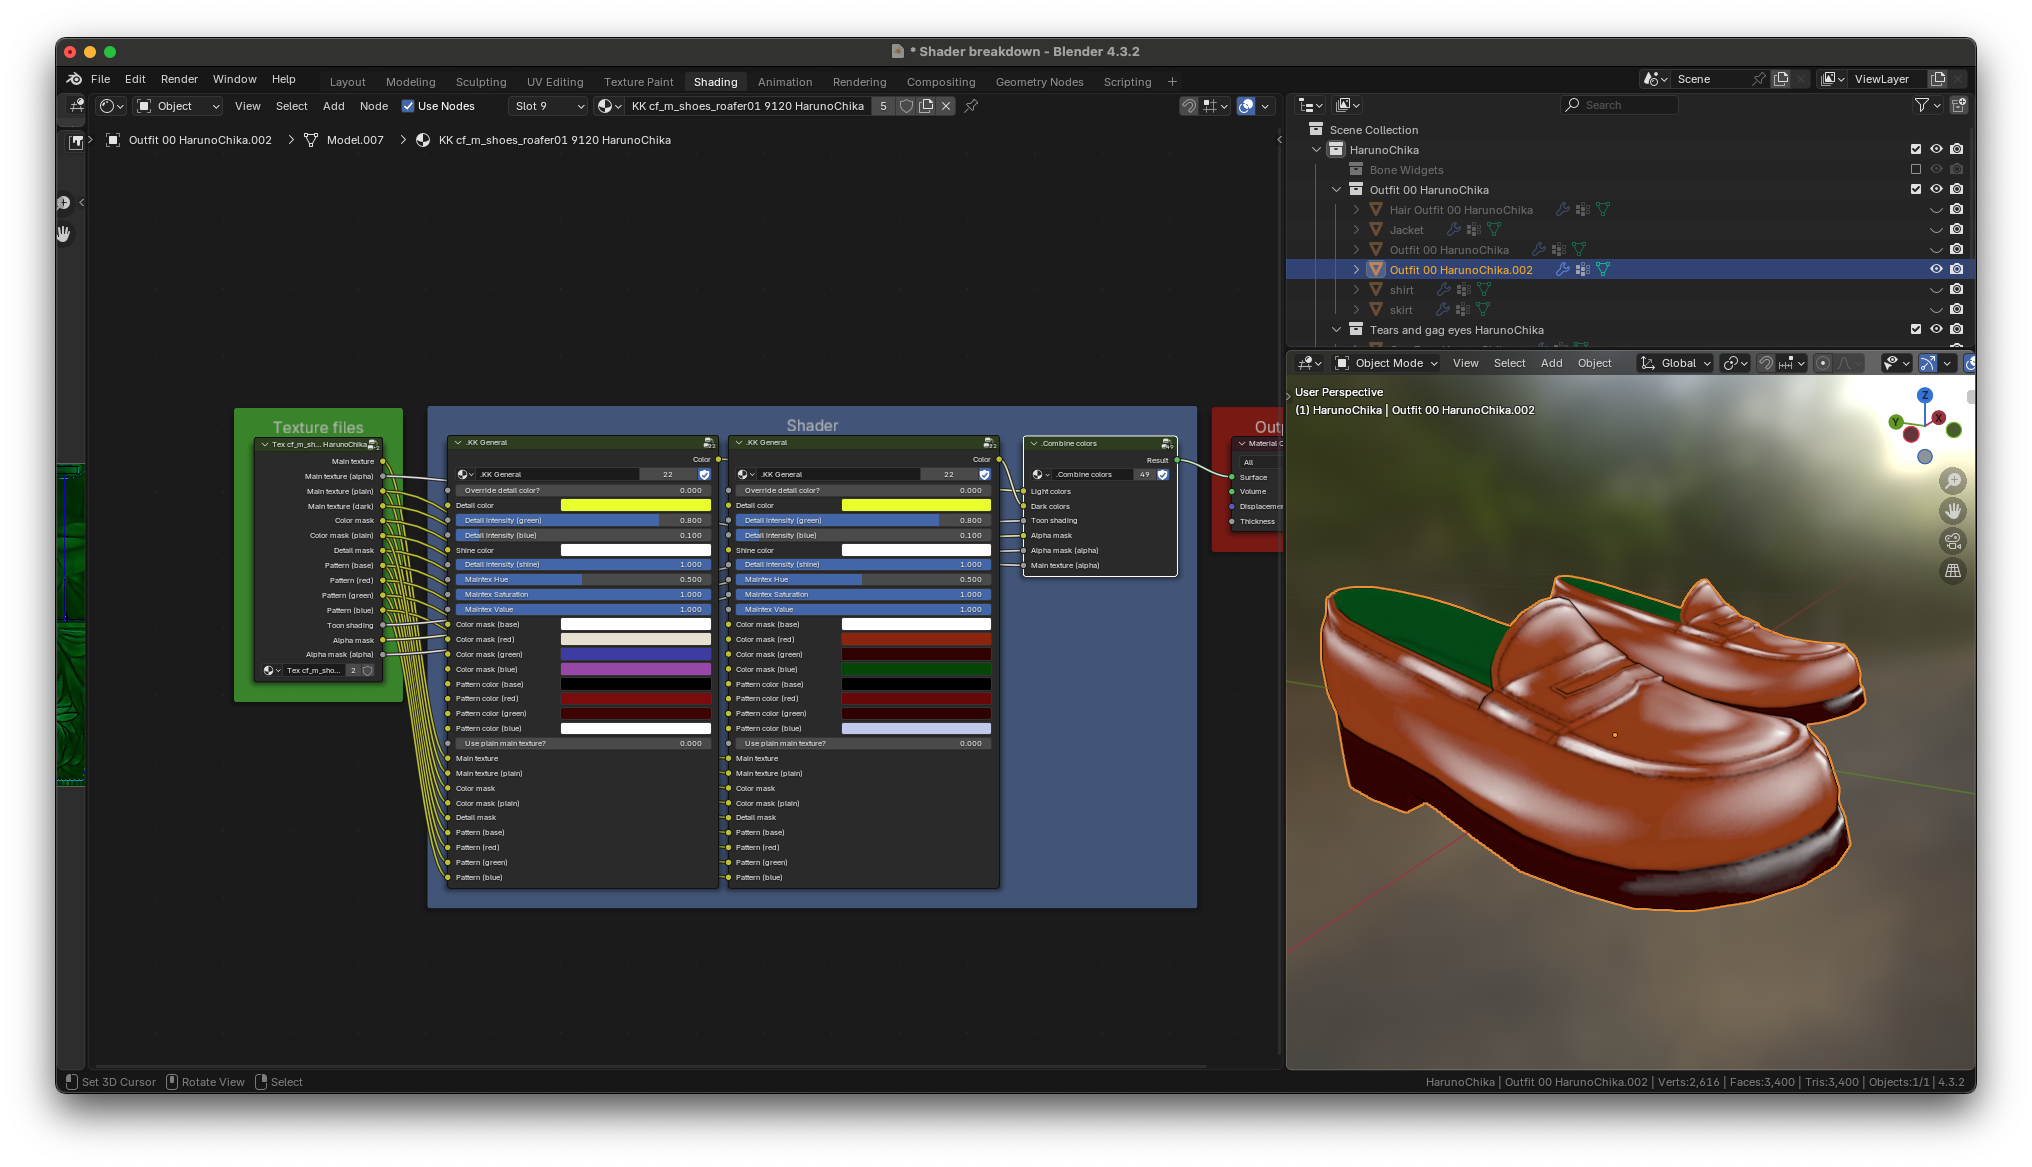
Look familiar? This is what the fully assembled material looks like. The
brown, dark brown, and green portions of the shoes match up with the
red, green, and blue portions of the color mask.
## Detail mask slots
This is the detail mask for the jacket.
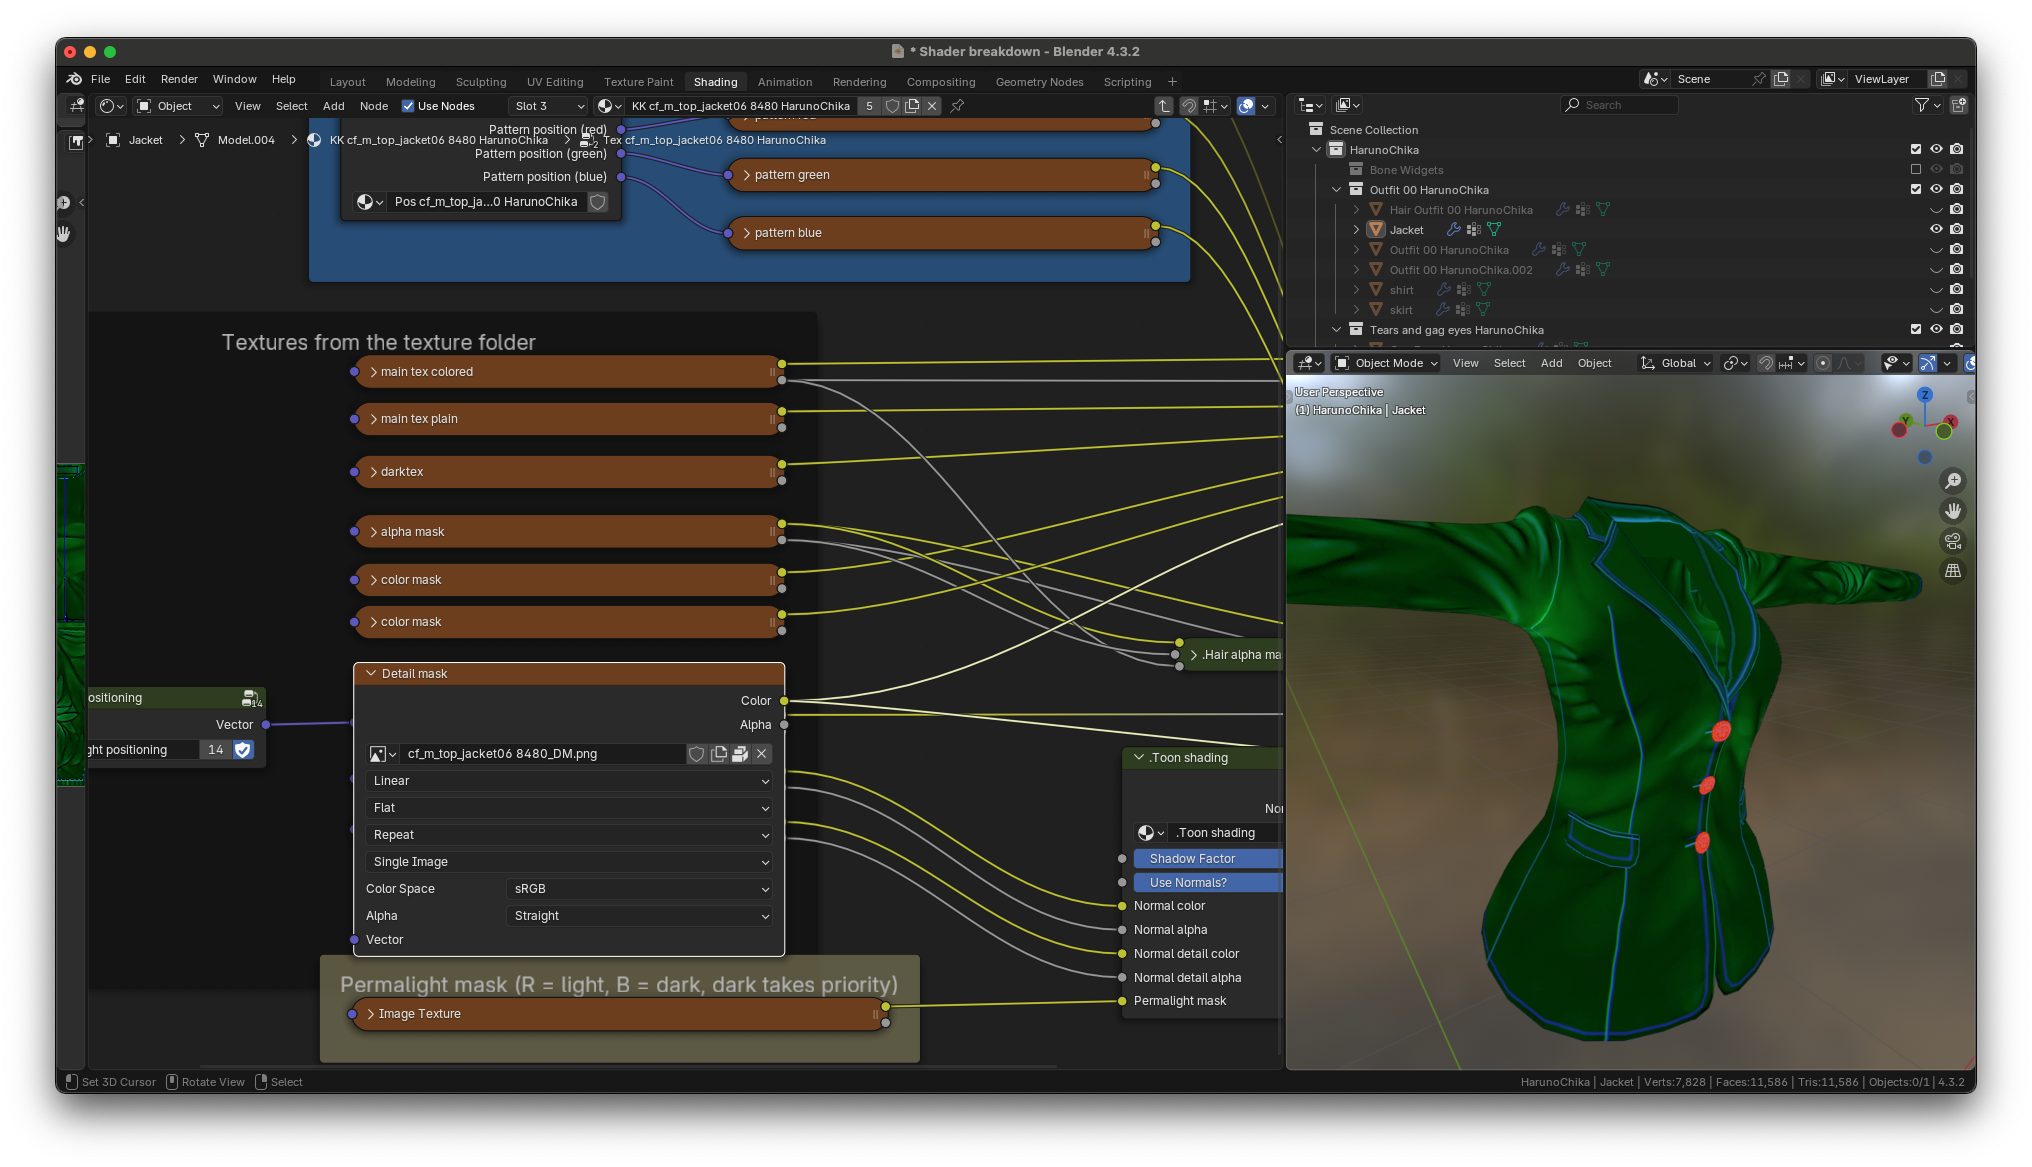
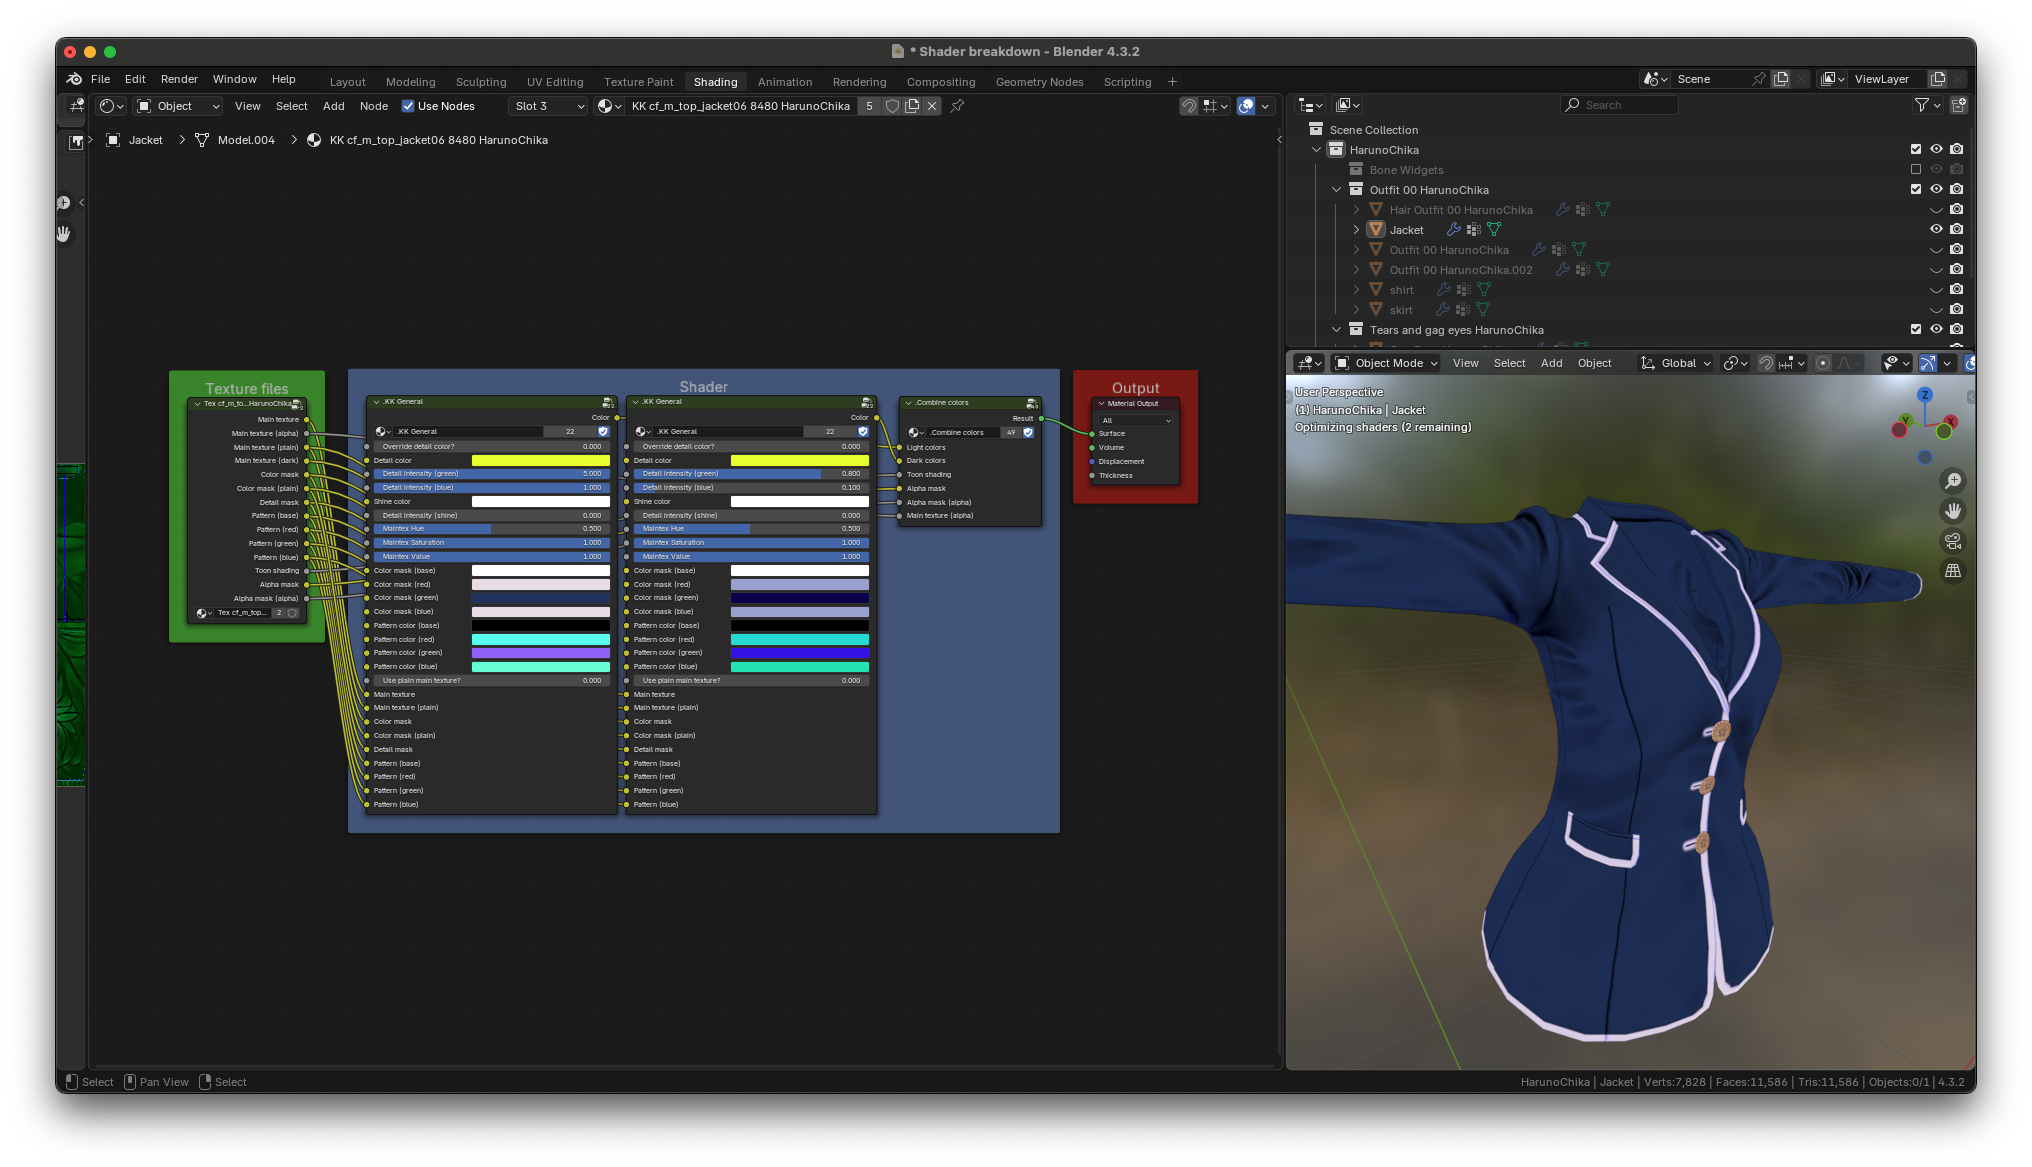
Look familiar? This is what the fully assembled material looks like with
the detail intensity cranked up to the max. The green portions of the
detail mask match up with the soft details on the jacket. The blue
portions of the detail mask match up with the hard lines on the jacket.
and if we take a look at the shoes, You can see the red portion of
the detail mask
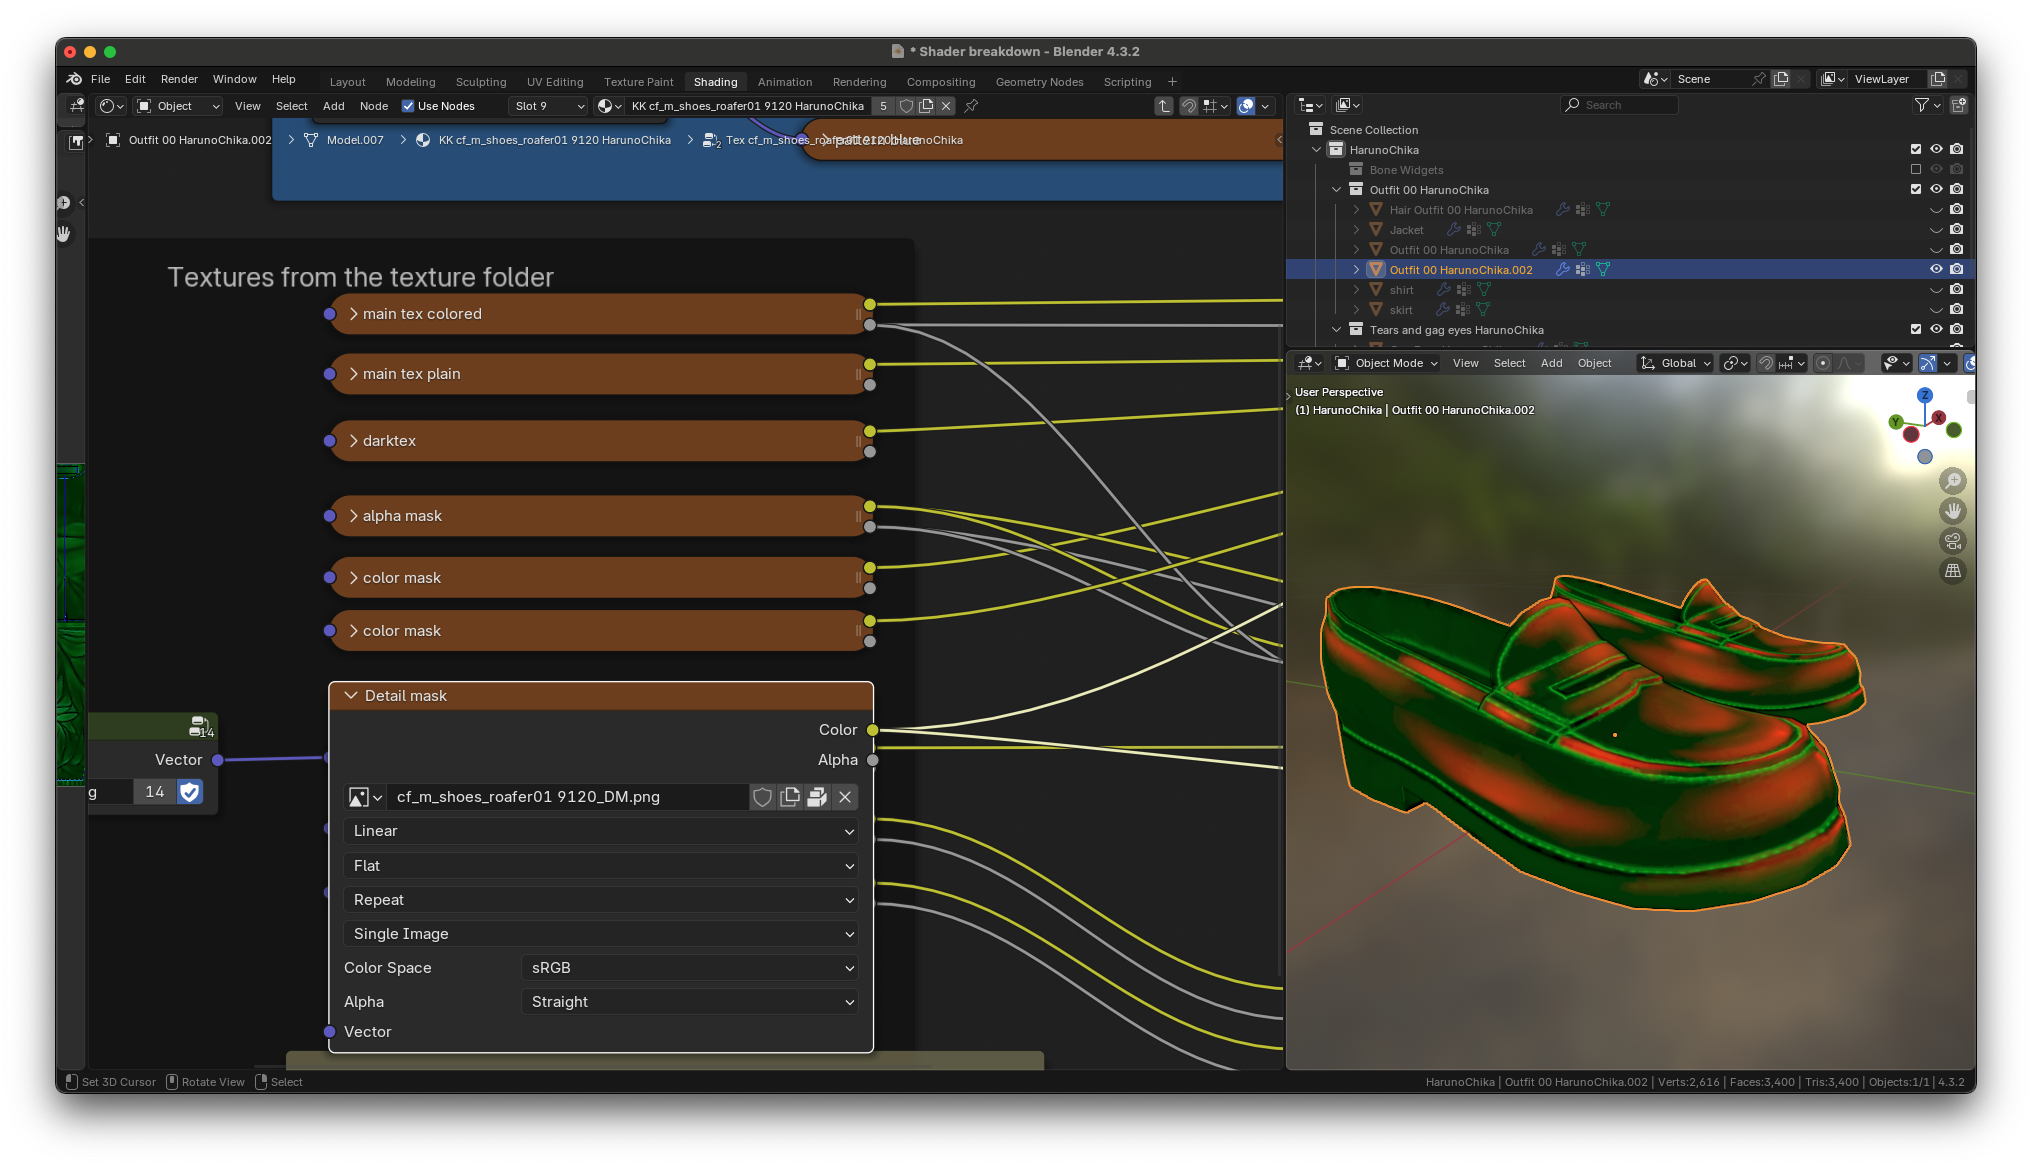
the red portion matches up with the location of the shiny parts of the shoes
## Detail masks and metallic materials
the KKBP importer has a shortcoming with the detail mask related to
metallic materials. The red portion of a detail mask can either mean
shine or metal. KKBP does not support metal materials, so if it detects a
metal material, it'll automatically set the detail shine slider to
zero. For example, if we take a closer look at the jacket's detail mask,
the buttons are obviously red.
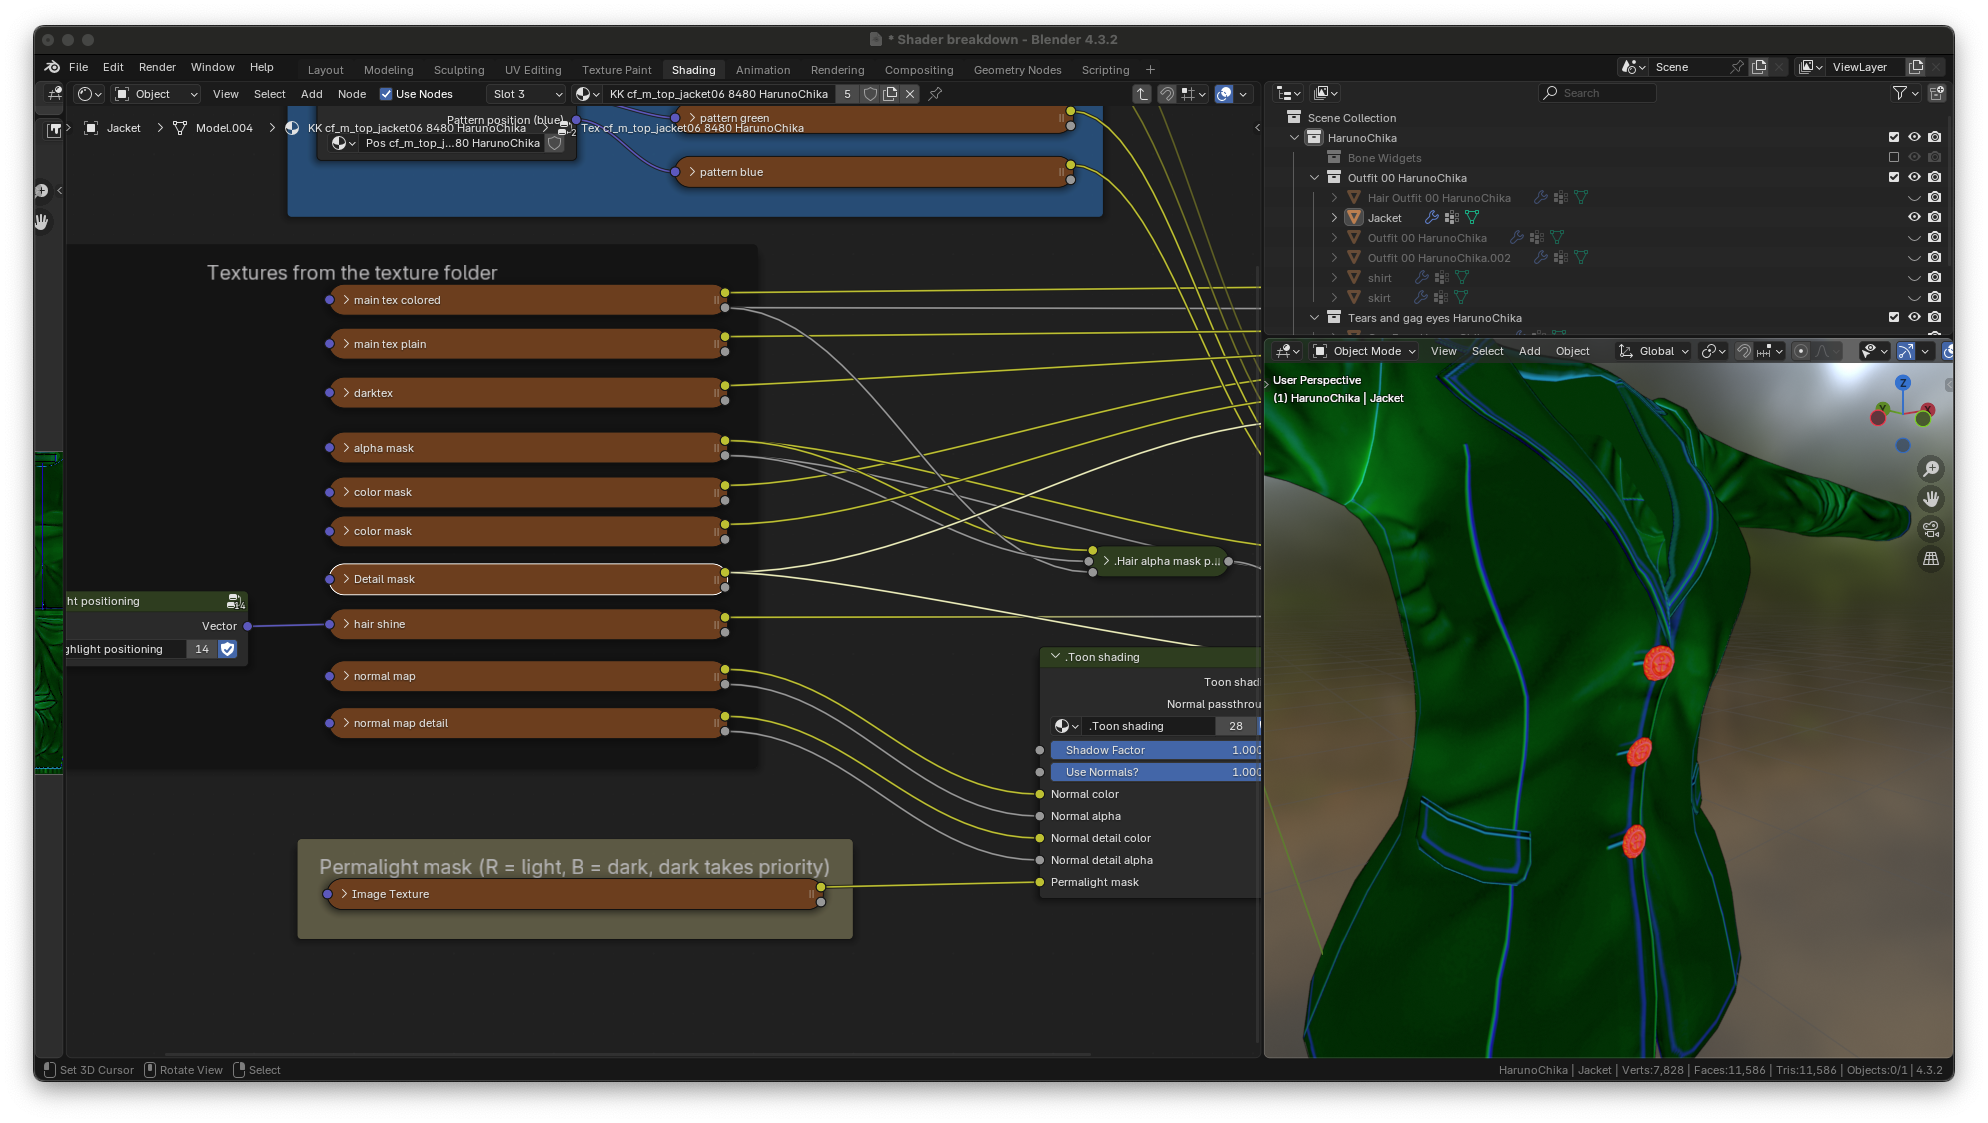
but when we take a look at the fully assembled material, the detail mask
intensity has been disabled
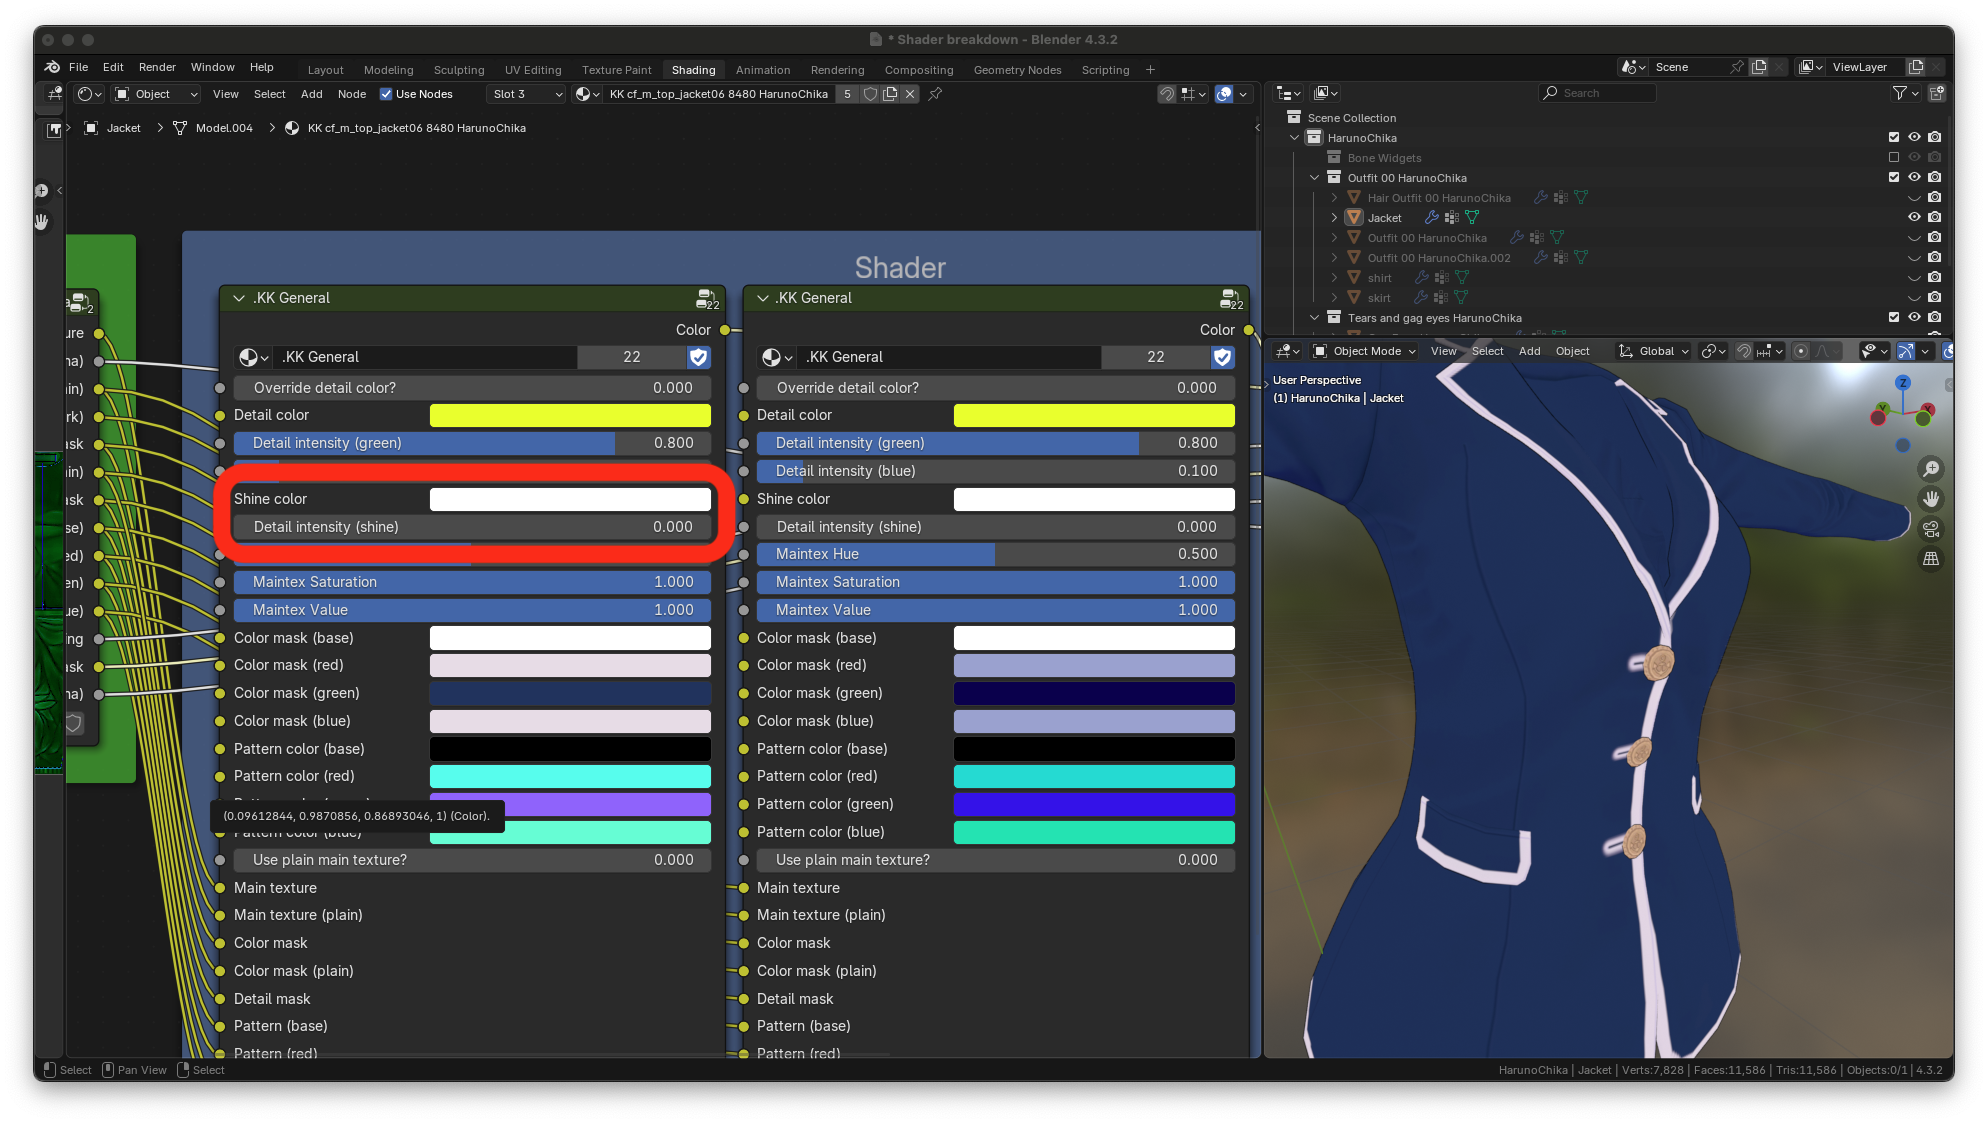
turning it back on results in erroneous appearance
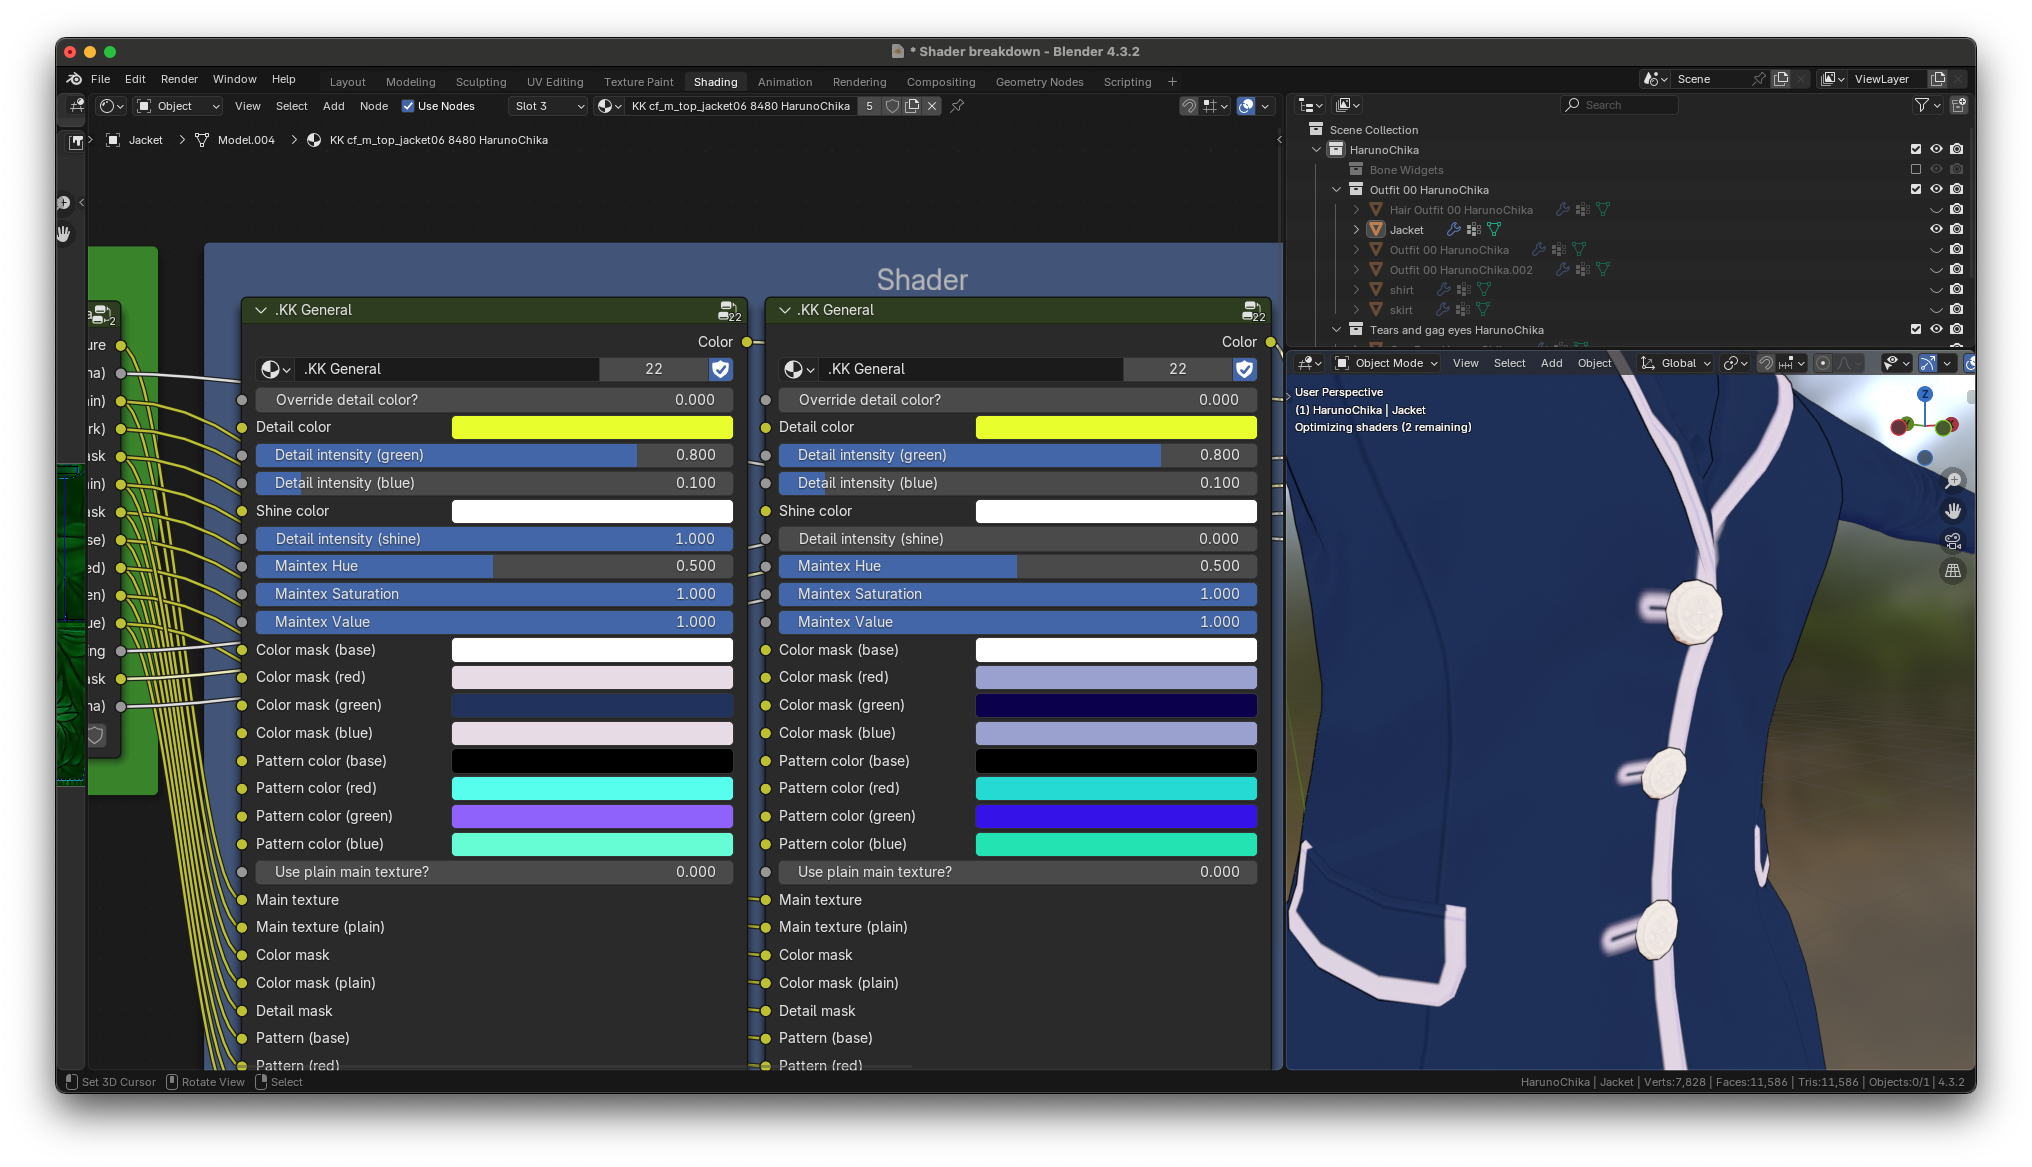
this is because the buttons are supposed to gain a metallic appearance
from the red channel of the detail mask but since KKBP does not support
metallic materials. It just turns white. KKBP determines if a material is
metallic by the presence of the AR.png texture. If a material has an AR
texture, then it is assumed to be metallic, and the detail shine
intensity will be disabled automatically to avoid issues like the one
seen above.
For example the jacket has such a texture
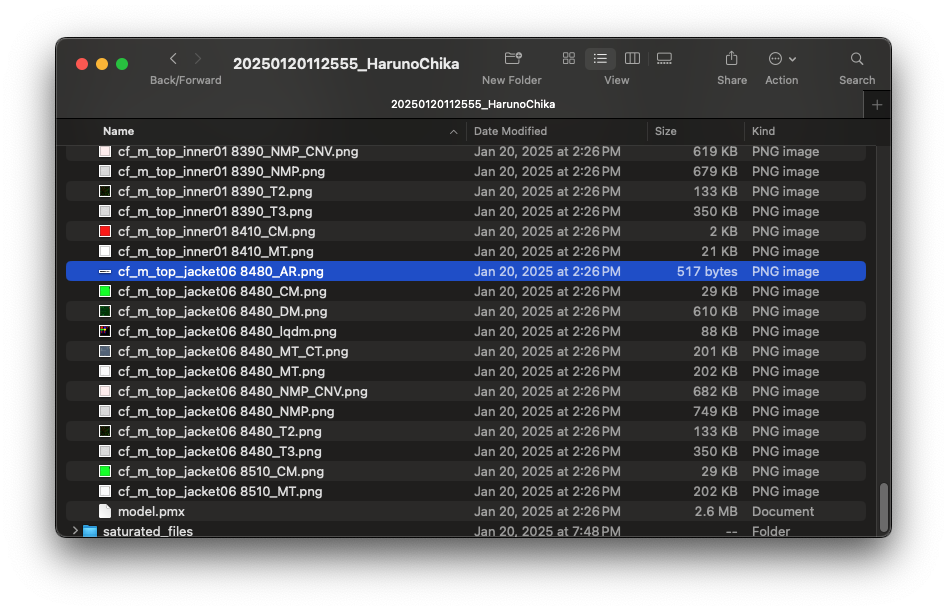
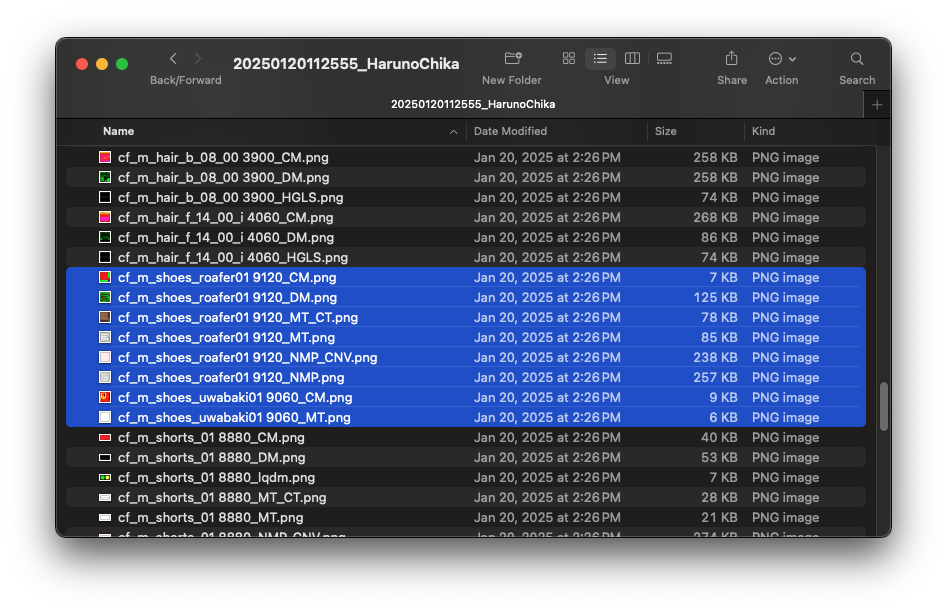
but the shoes do not have that texture so that's why the shine on the
shoes were not disabled
## Normal map
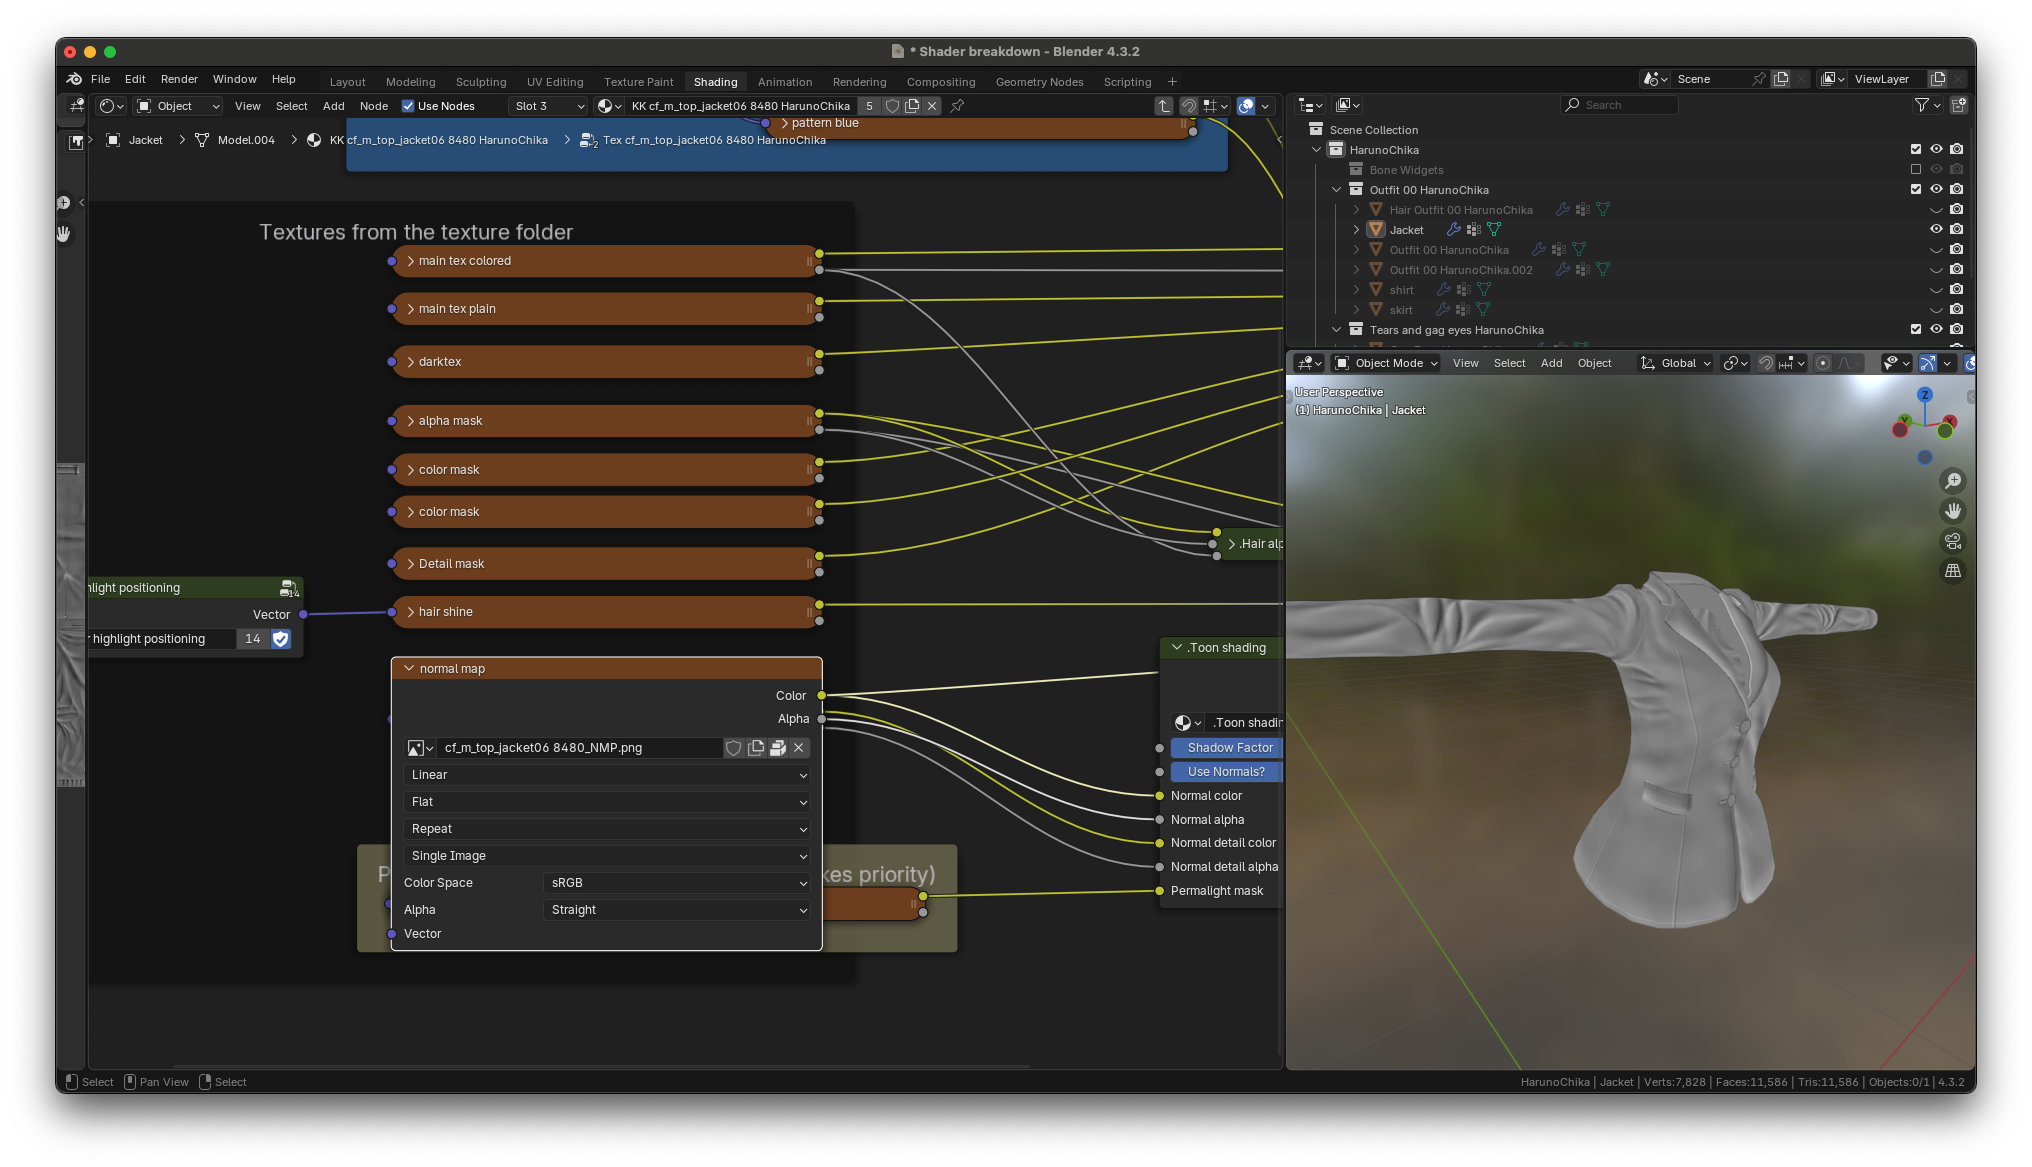
anything related to hair will be skipped in this explanation, so the
next node is the normal map. The normal maps are grayscale in appearance. The color of the normal map along with its alpha channel are used to create a proper normal map
## Normal map detail
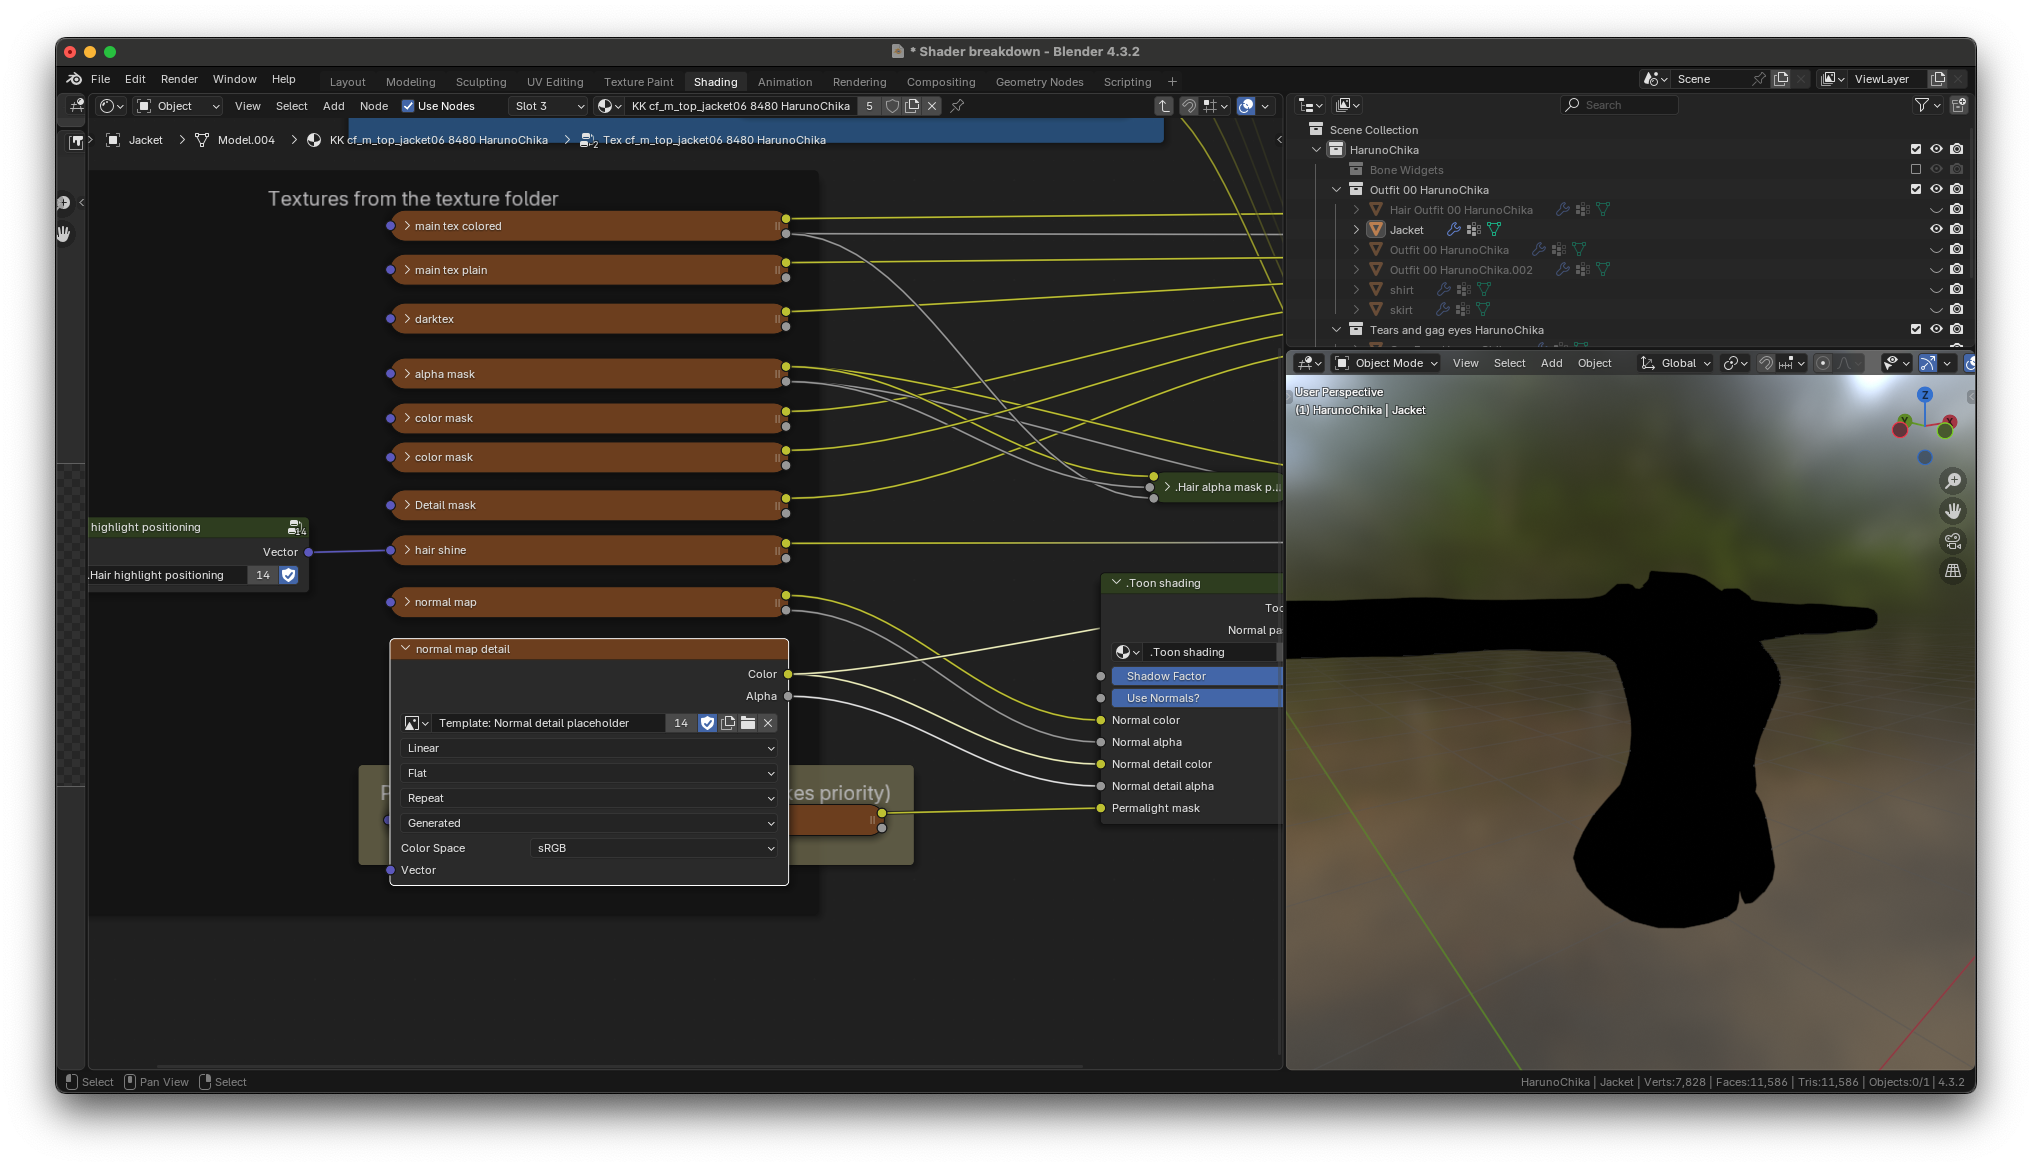
and the final node is normal map detail. Most pieces of clothing do not
have a normal map detail so you'll find this placeholder instead.
## Final things to note about the textures group
First thing:
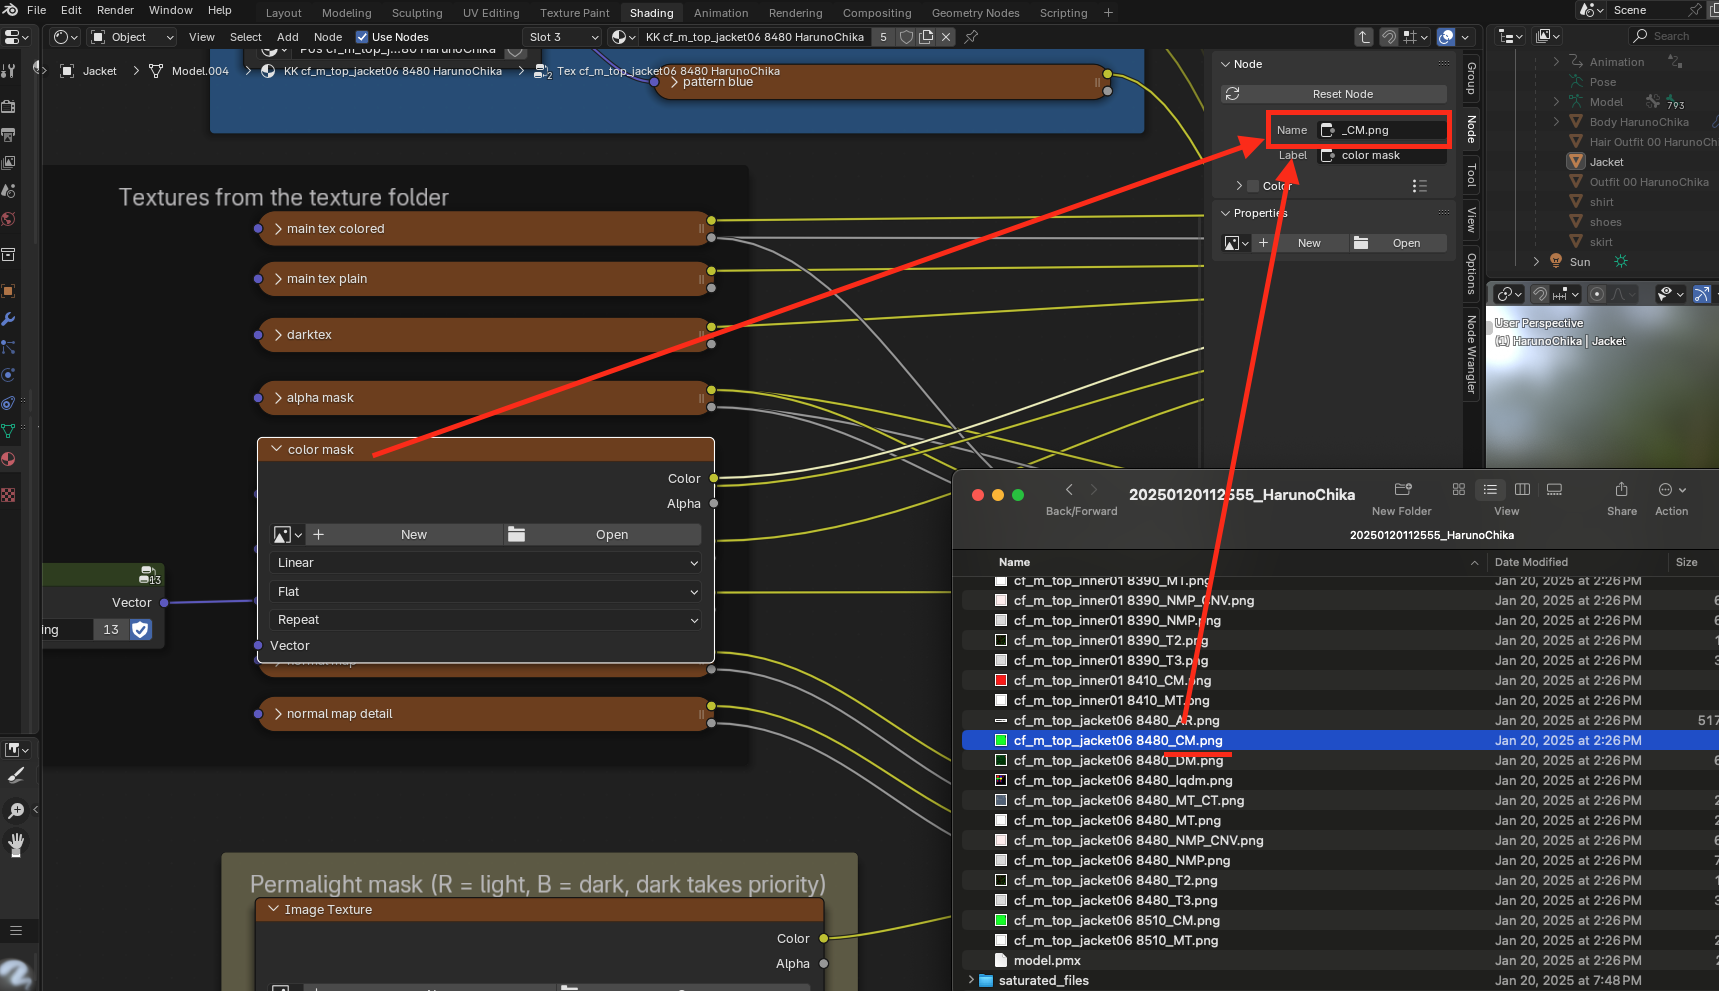
Textures are loaded into each image node by their suffix. For example, the material name for the jacket is cf_m_top_jacket06 8480. The KKBP importer searches the export folder for an image called cf_m_top_jacket06 8480_CM.png and if it finds the image it loads it into the _CM.png node. Each one of these nodes has an "_ABC.png" name tag on them to ensure each texture is loaded into the correct image node
Second thing:
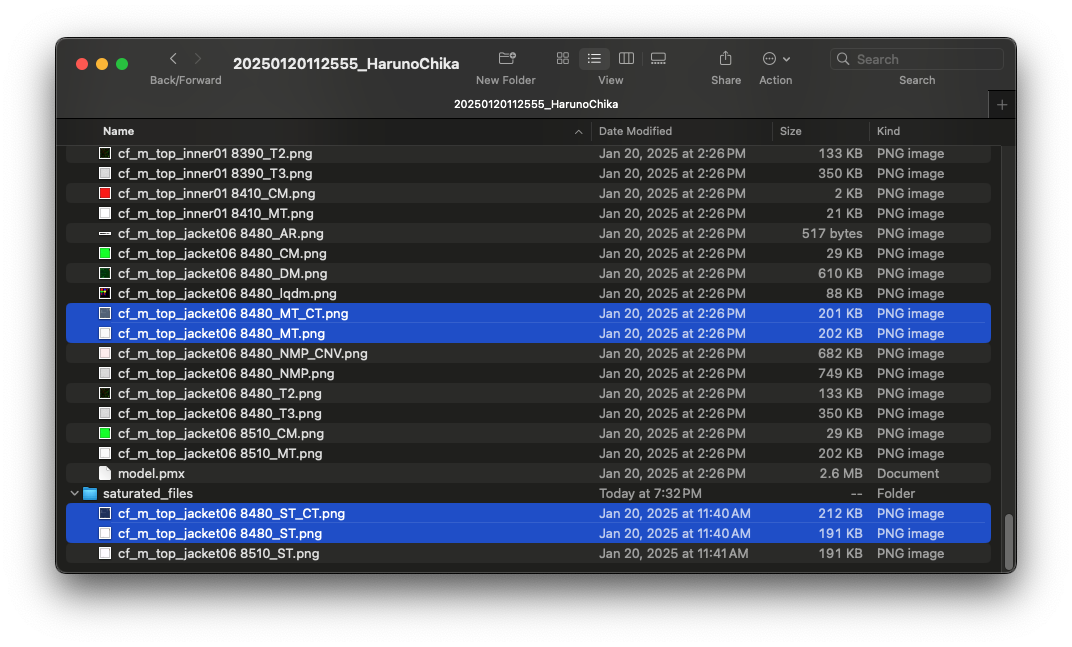
Main textures exported by the KKBP exporter are not saturated. These files end in "_MT_CT.png" and "_MT.png". In the game, the textures are saturated in realtime to make them look like they normally do. In blender, the KKBP importer saturates these images once, then places them into a new "saturated_files" folder. When the KKBP Importer loads the main textures, it loads the saturated _ST versions of the main textures instead of the unsaturated _MT ones. It does the same thing with dark main textures too. It will grab the _ST version of the main texture, create a dark _DT version of it, save it in a new "dark_files" folder, then load it into the dark main texture slot.
## Permalight image
let's also take note of this permalight mask texture. This is
an optional texture. You can create one yourself to make portions of
clothing, hair or body materials, permanently light or permanently
dark. An example of this will be shown later on
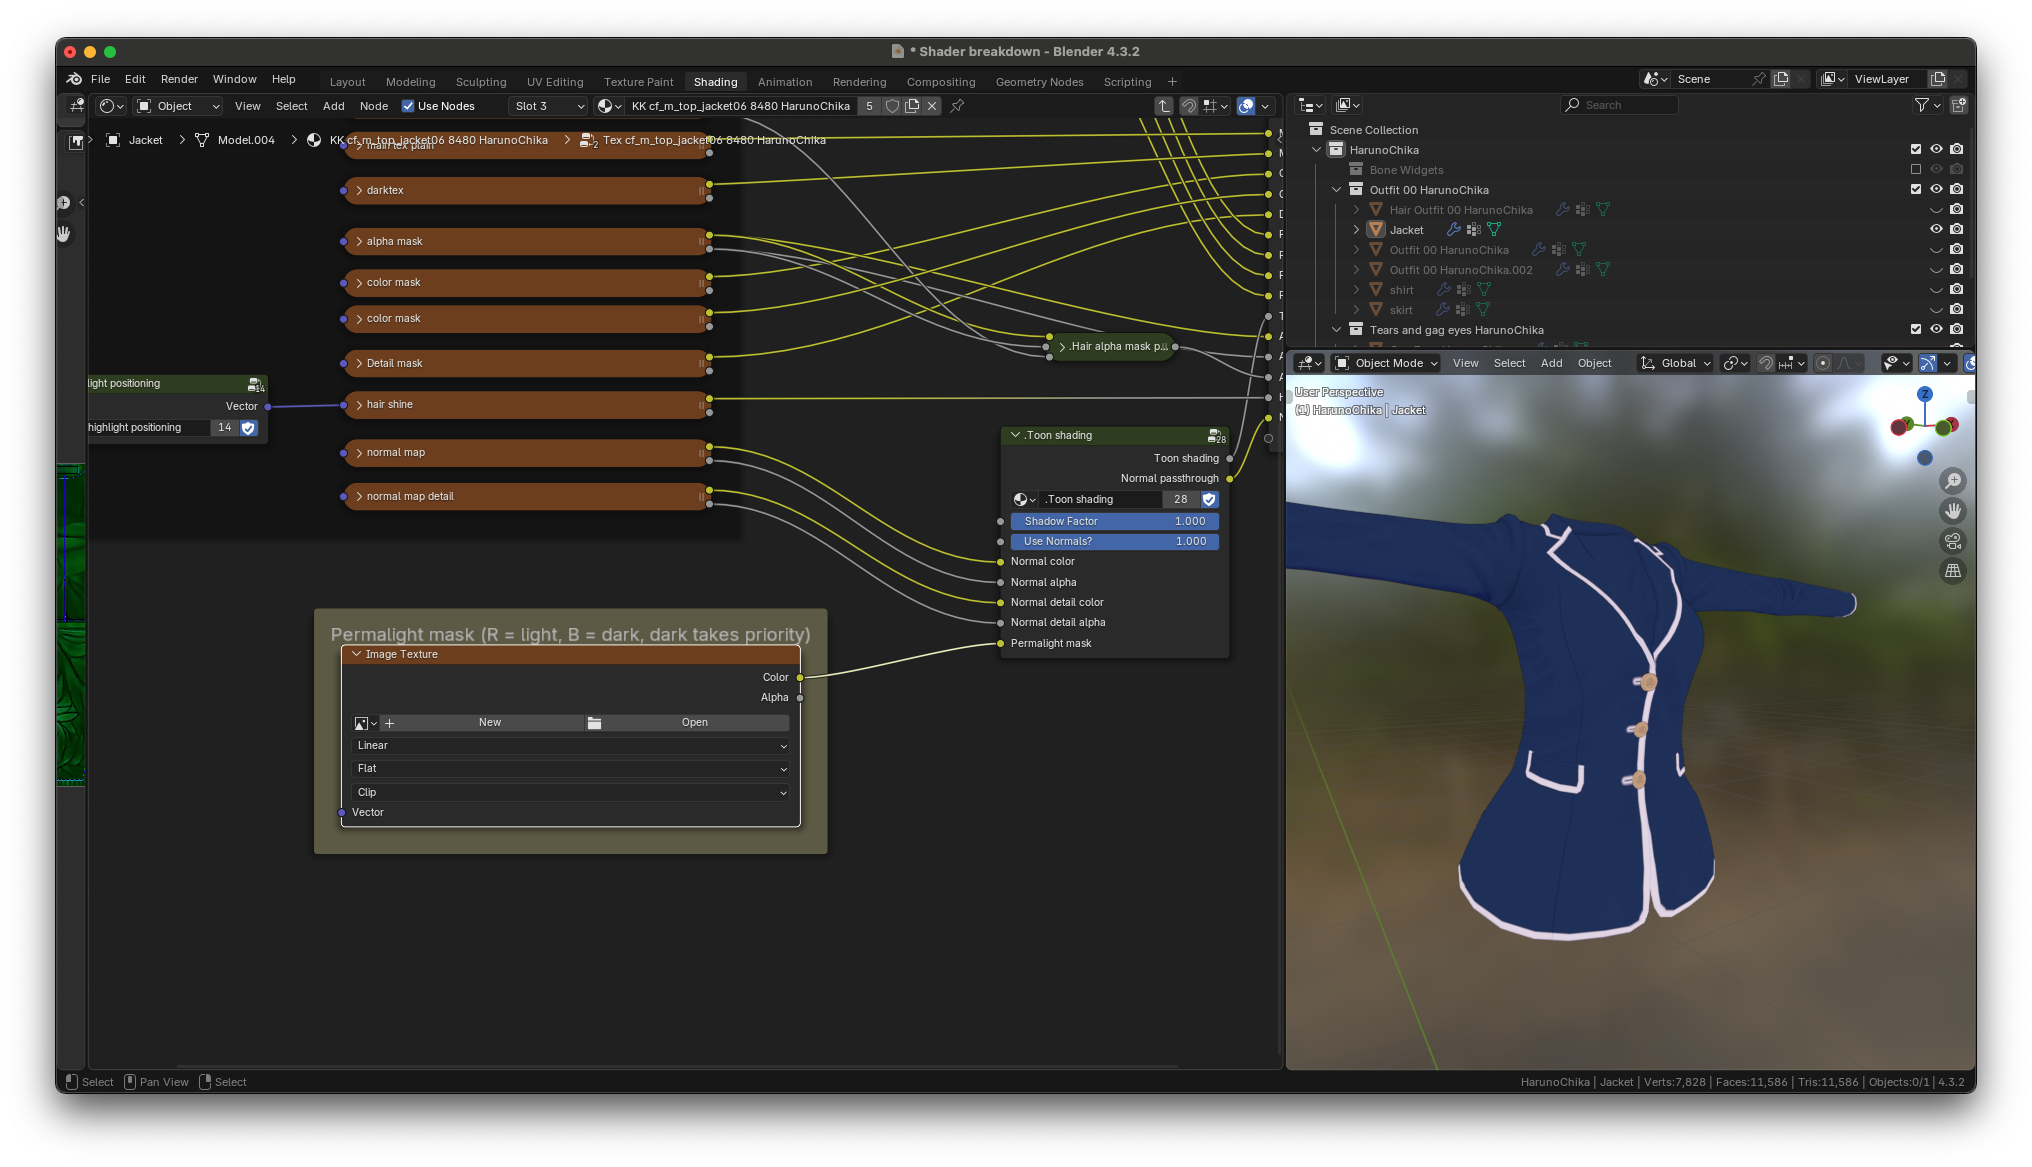
This texture along with the normal textures are fed into the toon
shading group. Let's go into this group.
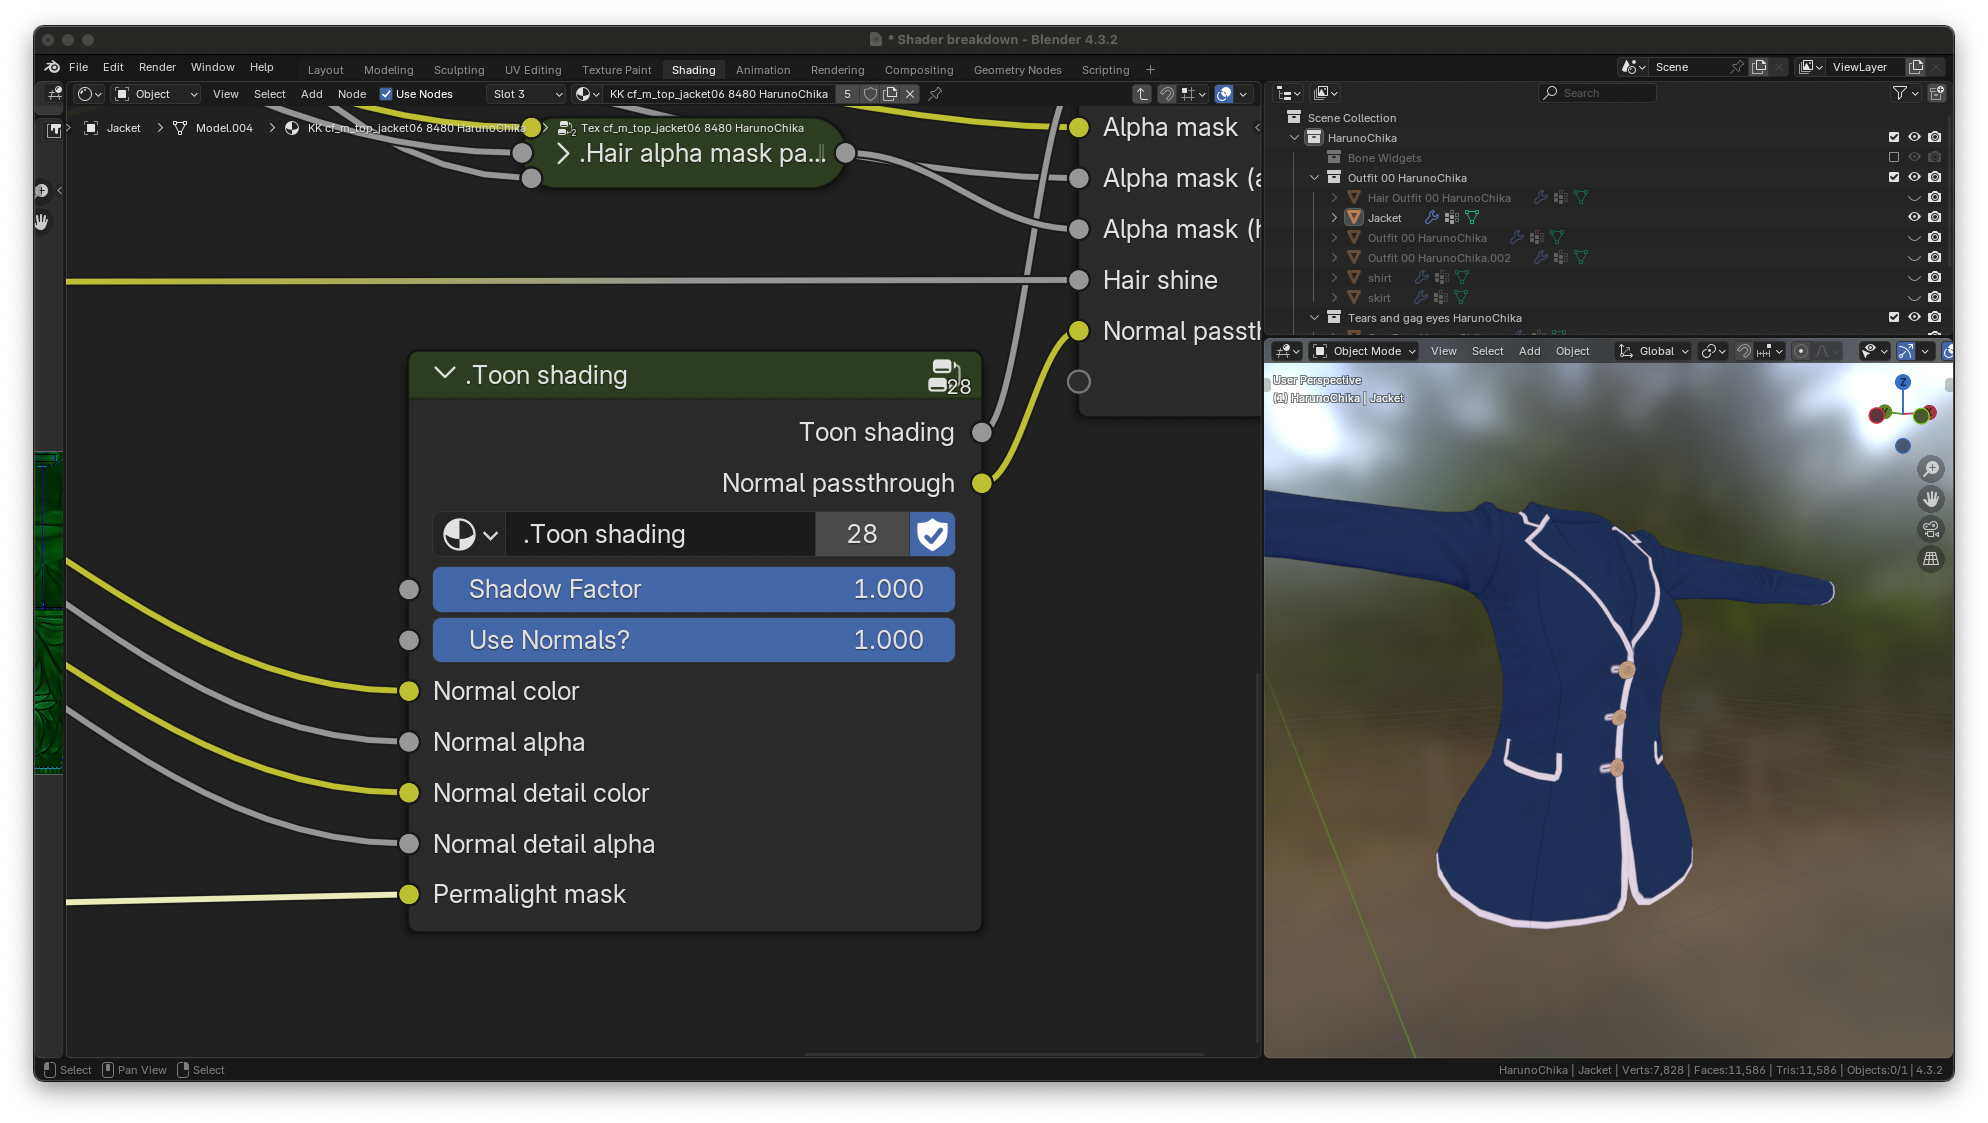
## Toon shading group
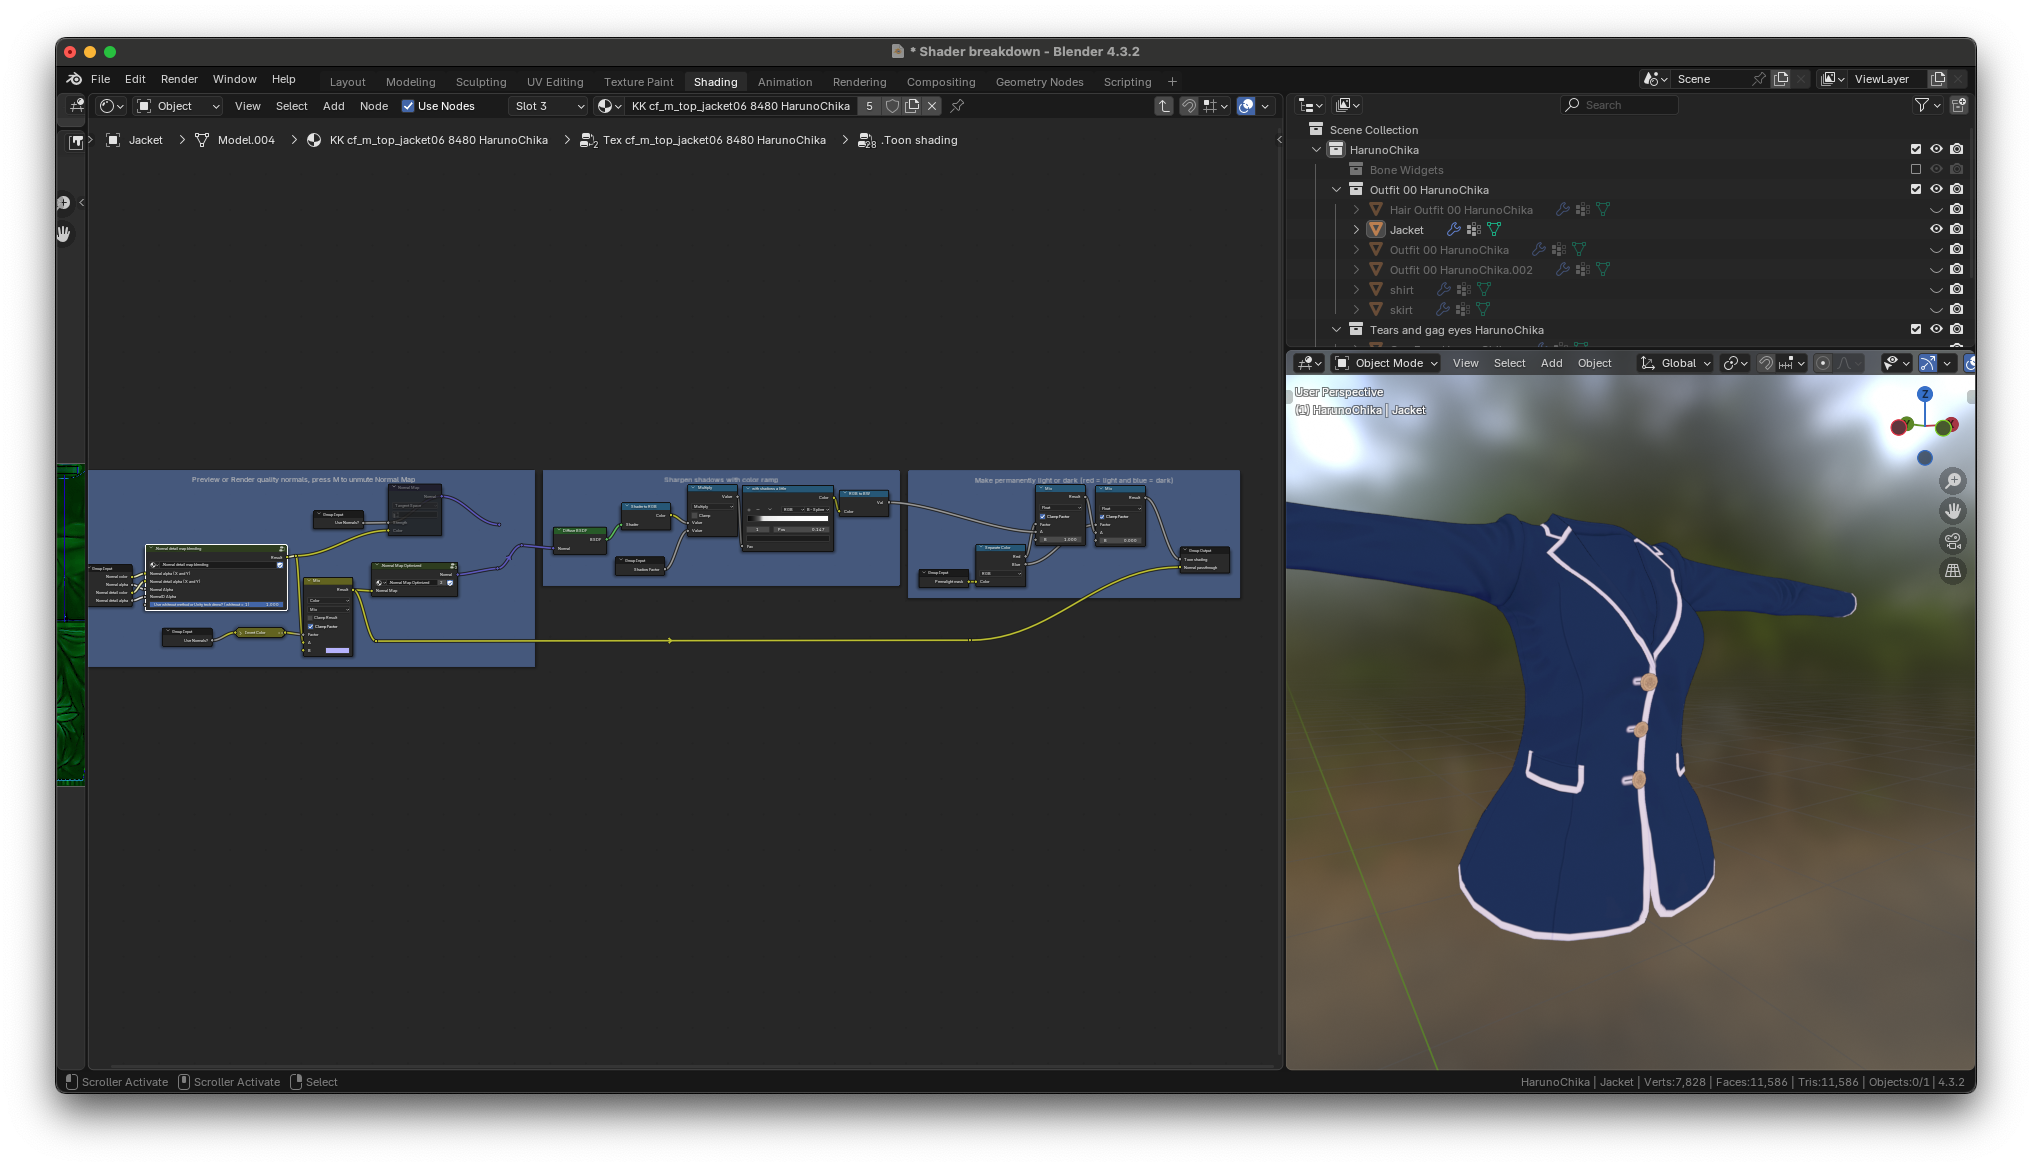
this is the group that creates the light and dark portions of every
material. Let's work from left to right
## Normal map blending and optimizing performance
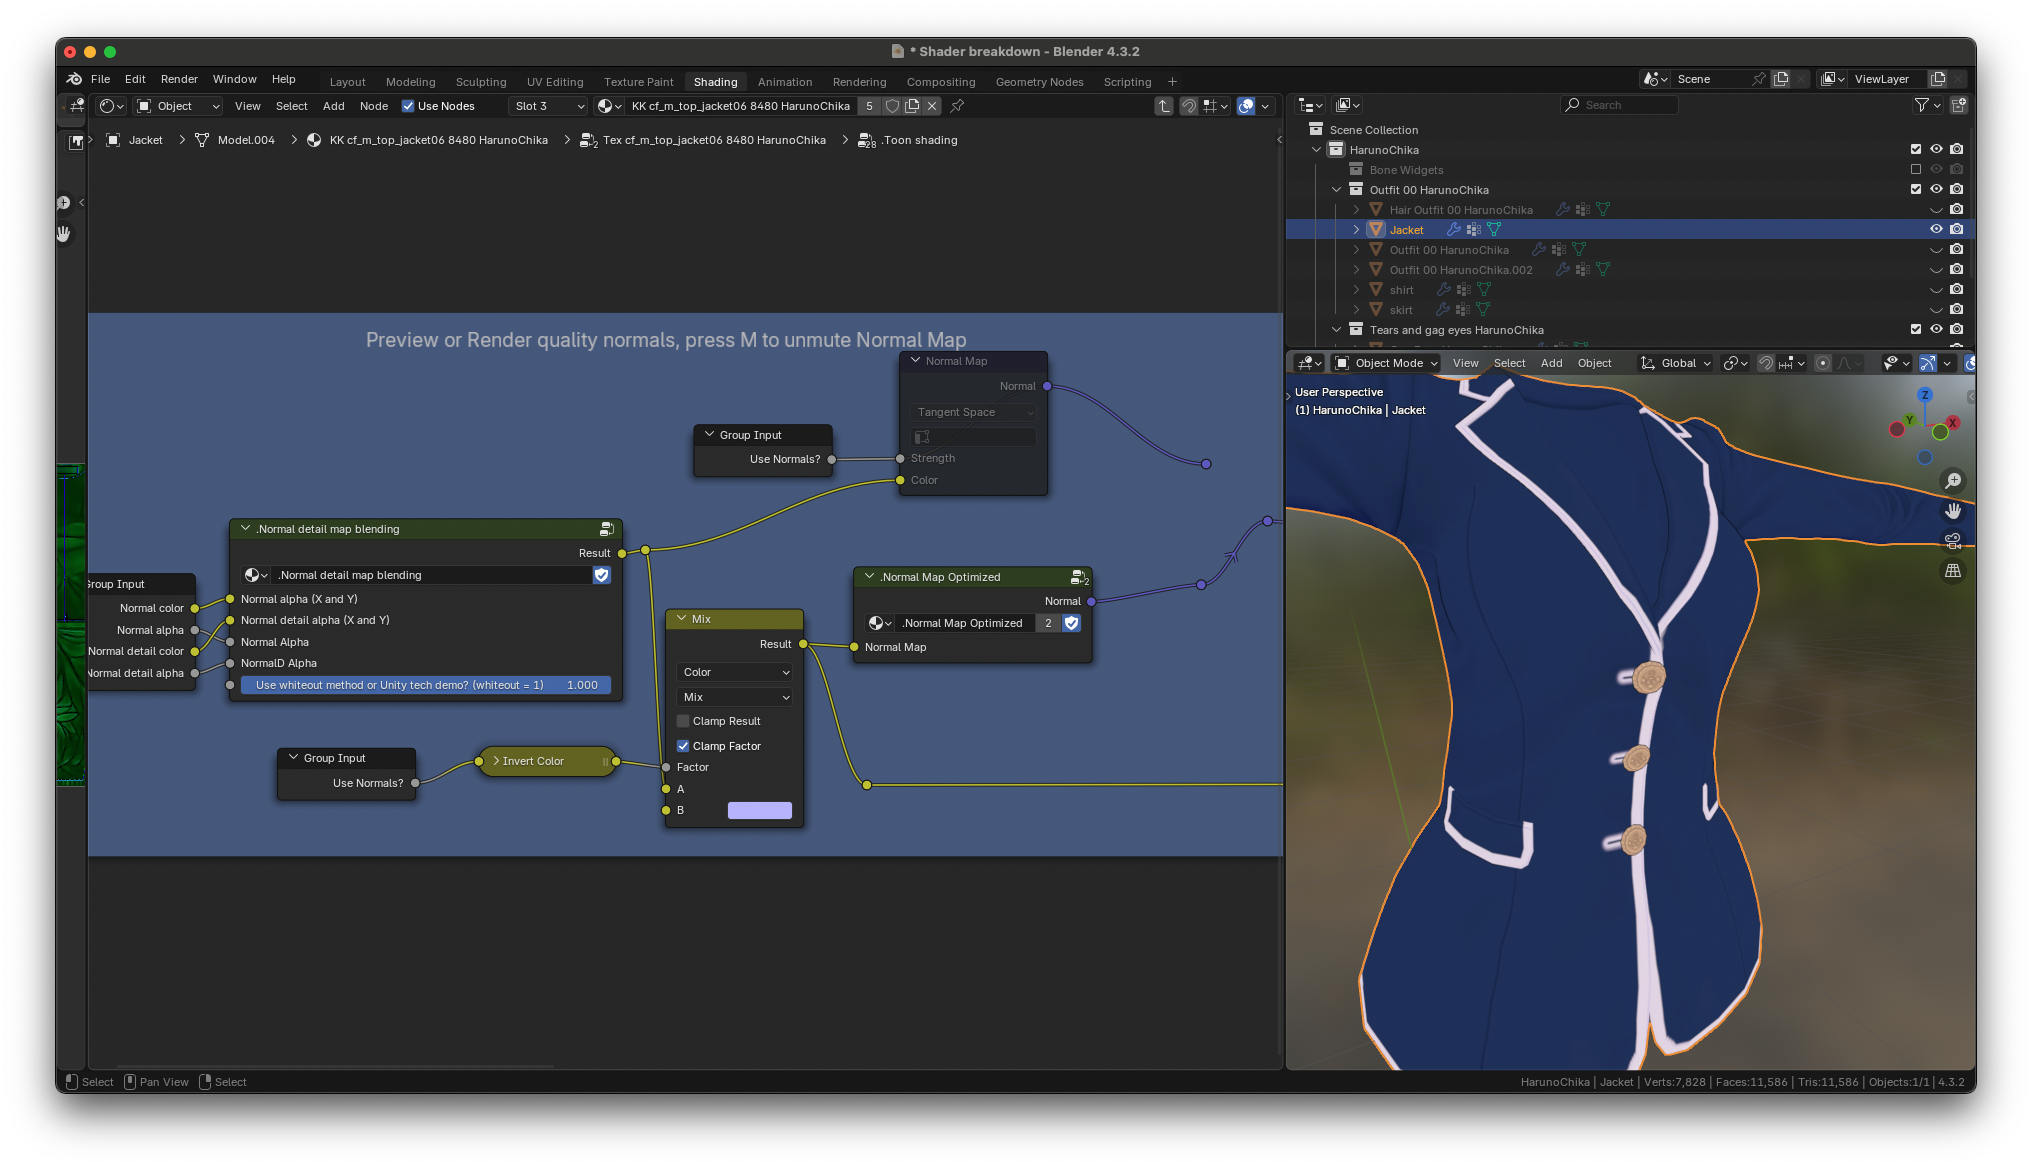
this section is for determining what normal data will be fed into the
BSDF shader. By default, normals are enabled and are fed into the "normal
detail map blending" node group. This group accepts the
grayscale + alpha normal map from the game and the detail normal map (if it exists). There are two built-in methods for blending the two normal maps together. The default is the whiteout method. if you
want to use the unity tech demo blending method, you can set the slider
to zero.
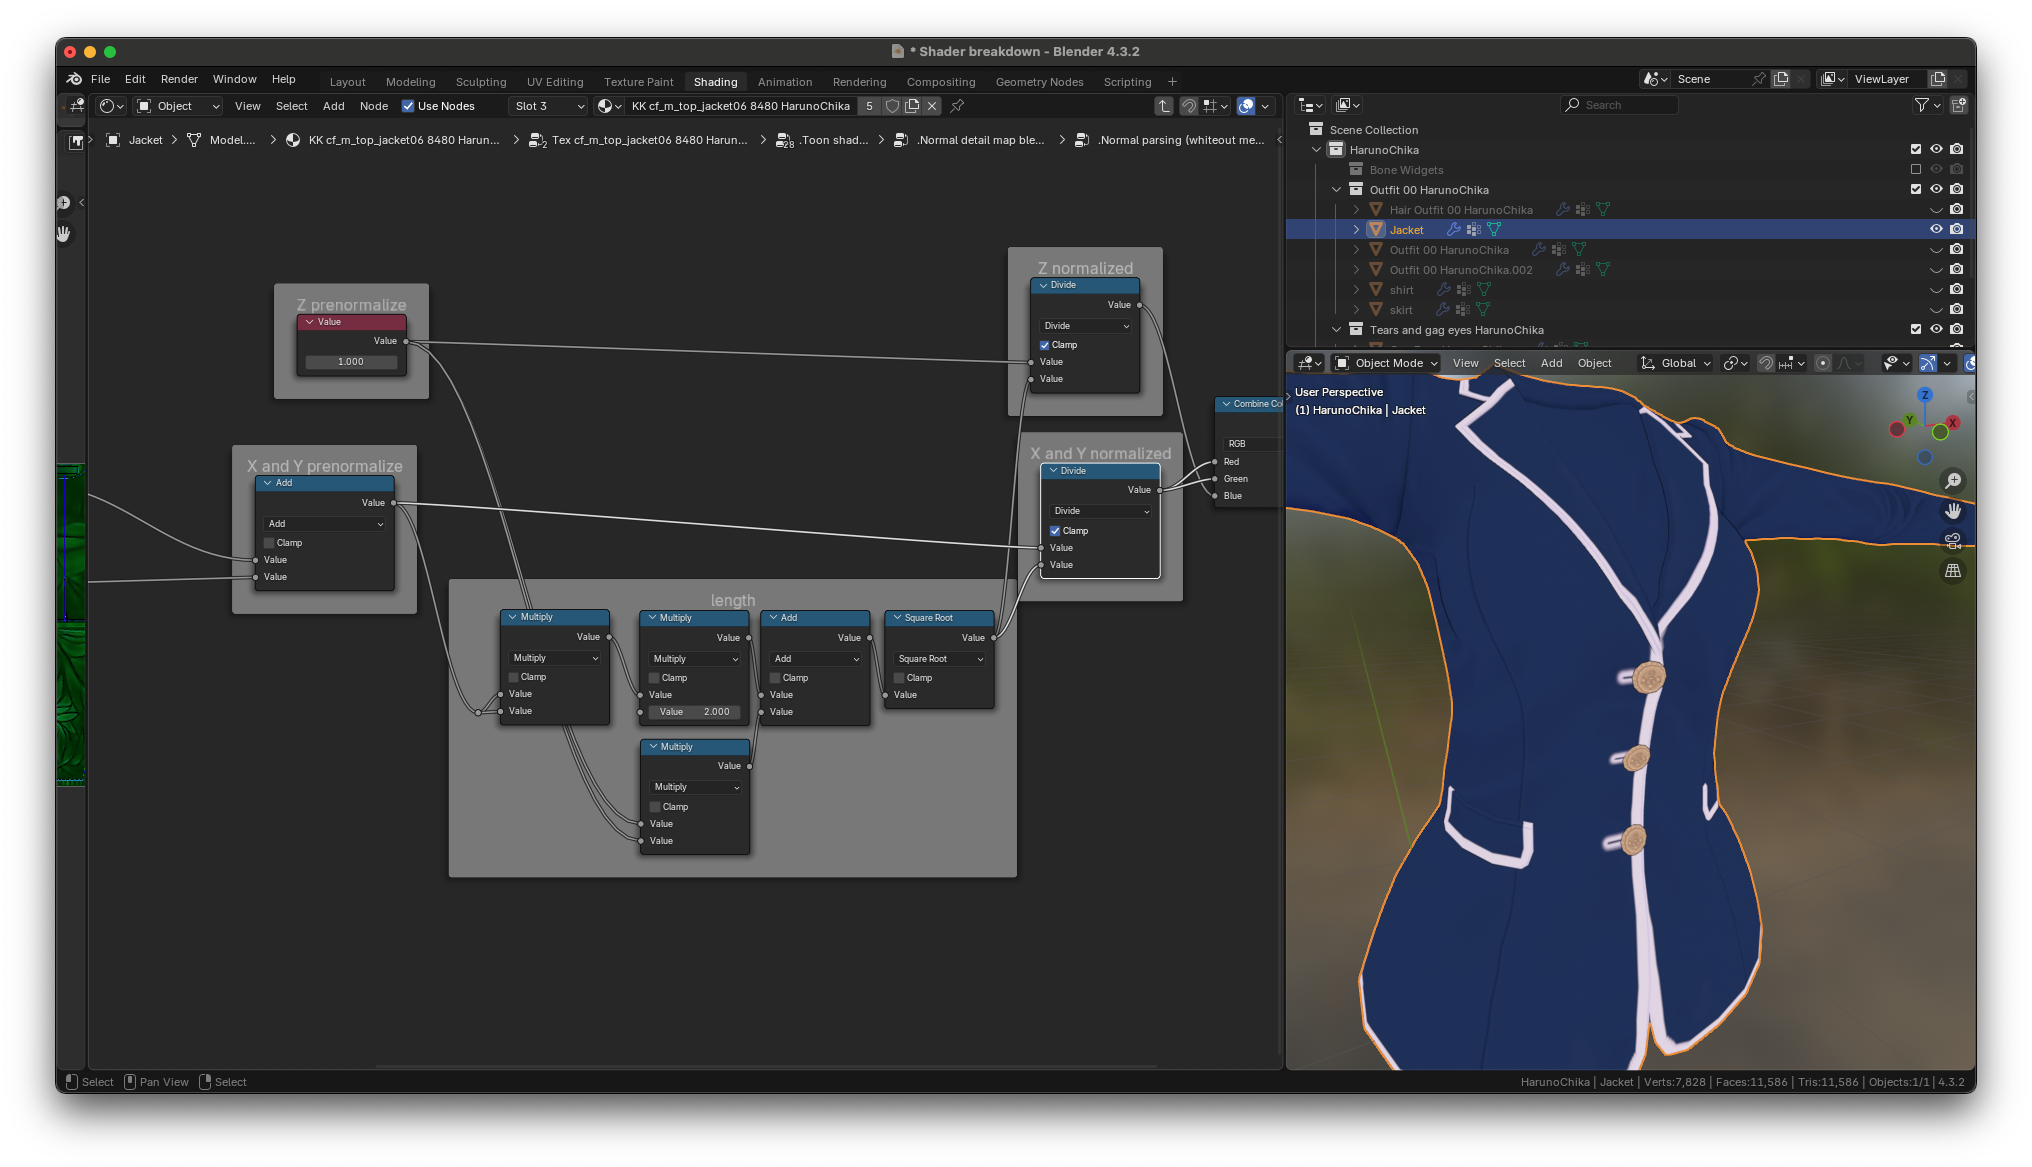
Digging into the node group we can see both methods.
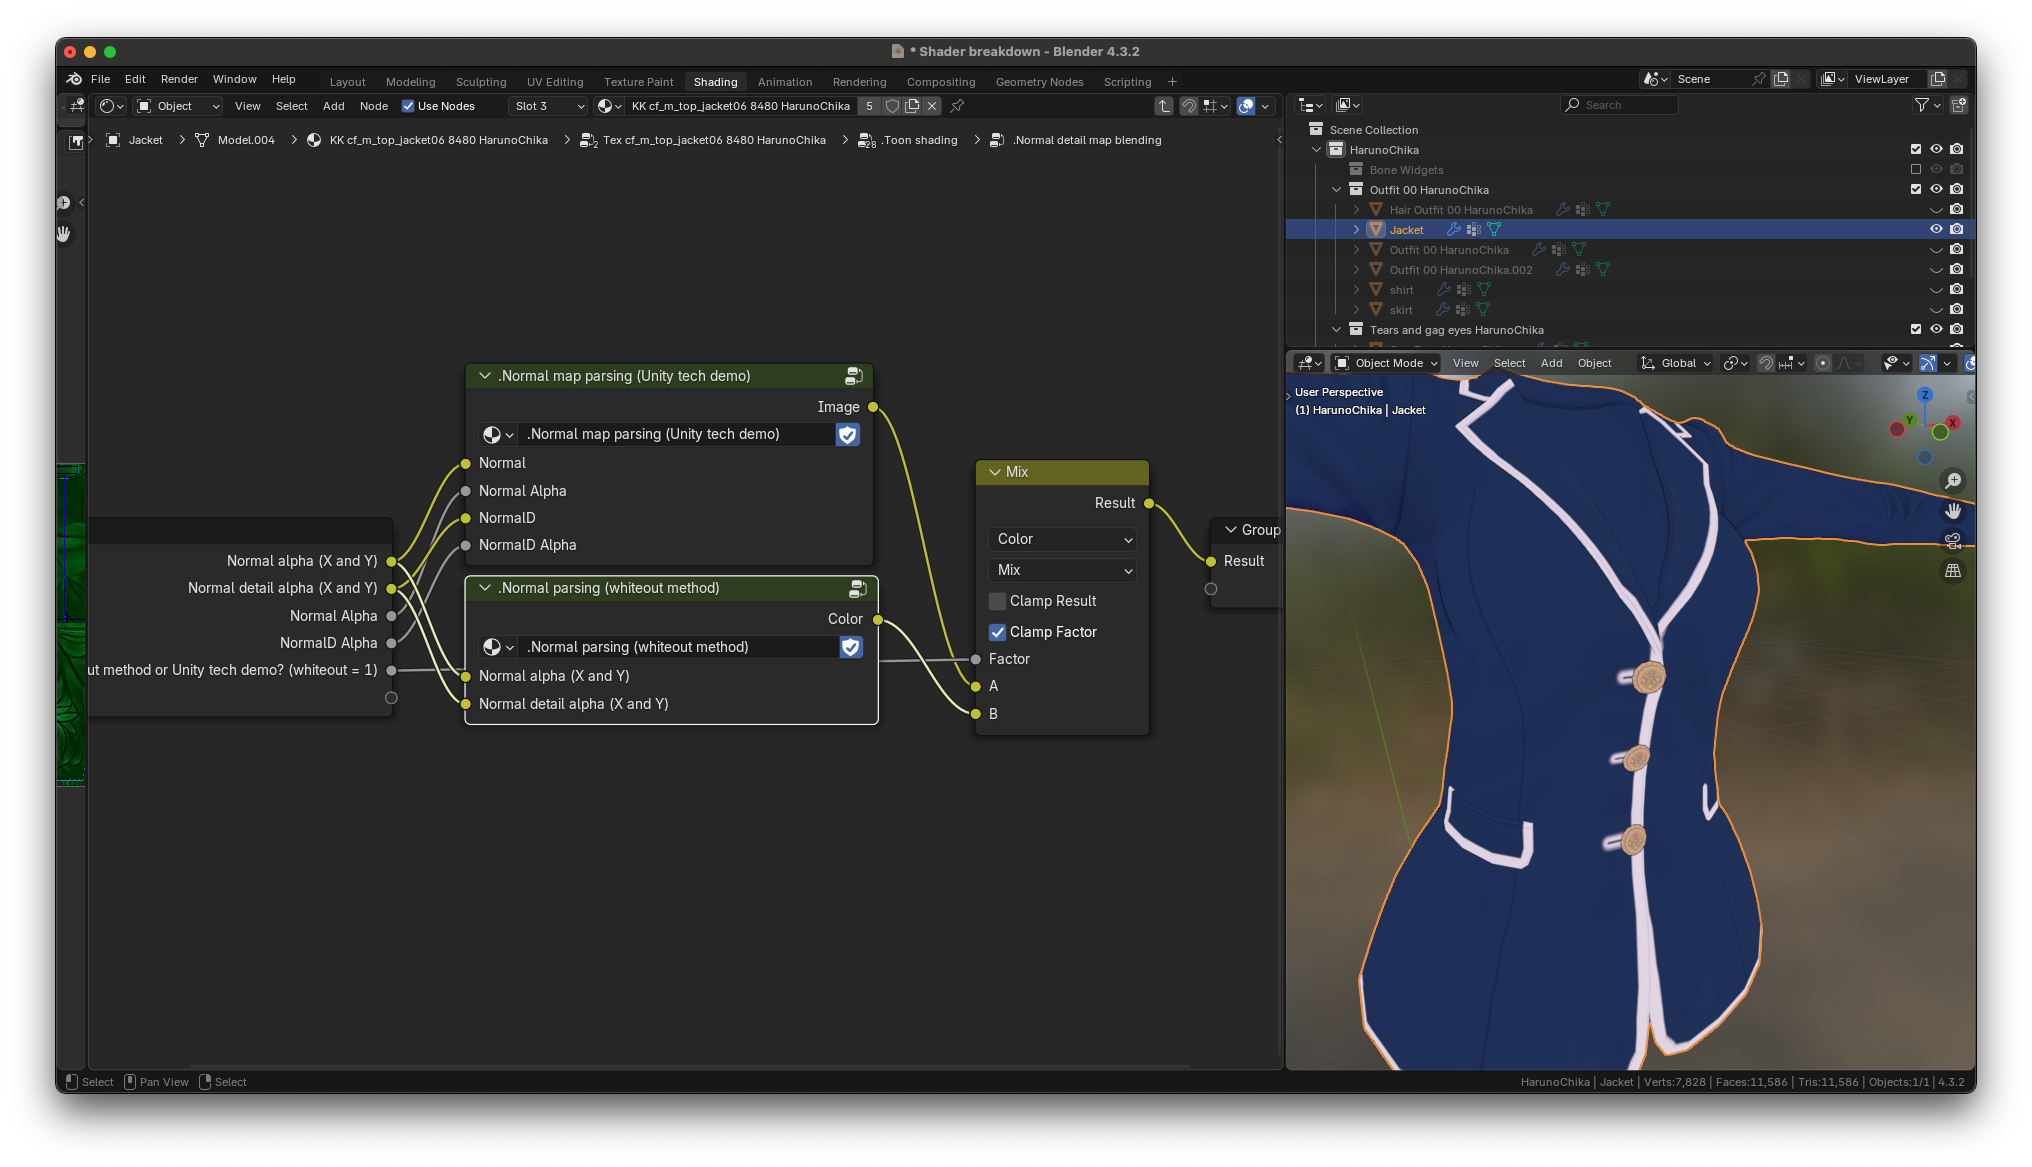
both methods were taken from
, so these
are just blender node implementations of the math equations found on that page
Returning to the normal section, The output of that group is fed into a
mix node. if normals are enabled, the output is fed into the Normal
Map optimization group. If normals are disabled, a pure purple color
will be fed to the Normal map optimization group. here's what the
output of the mix node looks like when normals are enabled
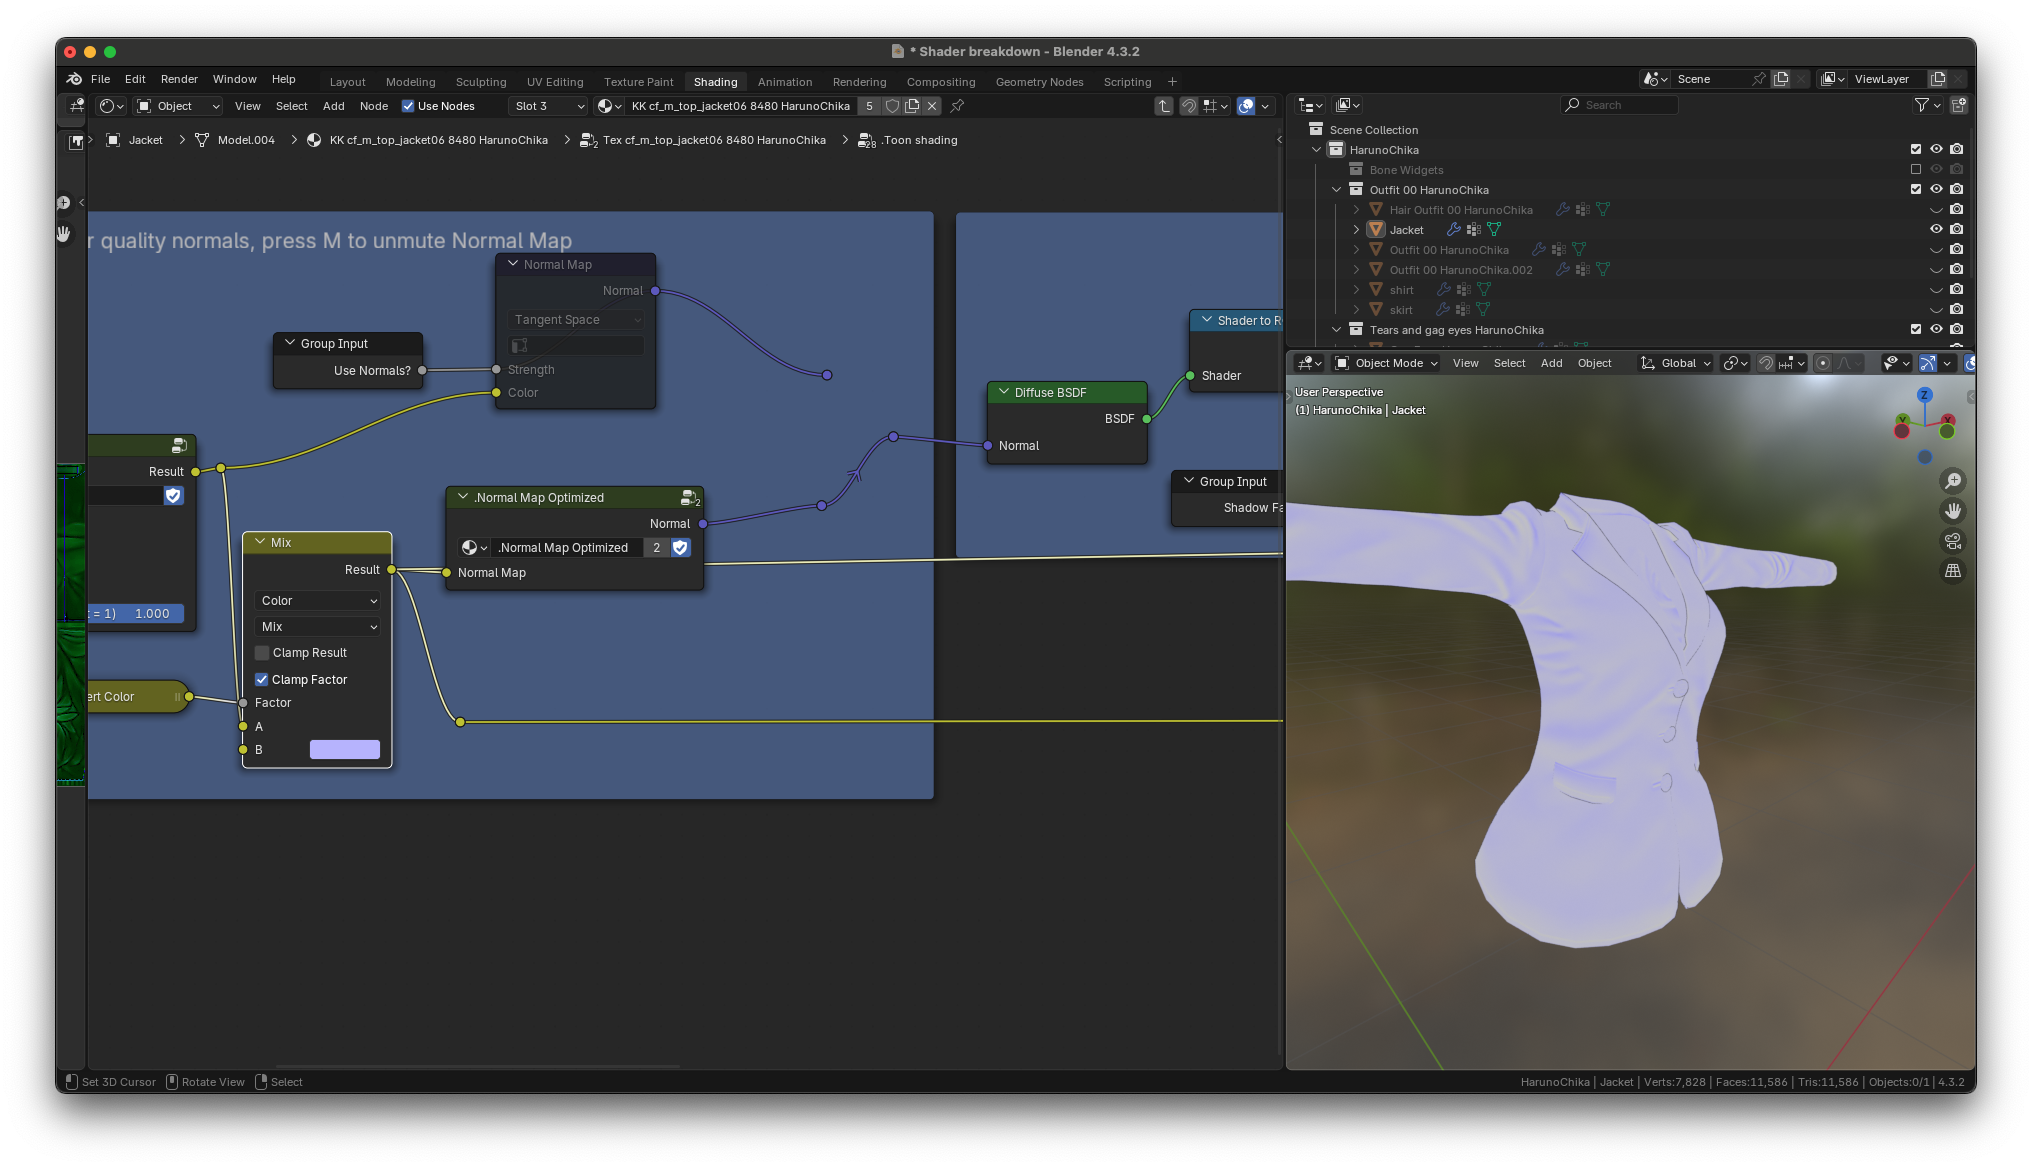
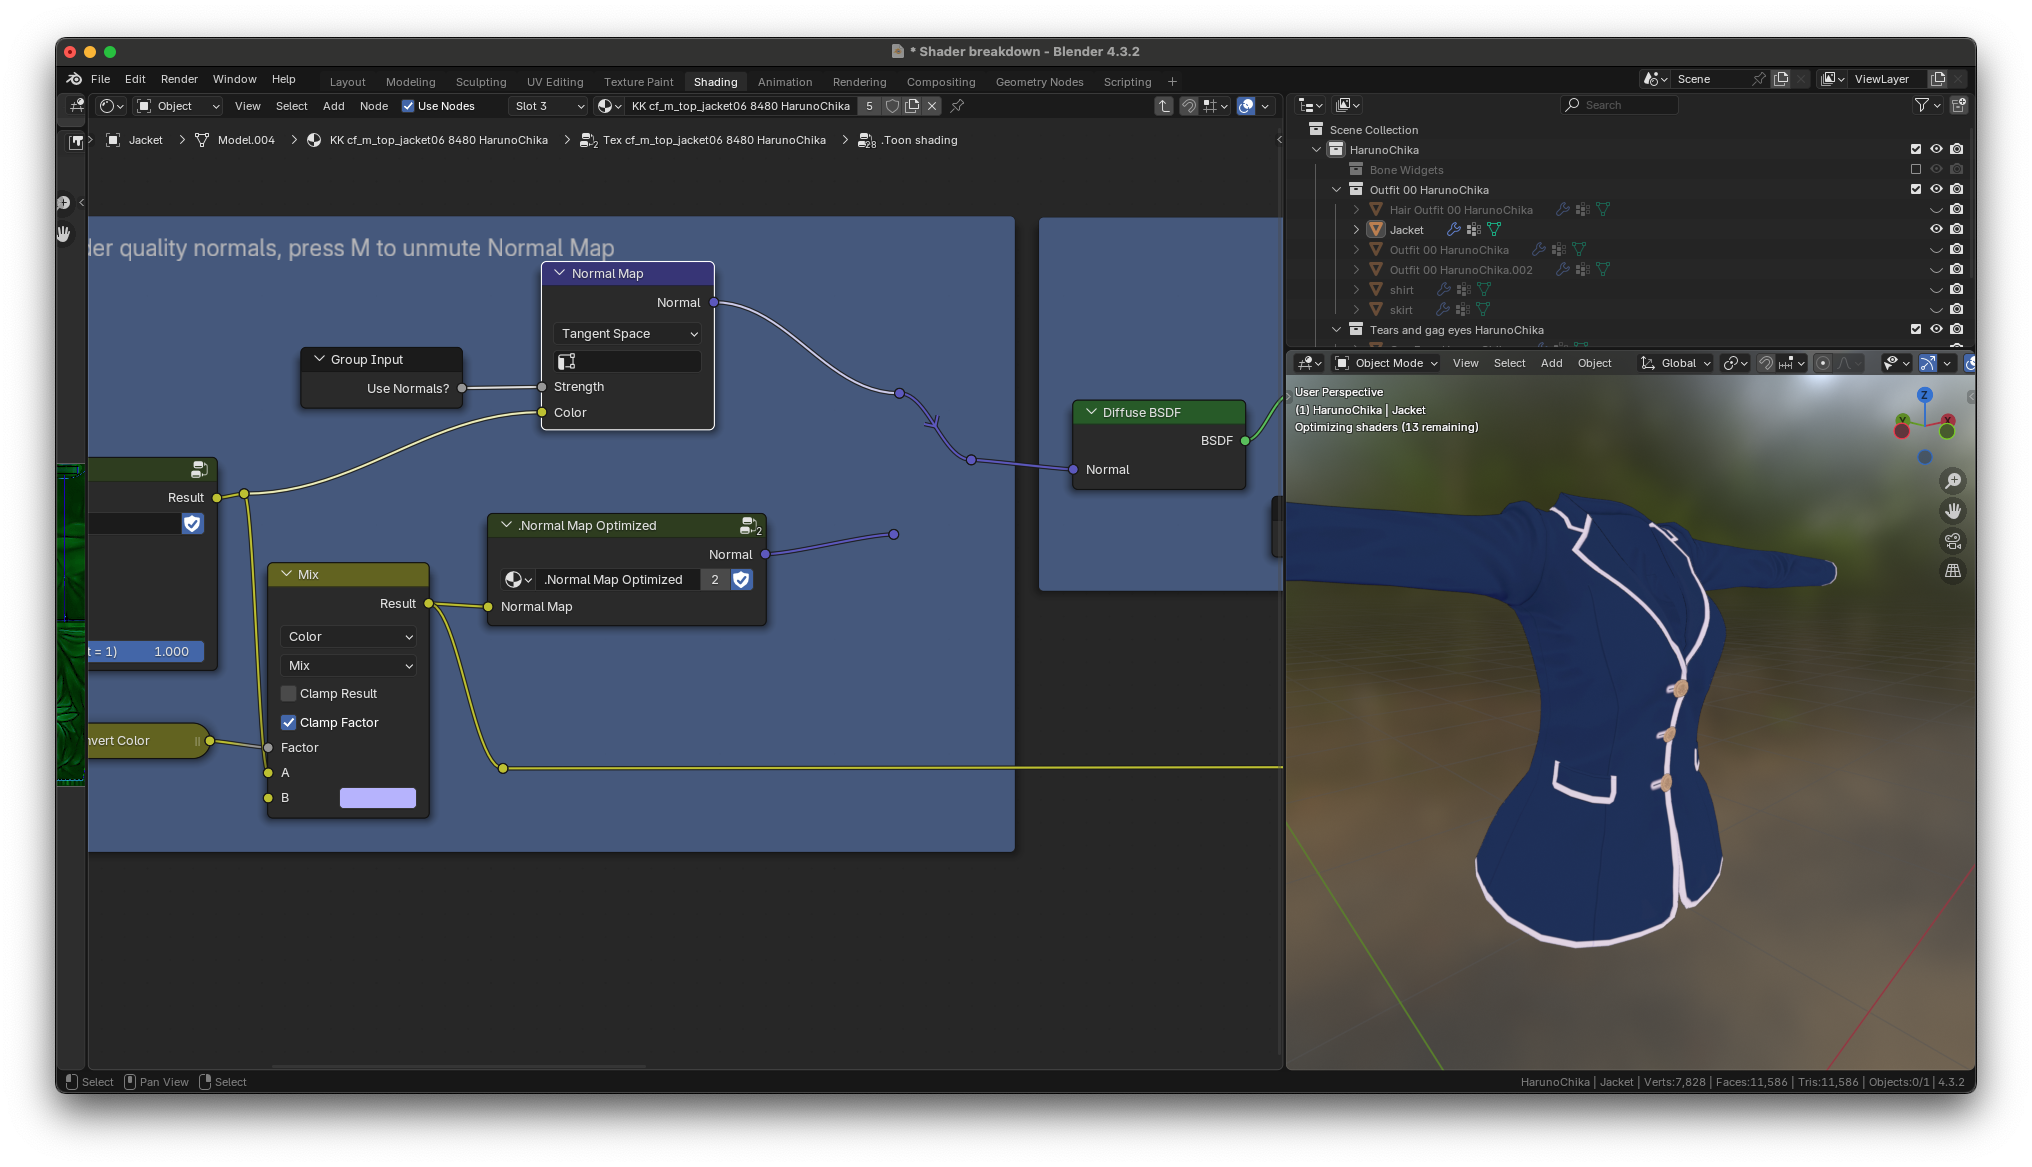
Blender has a very poor performance with the normal map node when it's
set to tangent space. The optimization group is used to improve
animation playback. When you're done animating and ready to use the
full quality normals for rendering, you can unmute the normal map node by selecting it
and pressing M, Then you can connect the output of the normal map node
to the inputs of the diffuse BSDF node. The image below shows the normal map unmuted and attached to the BSDF normal input
The normal map optimization group was taken from
## Toon shading with the BSDF node
the normals are fed into the diffuse BSDF node. This is the output of
the BSDF node. It looks like realistic shading
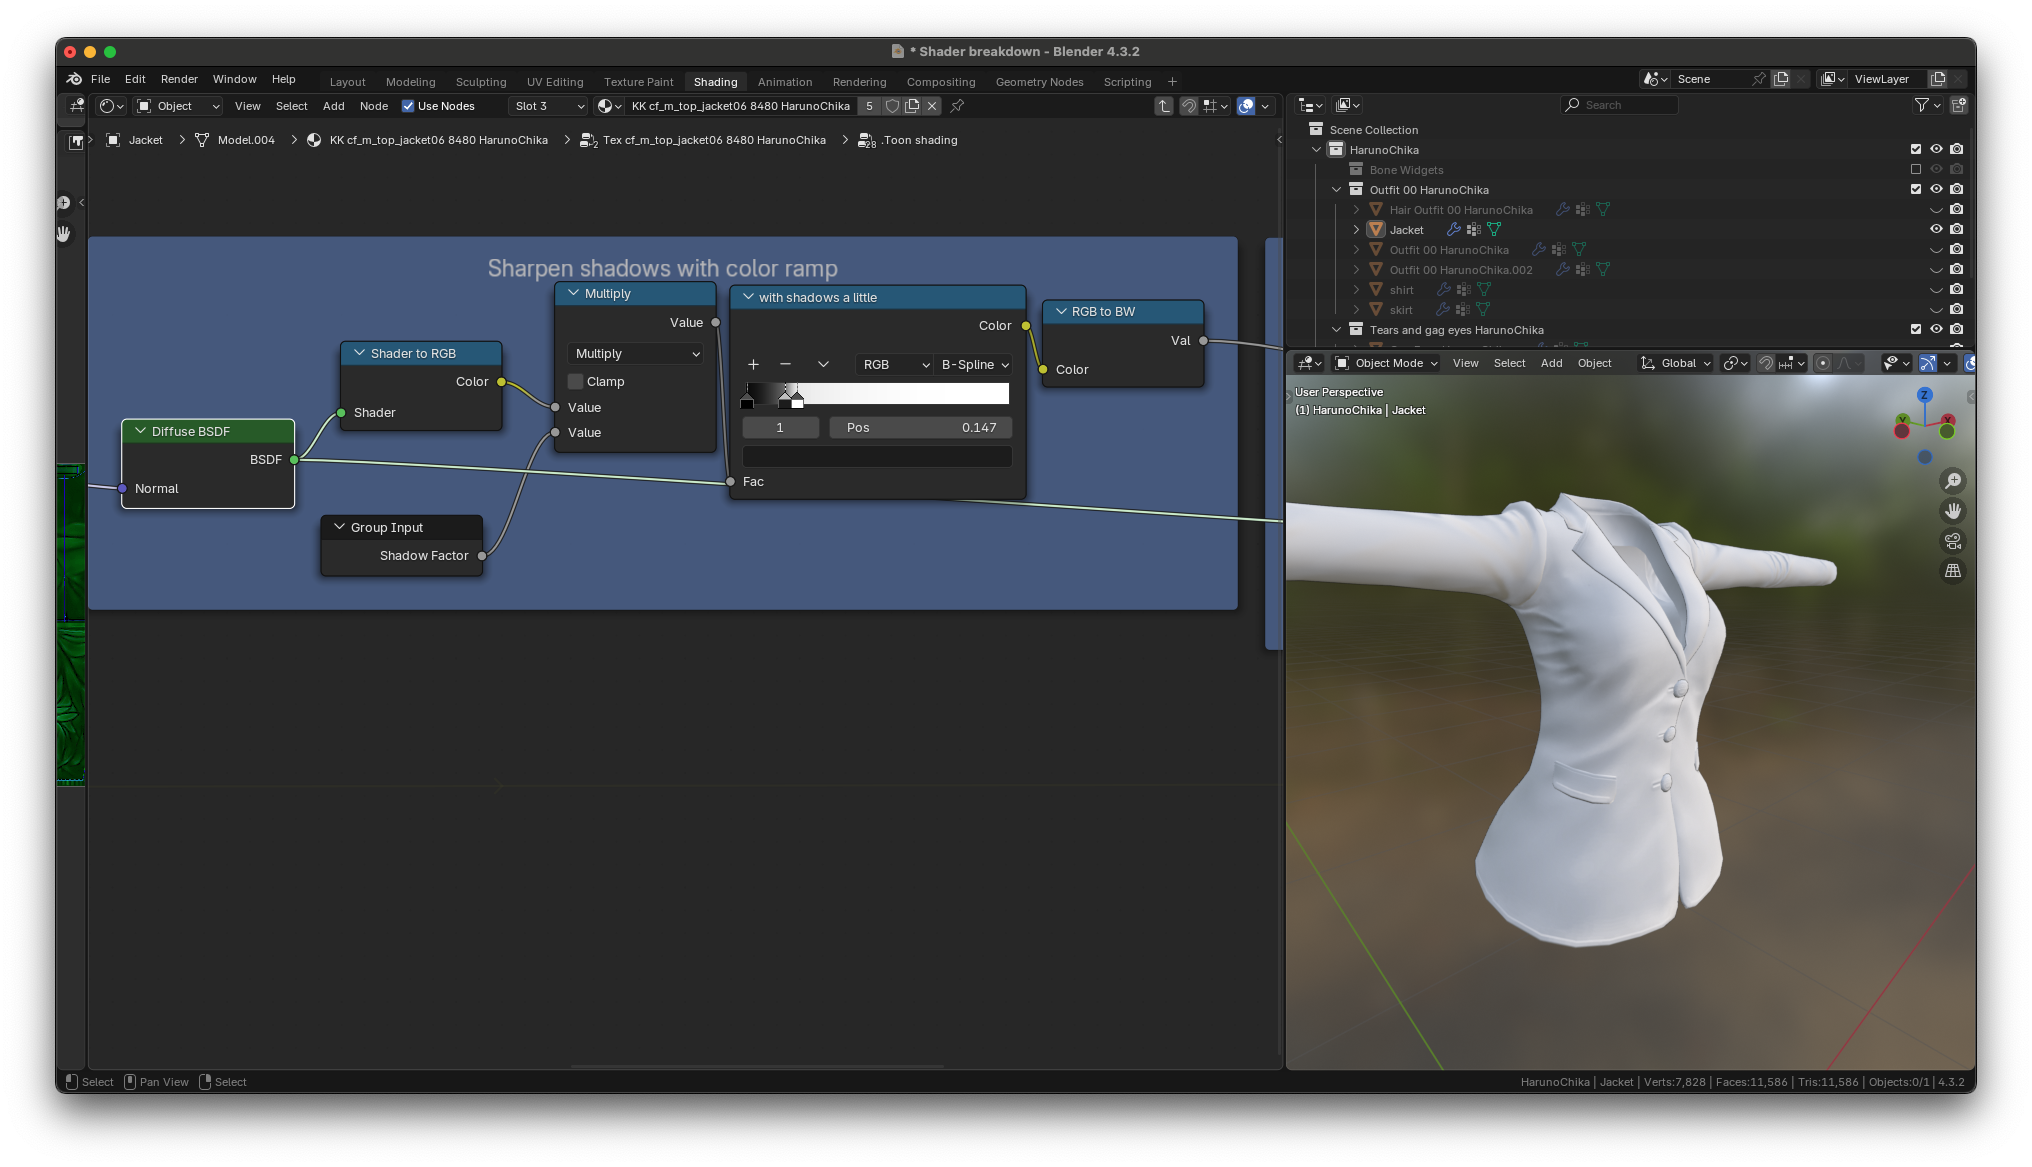
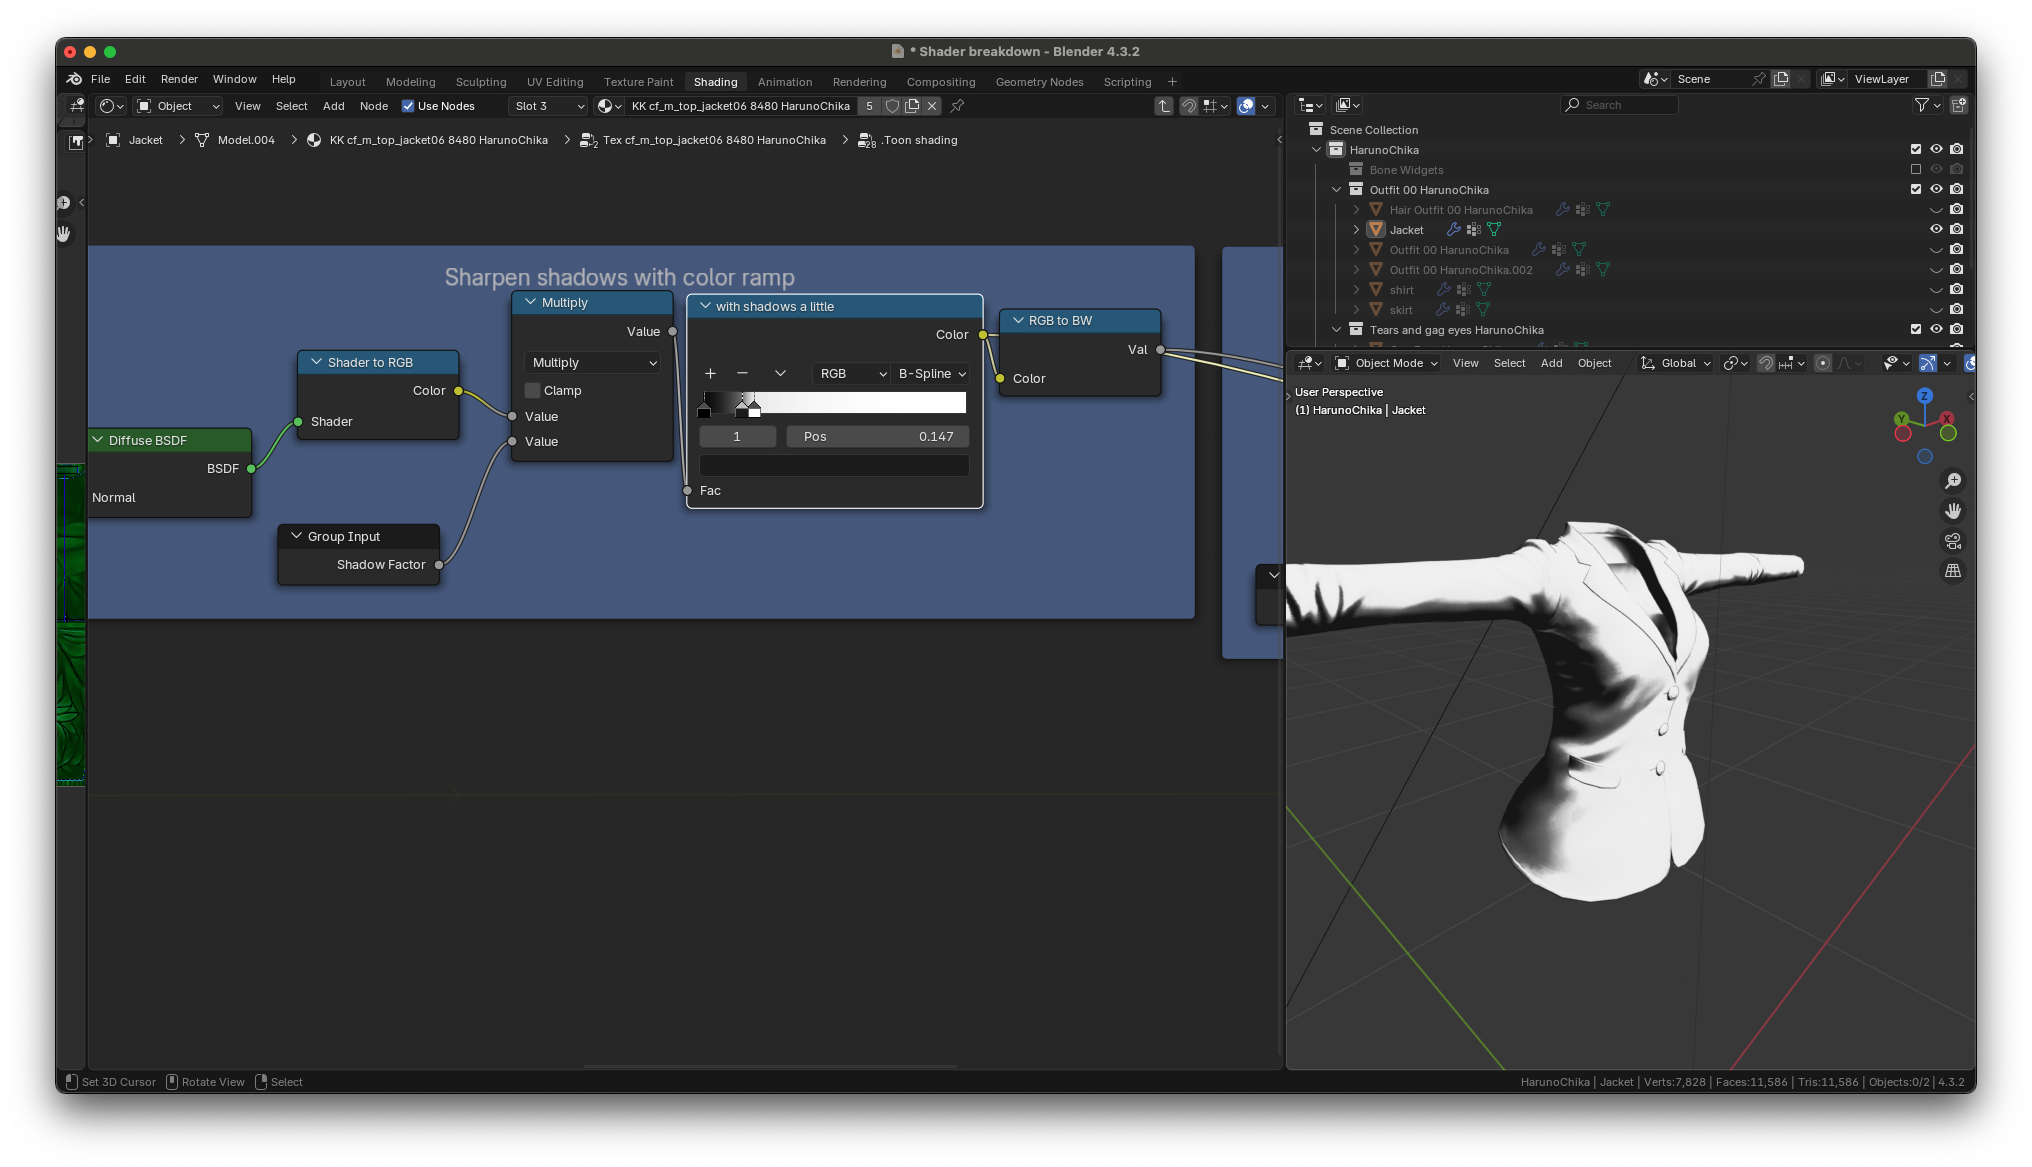
the black-and-white portions of the output are then crunched down using
a color ramp. Here's what the output of the color ramp looks like. It
looks more toon-like now. The white portions of this output will ultimately get the light versions of all colors. The black portions of this output will ultimately get the dark version of all colors.
## Permamask node
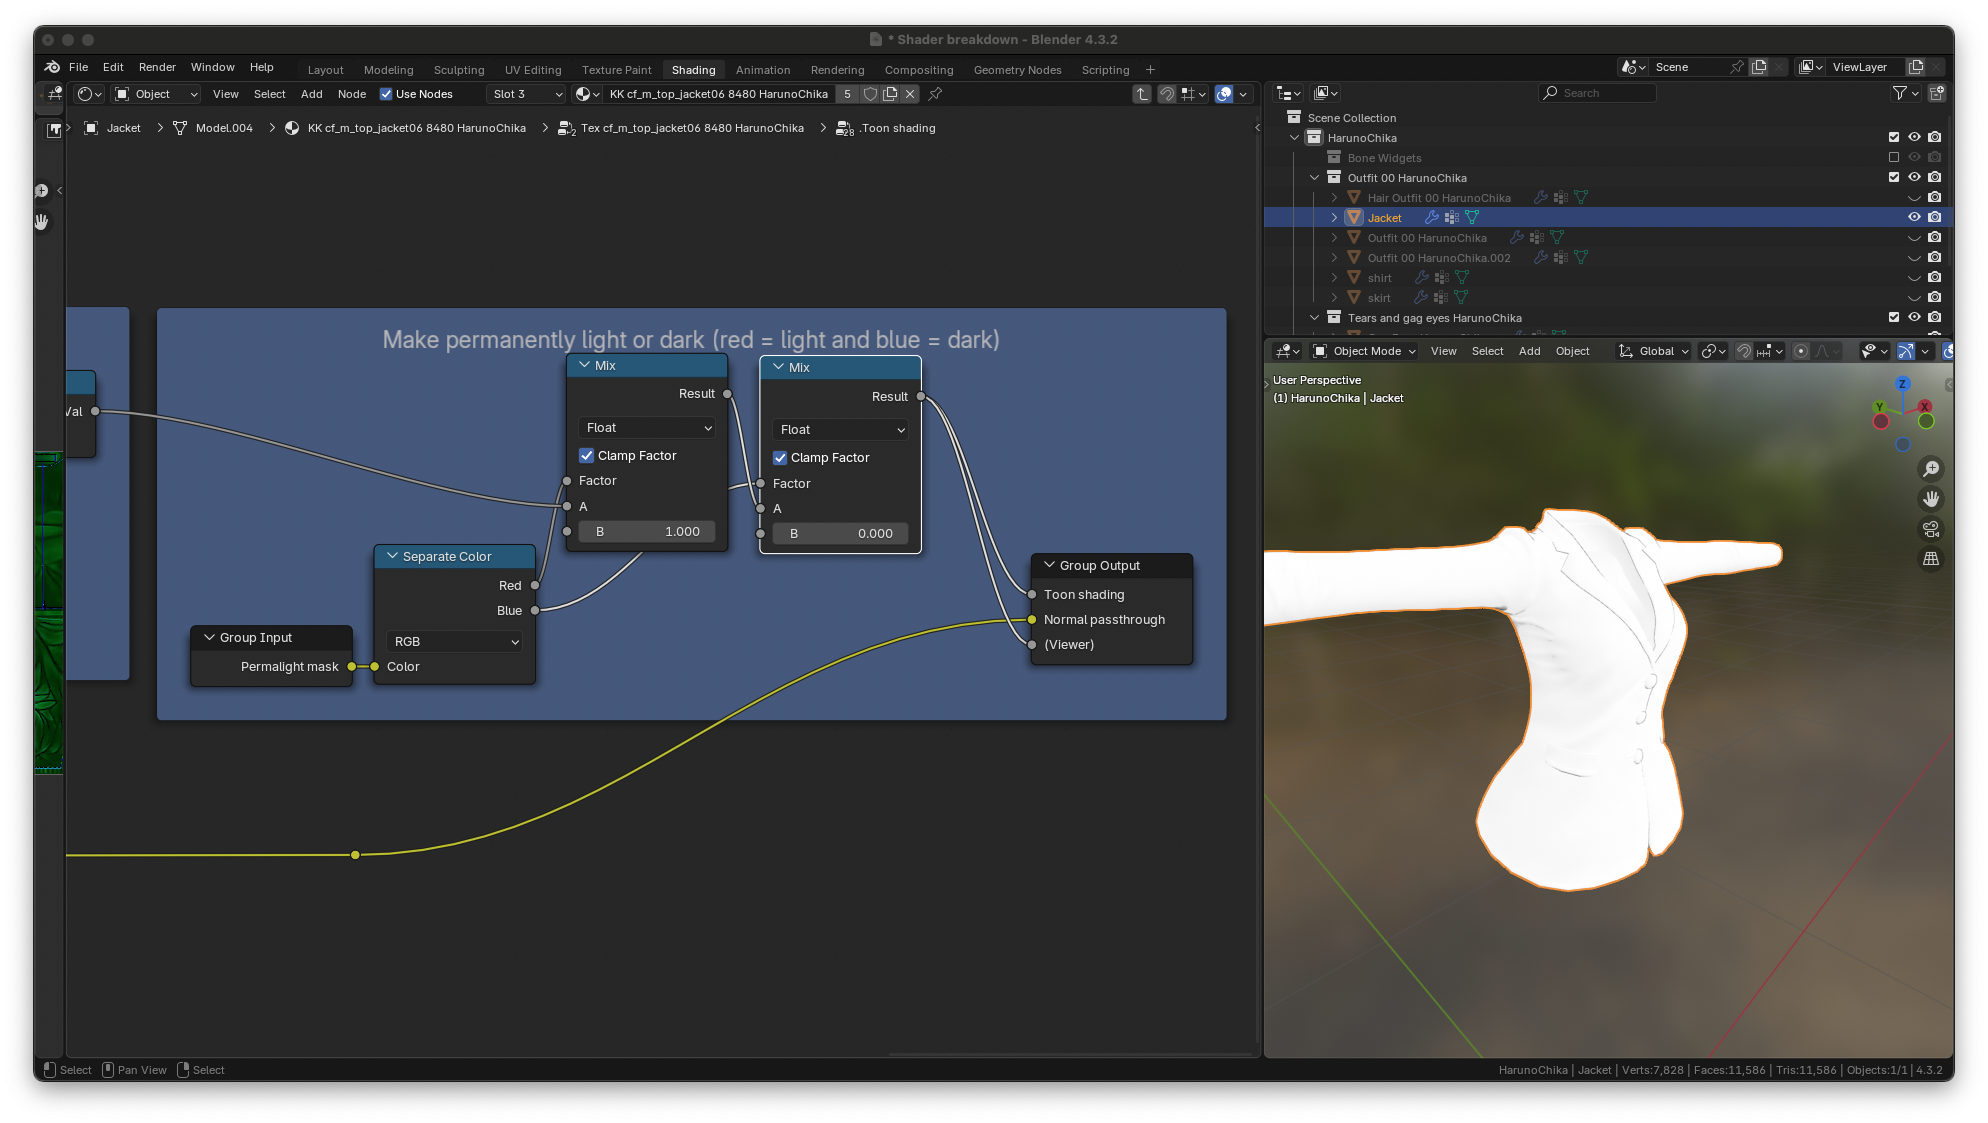
The final section makes the material permanently light or permanently dark
through the use of the permalight mask. Here's what it looks like with
no perma mask loaded in
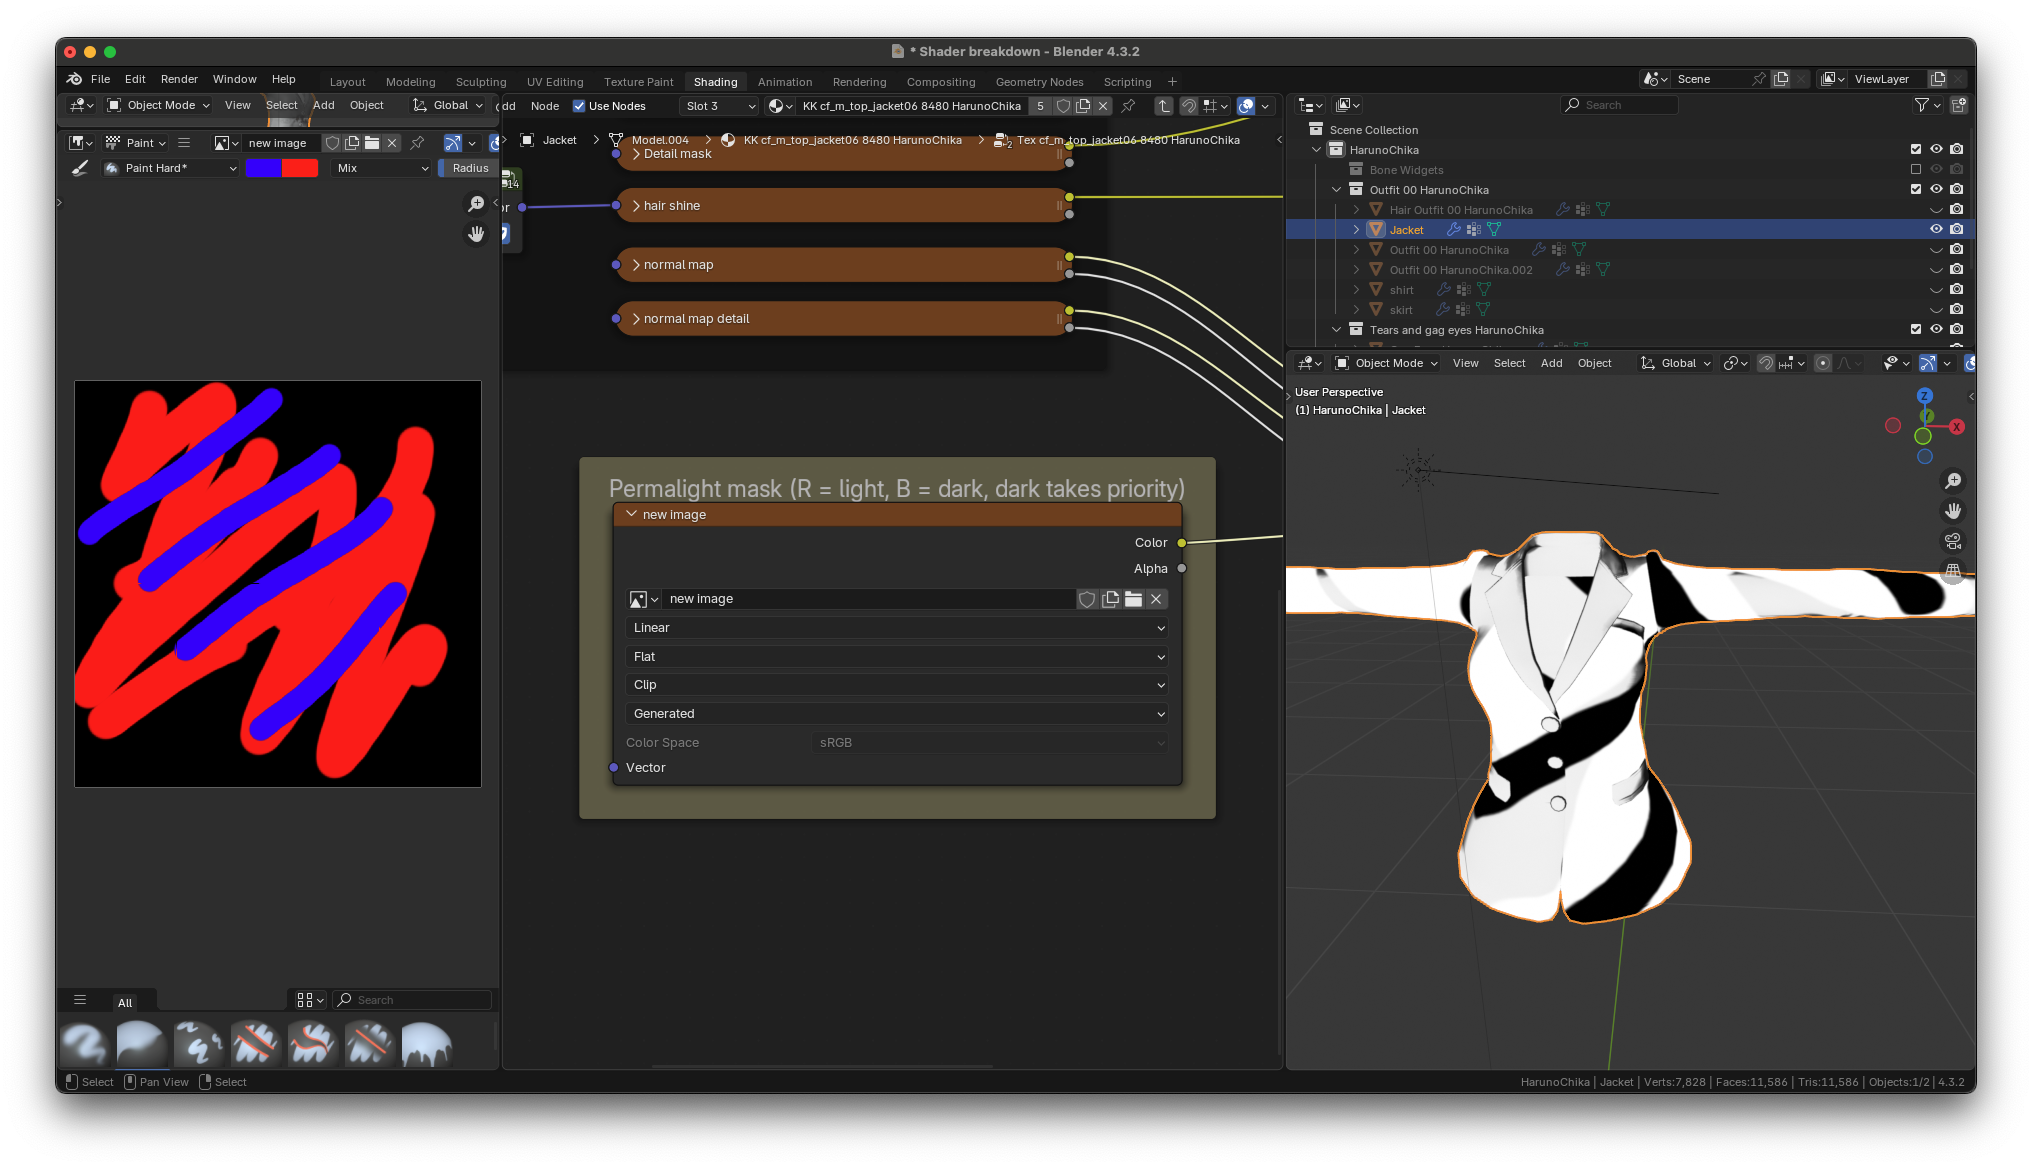
here's what it looks like with a new mask loaded in. The red portions
of the image are now permanently light, and the blue portions of the
image are now permanently dark
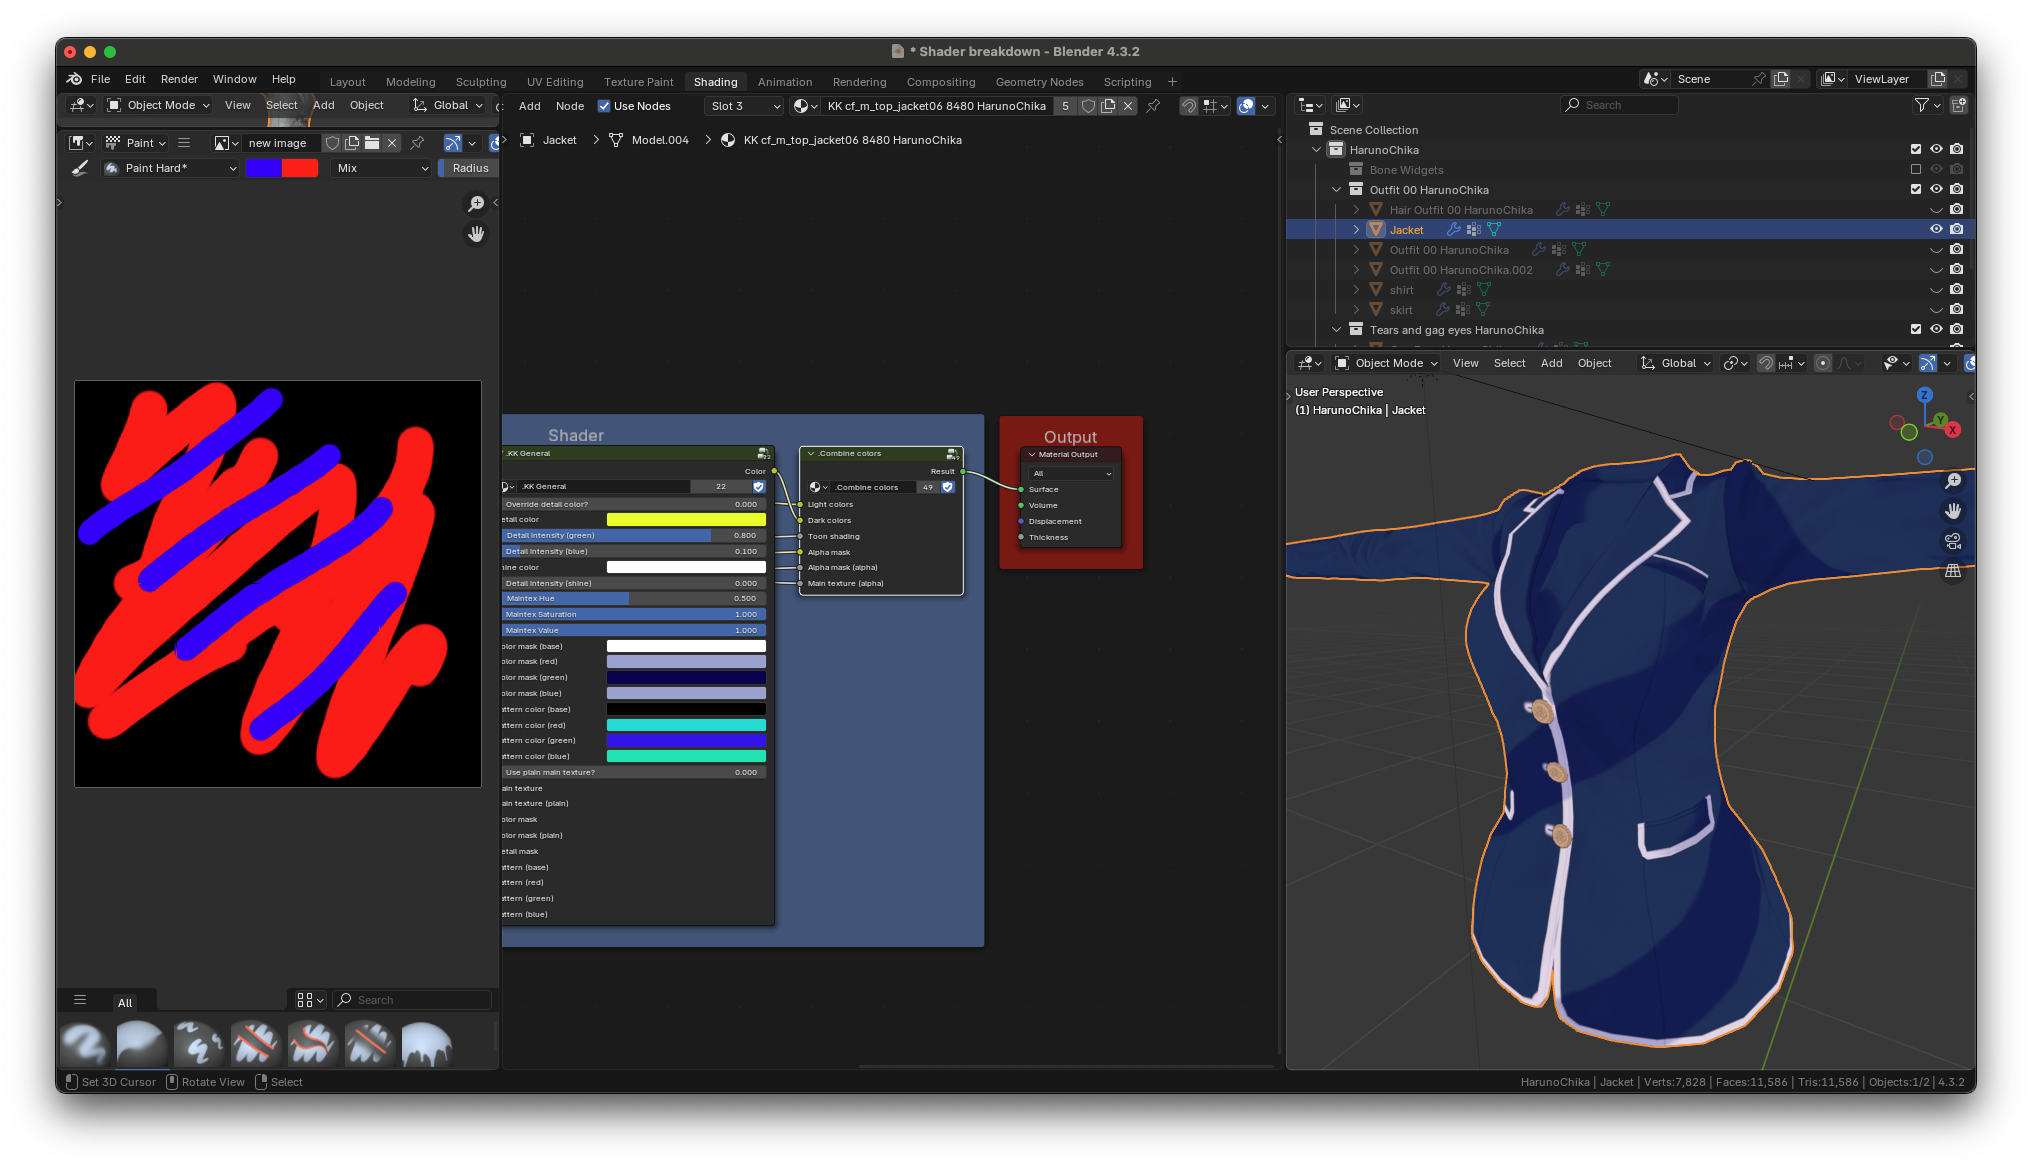
here's what the fully assembled material looks like with the permamask
loaded in
## KK General node group
that was everything in the textures group so let's move on to the KK
general node group
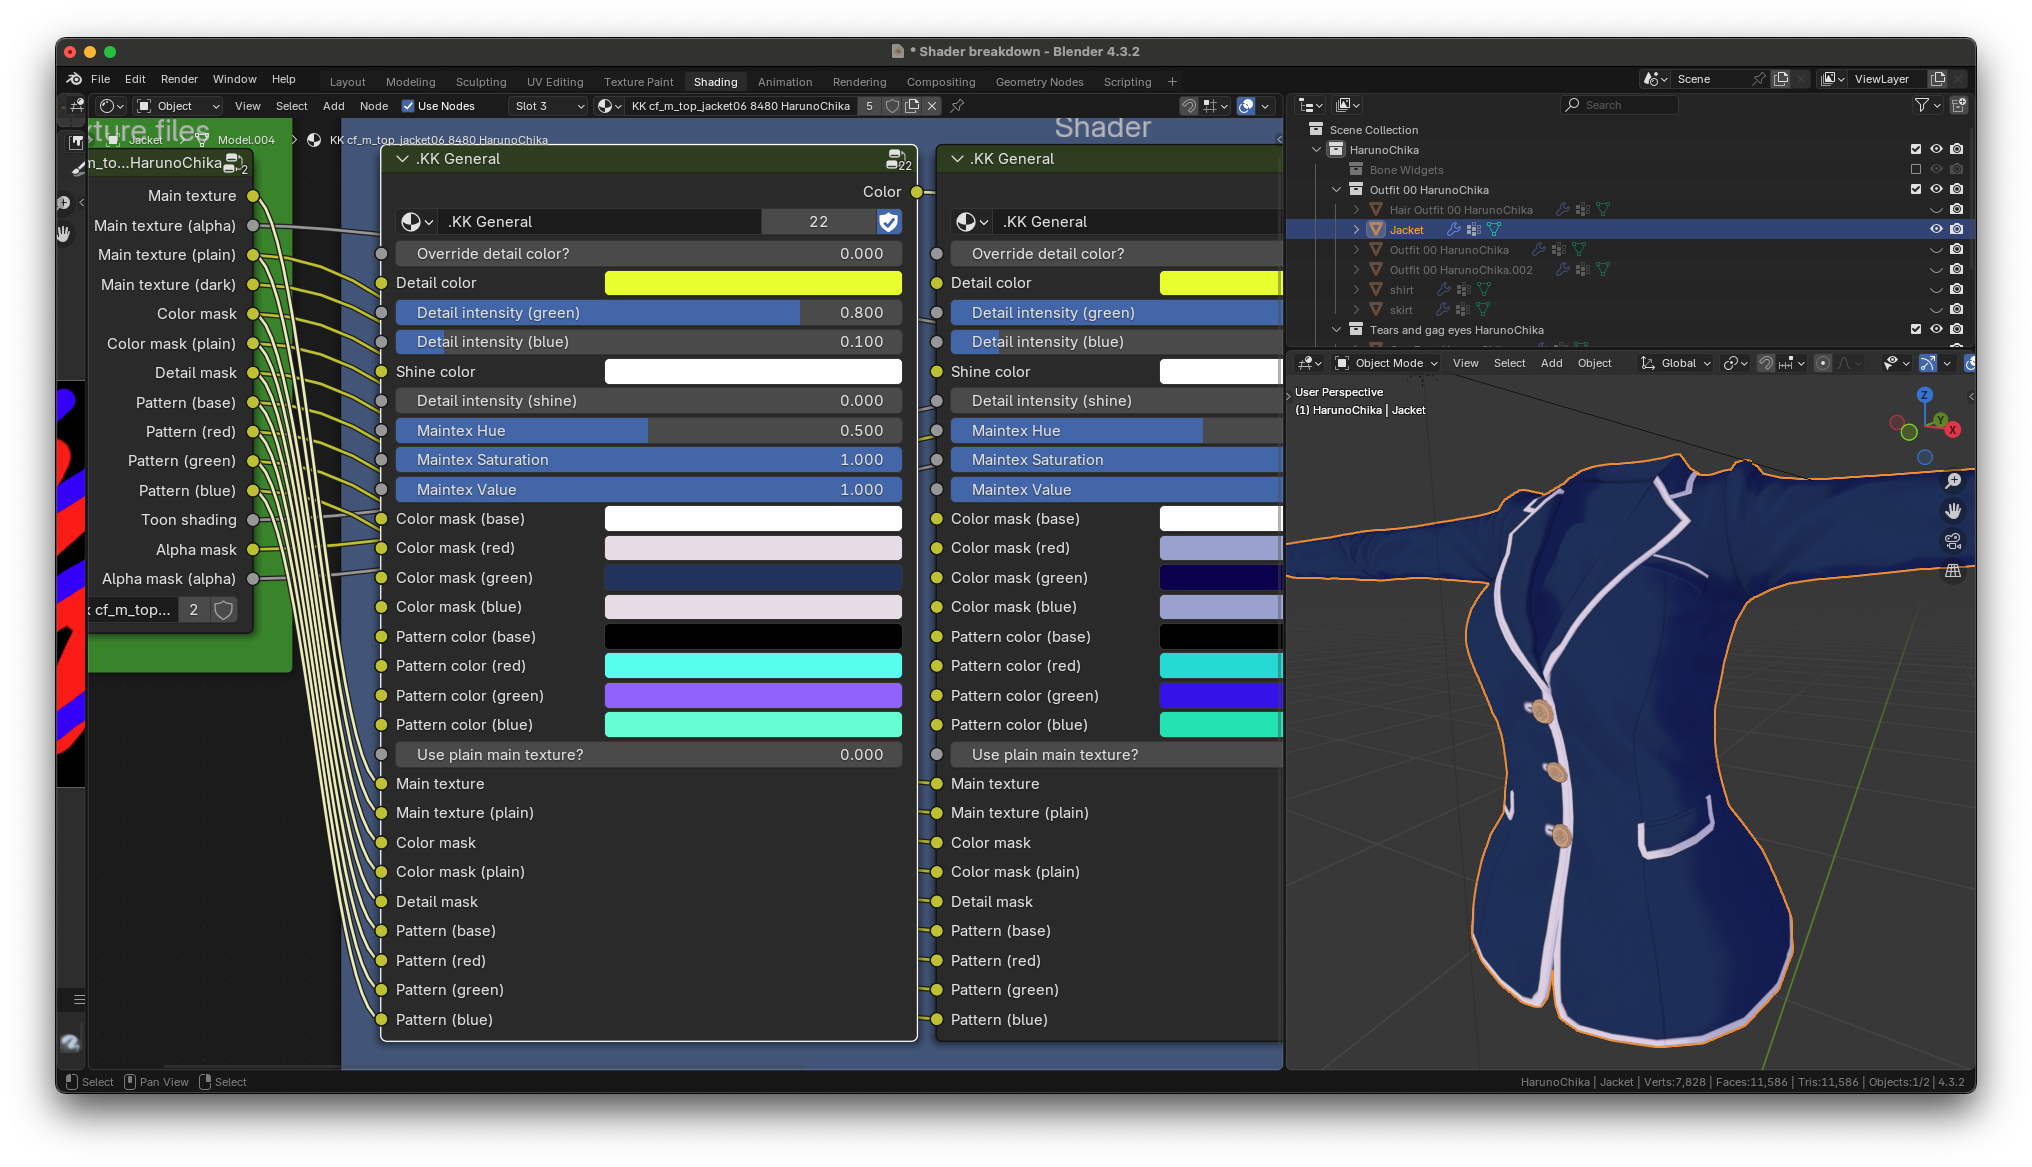
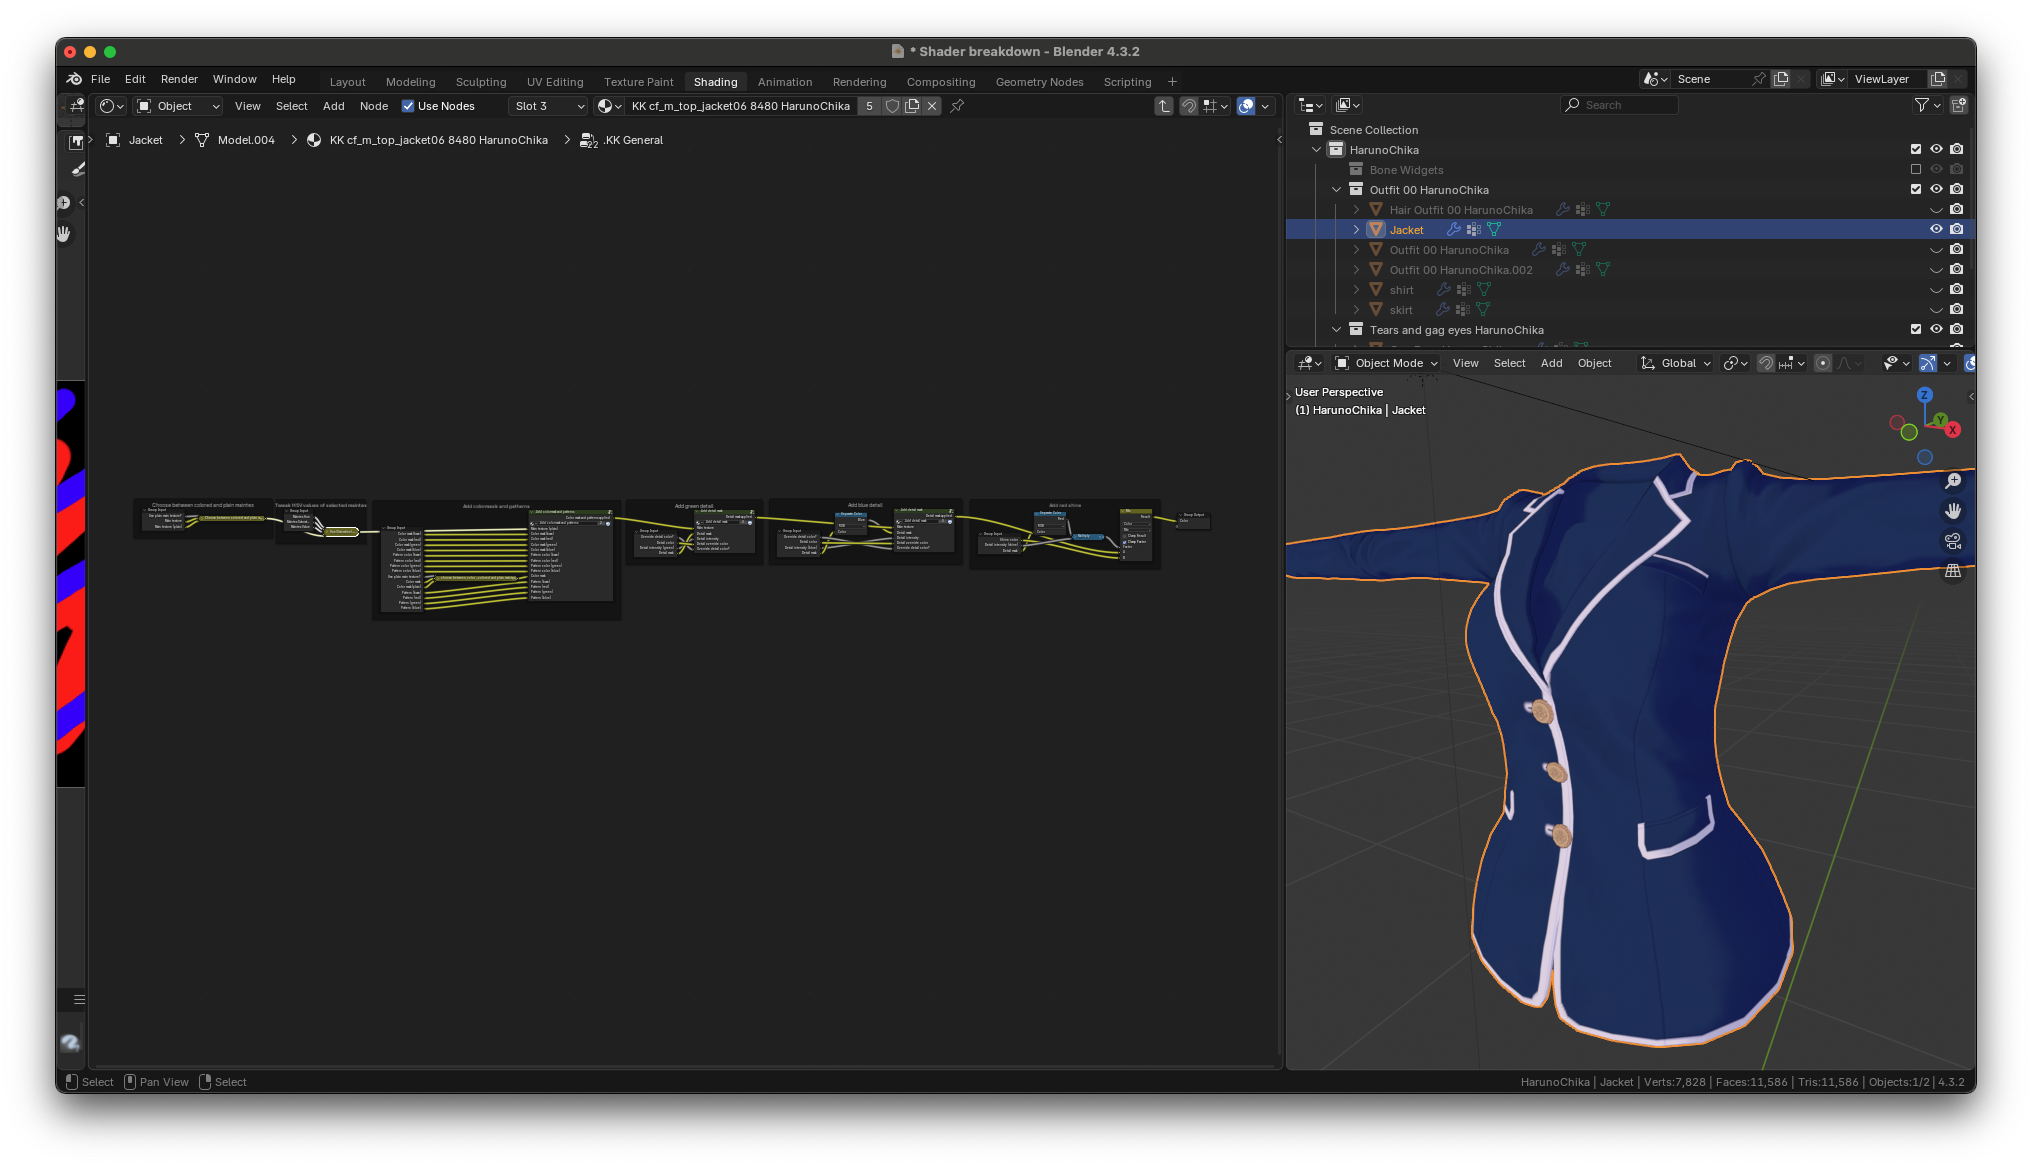
this node group takes all of the textures from earlier and uses them to
form the colors you see on the clothes. Let's again start from the left
and work our way to the right.
## Colored or plain main texture
first, we choose between the colored main texture and the plain main
texture. the output of the "use plain main texture?" output is currently
zero so it outputs pure black on the entire piece of clothing
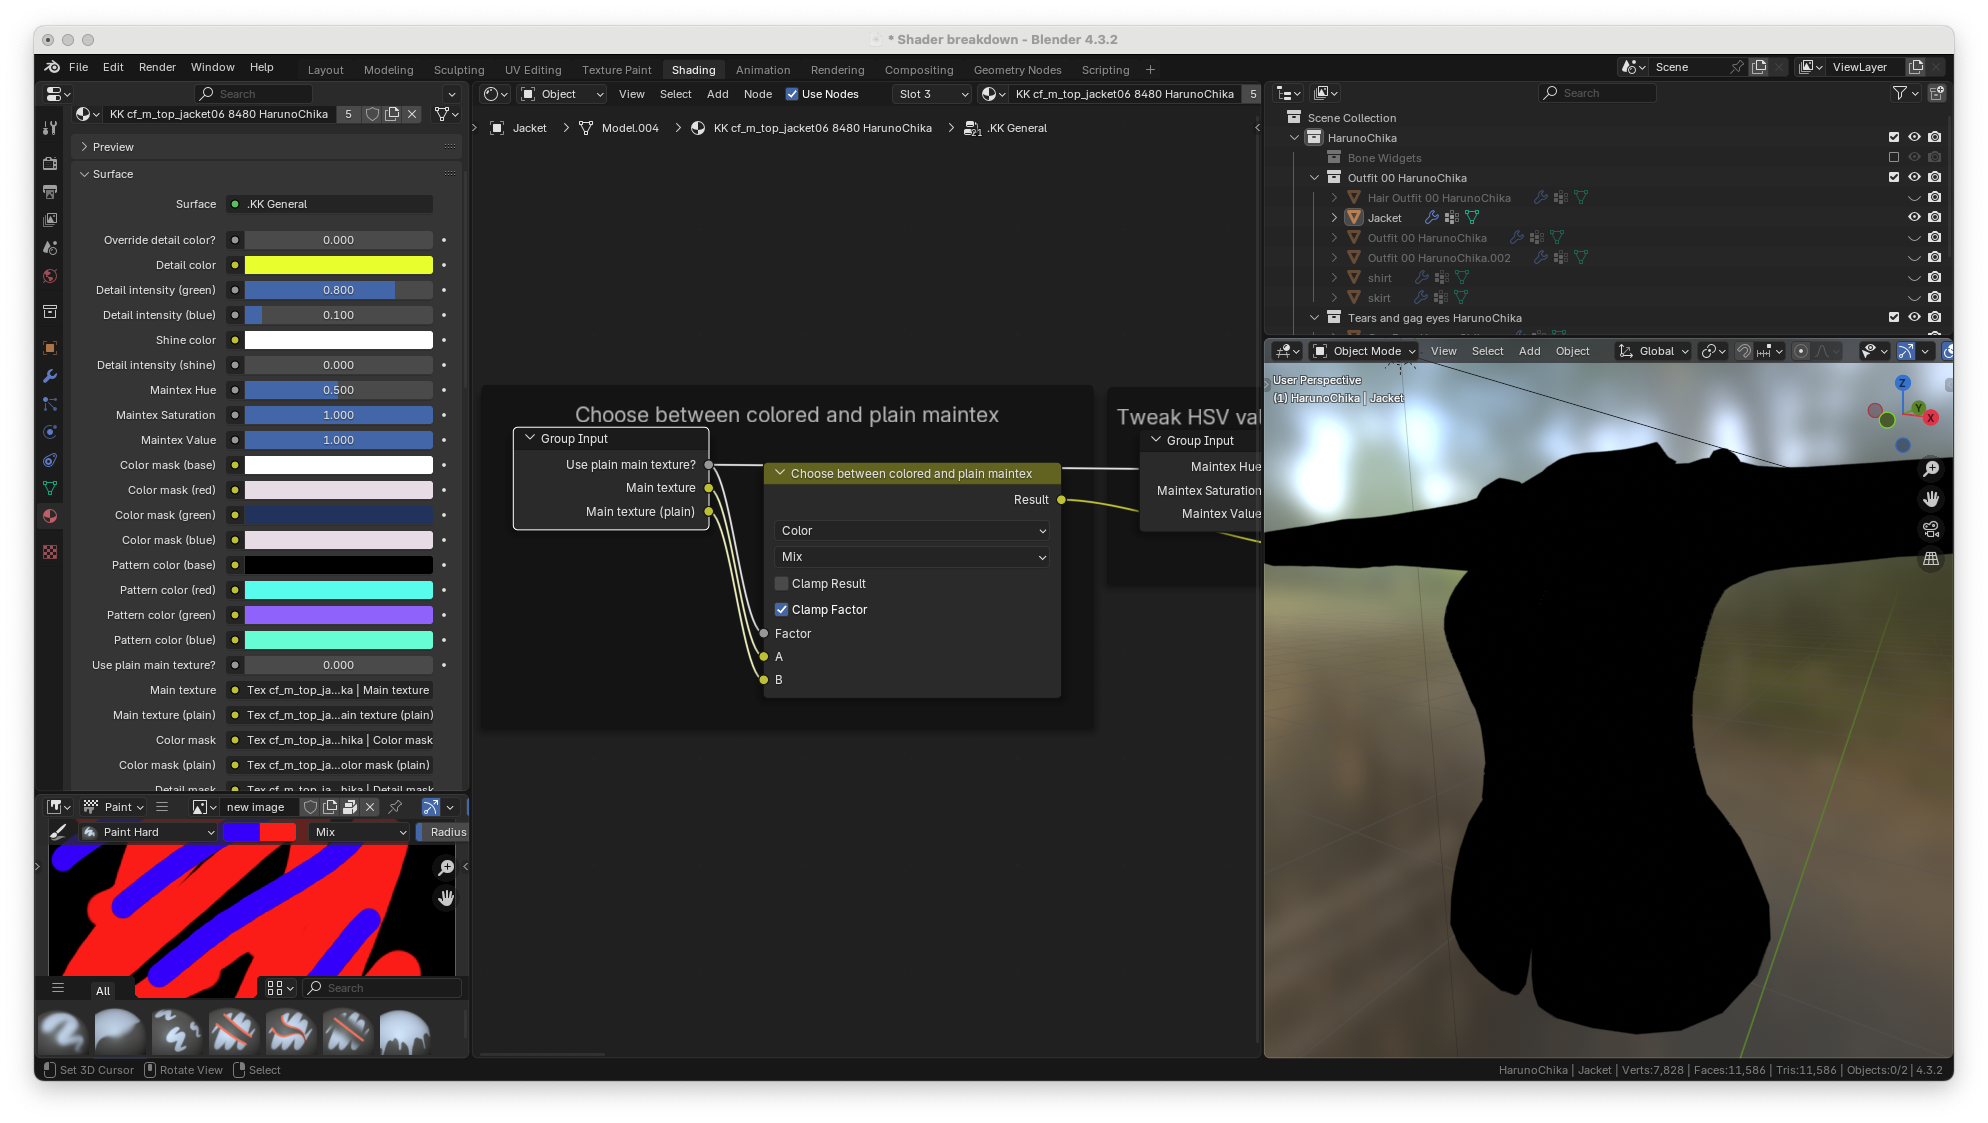
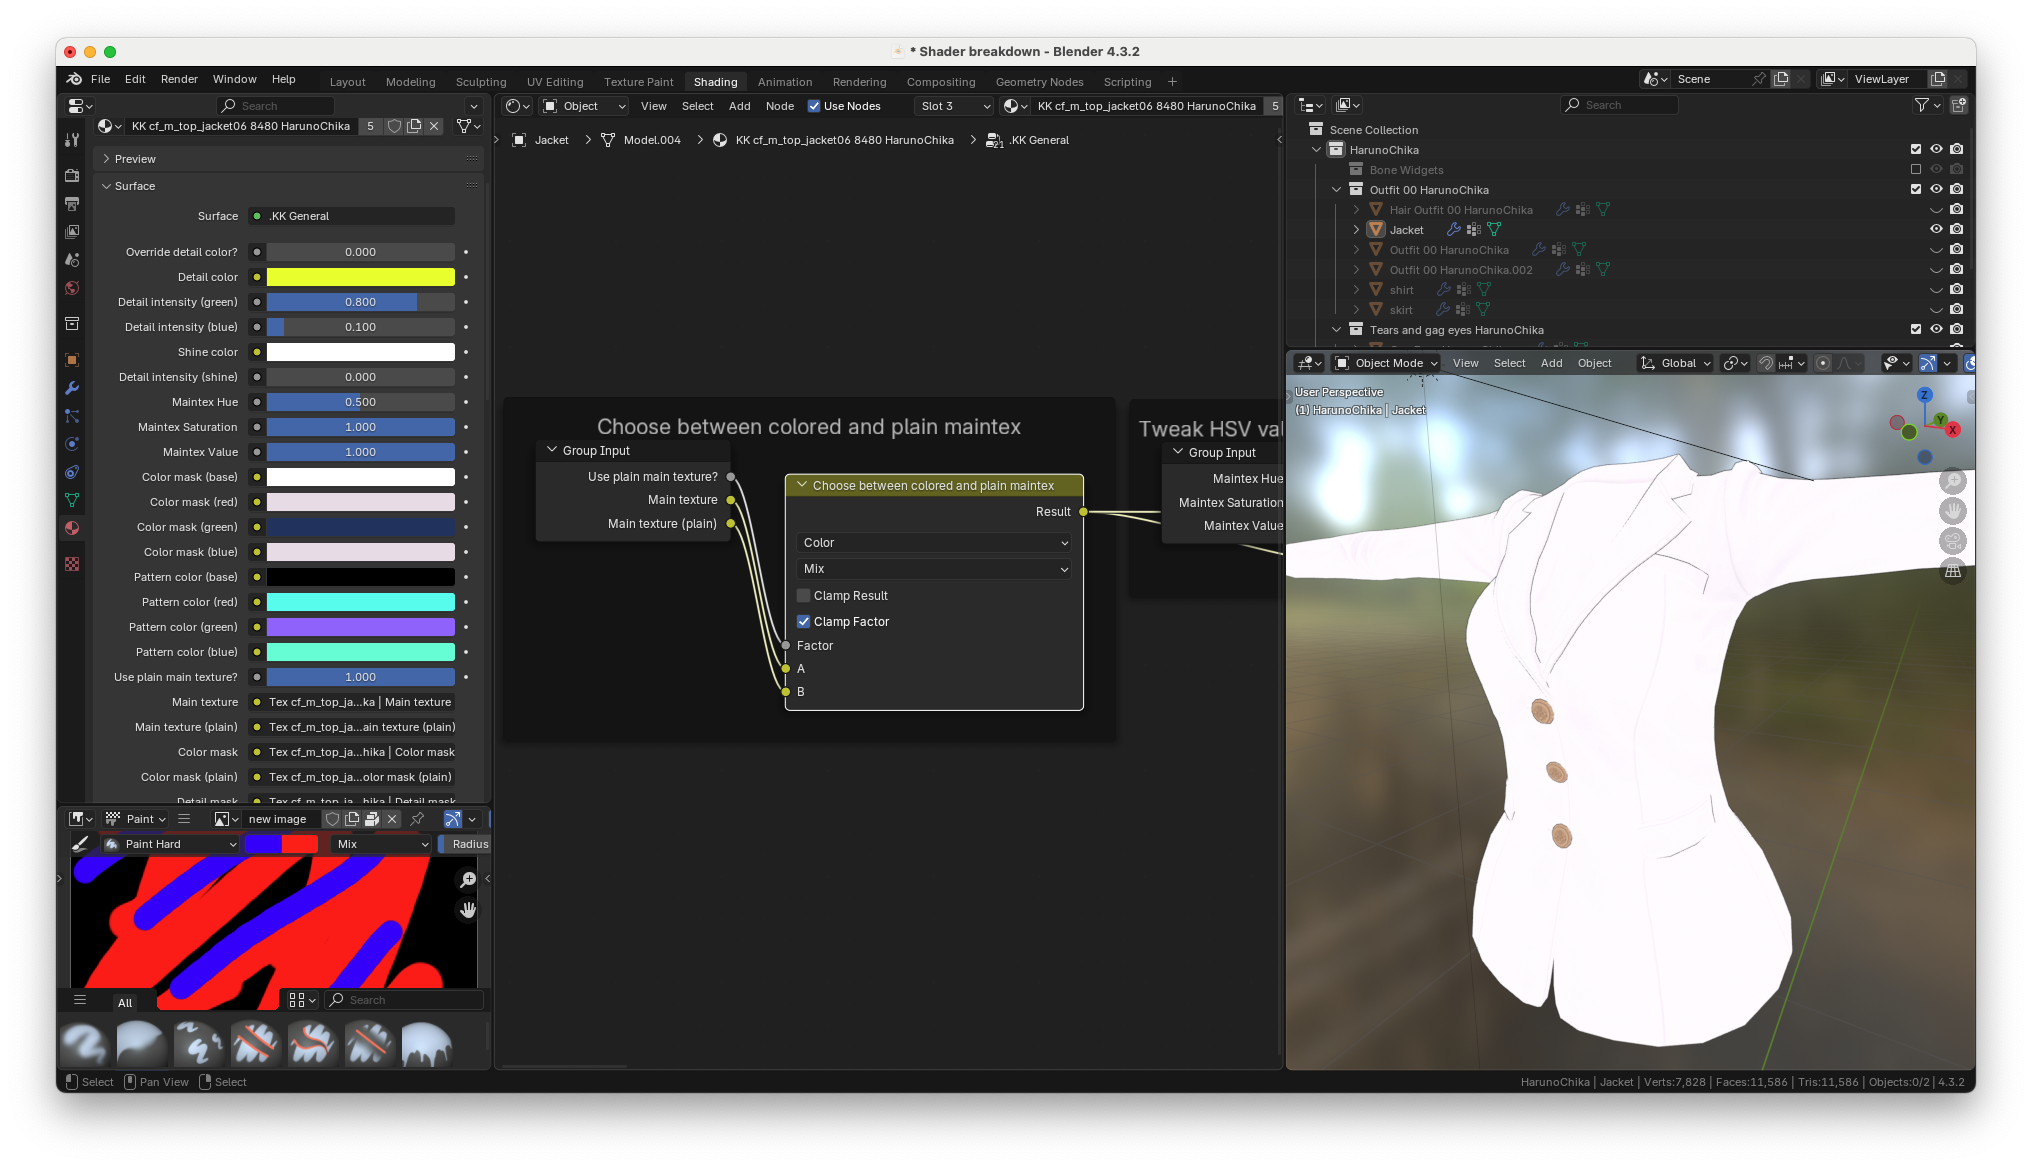
When the slider is set to zero the factor of the mix node is set to
zero. because of this the A input of the mix node is placed on the output of the node. In this case, the colored main texture is attached to the A input
of the mix node, So that's what gets passed through
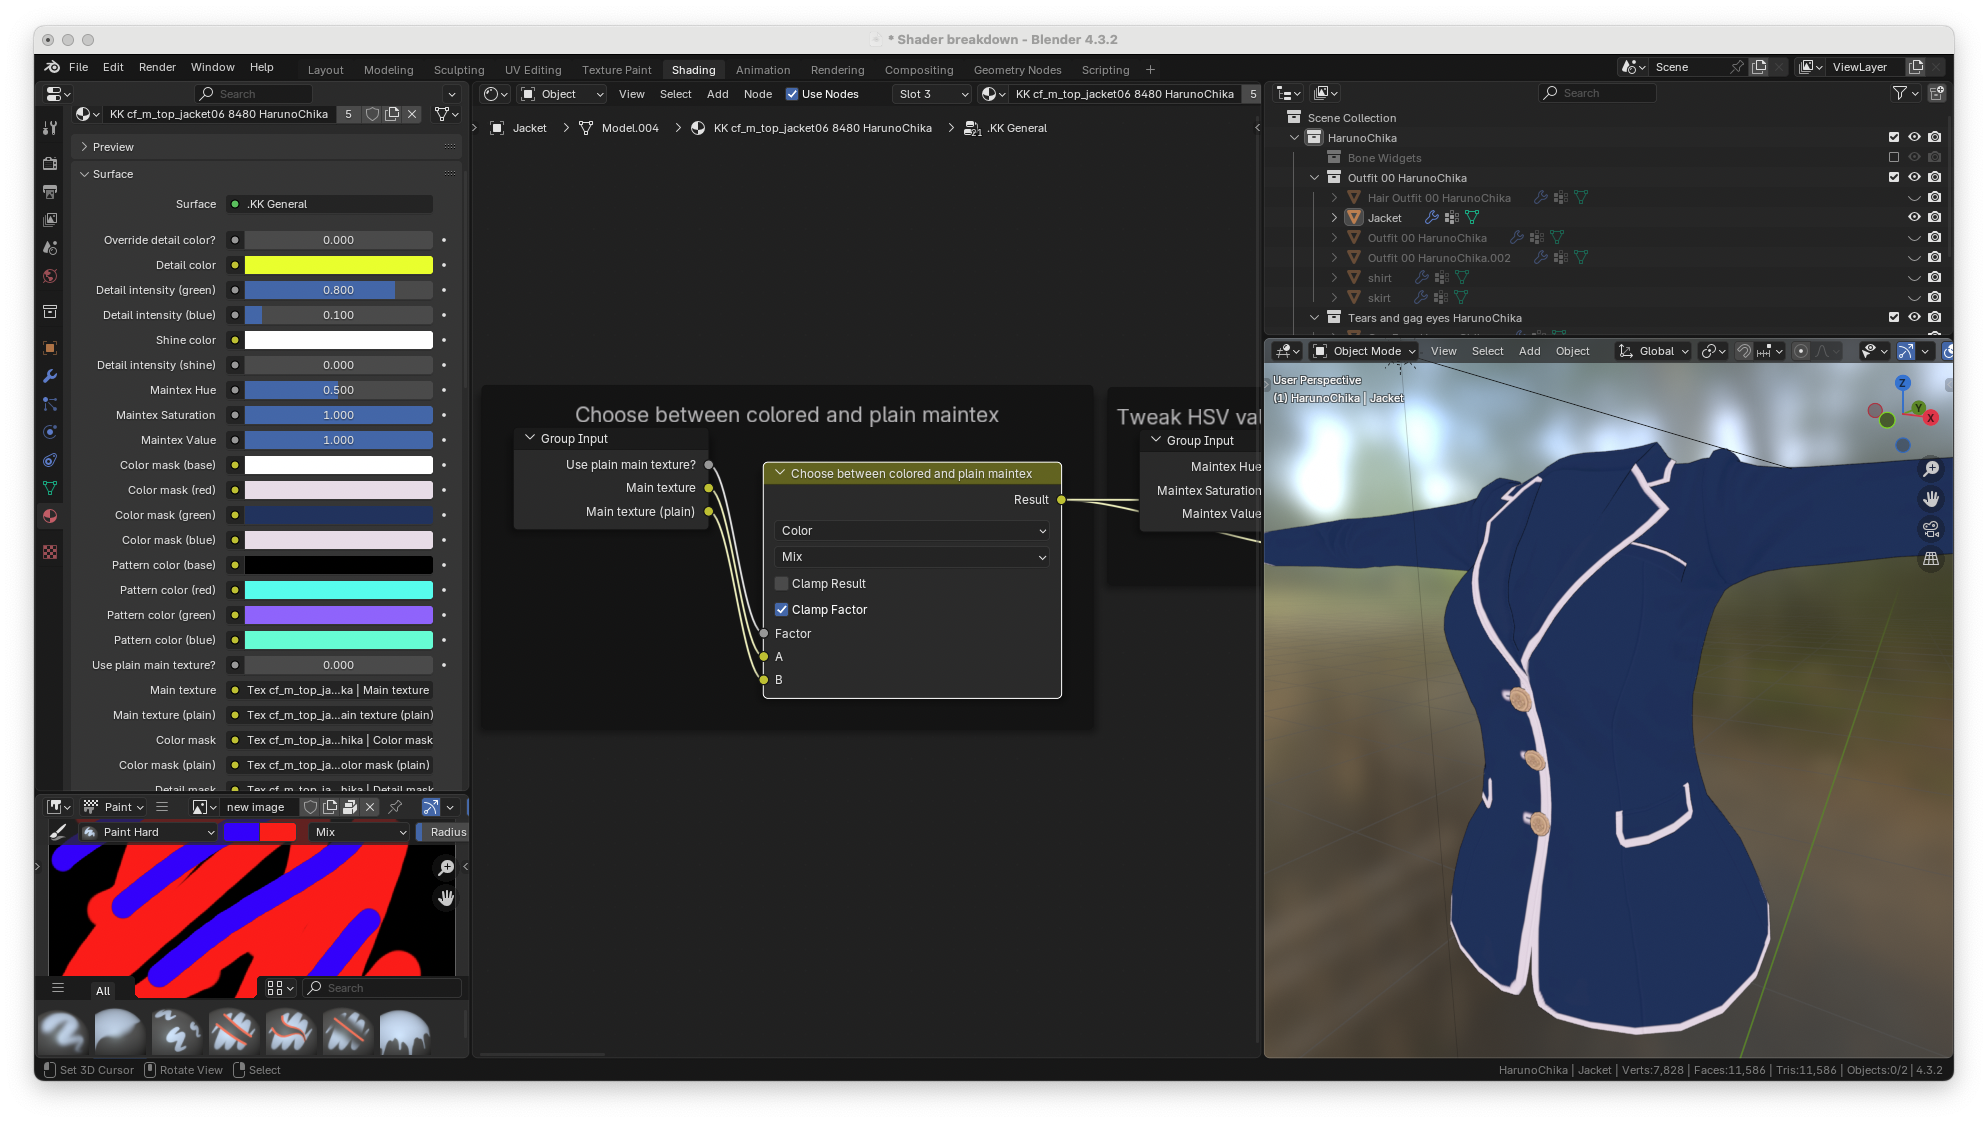
when the "use plain main texture?" slider is set to one, the node will output
pure white to the clothes.
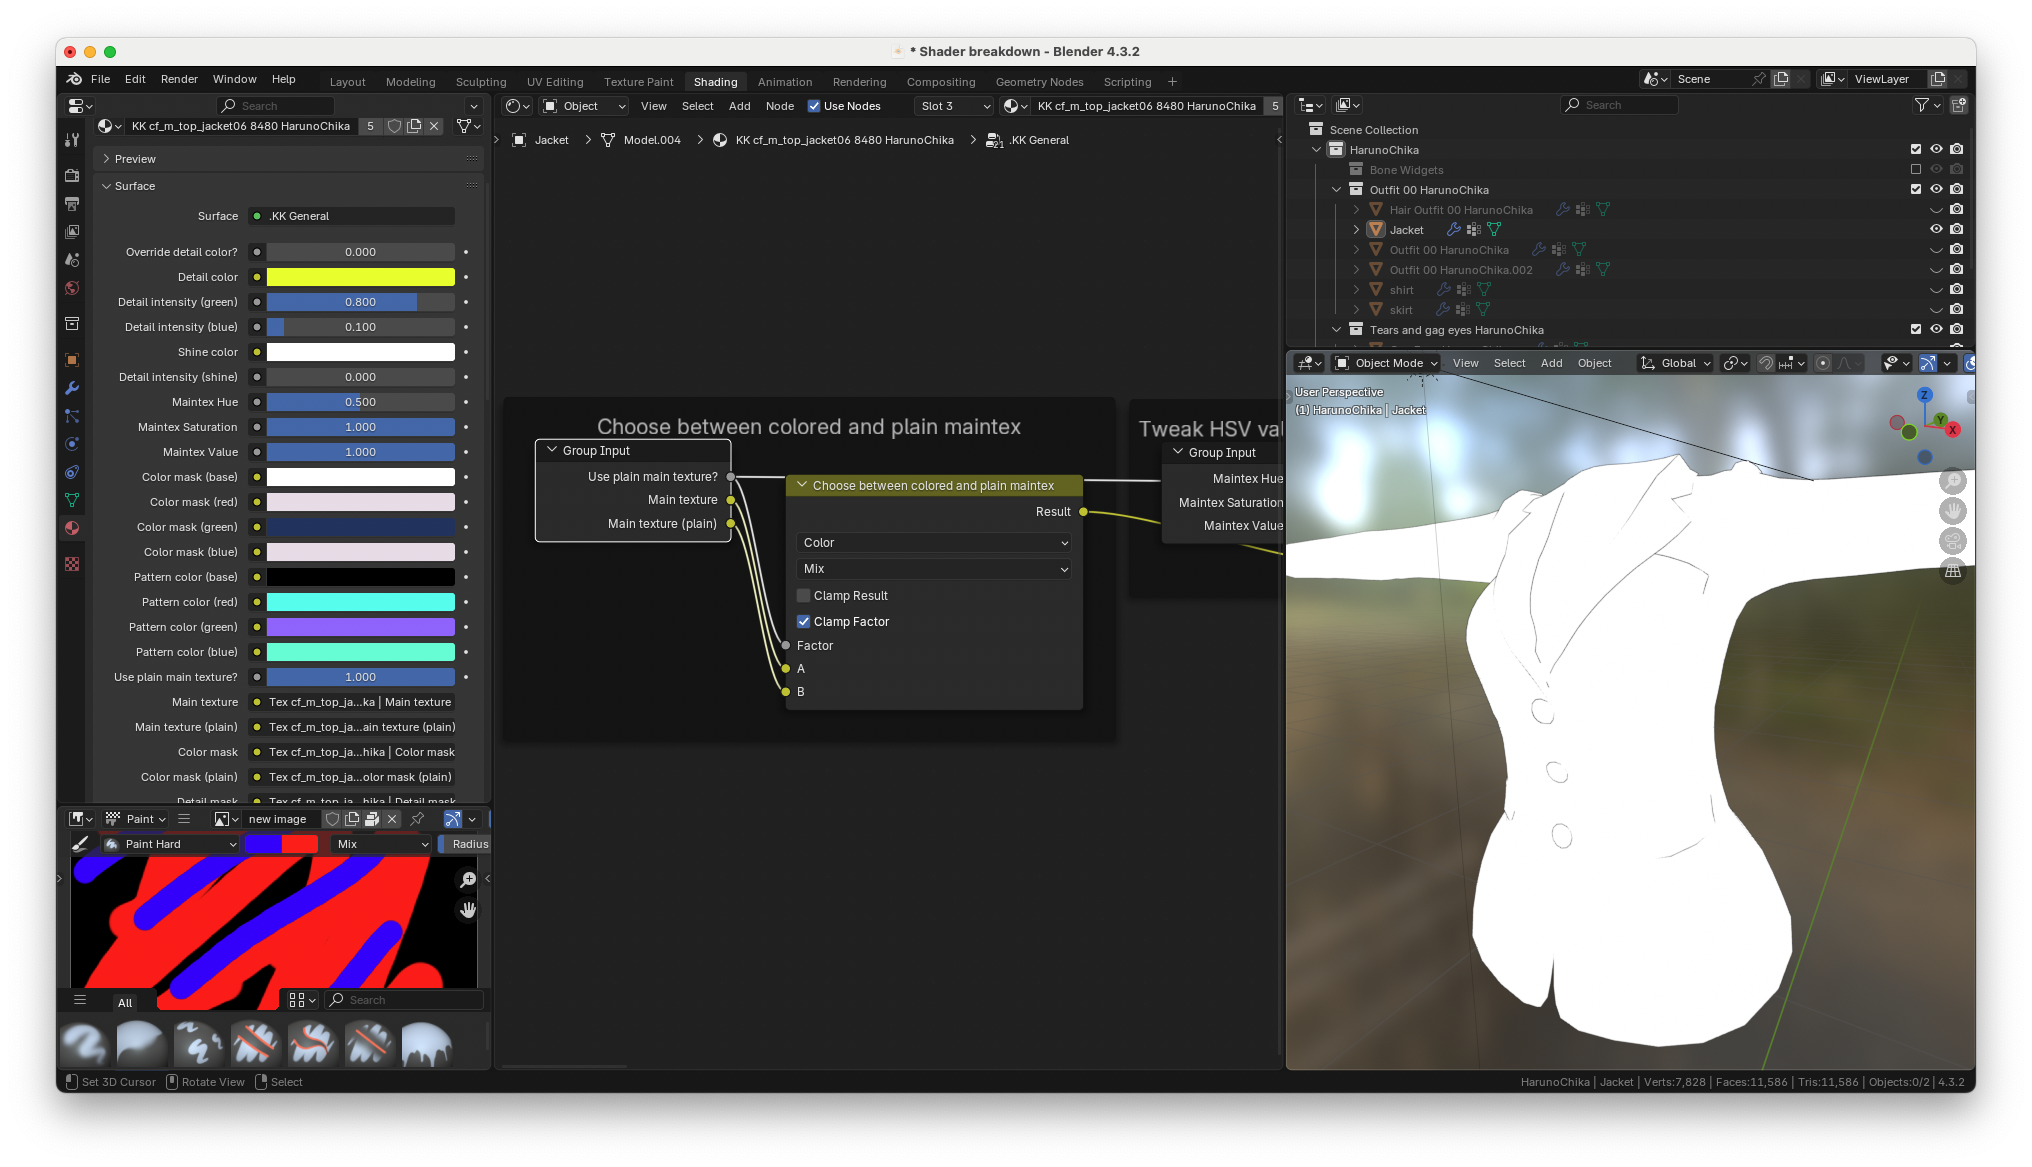
because the factor of the mix node is now set to one. The B input gets
passed through the mix node. In this case, the B input is the plain main
texture
## HSV node
once the main texture type is chosen It's sent through an HSV node.
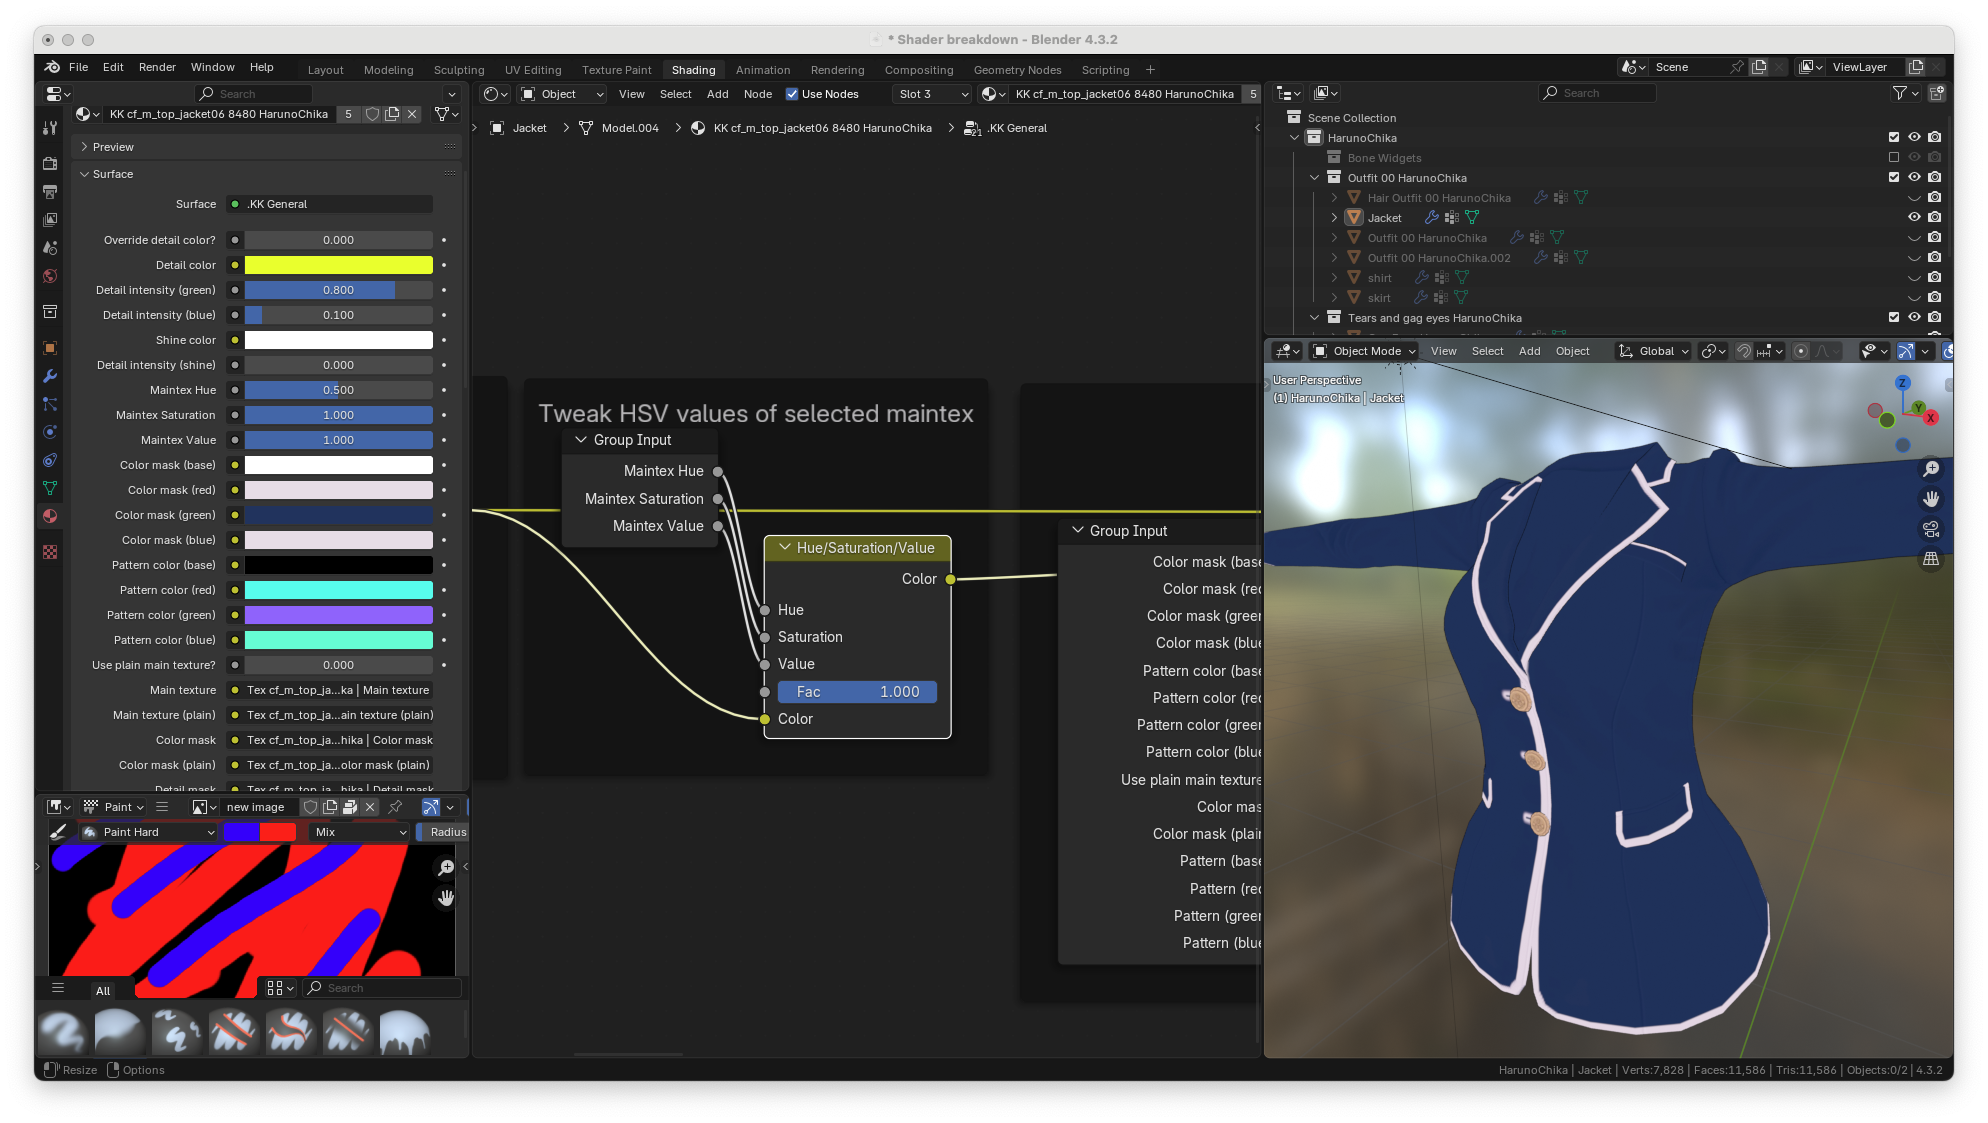
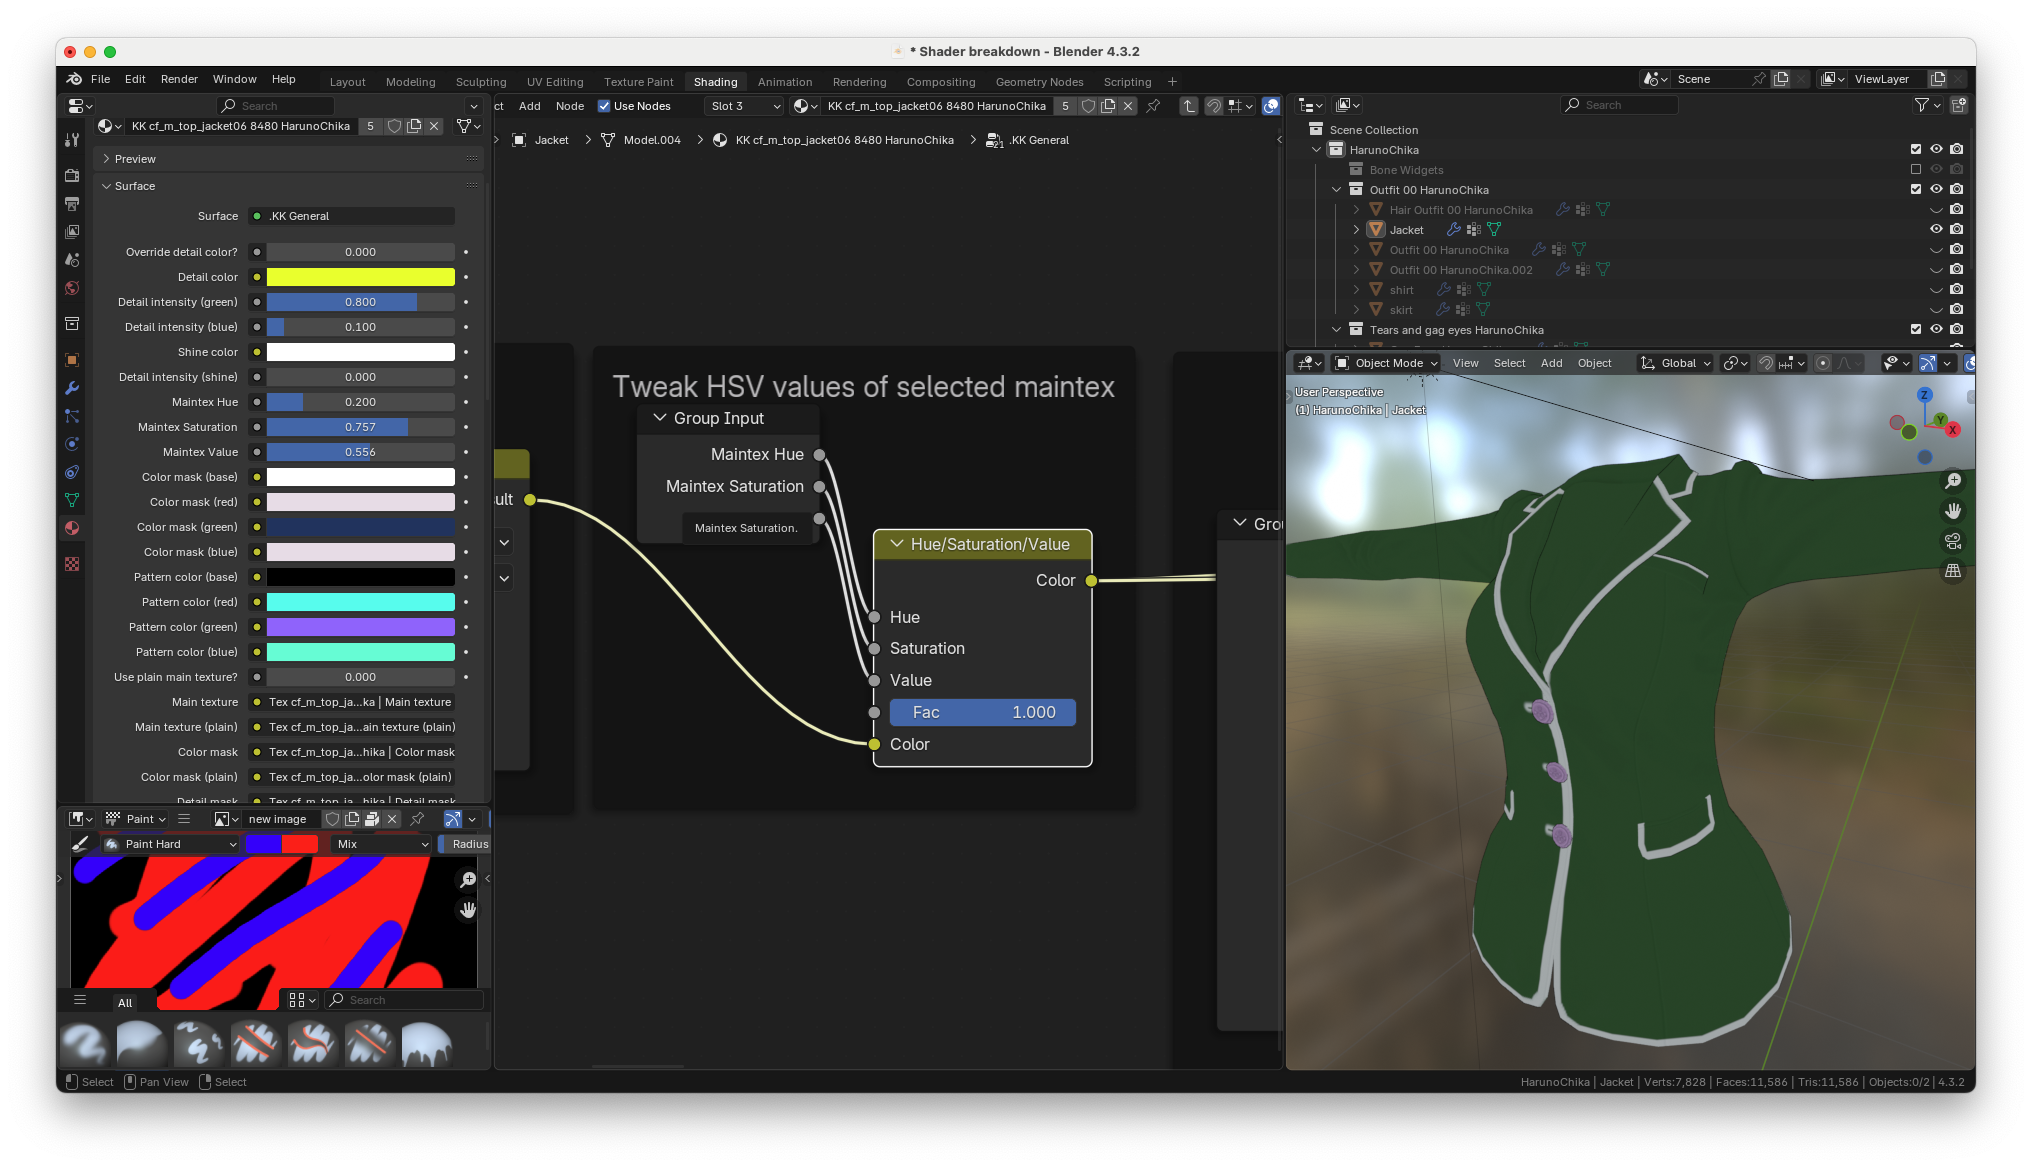
the HSV values in the material tab for the main texture directly
correlate to the inputs of this node.
## Colormask and patterns
Once the HSV values are adjusted, The color mask and the patterns are
applied. Not every piece of clothing uses every feature here so we'll
take a look at a few different pieces of clothing in this section
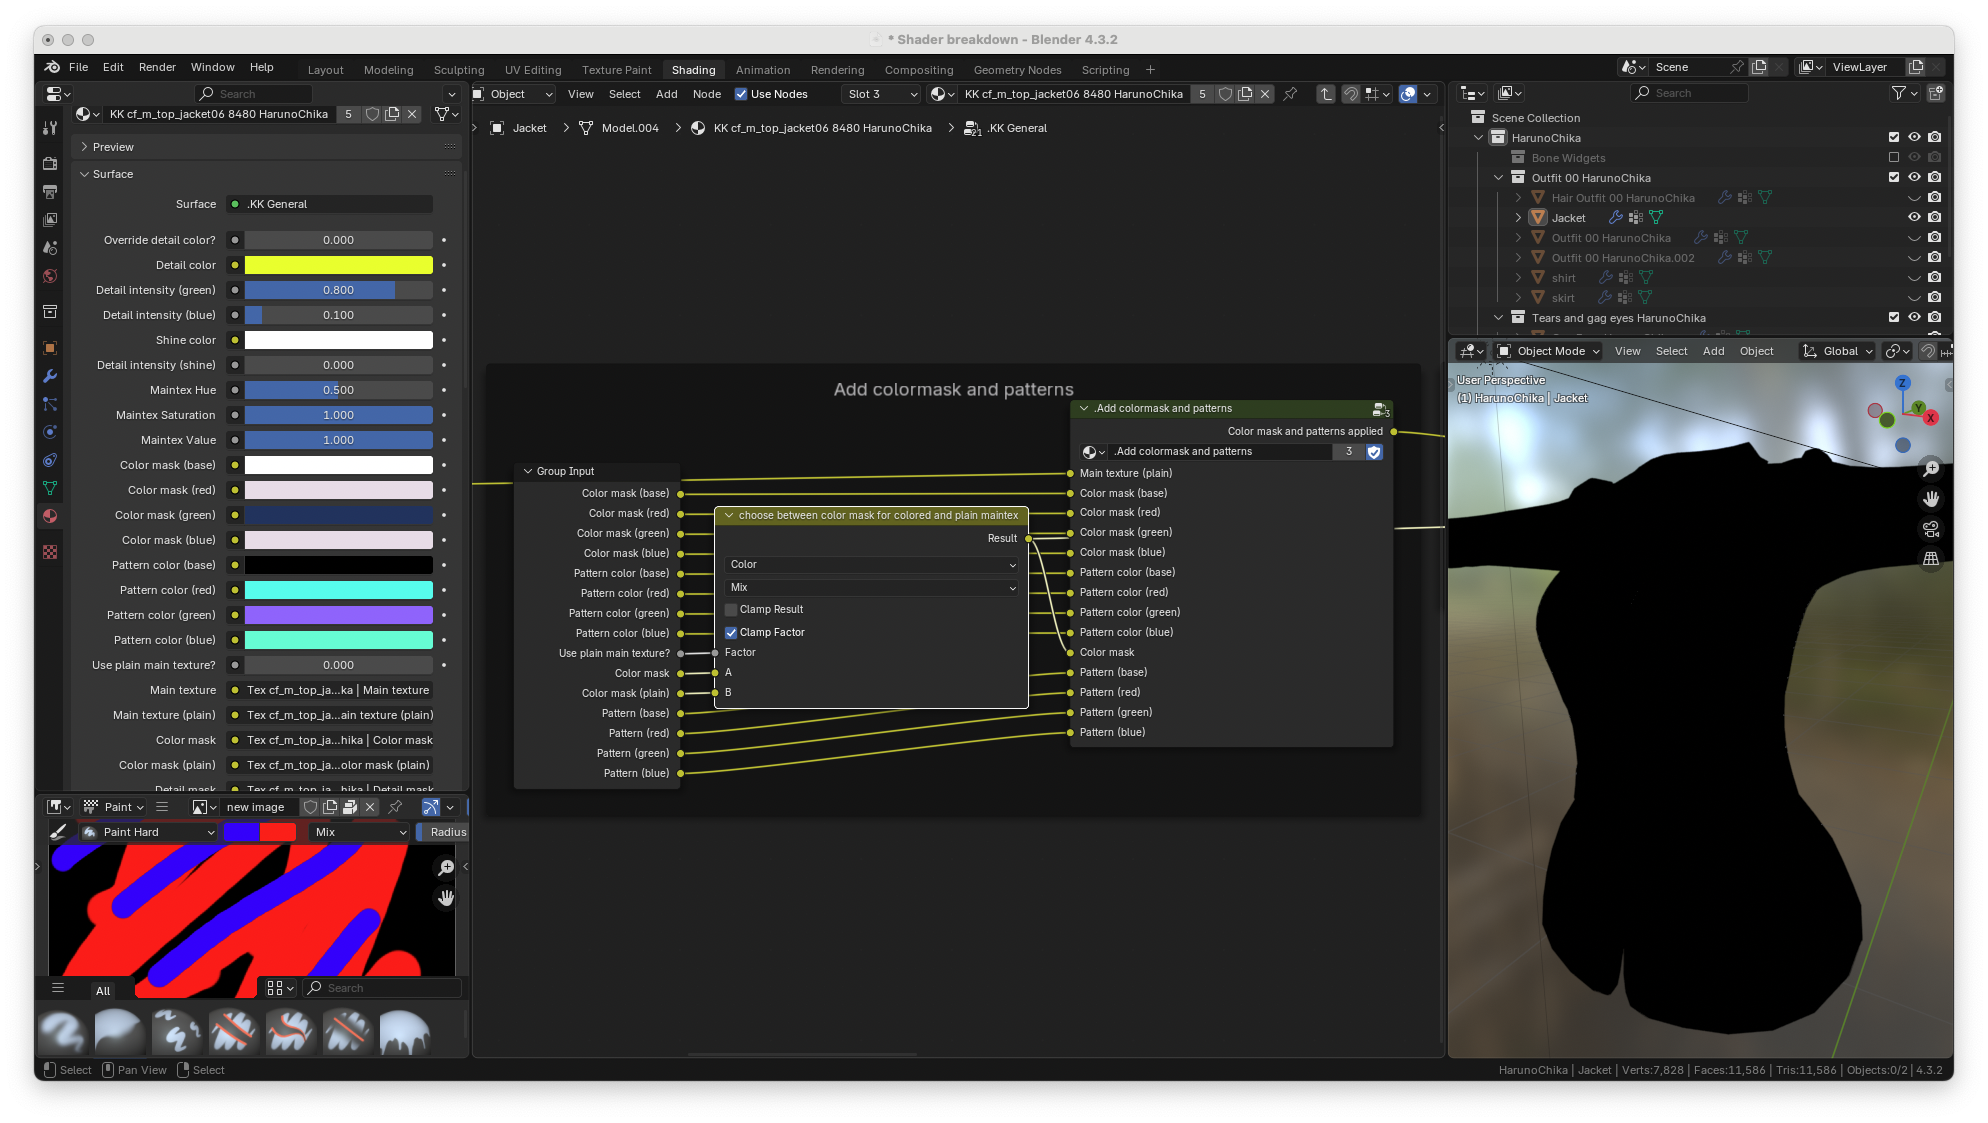
let's start with the node inbetween the inputs and the "add color mask
and patterns" node group. When you disable the "use plain main texture?"
slider, the first color mask from the textures group is placed at the output of the mix node.
If you recall from earlier, opaque materials that use the shaders below are not
supposed to have a color mask
'Koikano/main_clothes_opaque', 'Shader
Forge/main_opaque', 'xukmi/MainOpaquePlus',
'xukmi/MainOpaquePlusTess', 'Shader Forge/main_opaque2', 'Shader
Forge/main_opaque_low'
this piece of clothing happens to be an opaque material so that's why
the colormask in the first slot was pure black.
If you enable the "use plain main texture" slider, then the color mask loaded
into the second color mask slot will be passed through the mix node.
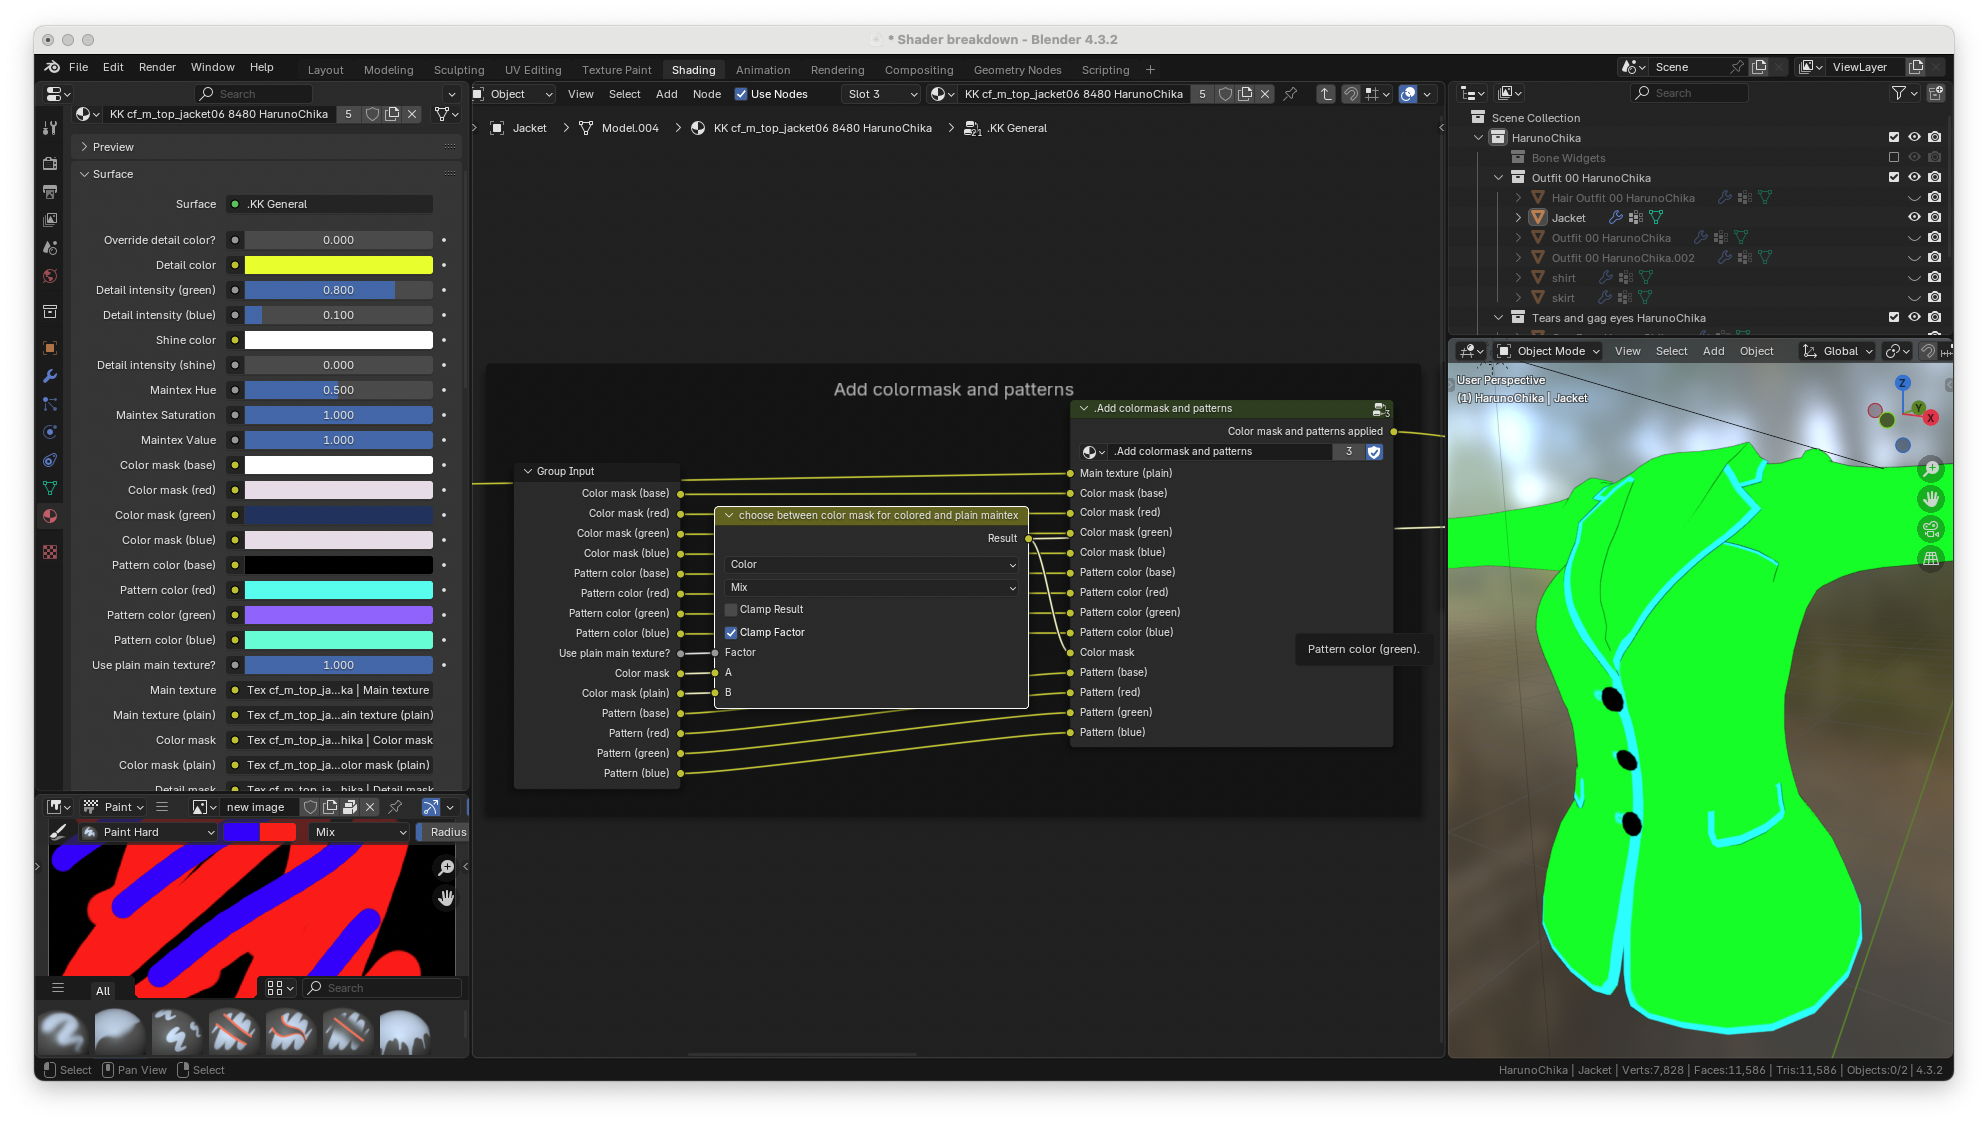
If we take a look at the output of the "add color mask and patterns" node
group, you can see that the colors look correct when the plain main
texture slider is set to zero
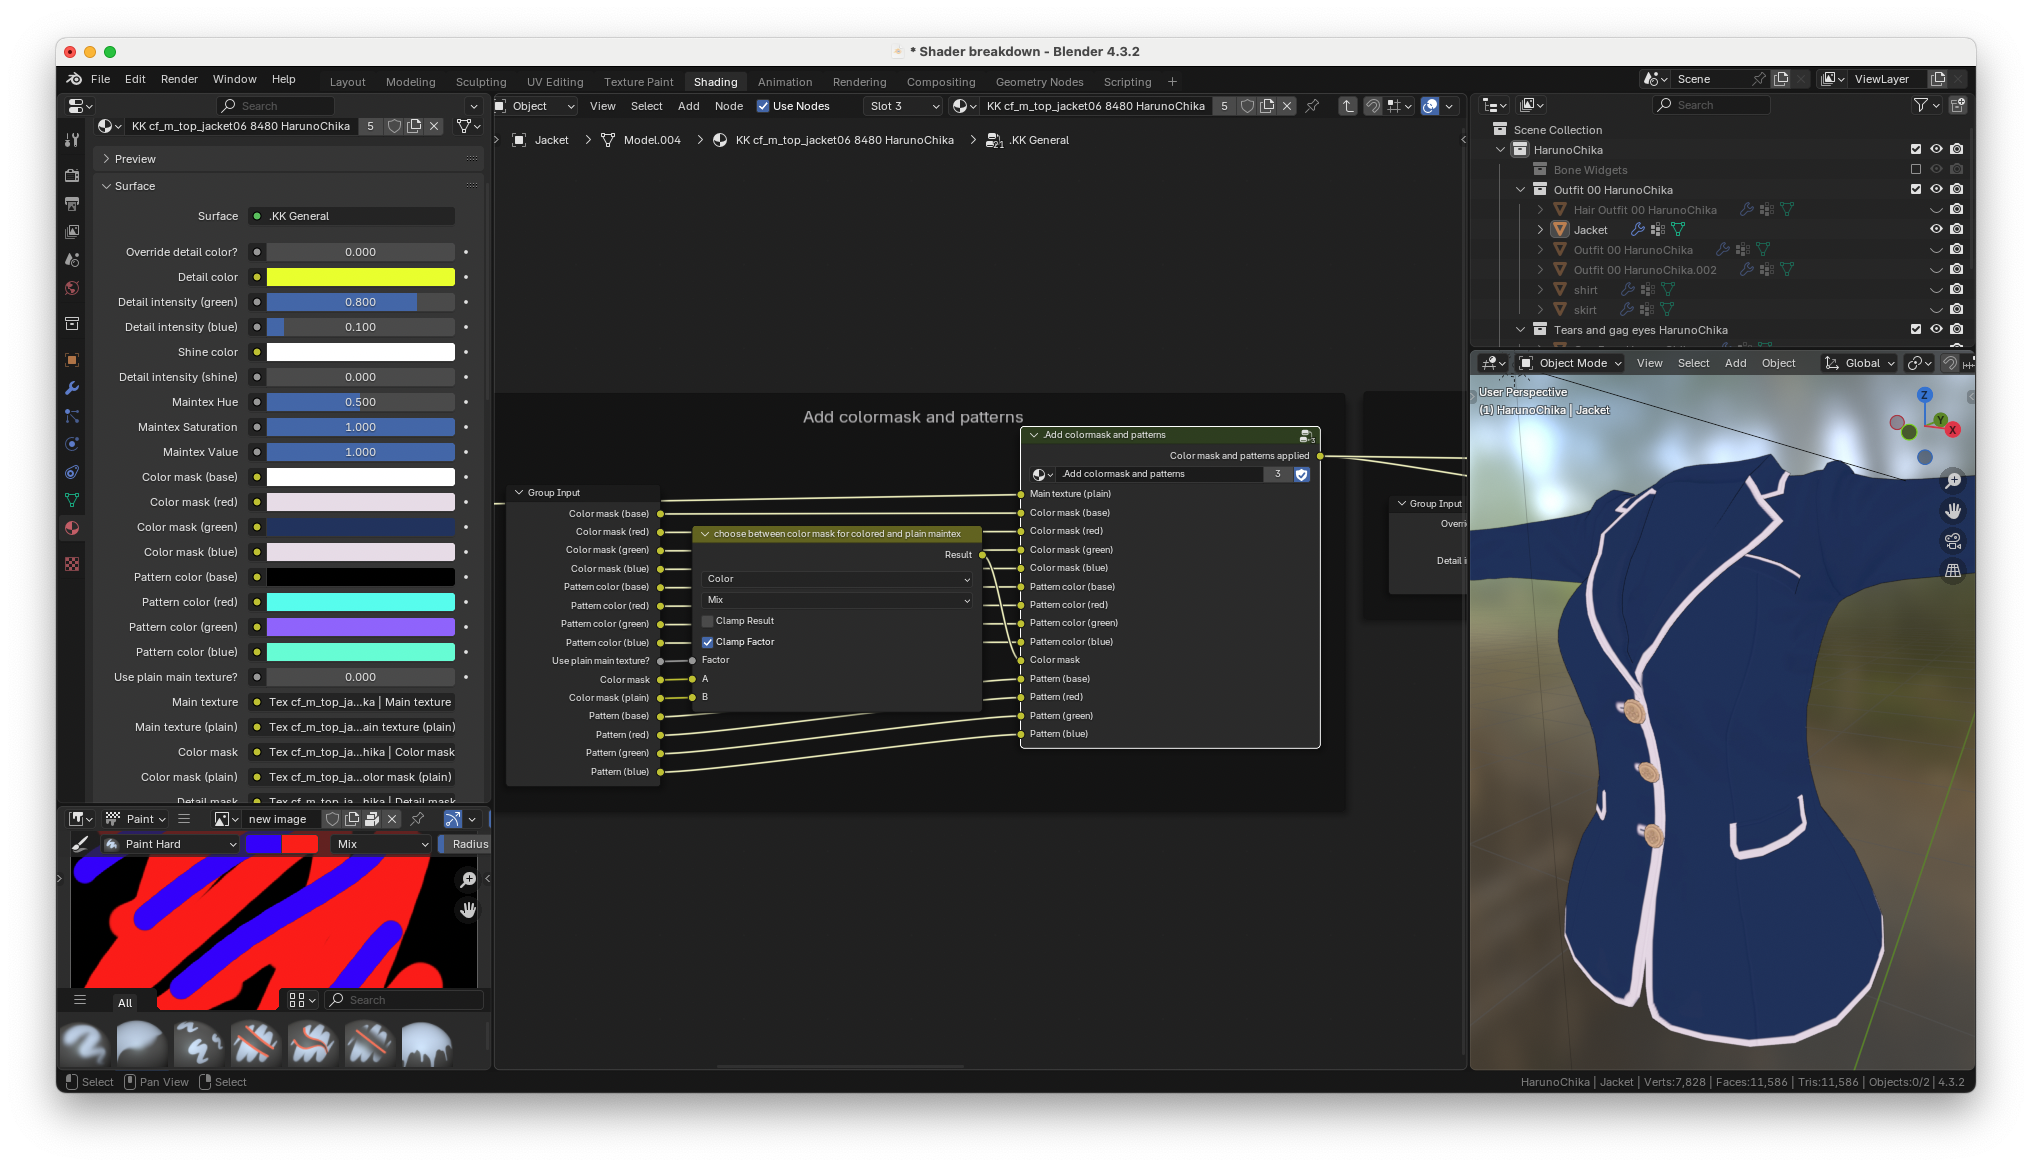
and they still look correct when it's set to one
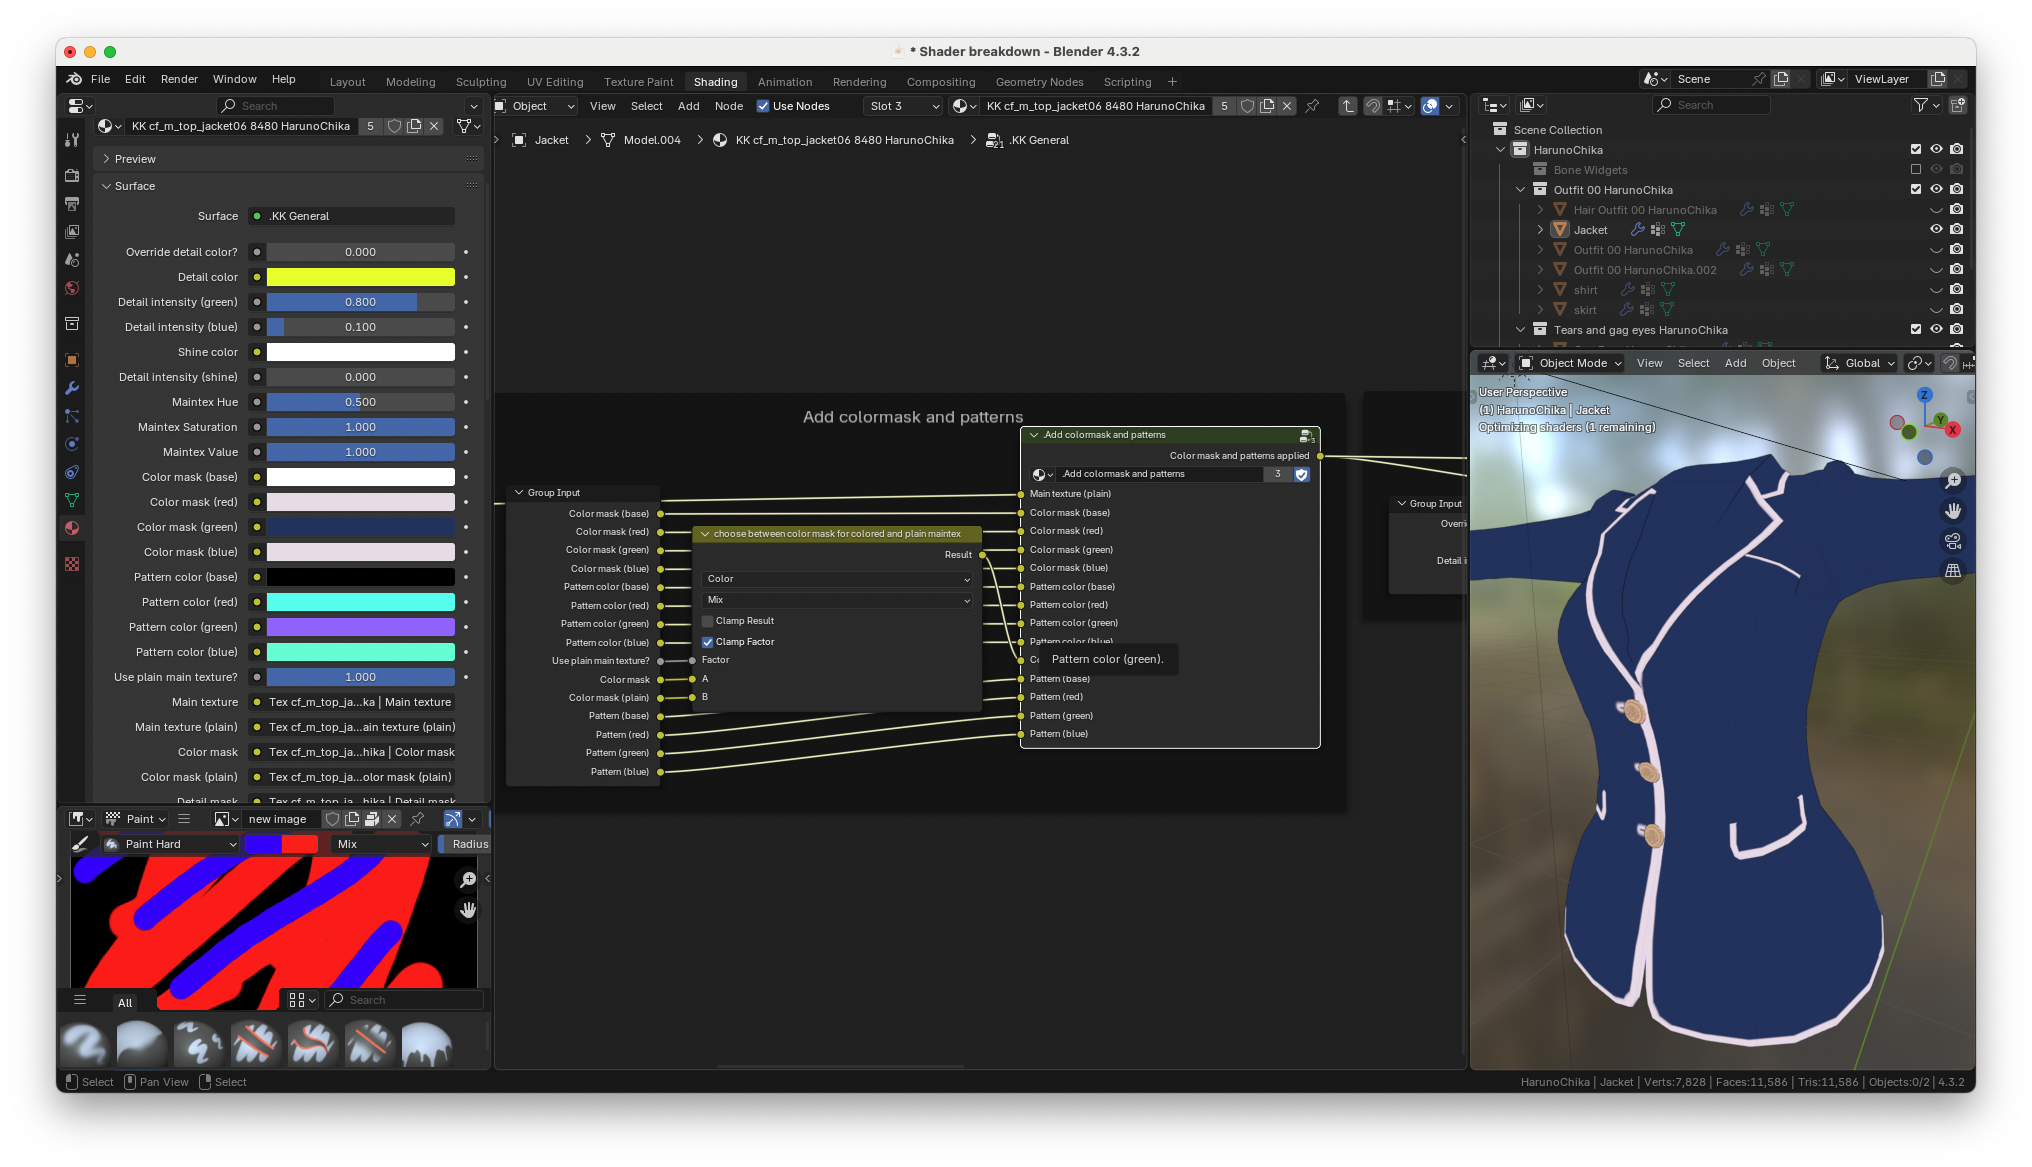
this is because of the dual color mask setup. If I force the second
color mask to be enabled while the colored main texture is active you
can see that the color is applied twice to the material and that's not
something that you want to see
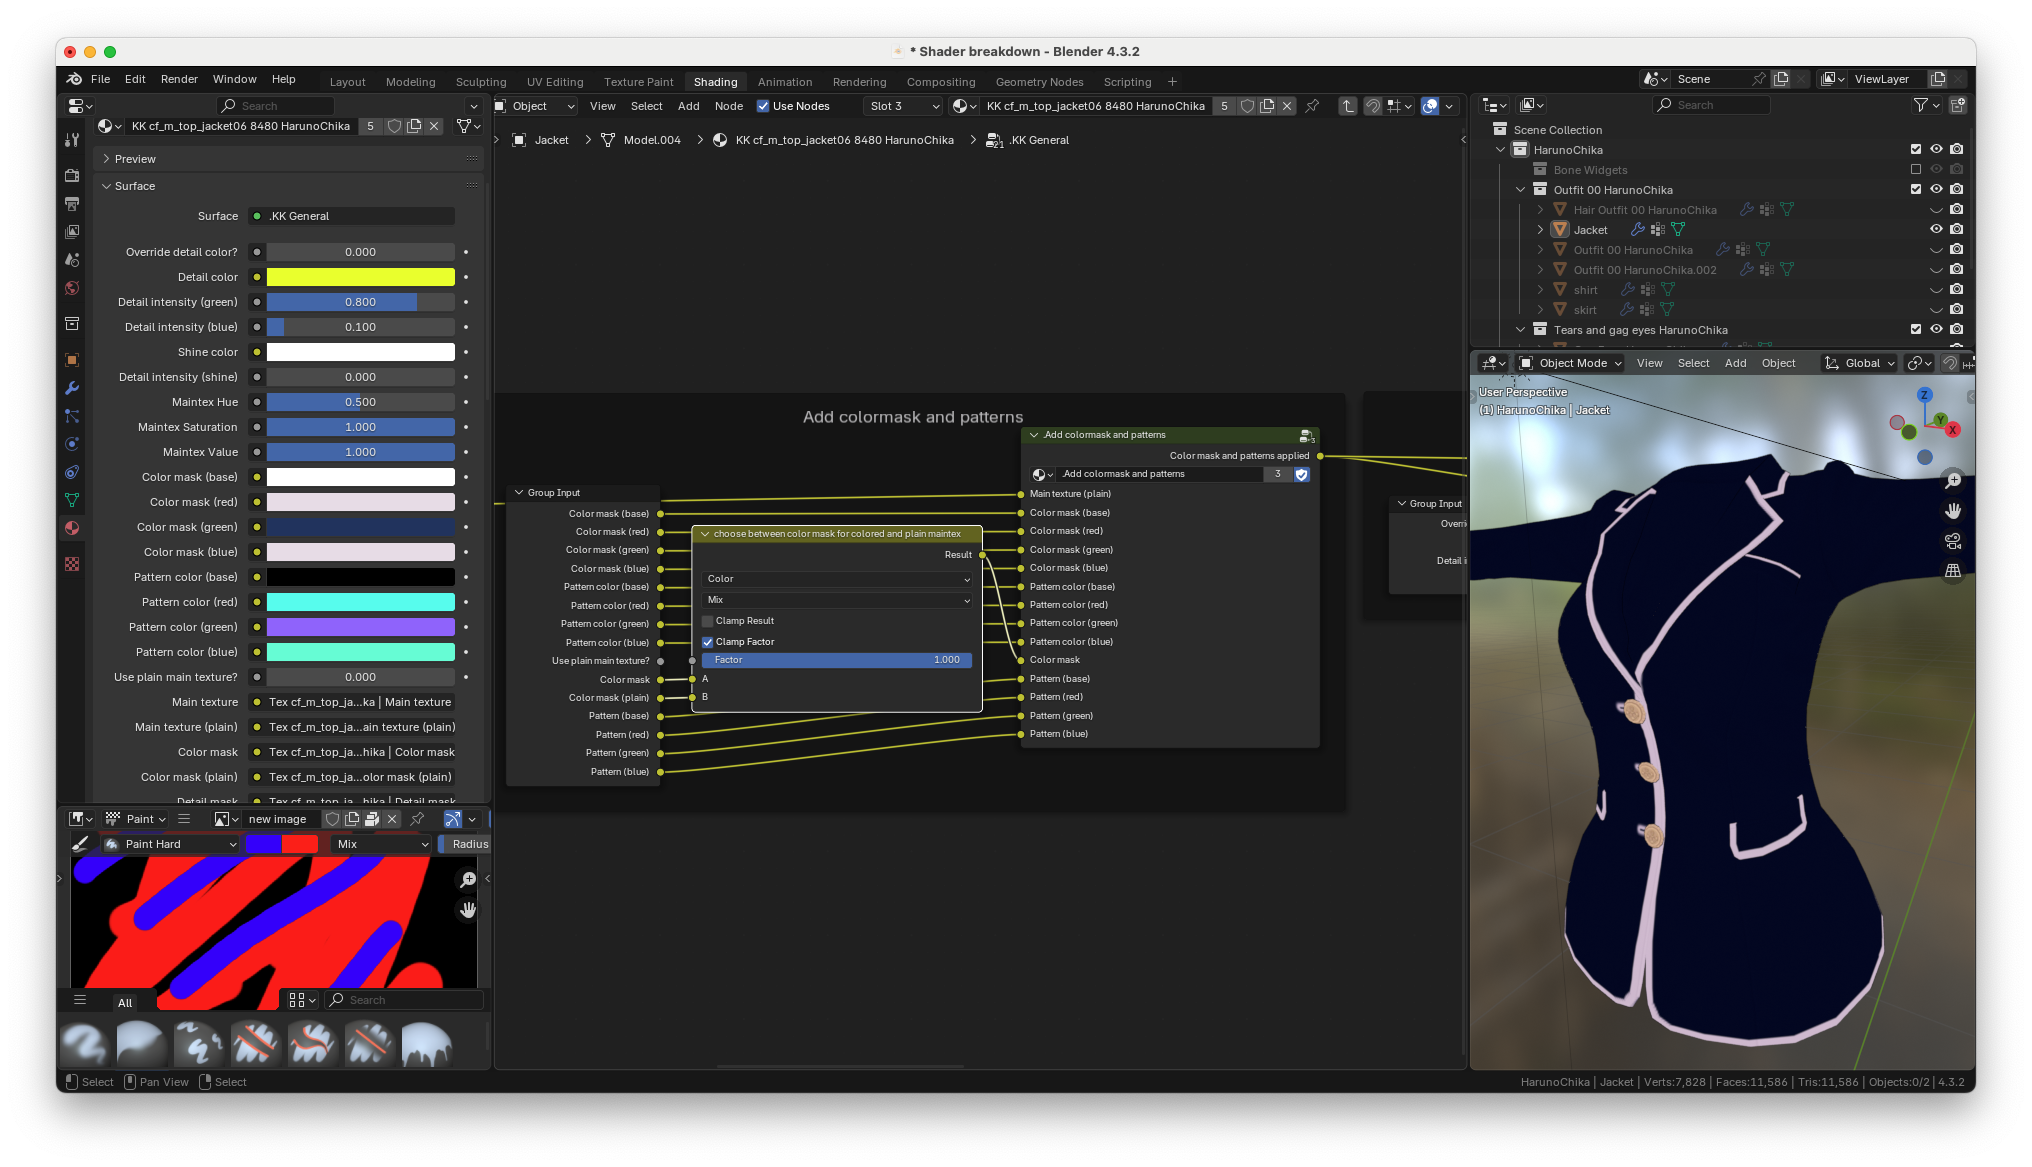
so again that's why there's two color mask slots. Because if the
clothing is using the opaque shader then you'll have a fully colored
main texture and a black color mask in the first color mask slot,
meaning no extra colors will be applied to the already colored main texture.
Then when you're using the plain main
texture, you always want the colors applied to it because it's white,
meaning you always want a color mask in the second slot.
## Add colormask and patterns node group
If it still doesn't make sense, let's take a look inside the "add color
mask and patterns" node group.
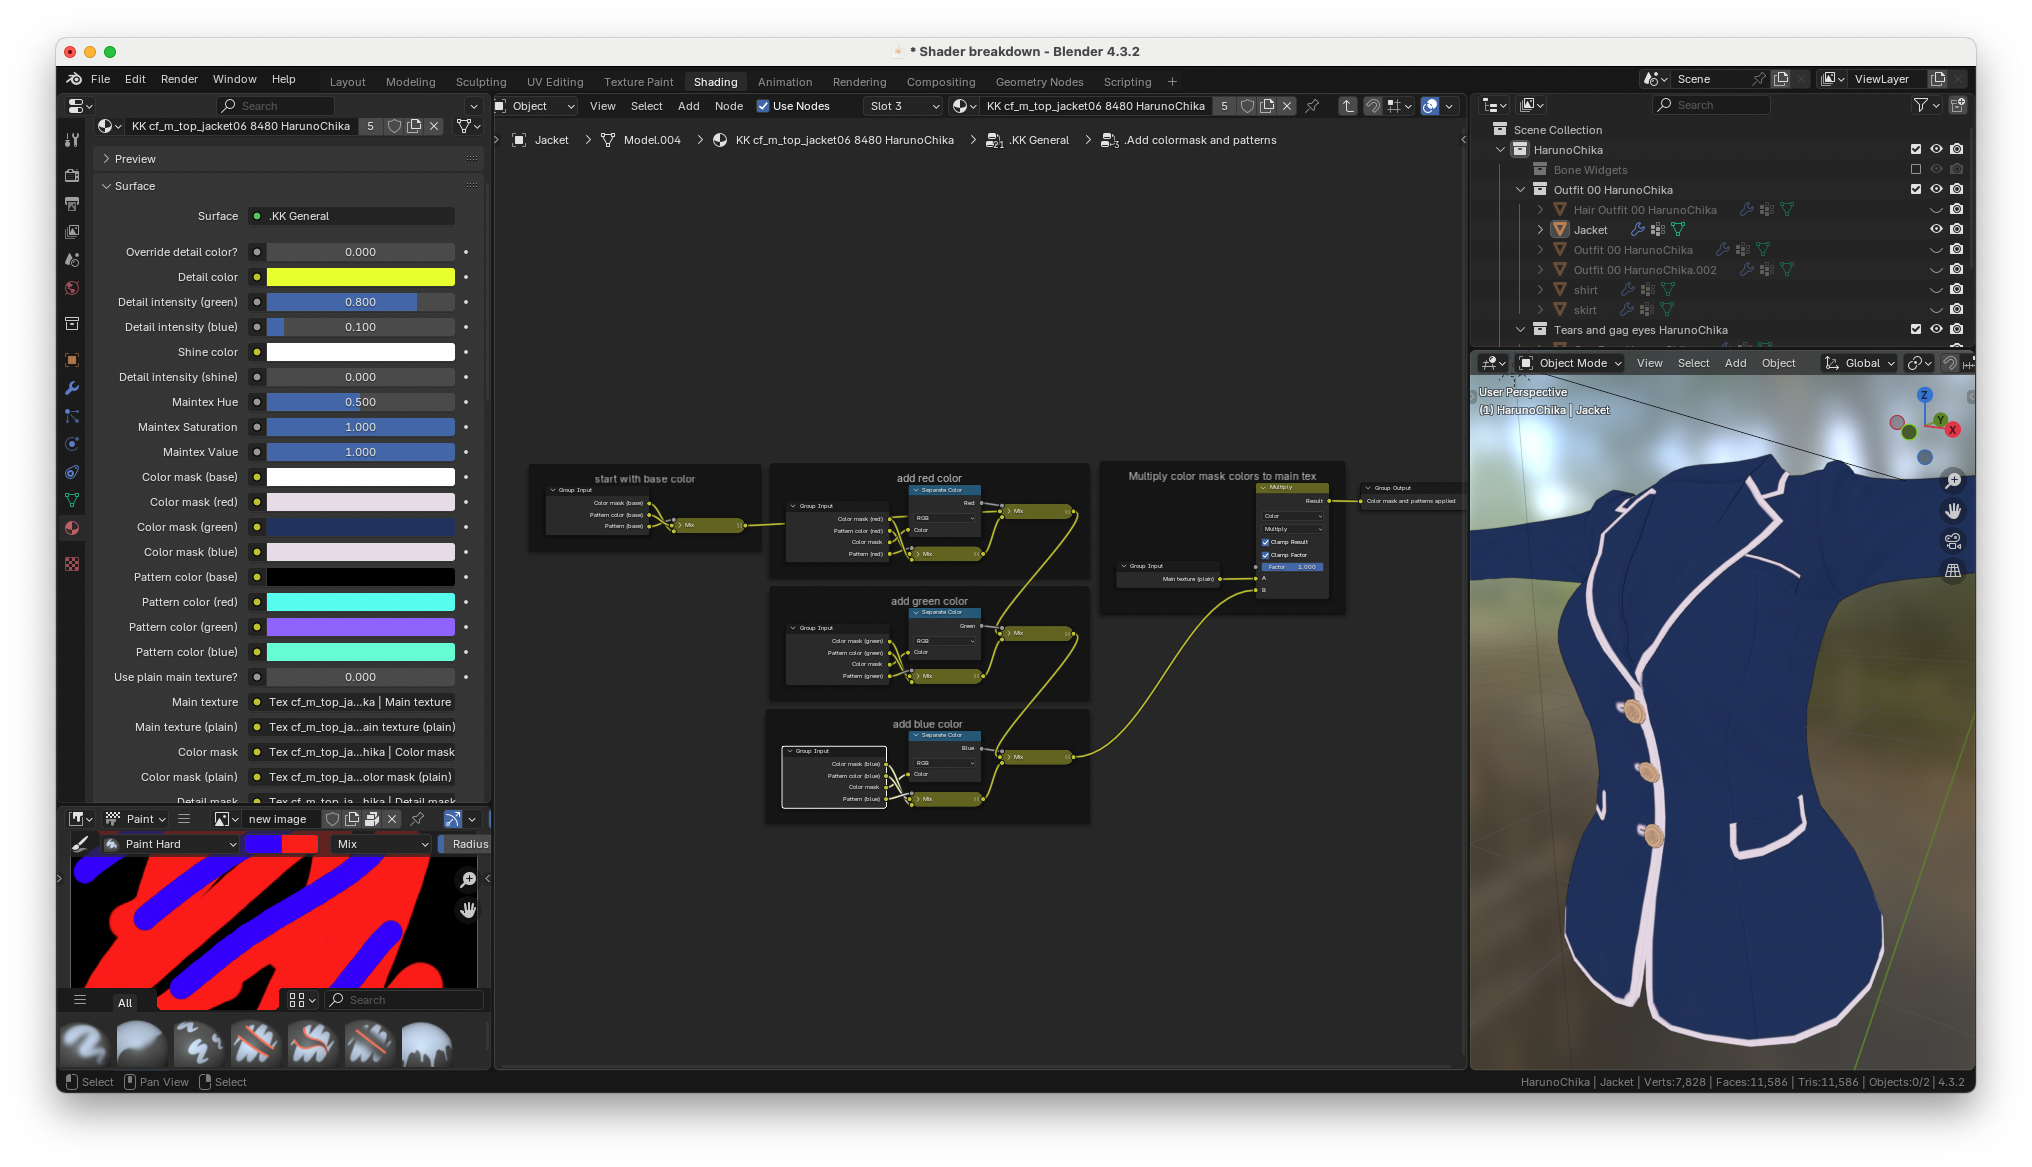
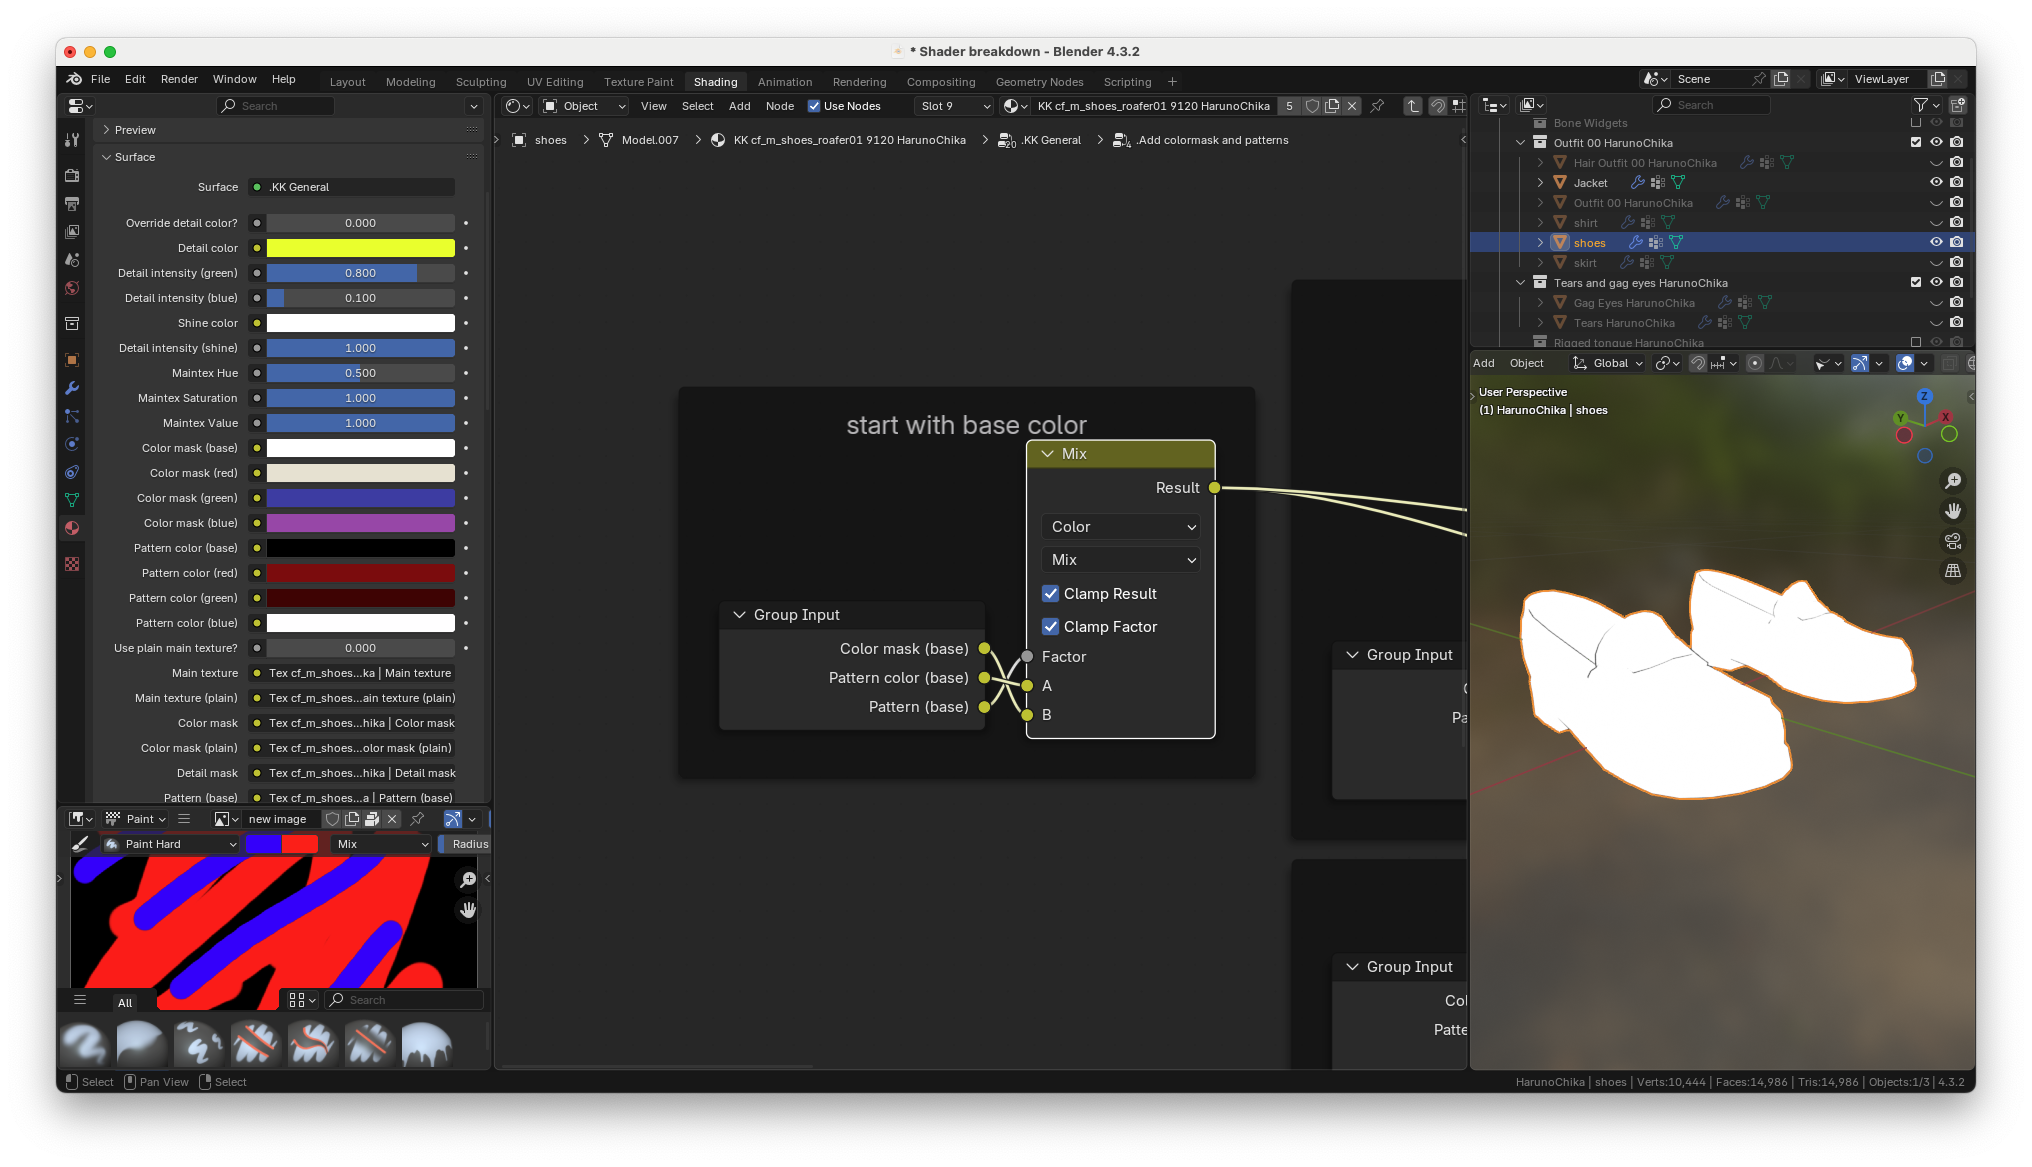
the group starts with the base color. The base color will always be pure
white, But you can change it if you want with the color mask base color
input in the material tab
next the red color from the color mask is placed. (make sure the plain
main texture slider is set to one or you won't see anything). if we get
a preview of the color mask, you can see where the red color is going to
go
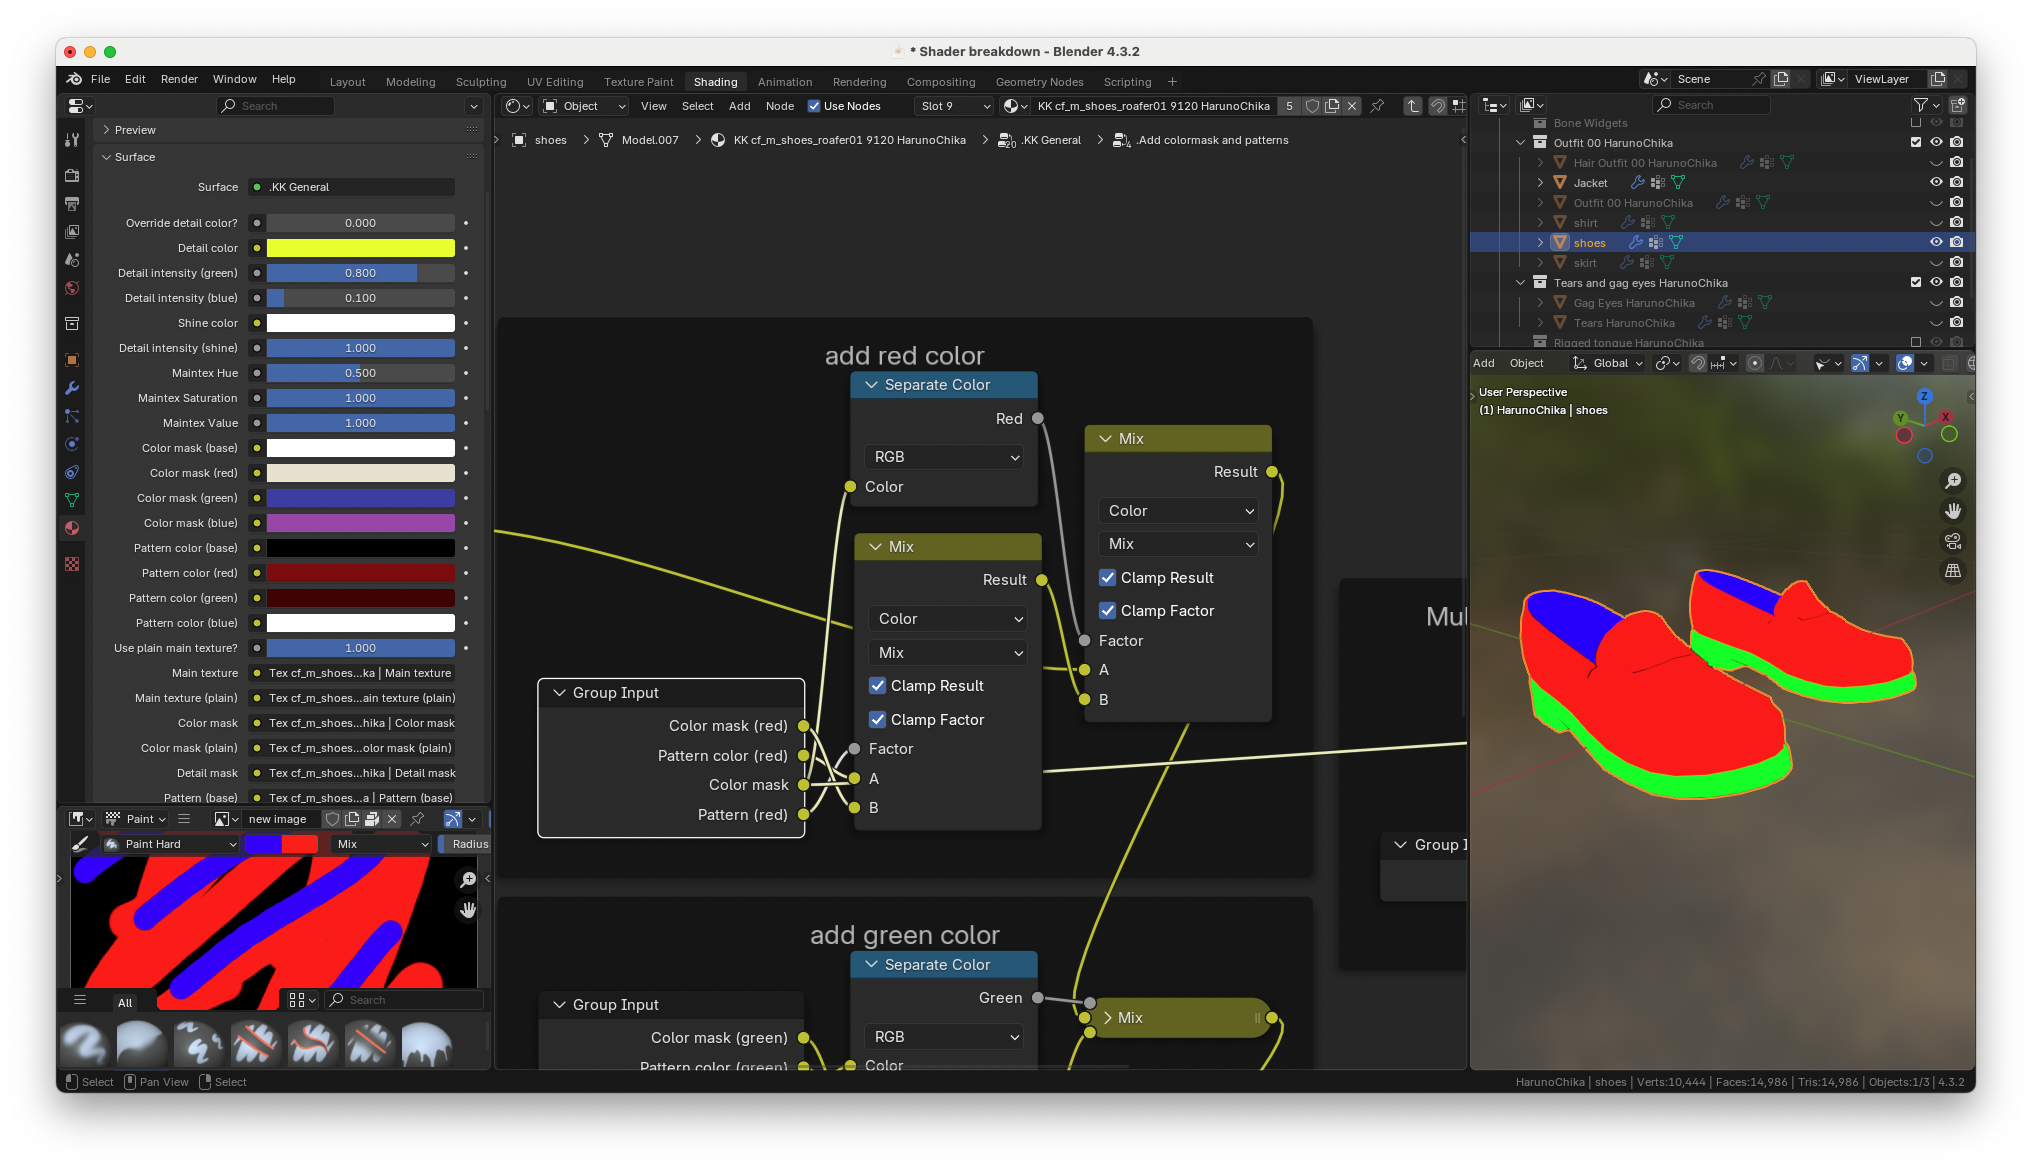
the red portion of the color mask is separated out with the "separate
color" node
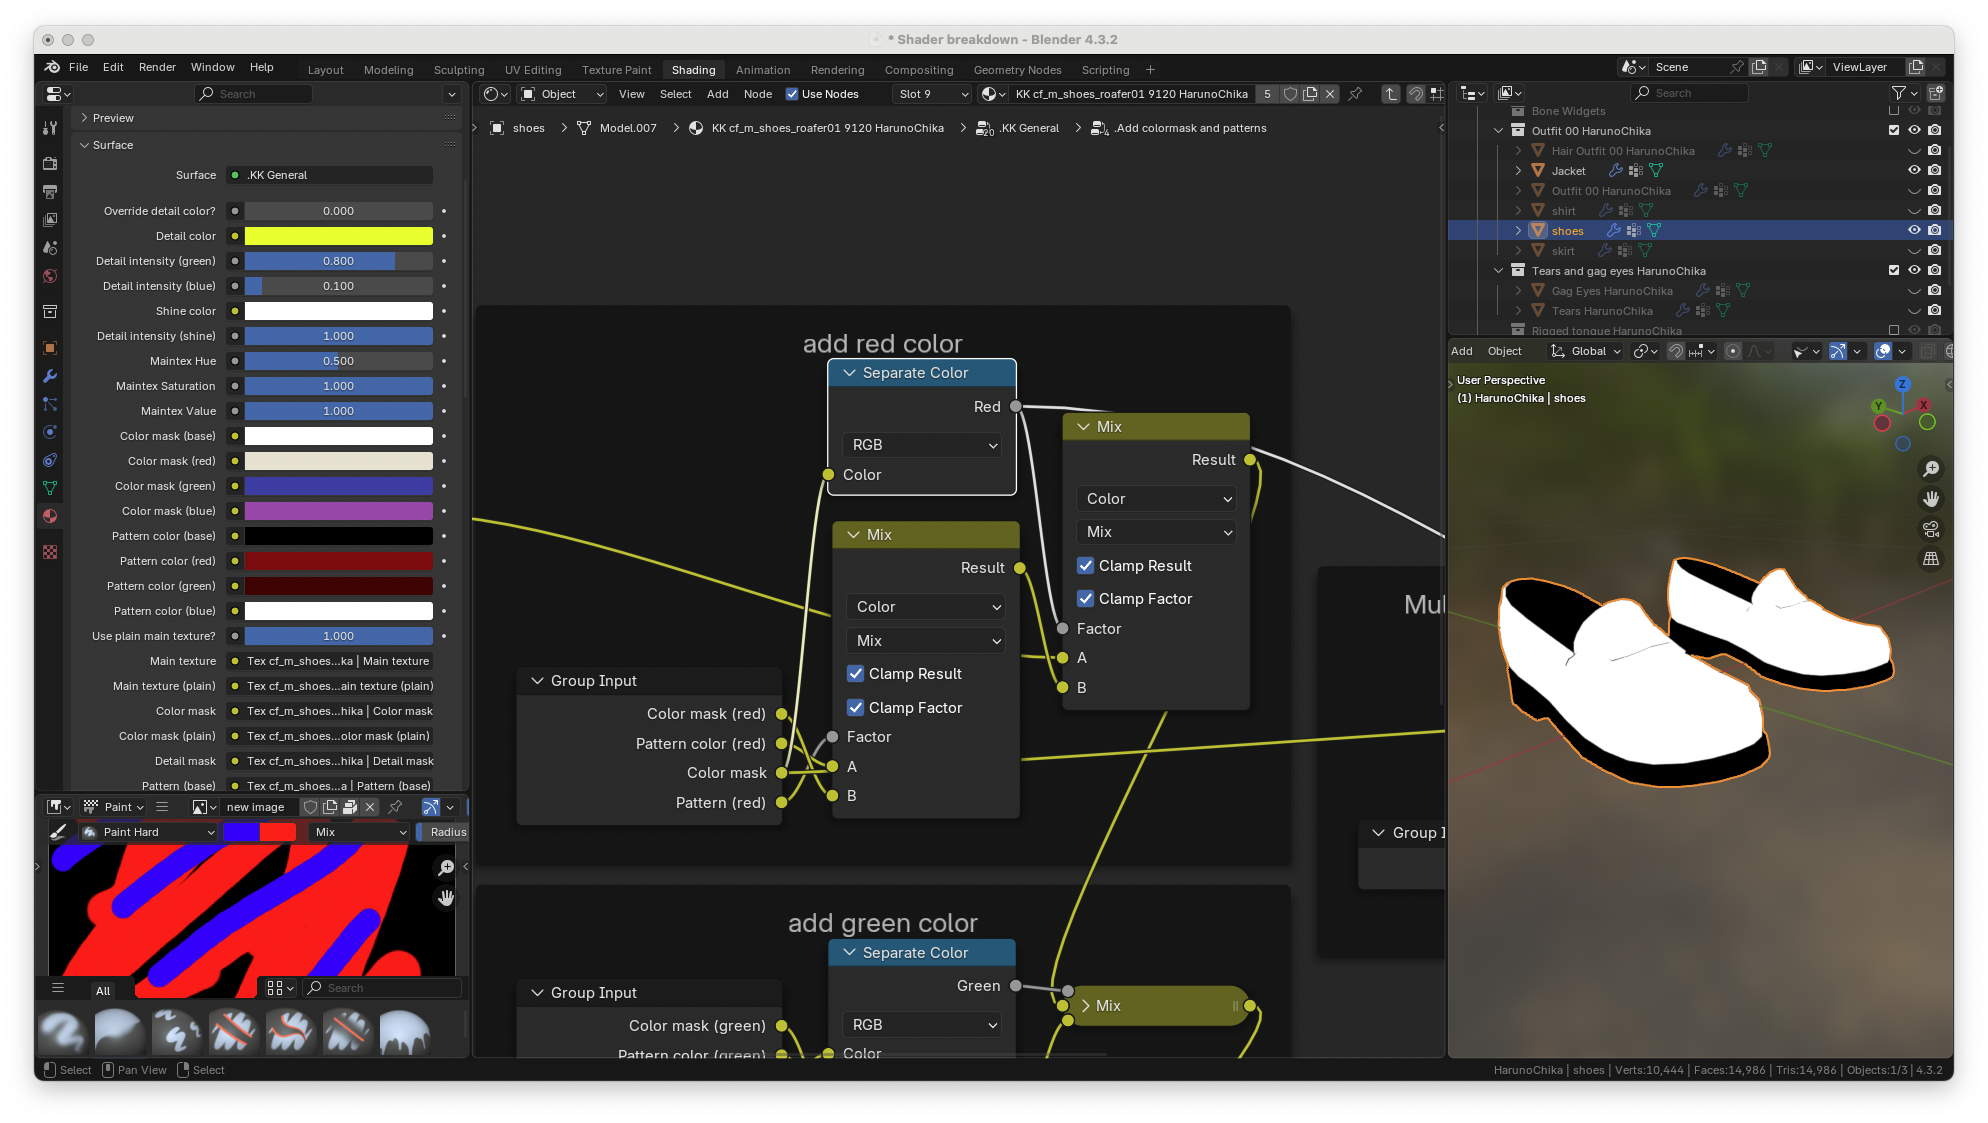
and the red color is applied to the white masked out portion going into
the factor input of the mix node
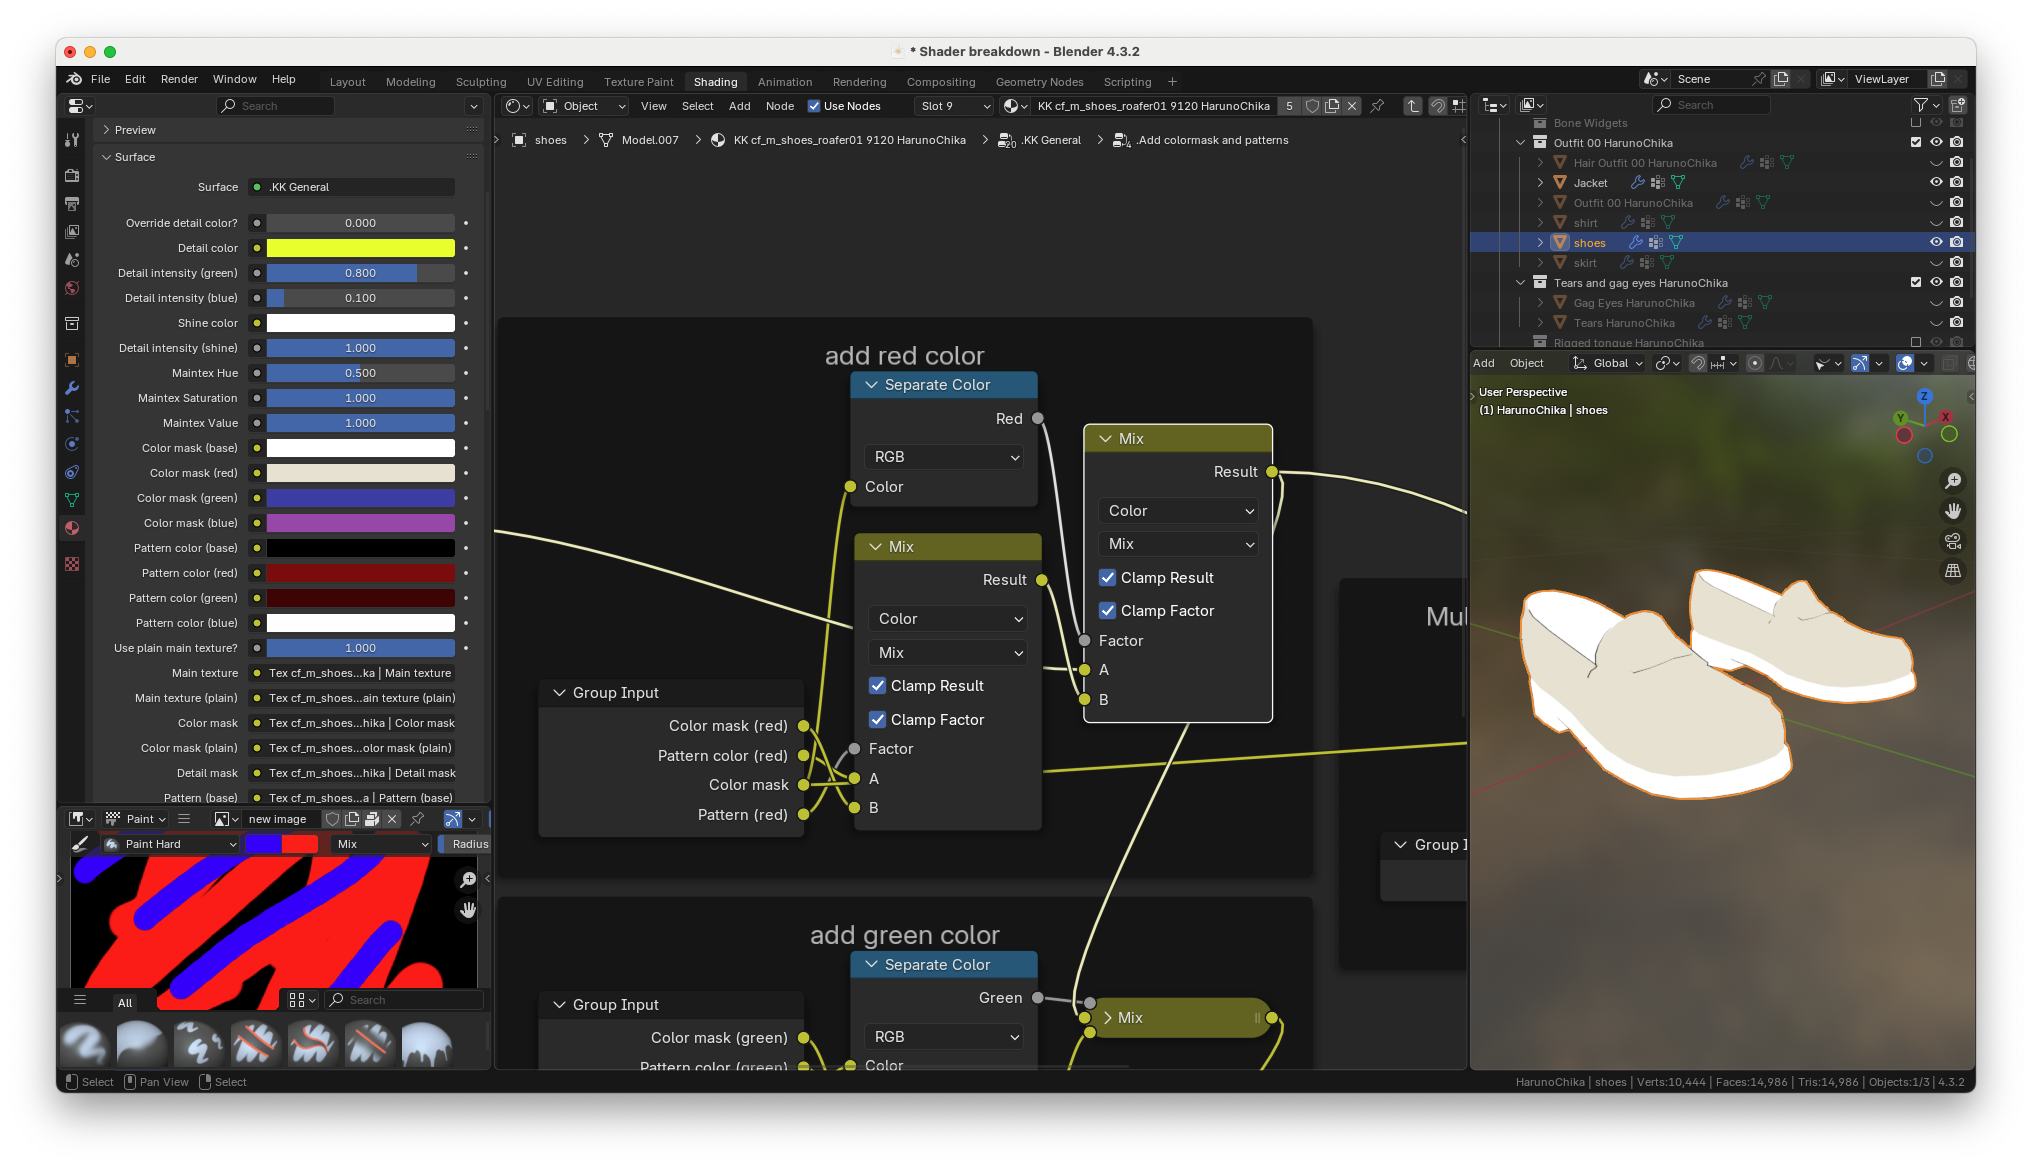
the same thing happens with the green channel of the color mask
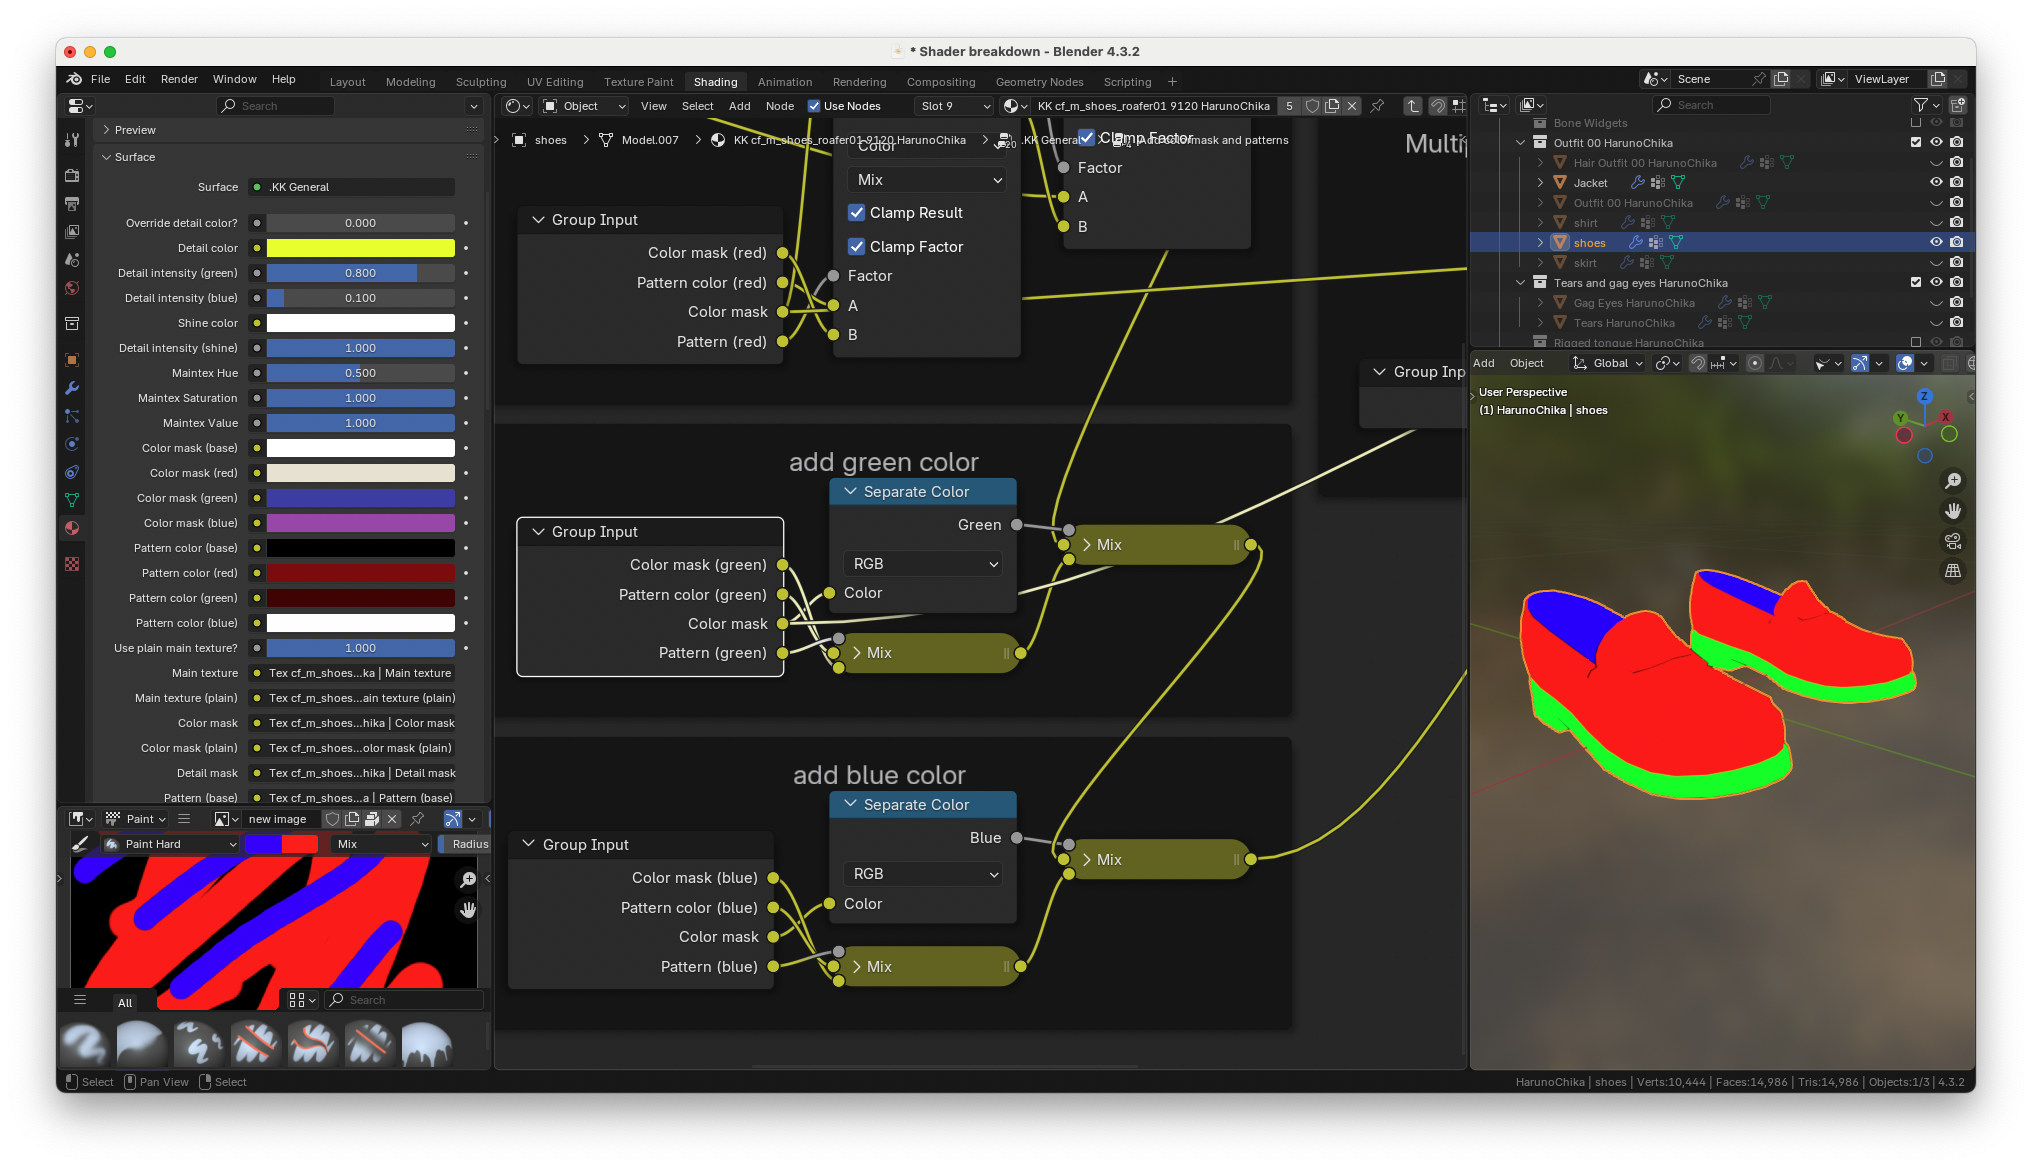
the green channel is singled out
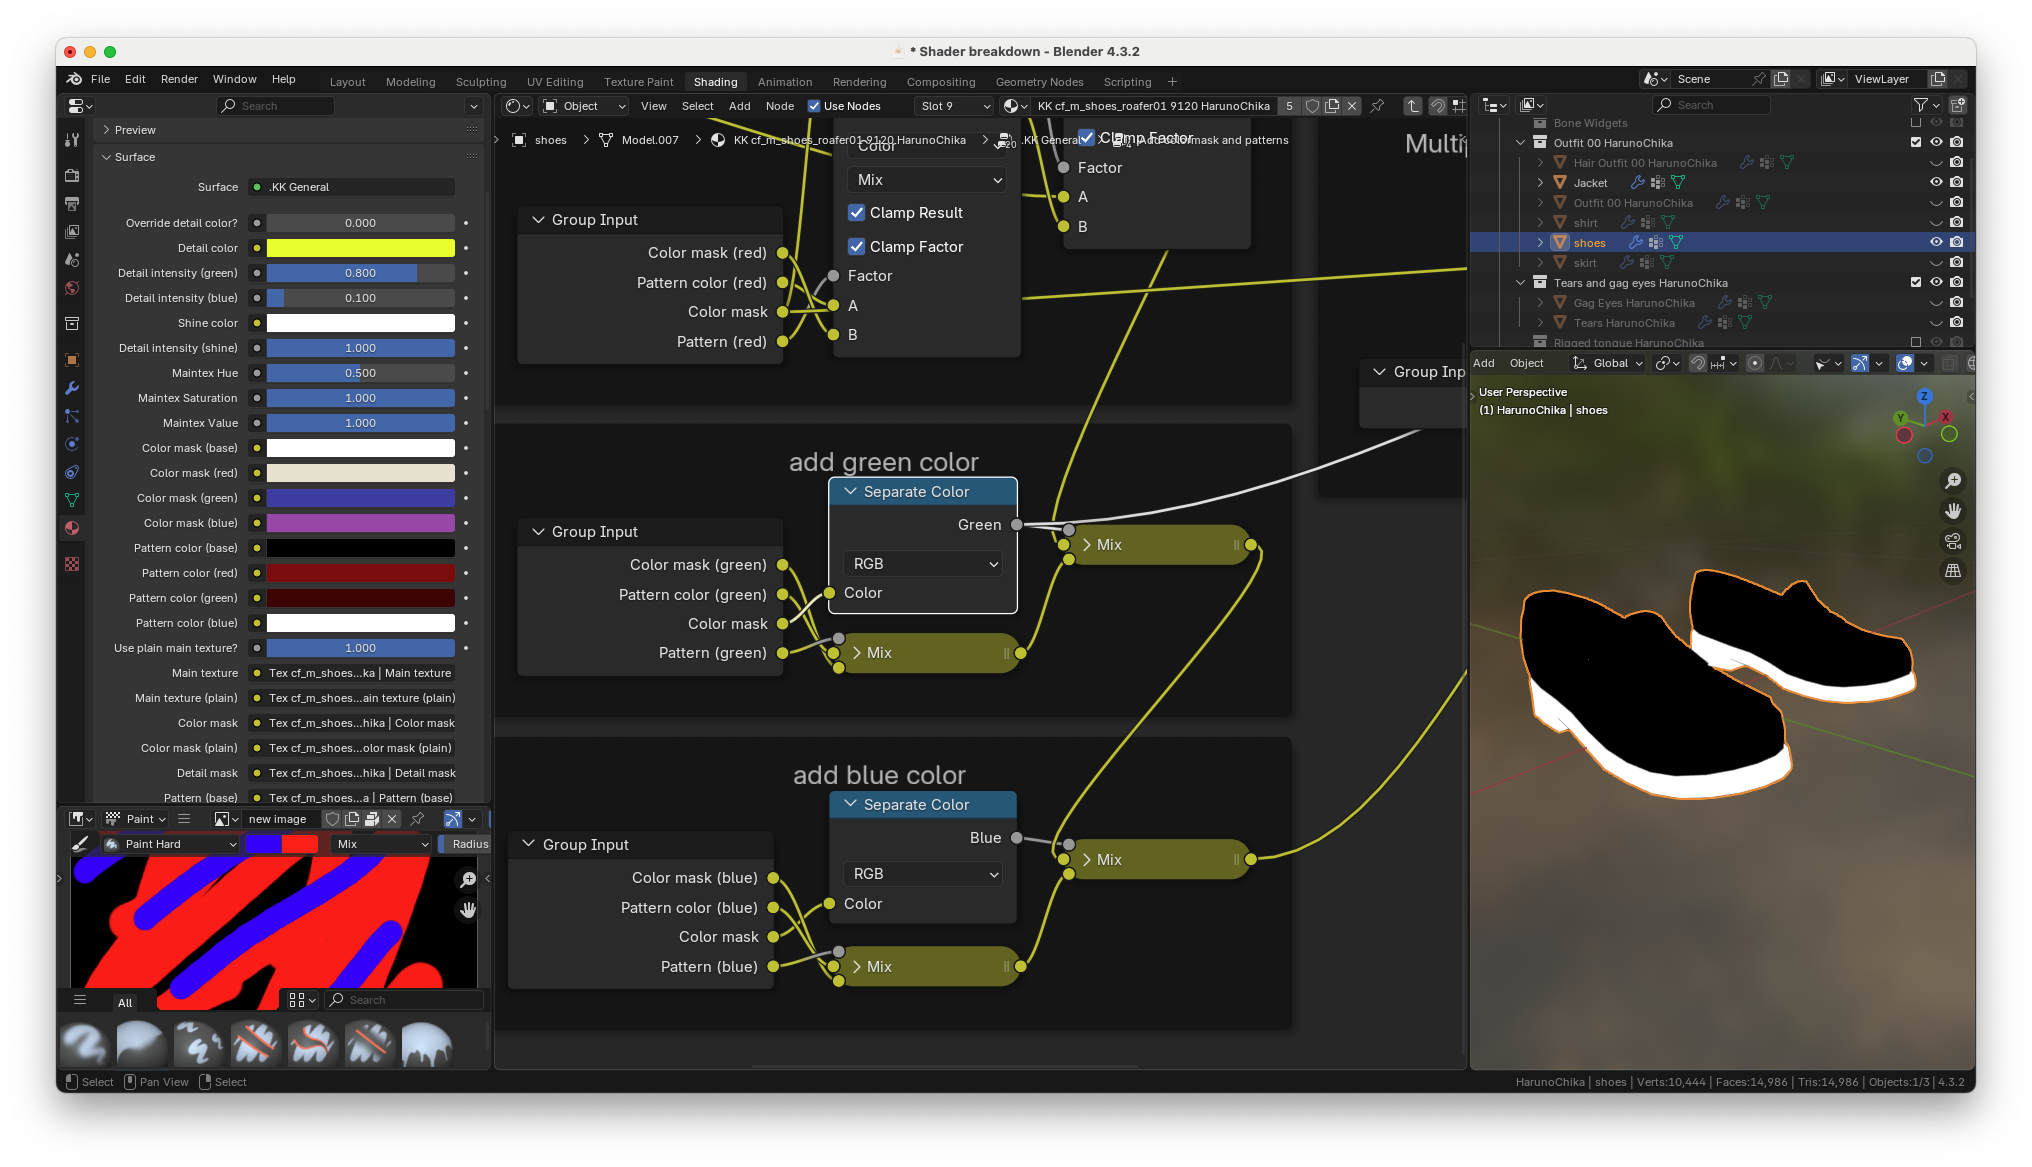
and the green color is applied to that white area
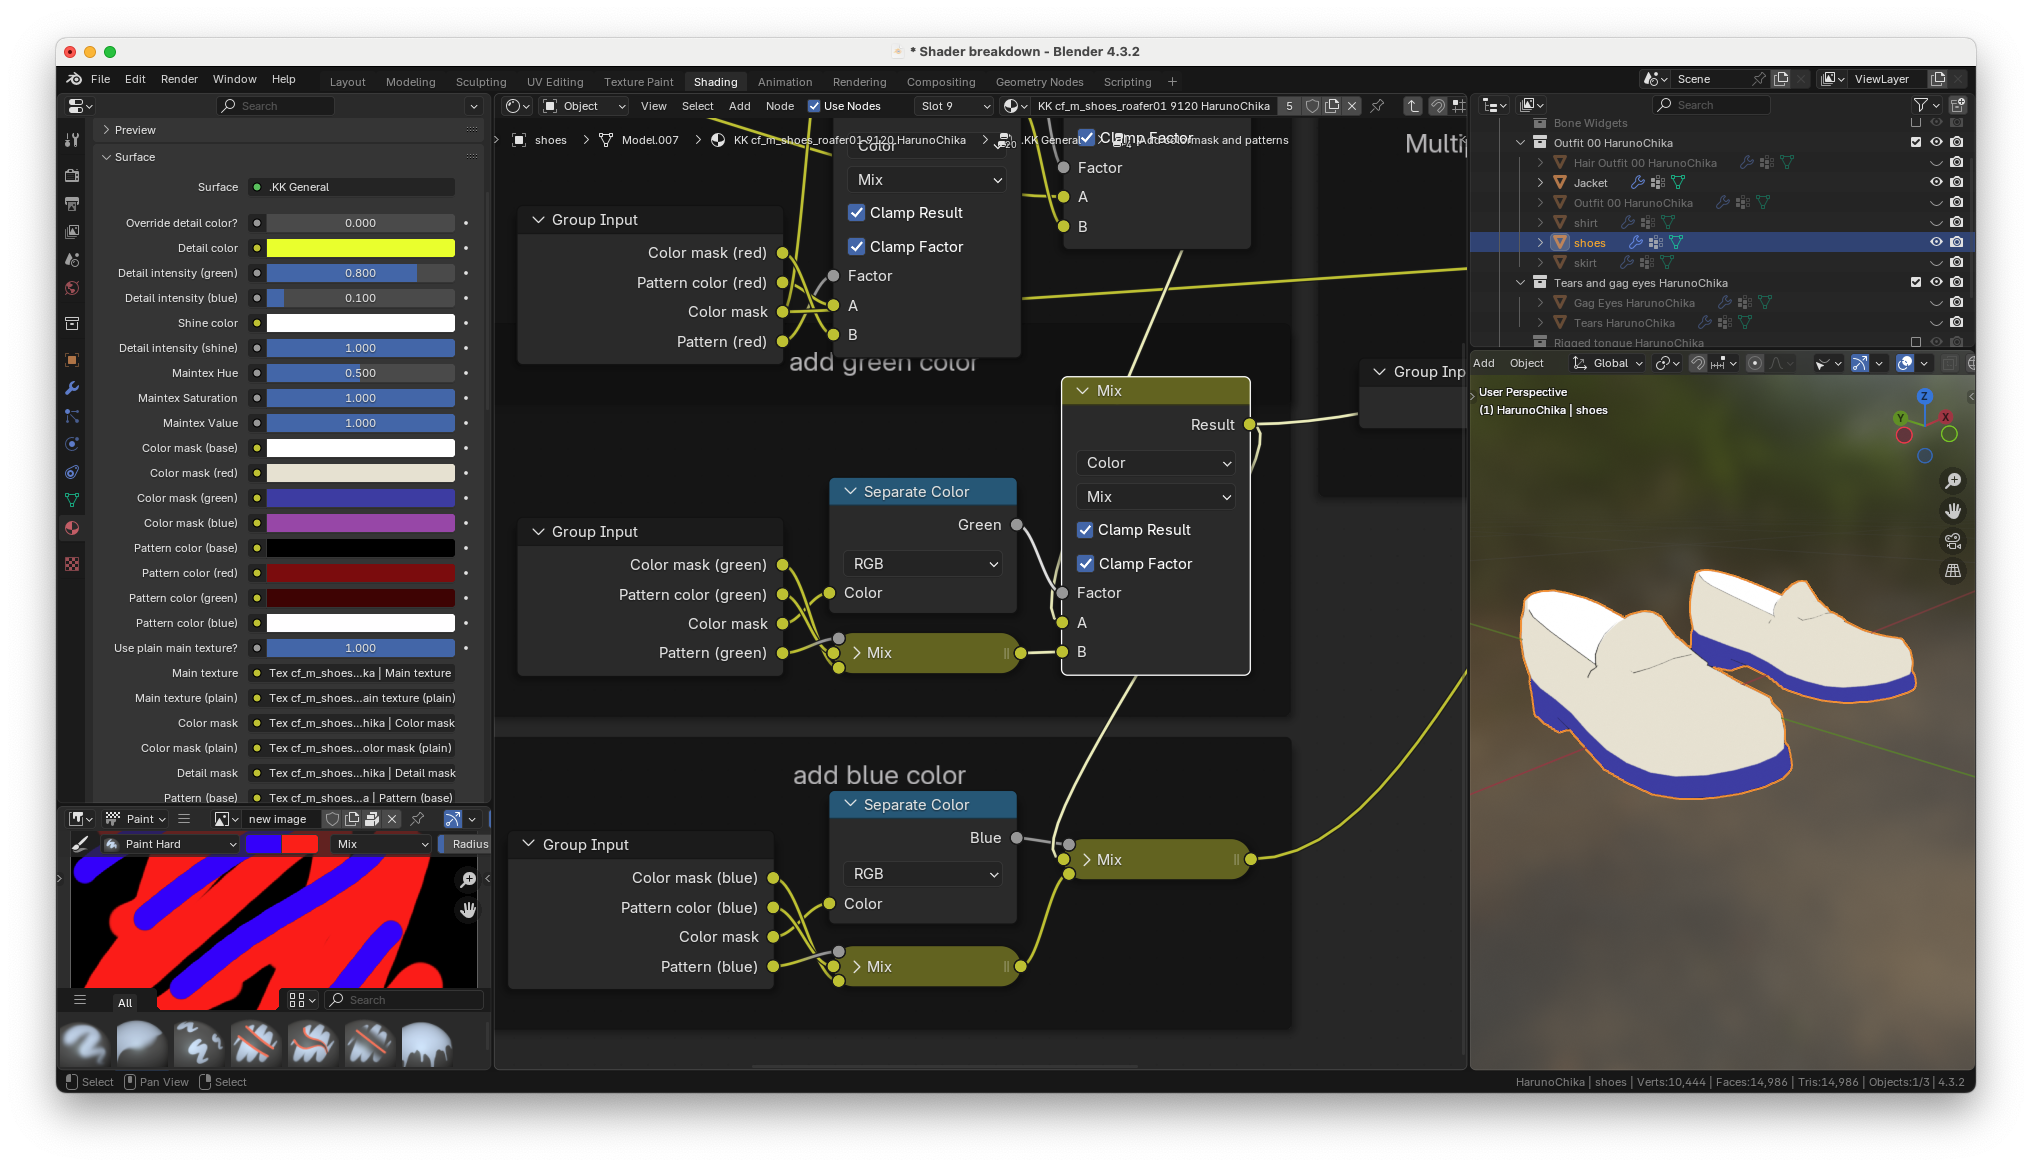
same with the blue channel
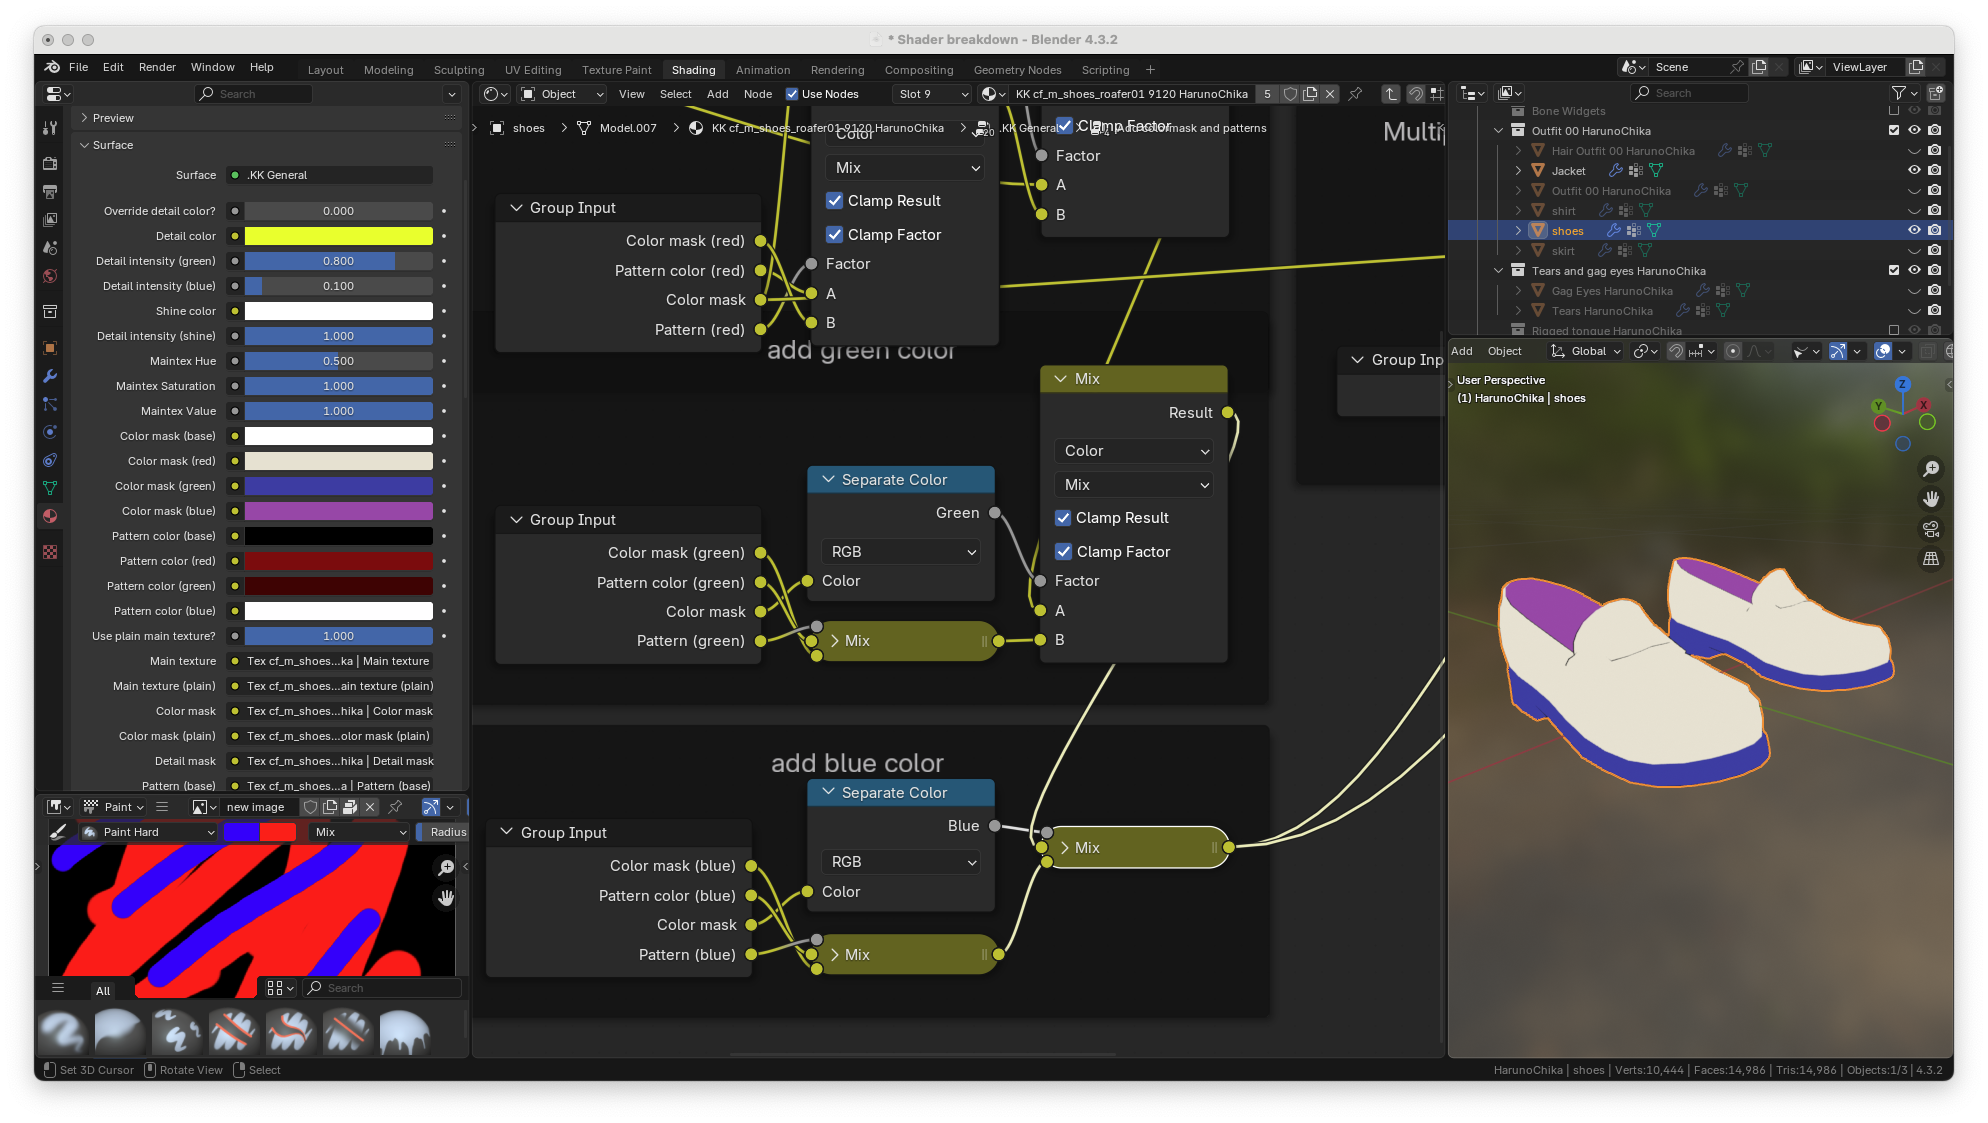
and finally the plain main texture is multiplied by those colors. recall this is what the plain main texture looks like
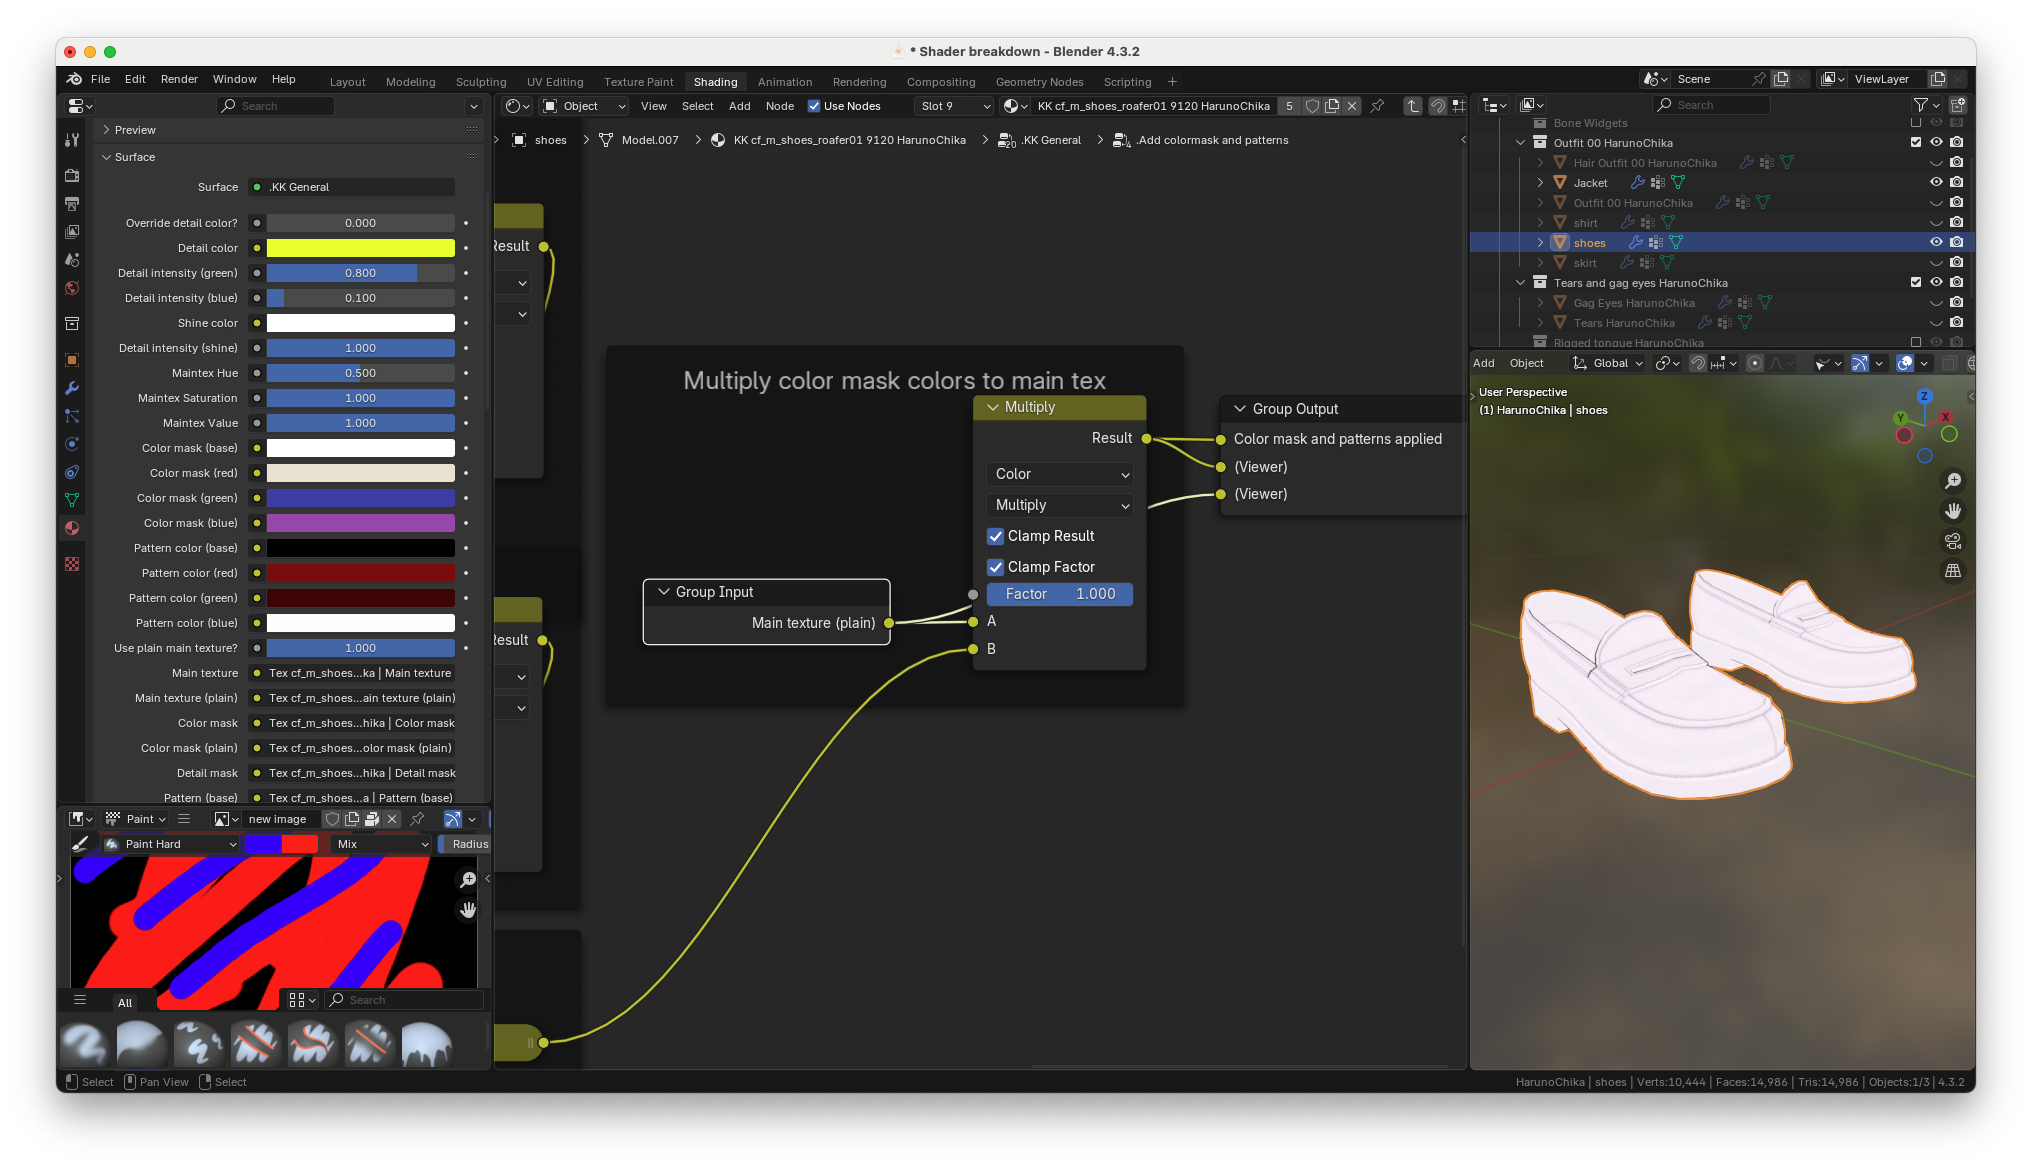
Once they are multipled, you get the resulting image
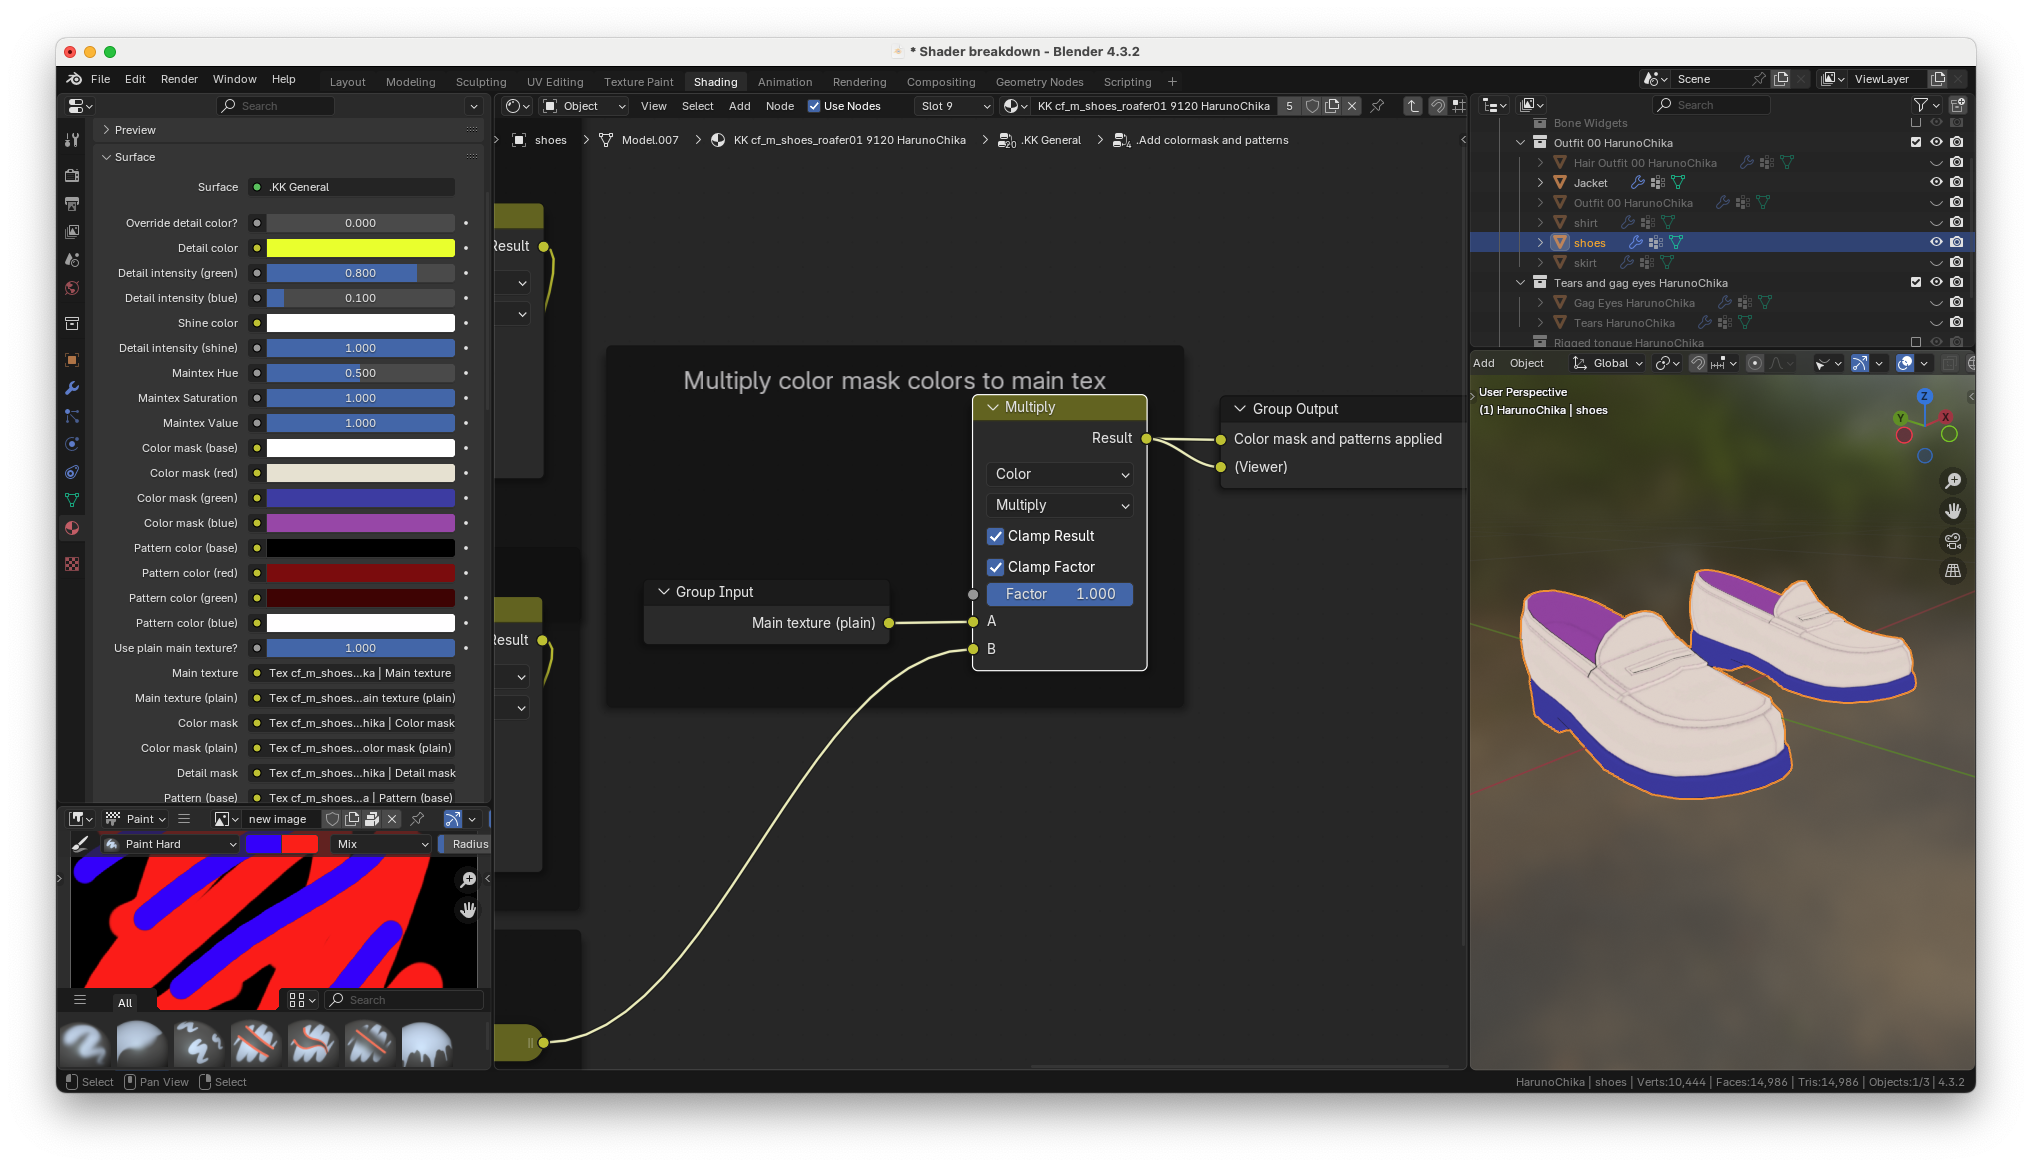
if we take a step back and see what the B input of the multiply node
looks like when the plain main texture slider is set to zero, we can see
that it's pure white.
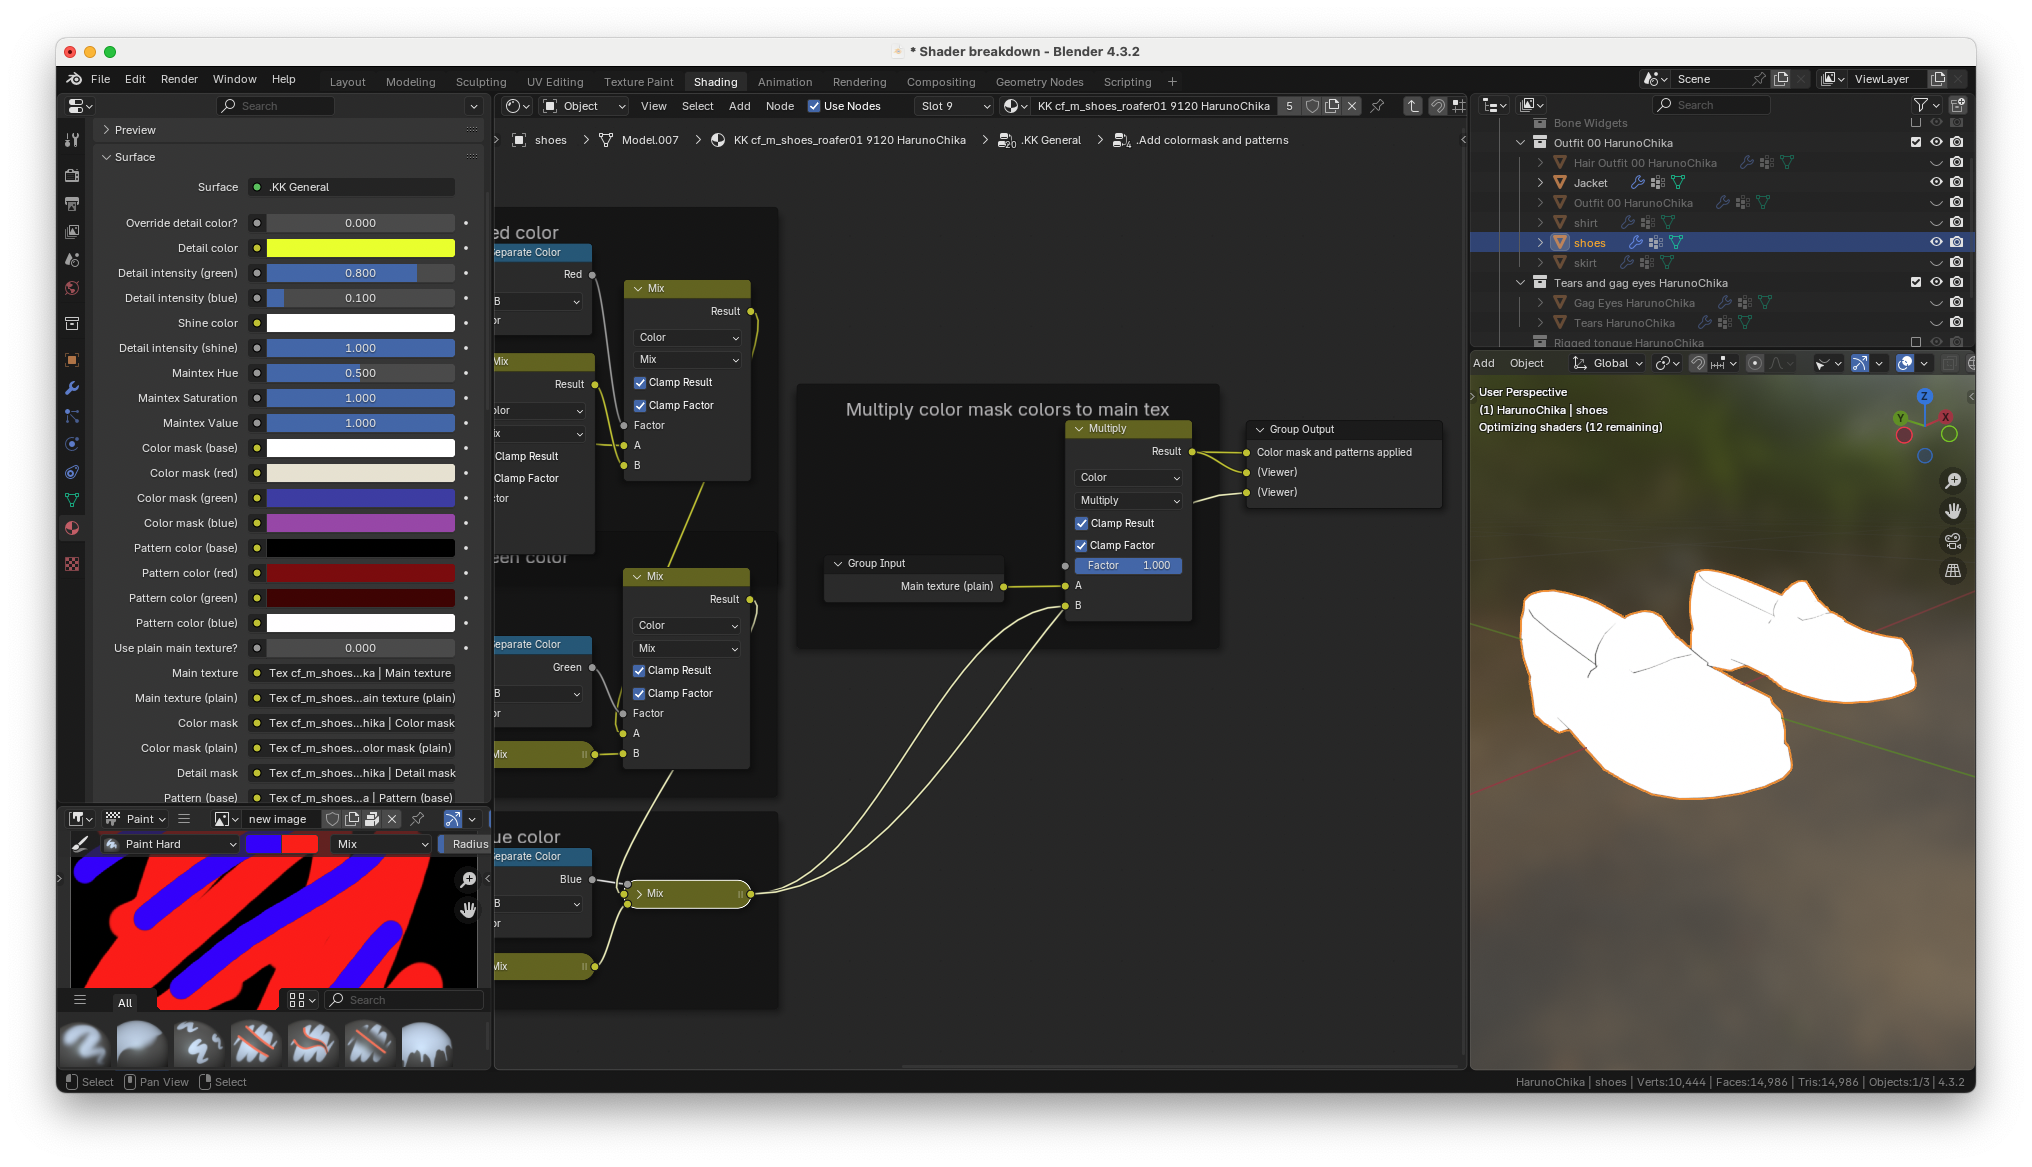
Recall that this color mask is pure black so nothing shows up at the
separate color mode output. A black section in the color mask basically means "do not put any color here, just keep it white".
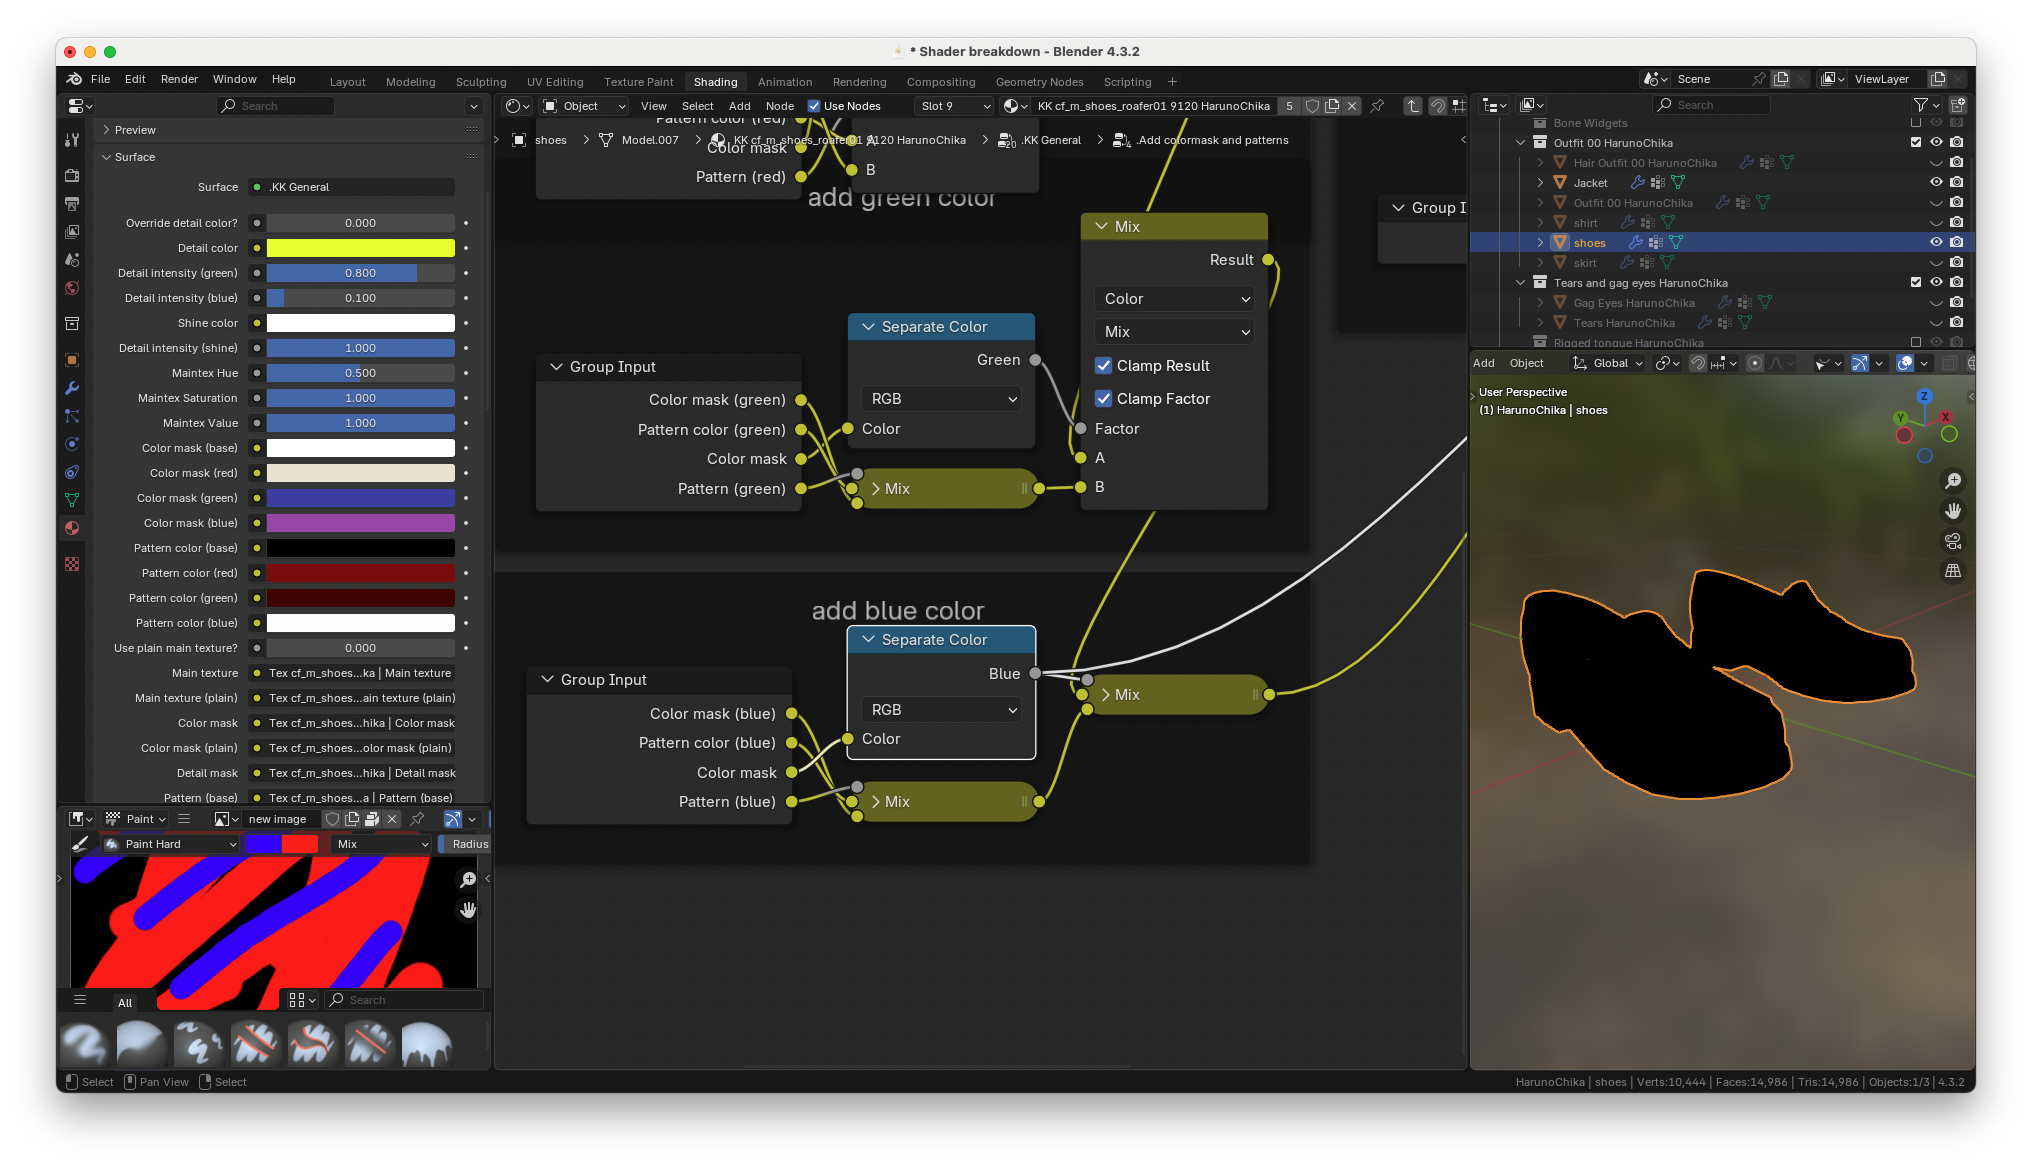
so when the slider is disabled and the color mask is black, the colored main texture is multiplied
by pure white. Here's what the A input of the multiplying node looks
like.
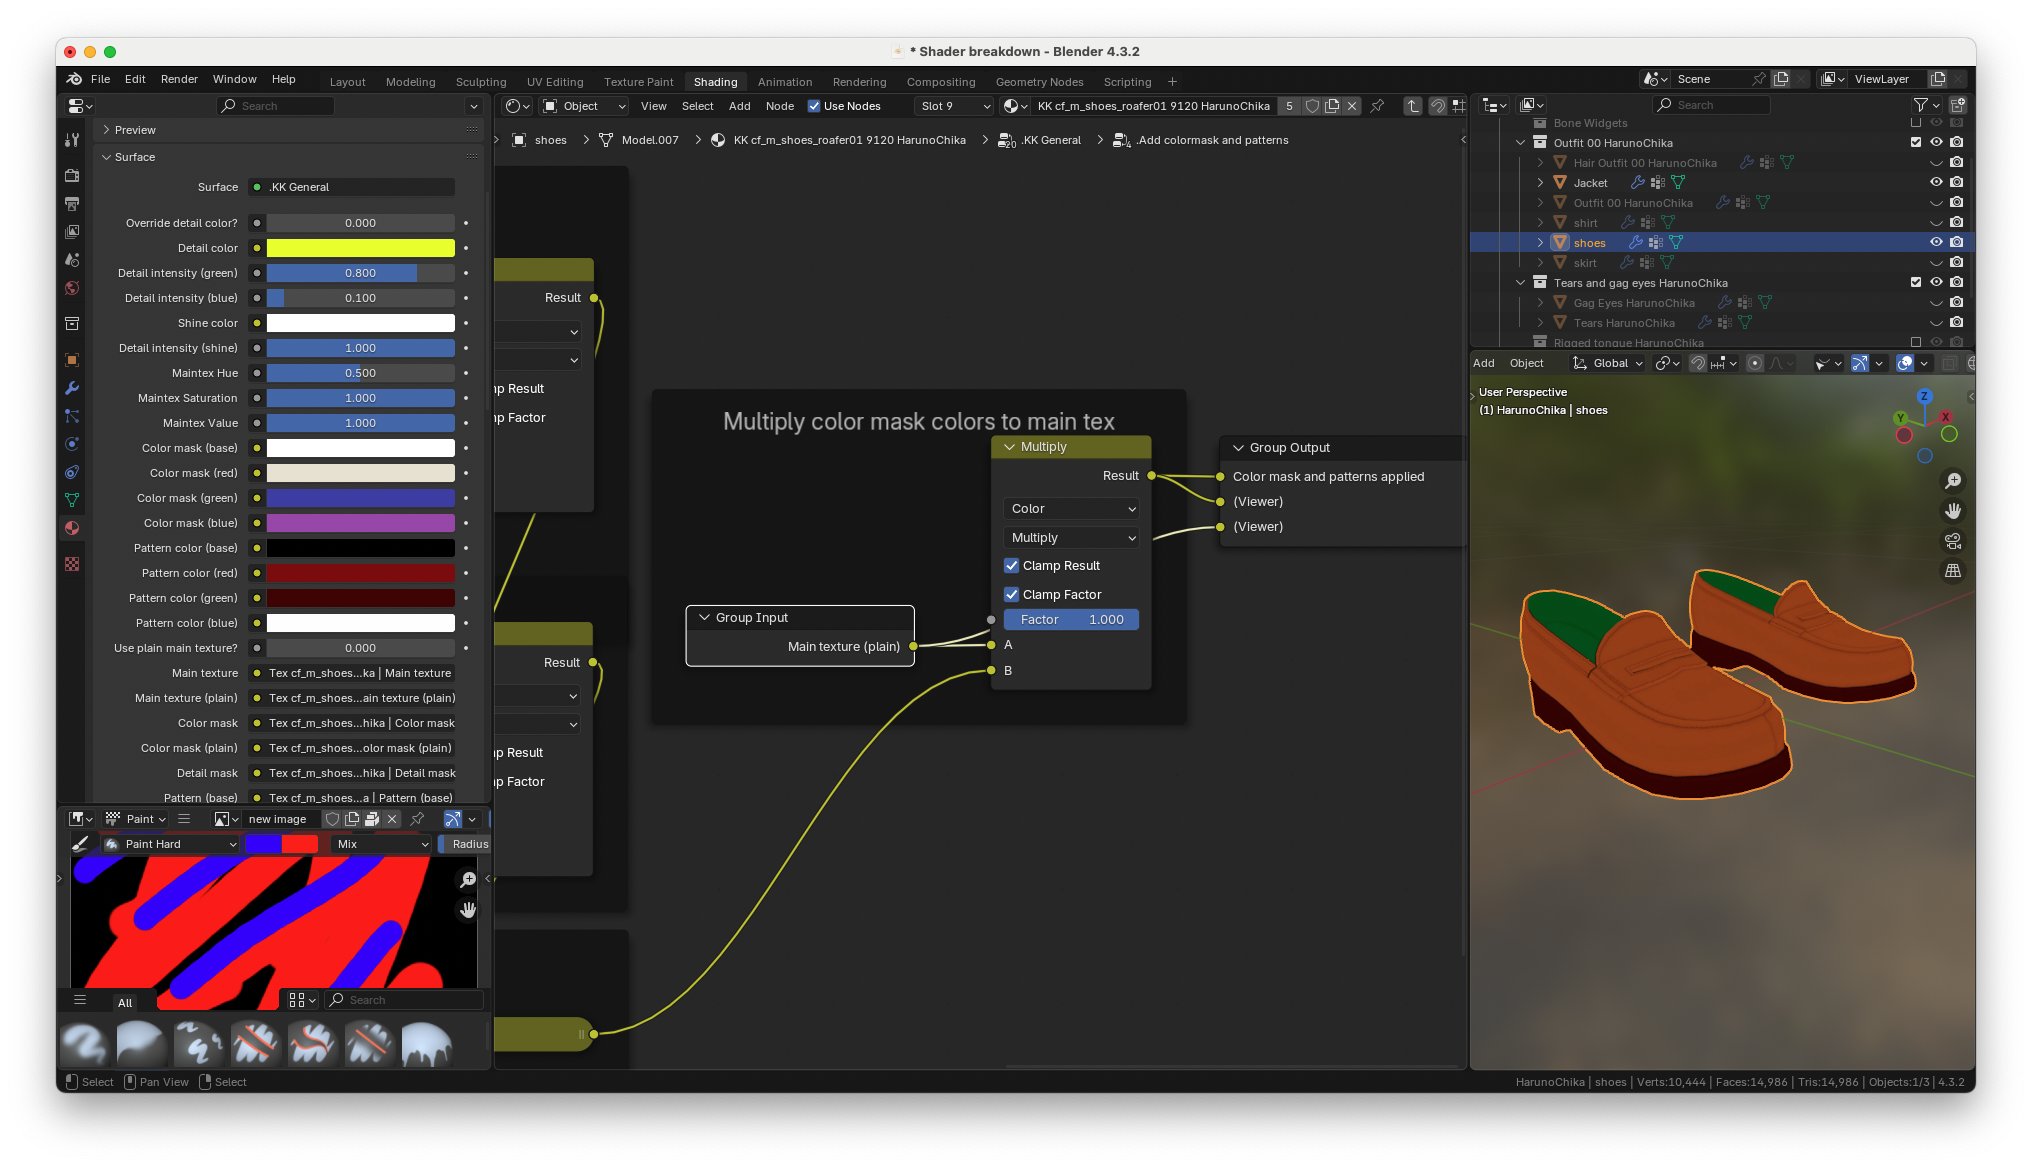
and here's what the result looks like. (exactly the same)
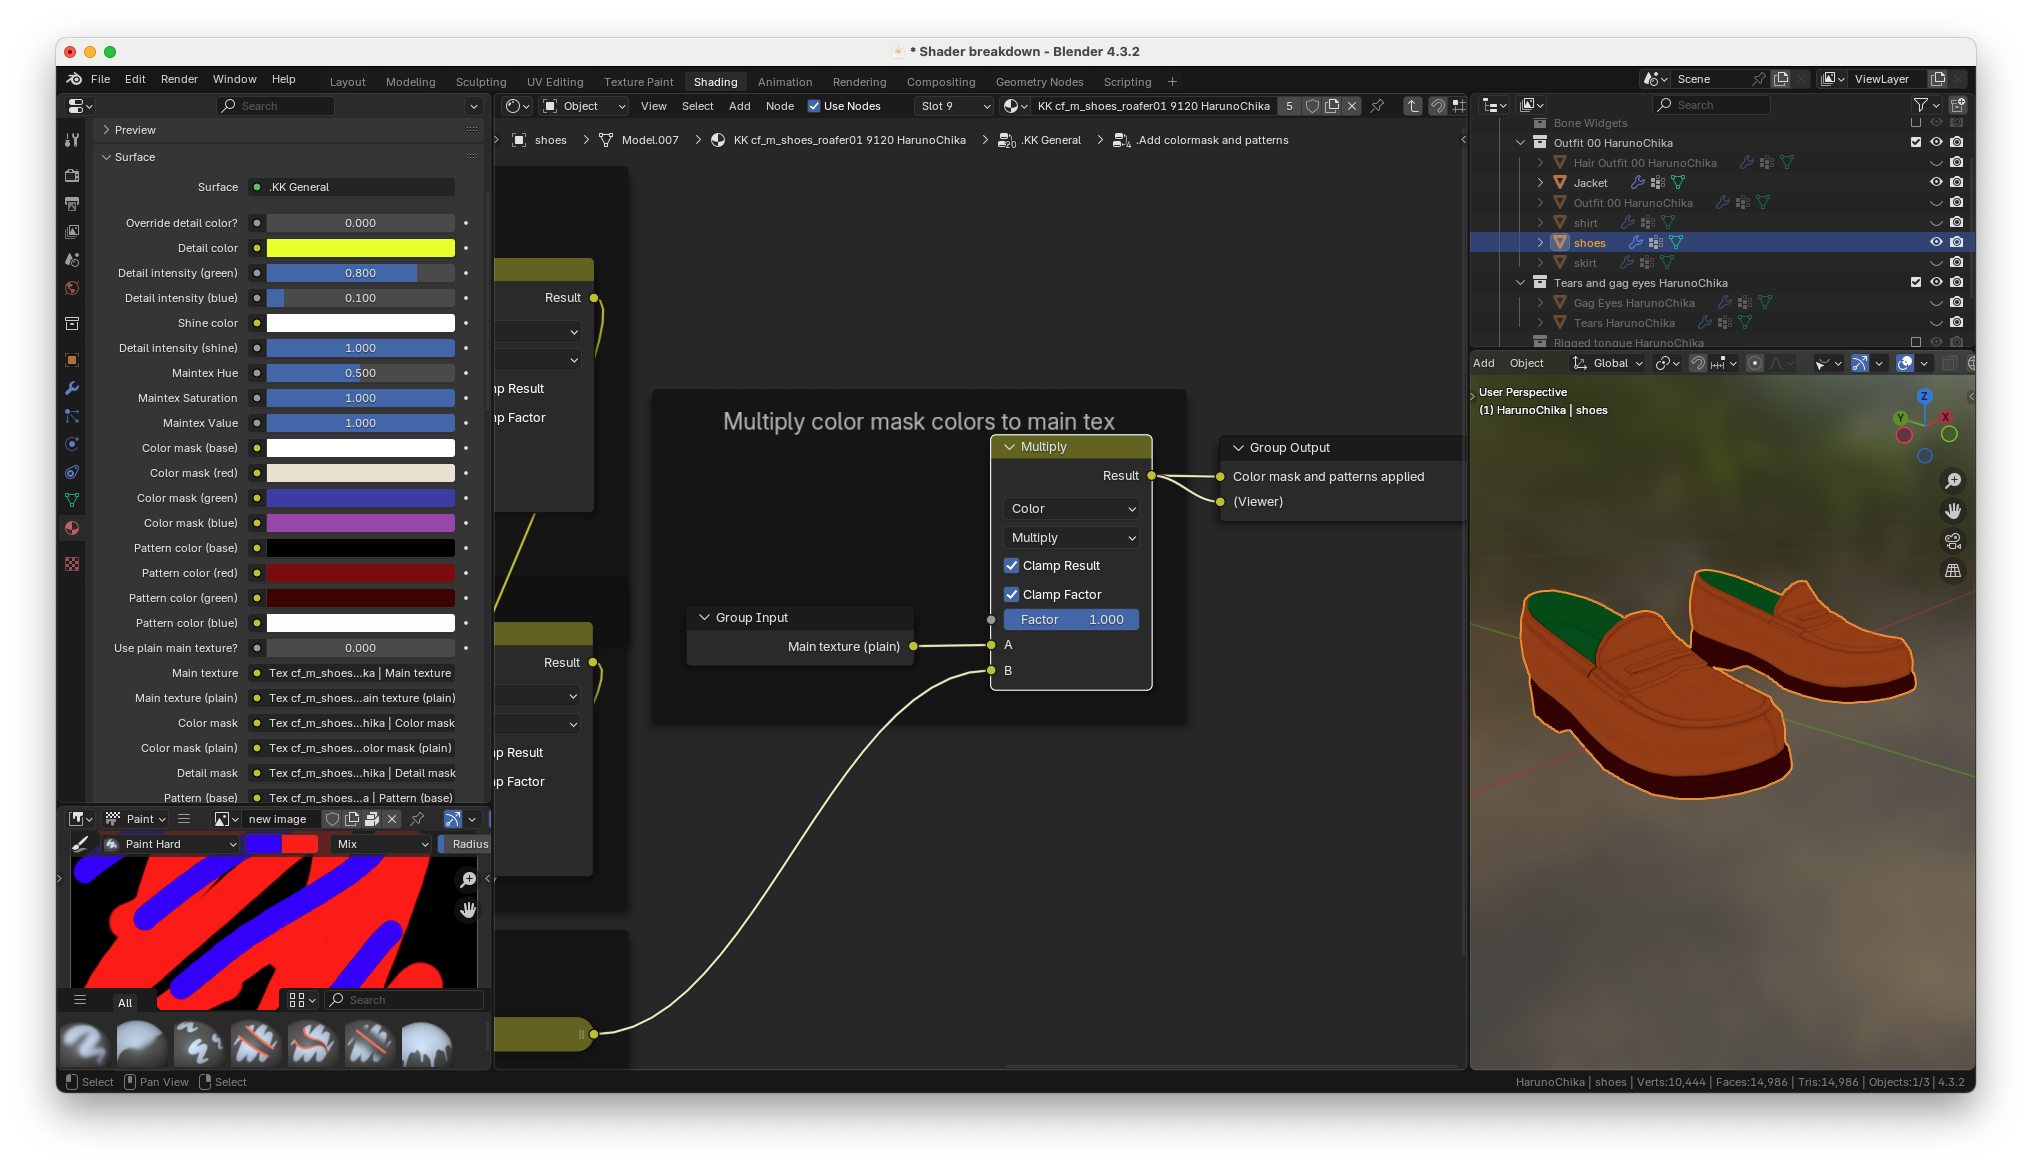
and if we take a step back one more time we can see how patterns work.
When a pattern is loaded into a pattern slot in the textures group, The
colors in the color mask (red) color input, and the pattern color (red)
color input will be applied to the white and black portions of the
pattern respectively, with this mix node
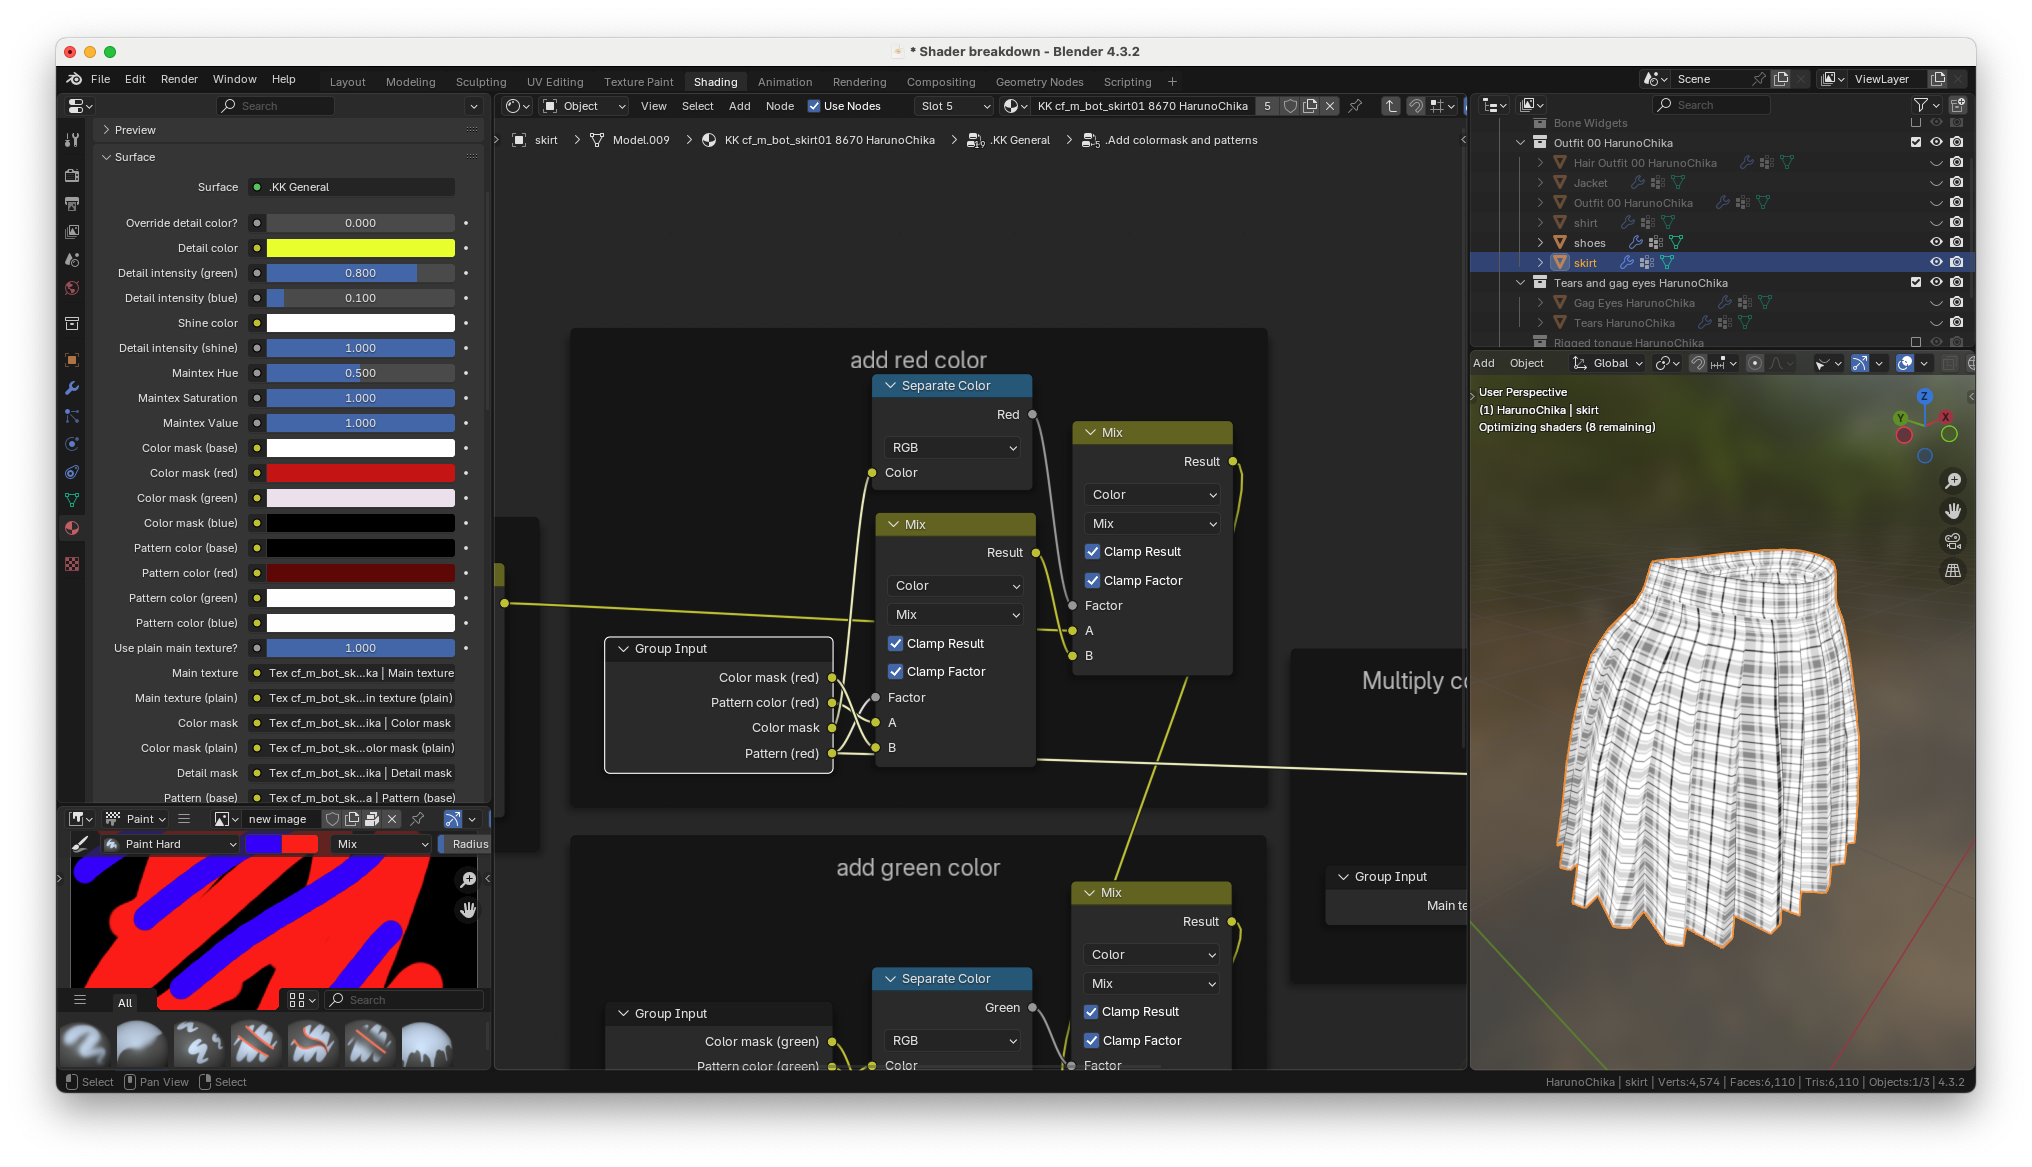
the black-and-white pattern goes into the factor input of the mix
node, So where the pattern is black the A input will be used which is
the darker color, And where the pattern is white is where the B input
will be used, which is the regular color mask color
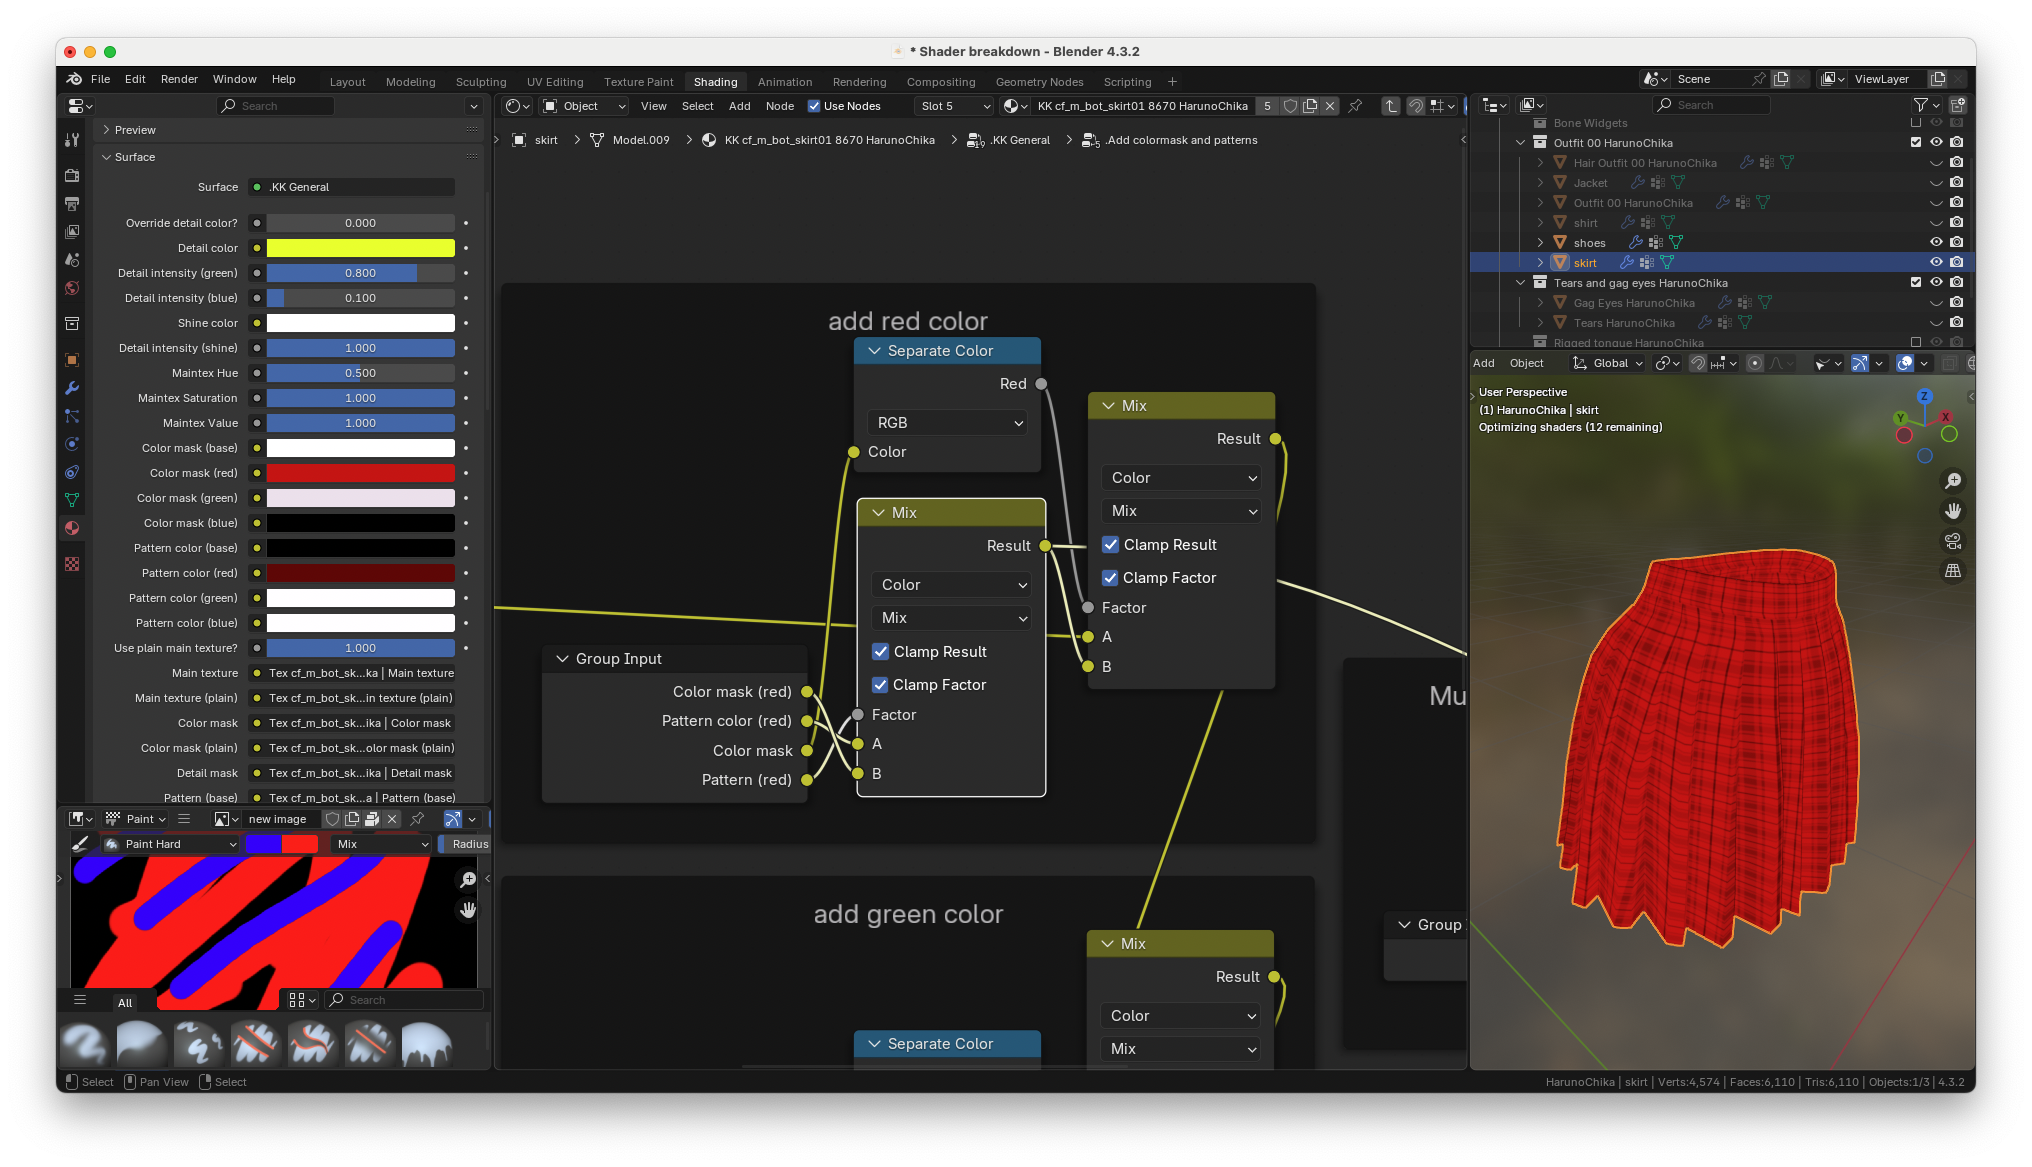
So to summarize the color mask behavior one more time...
* Black = Do not add any color to the main texture, keep it the way it is
* Red = Multiply the main texture by the red color mask color here
* Green = Multiply the main texture by the green color mask color here
* Blue = Multiply the main texture by the blue color mask color here
* Any overlaps in the color mask = Blue overrides green, green overrides red
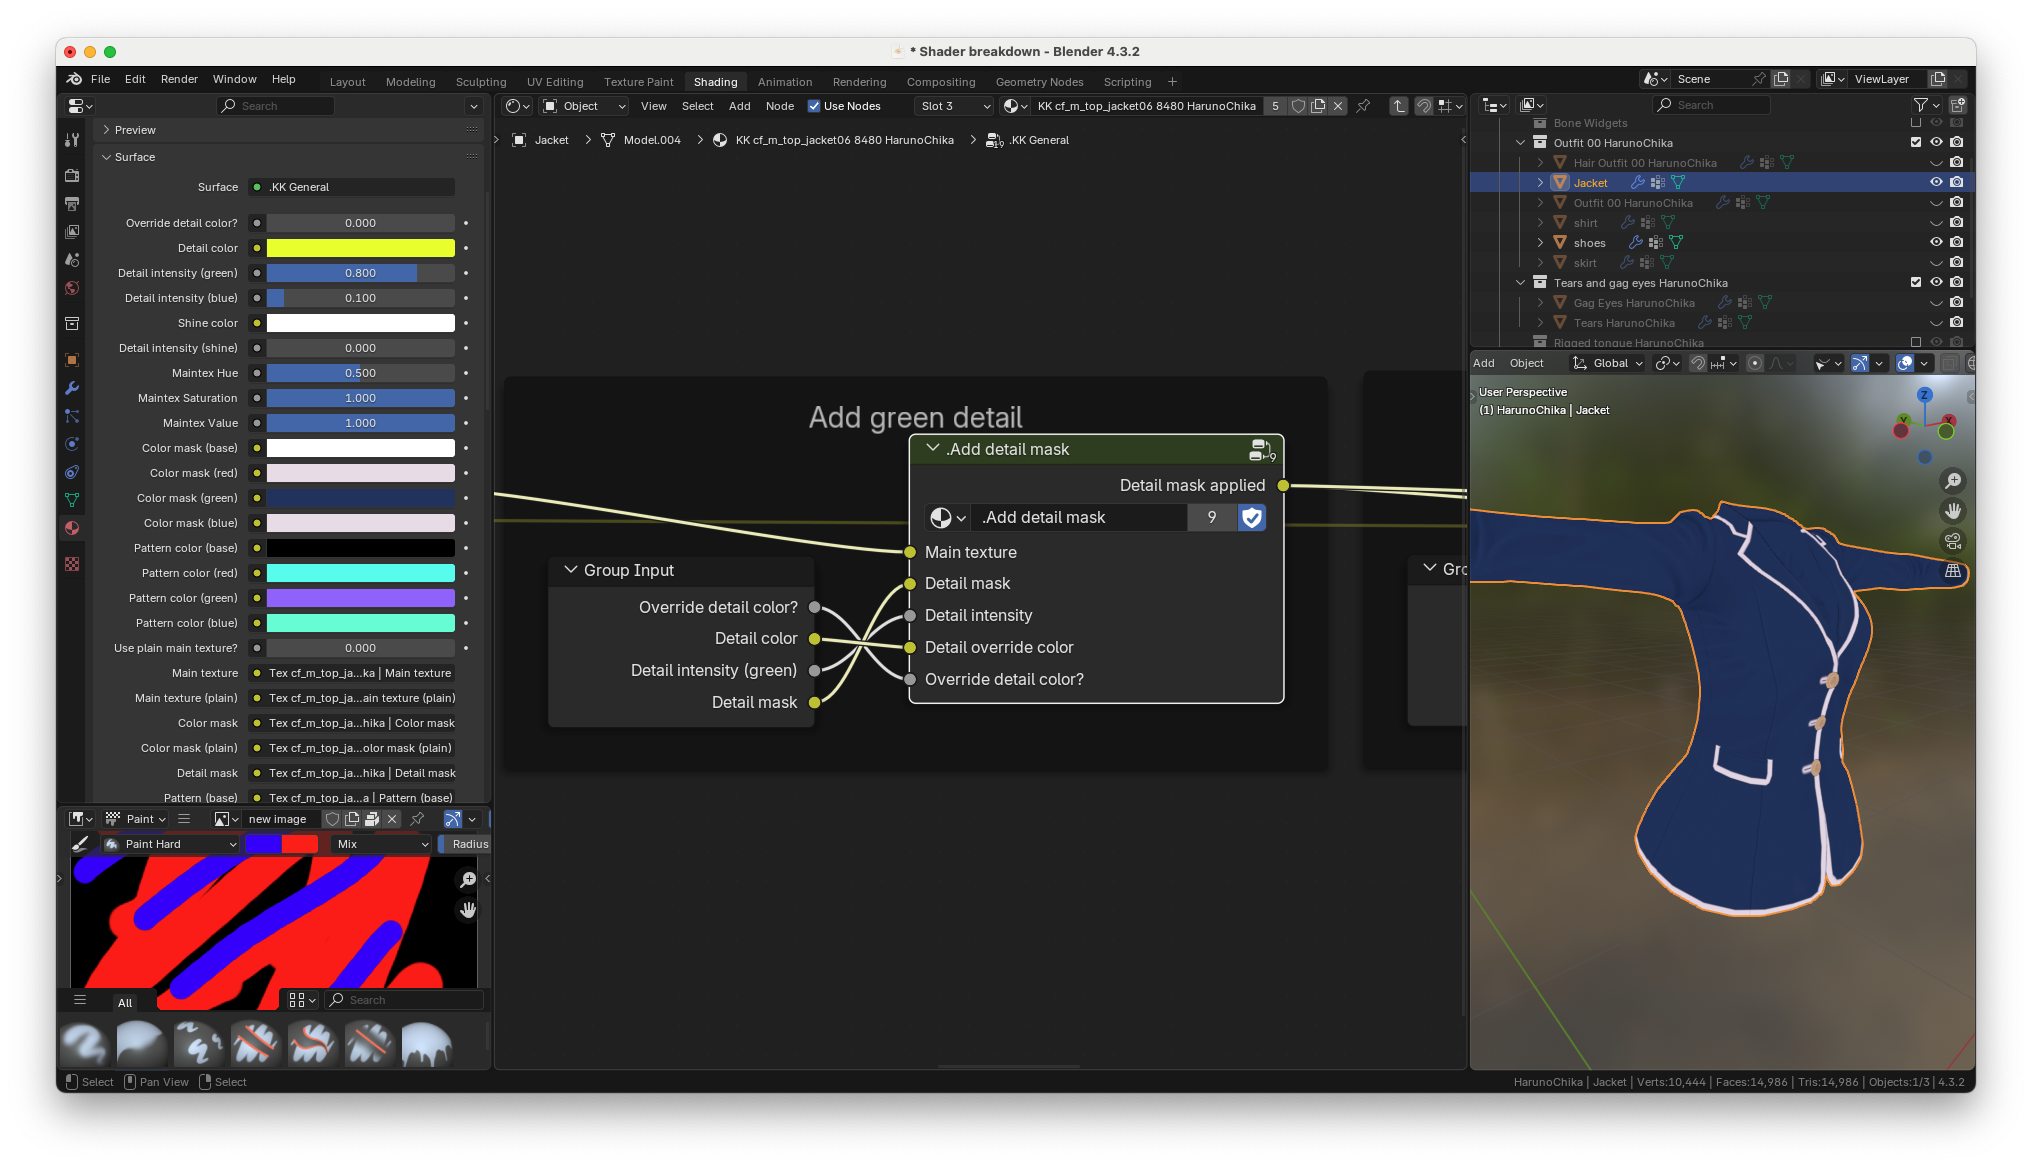
## Green detail
let's move onto group that applies the green channel of the detail mask
## Generating detail color
there's a few things that go on in this group. let's start with the
frame on the left
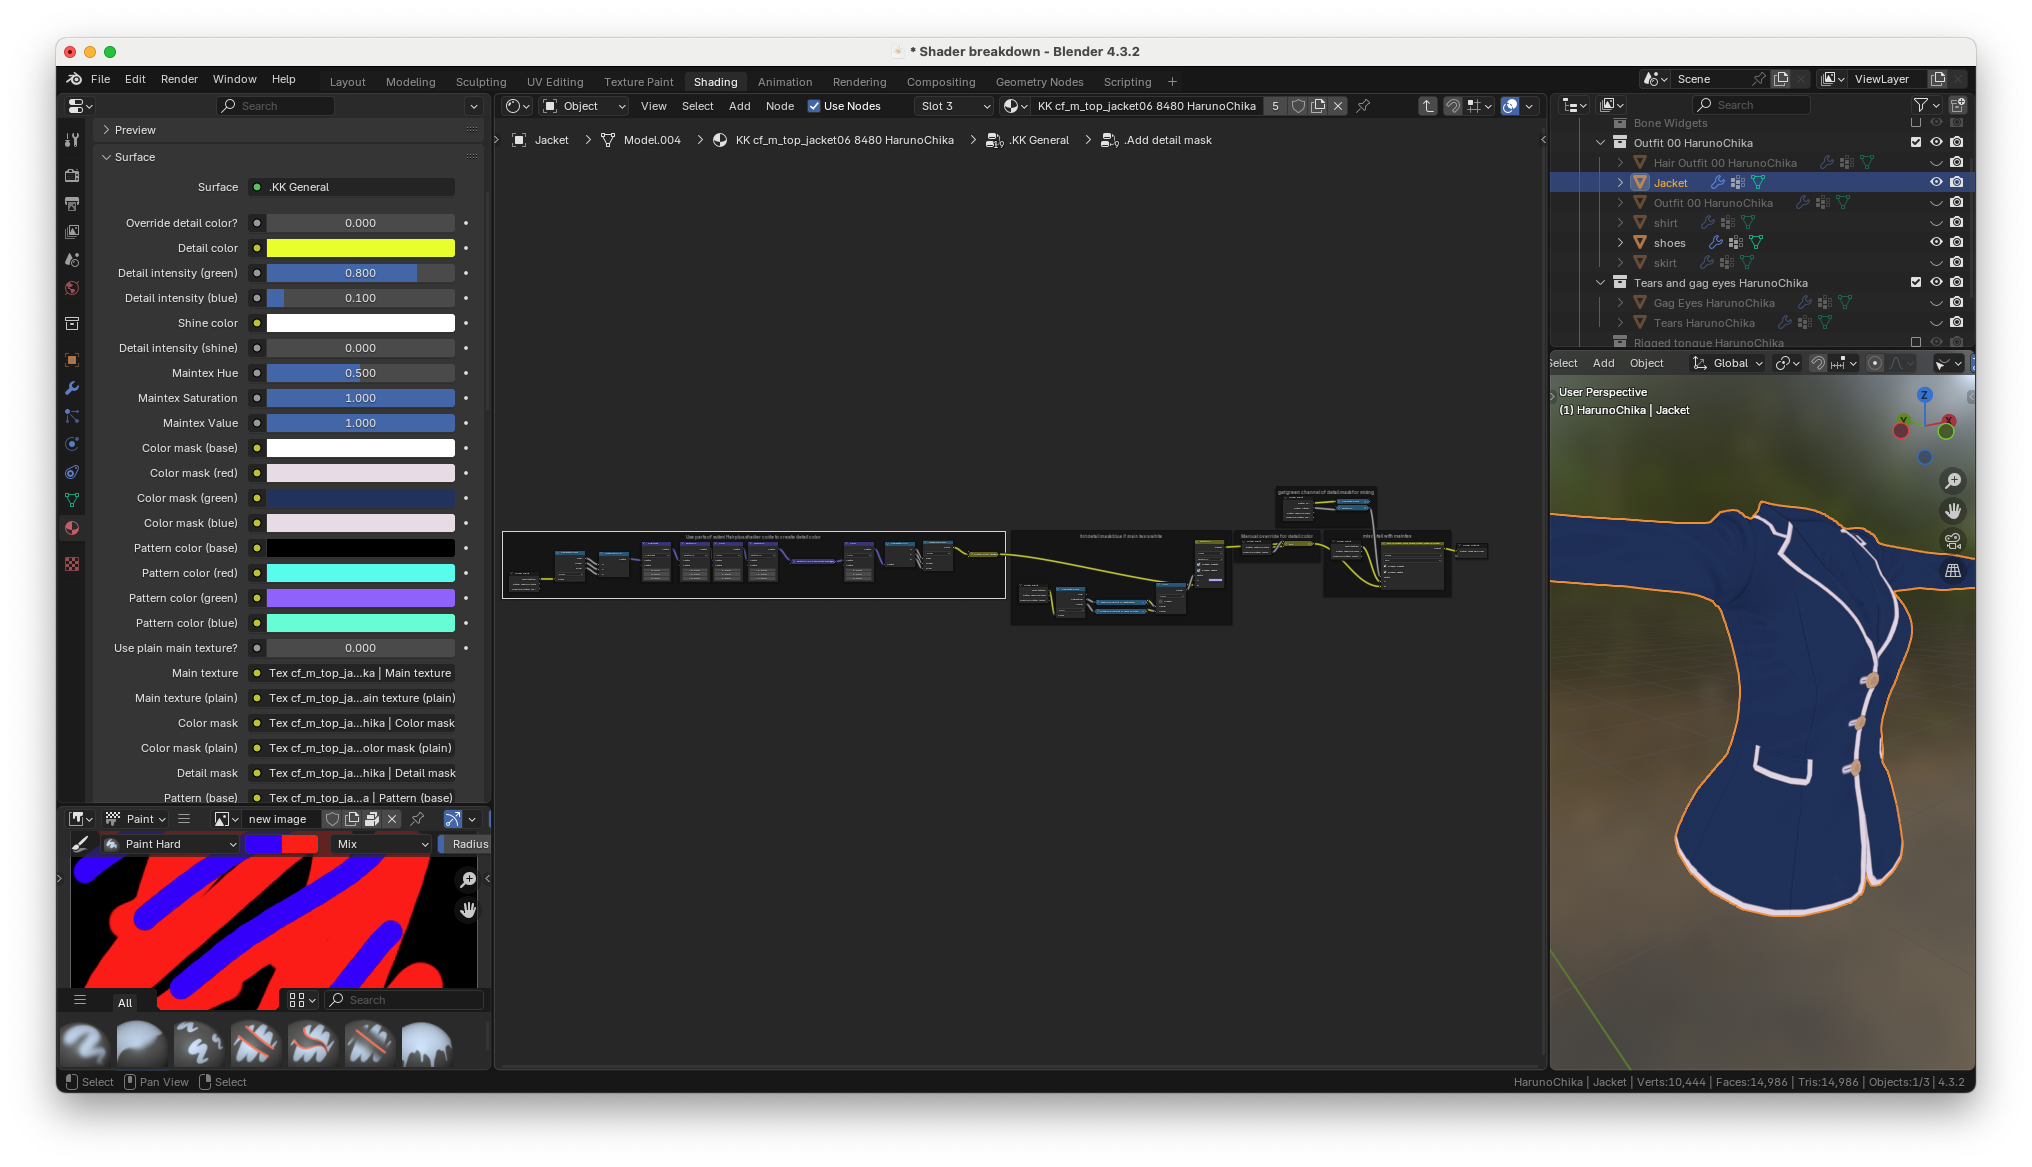
this section very intensely saturates the colors in order
automatically get a detail color. This is what the clothing looks like at the output
of the section
the darkening code is taken from
so it's
really just a node implementation of the equations found in that shader
file
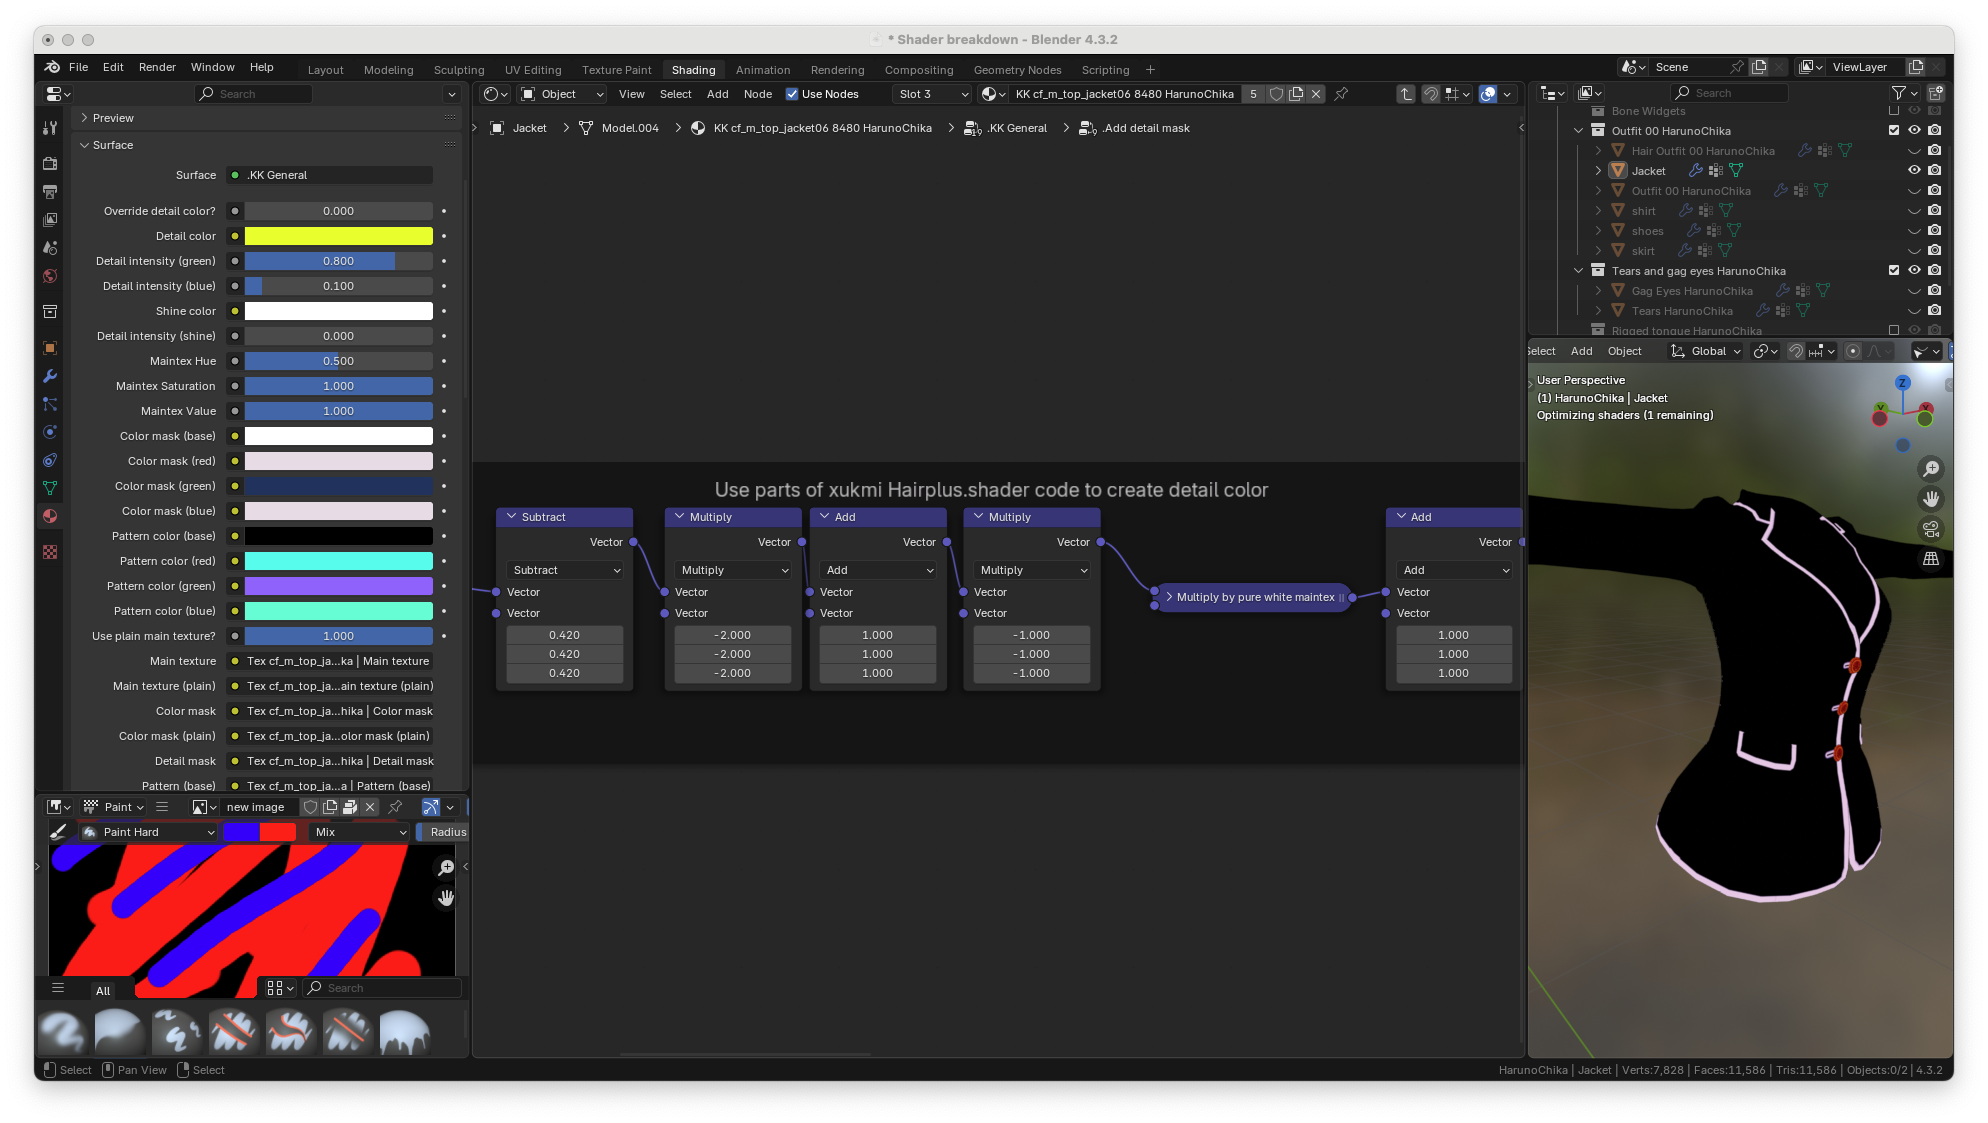
the next section adds blue tint to the saturated color, but only if the
color is detected as white, and never if the color is detected as dark.
the light color detection is done by taking the saturation value of the
material
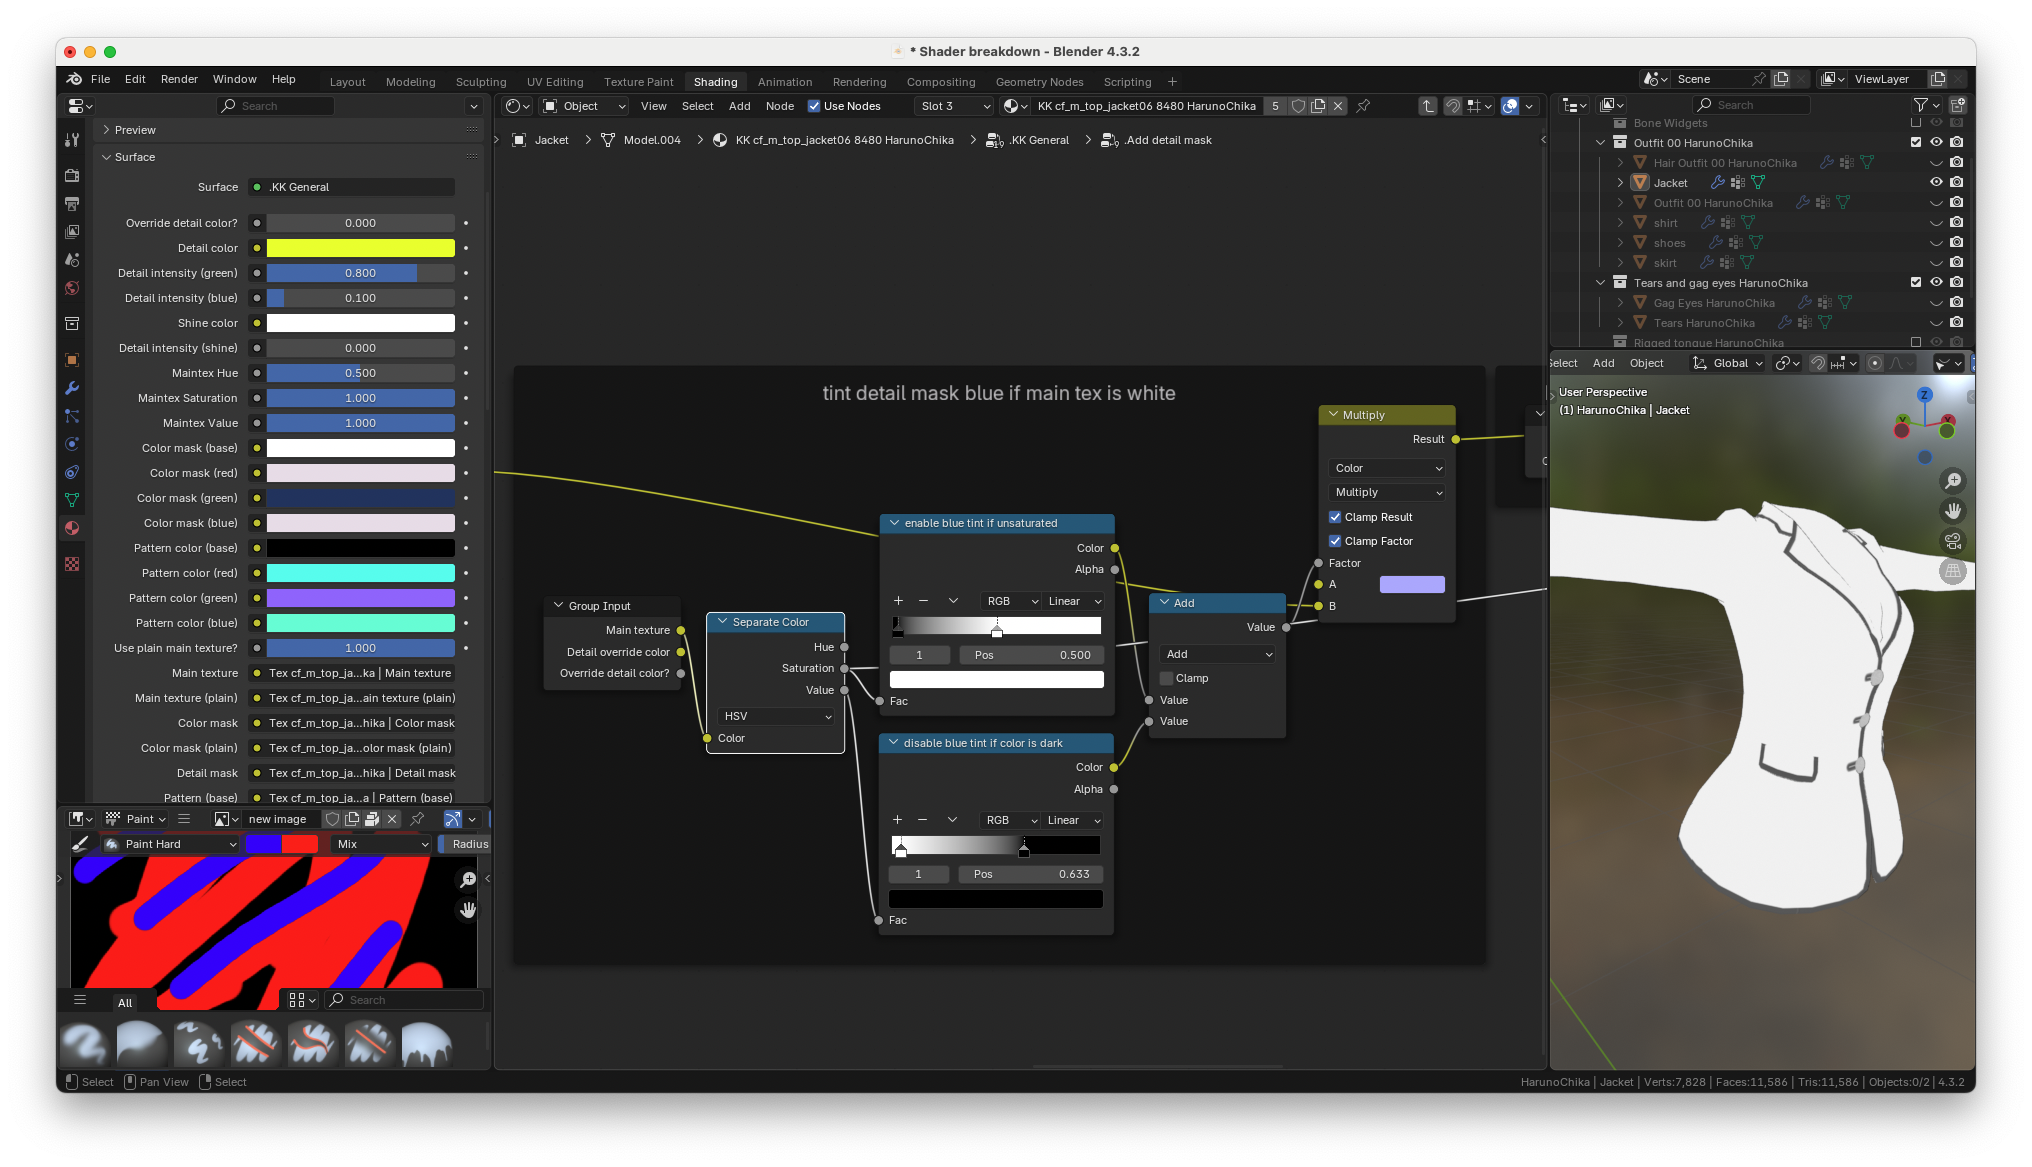
and sending it through a color ramp to make sure that only the least
saturated colors get a blue tint applied to them. the white portions of
the clothing will not get a blue tint. The black portions of the
clothing will get a blue tint
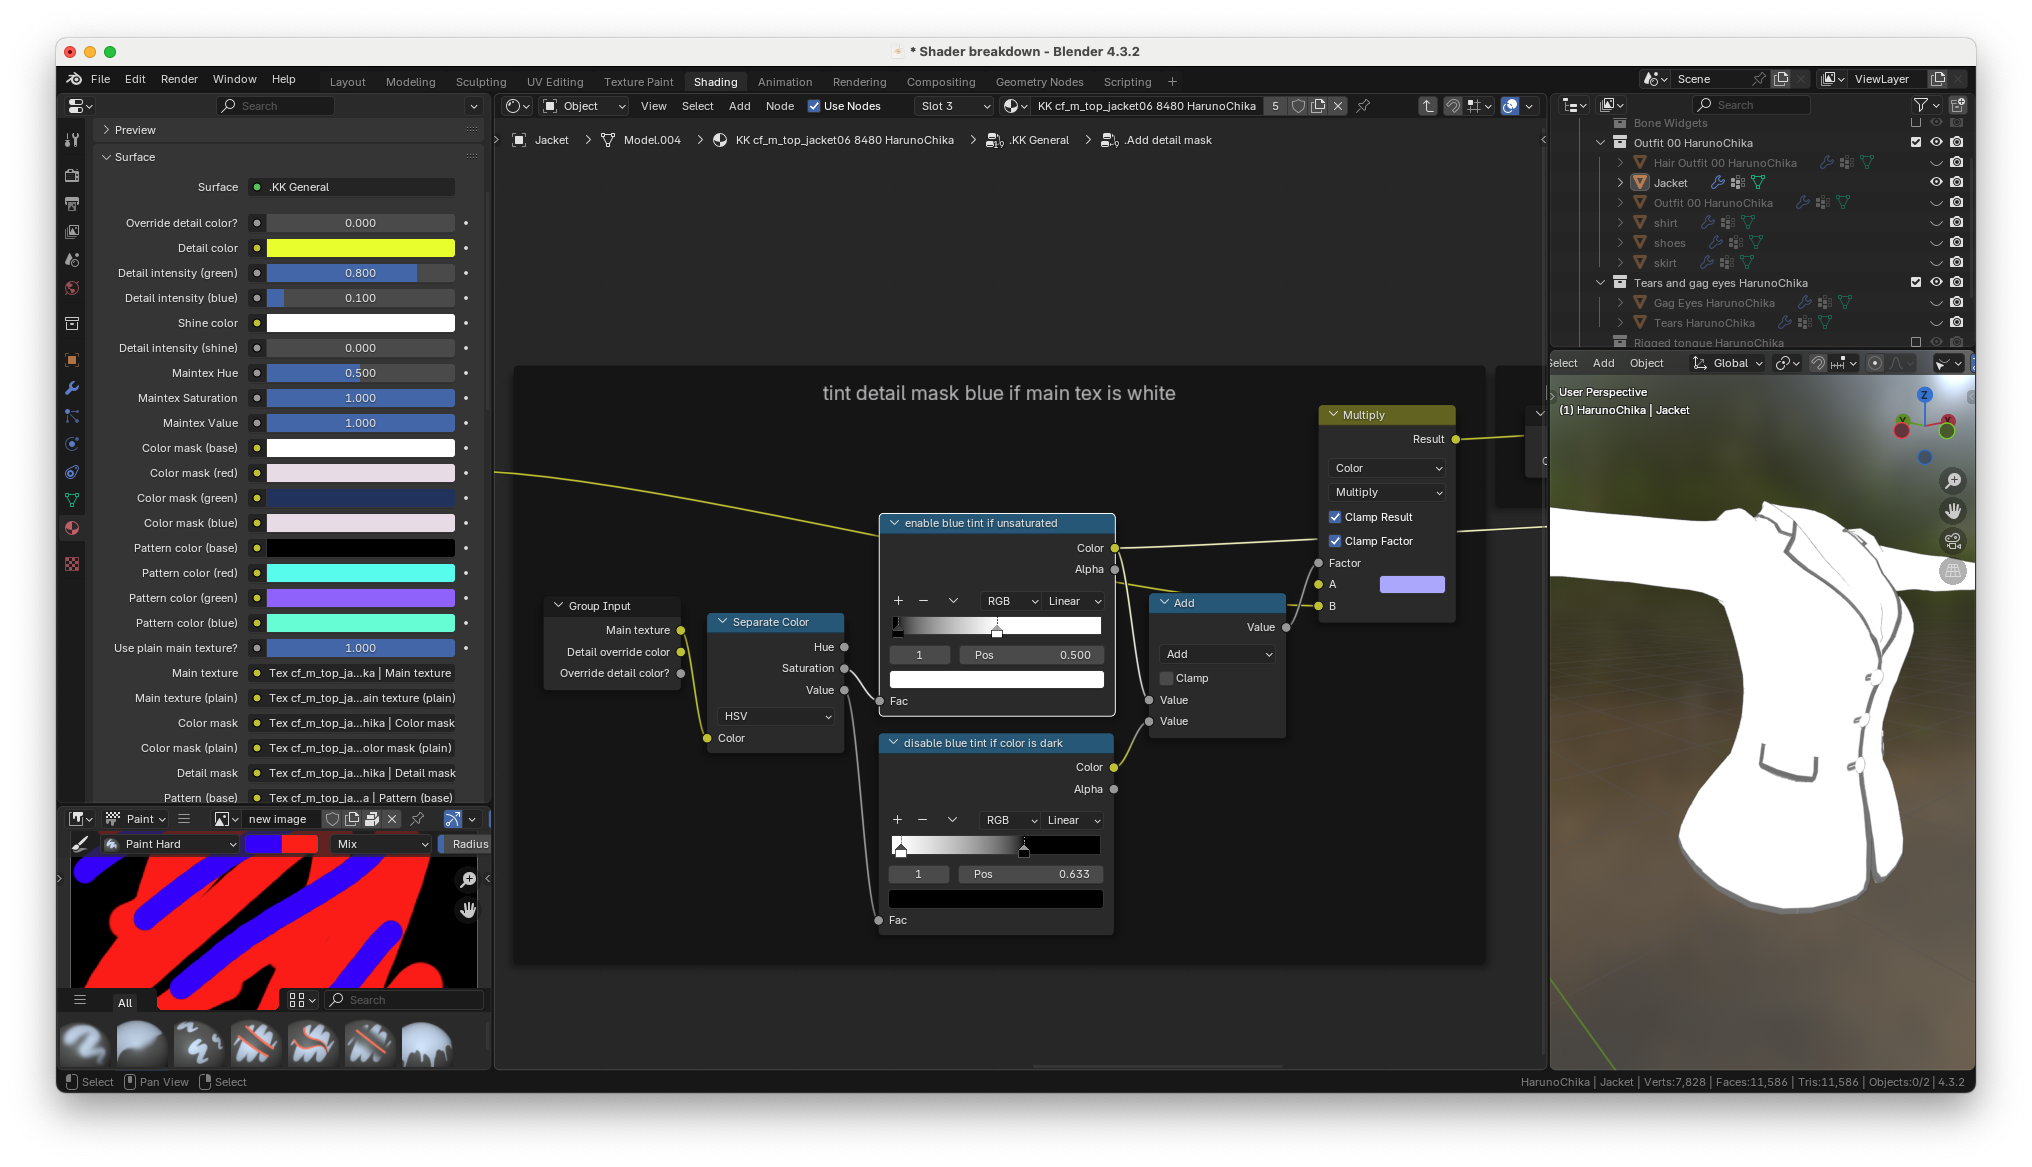
the dark color detection is done with the value of the color
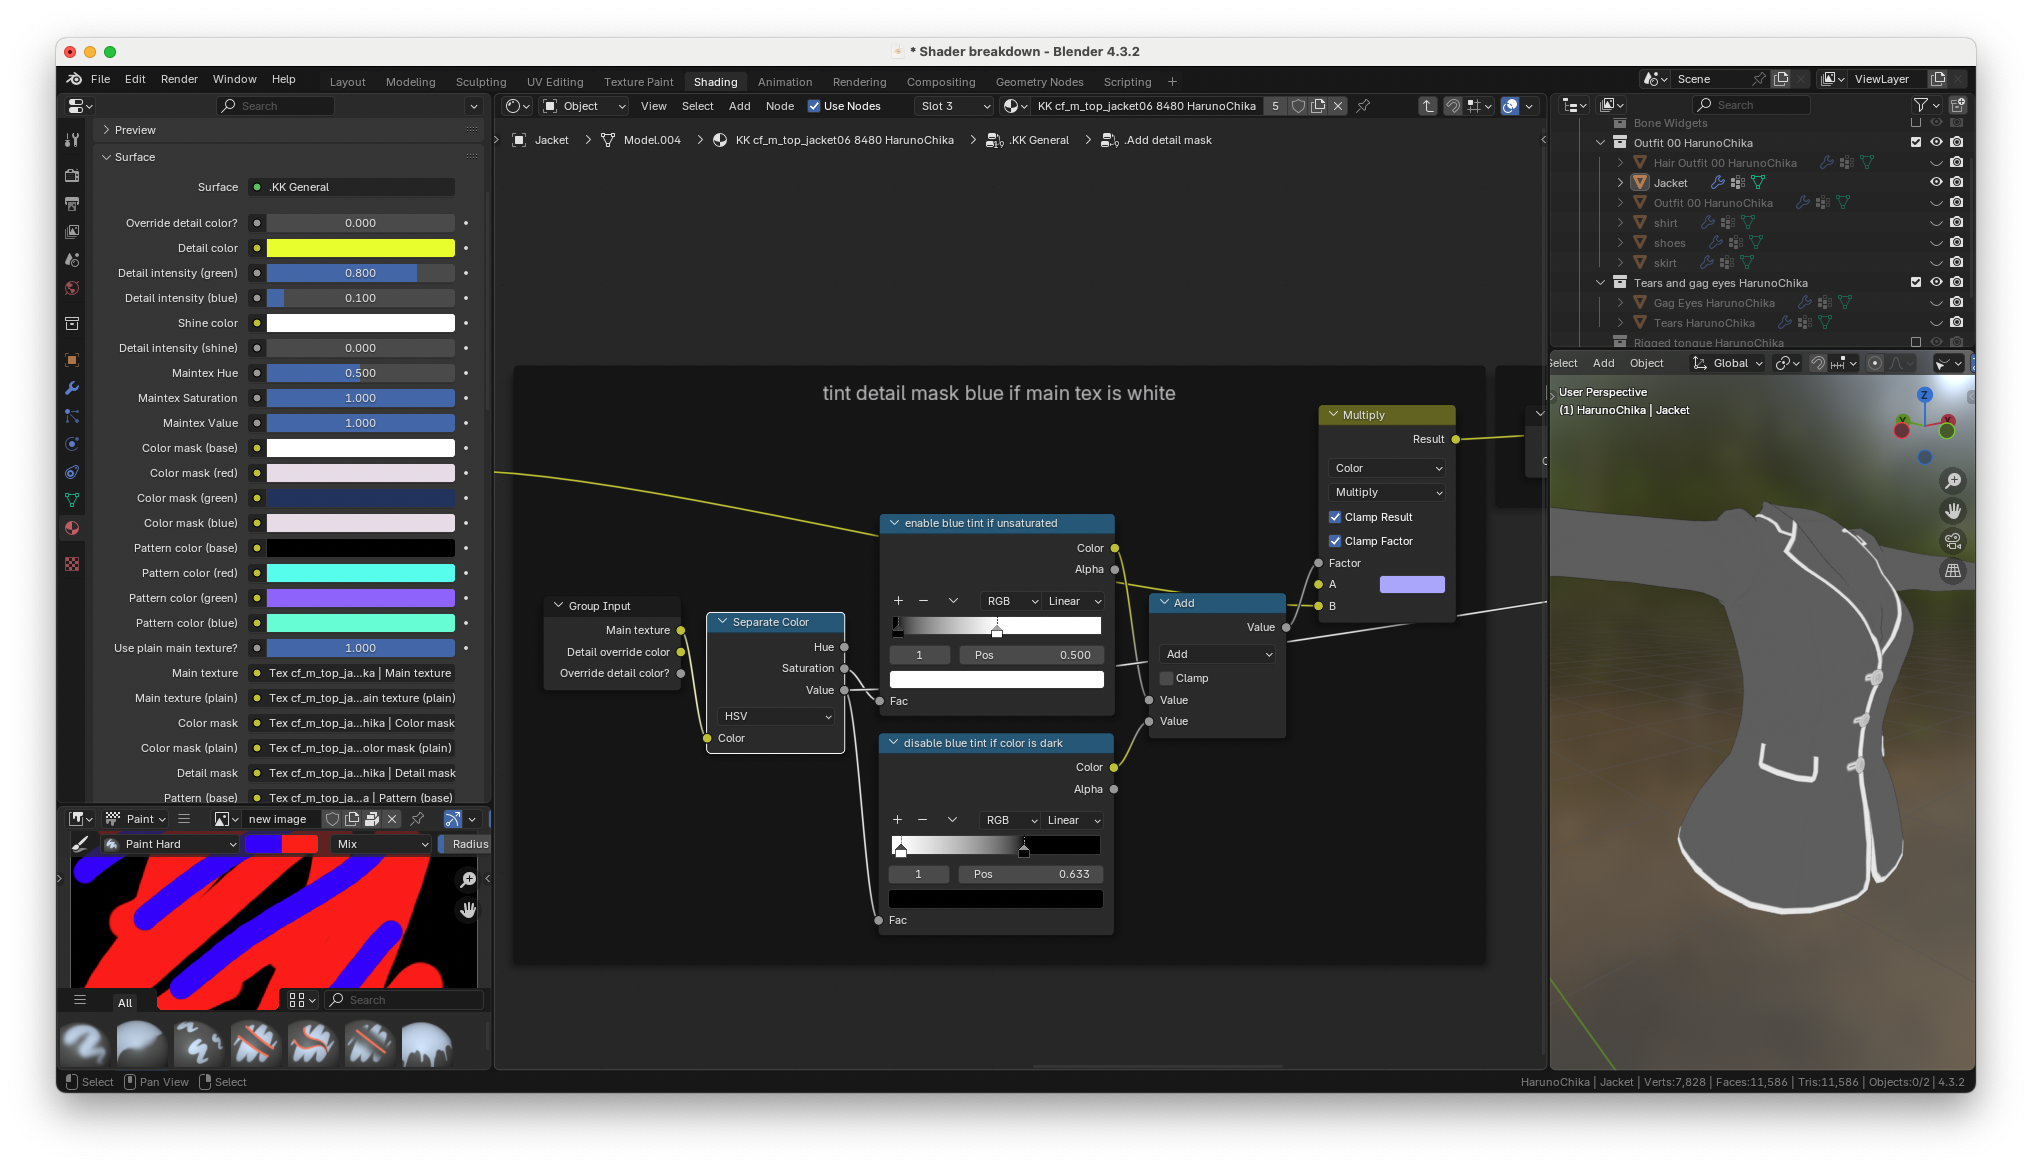
this value is then inverted and crunched down with another color ramp.
The white portion of the clothing will not get a blue tint. The black
portions of the clothing will get a blue tint
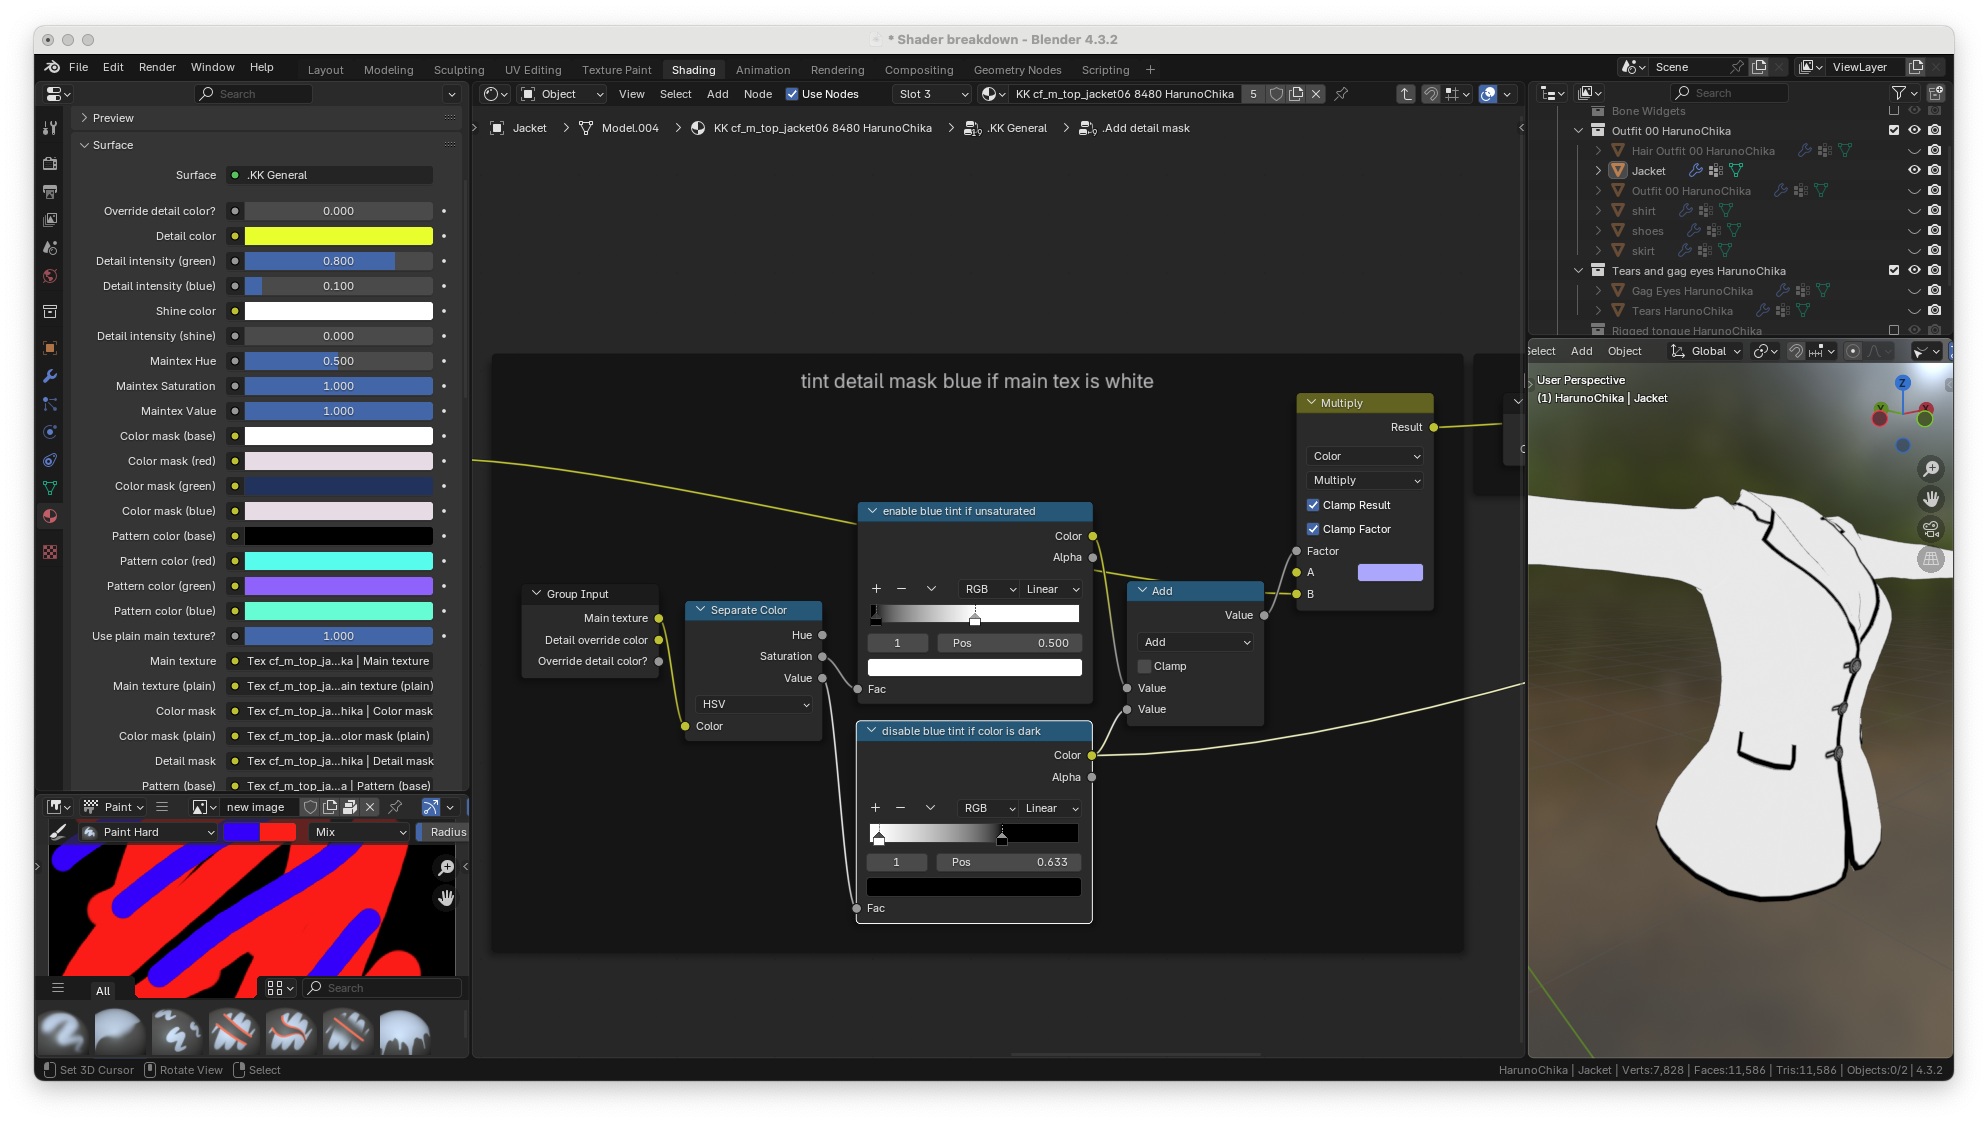
these two values are then added together and sent into the multiply node
factor input. Again, the white portions will not get the blue tint.
Only the black portions will.
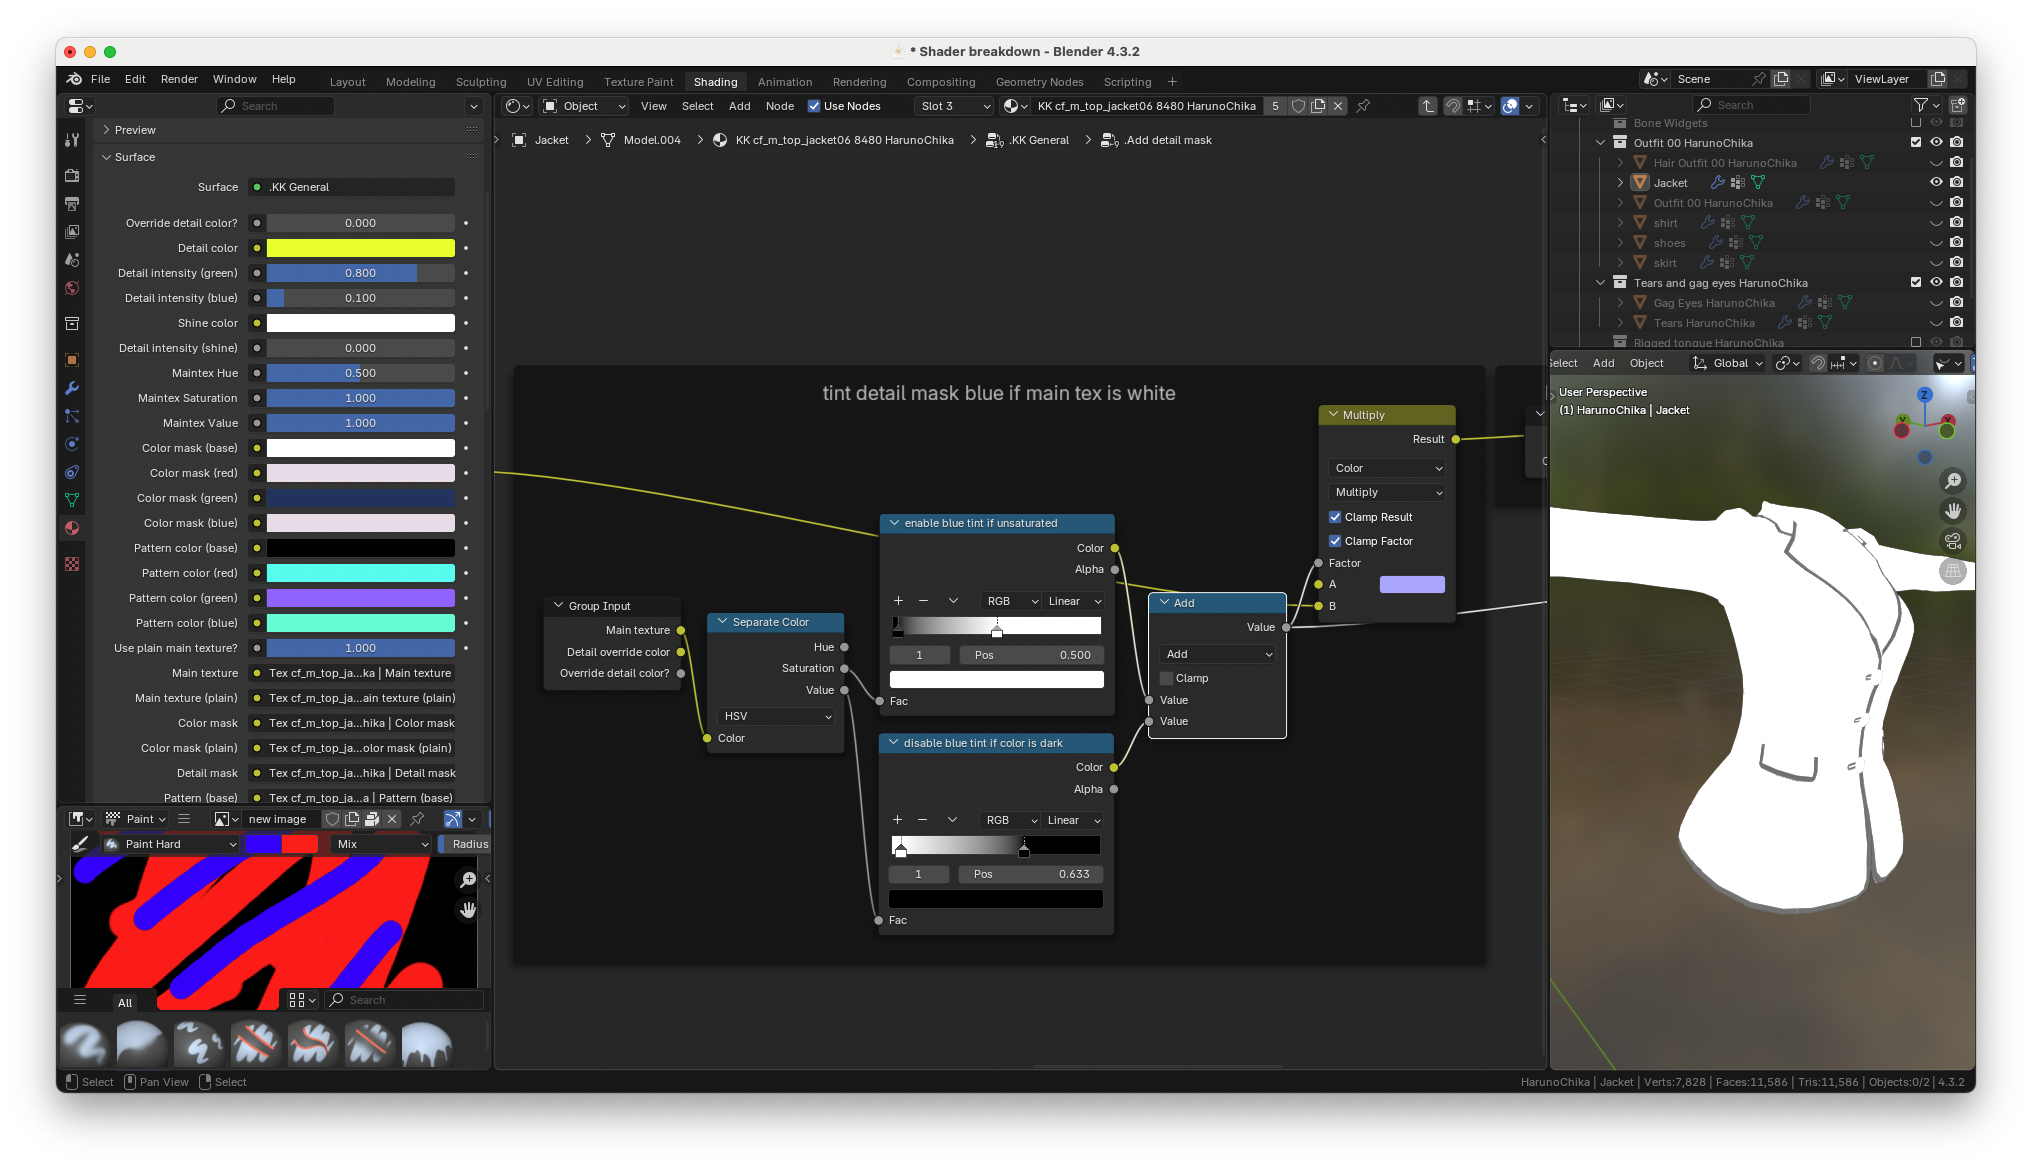
This is what the detail color looks like, with the blue tint applied.
Only the white-most portions of the jacket got a blue tint.
## Overriding detail color
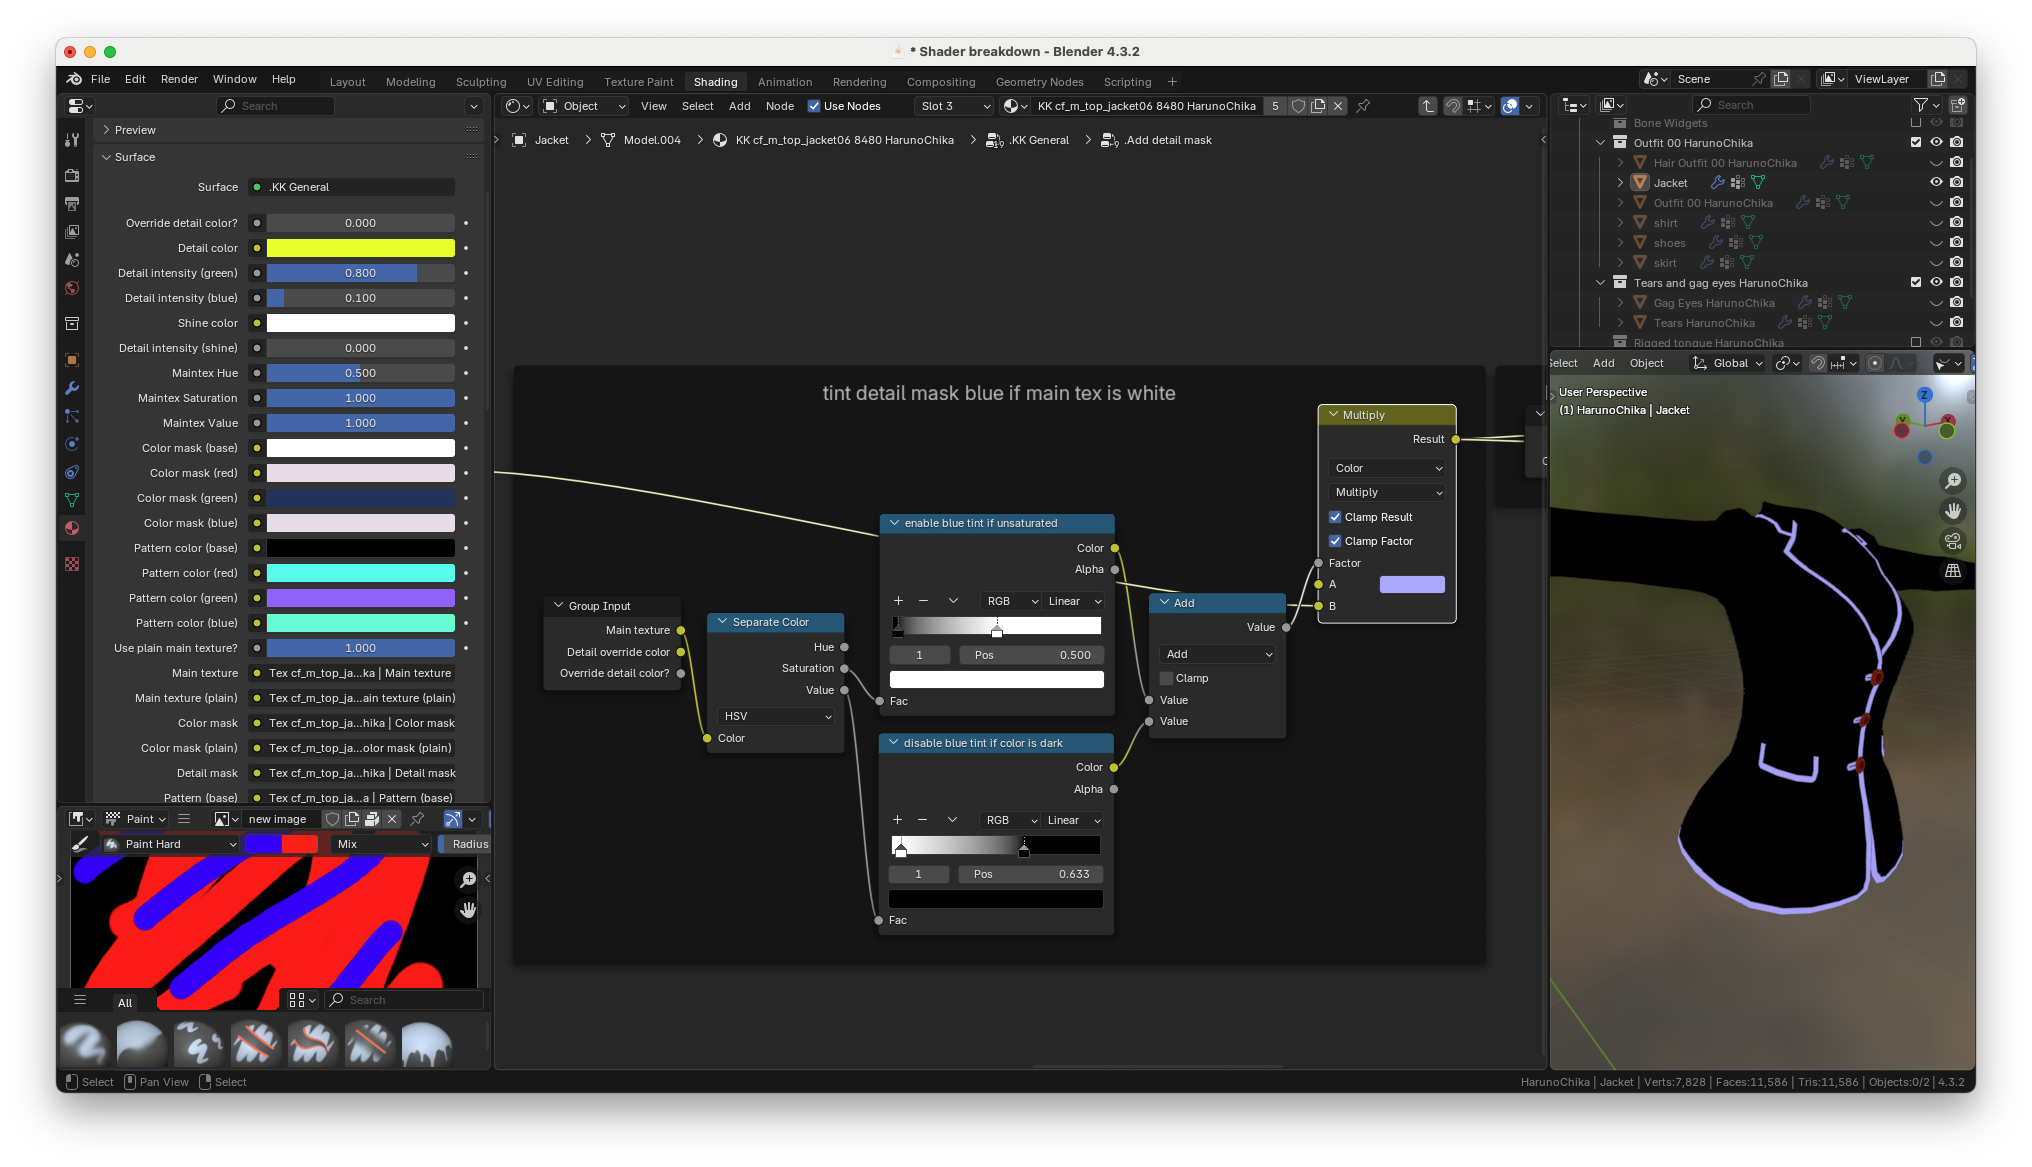
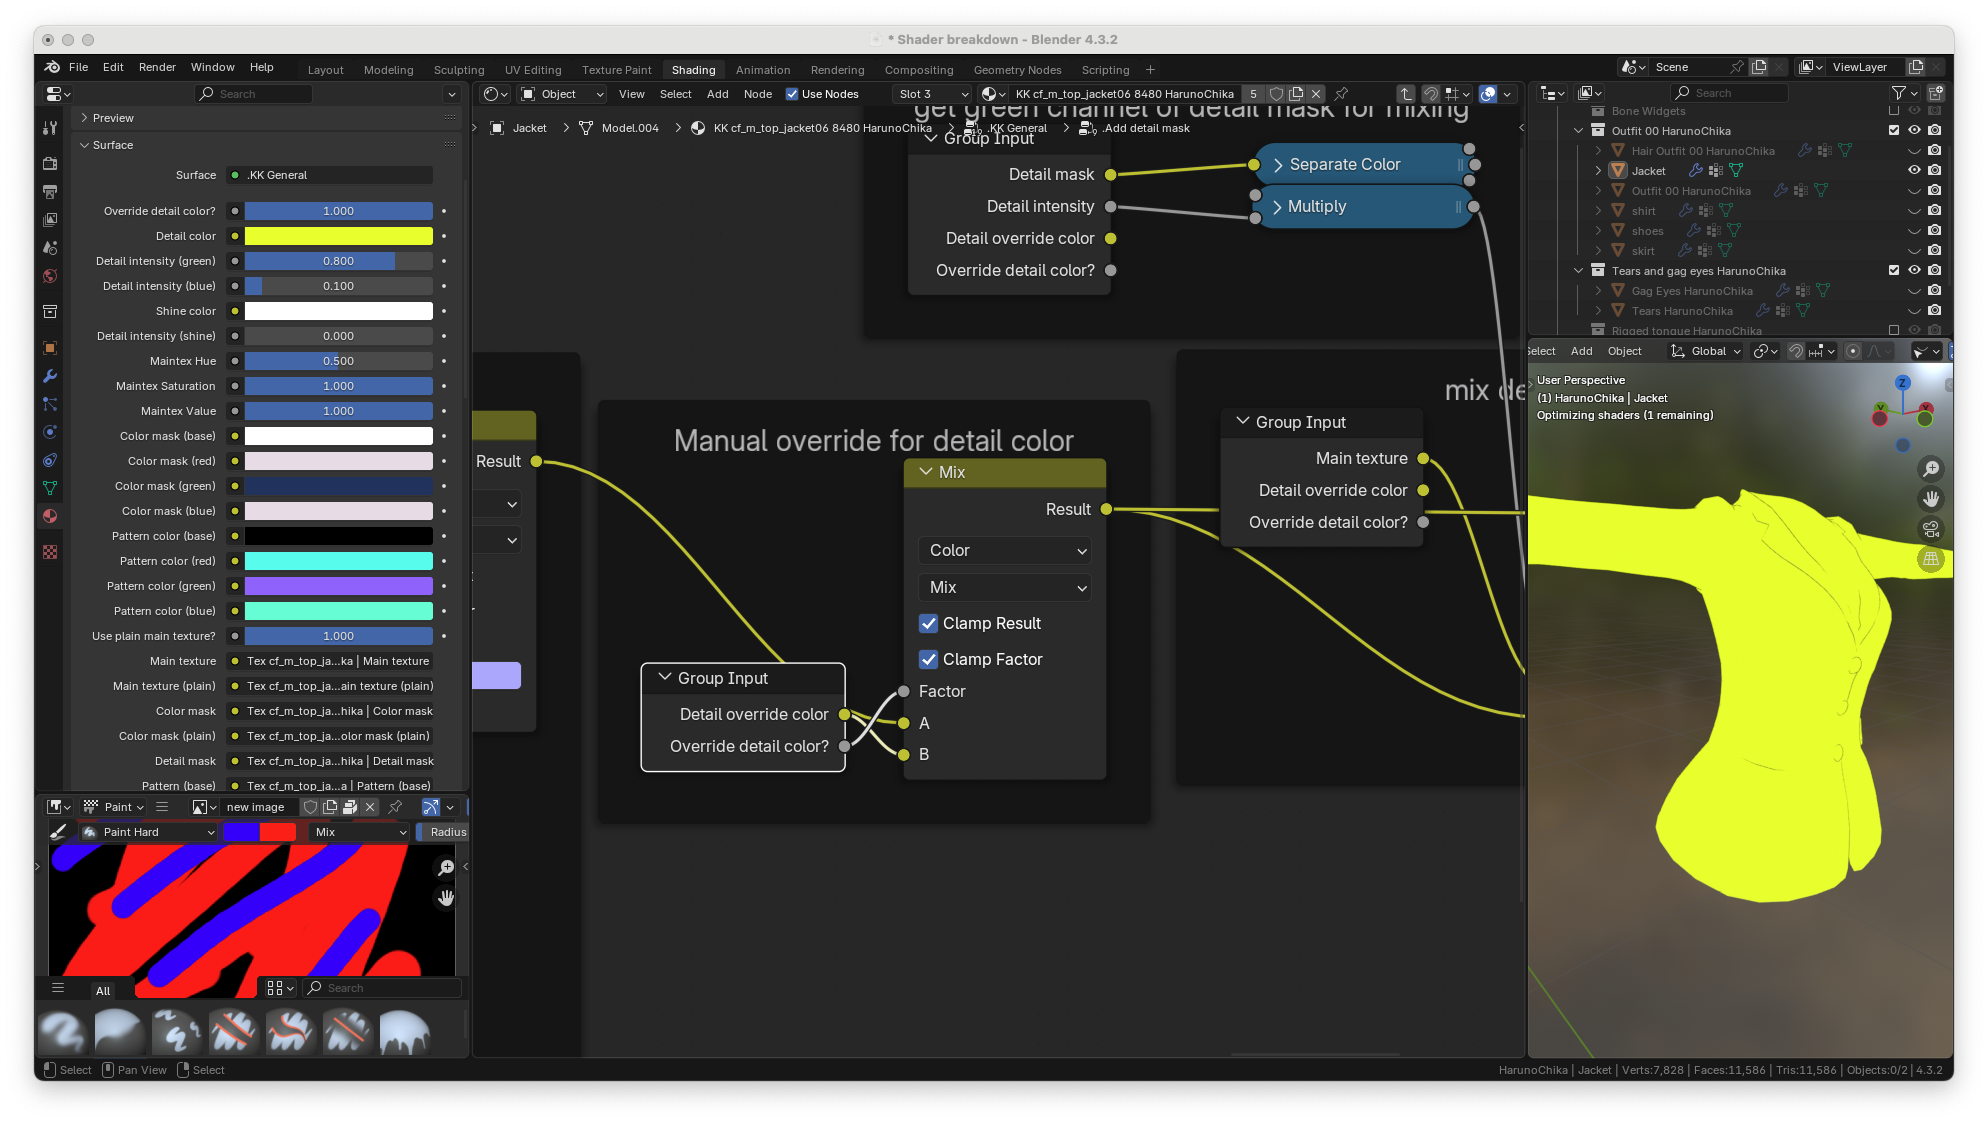
you also have the option of overriding the detail color. If you override
the detail color you can set it to whatever you want with the "detail
color" color input. here's what it looks like without the override
enabled
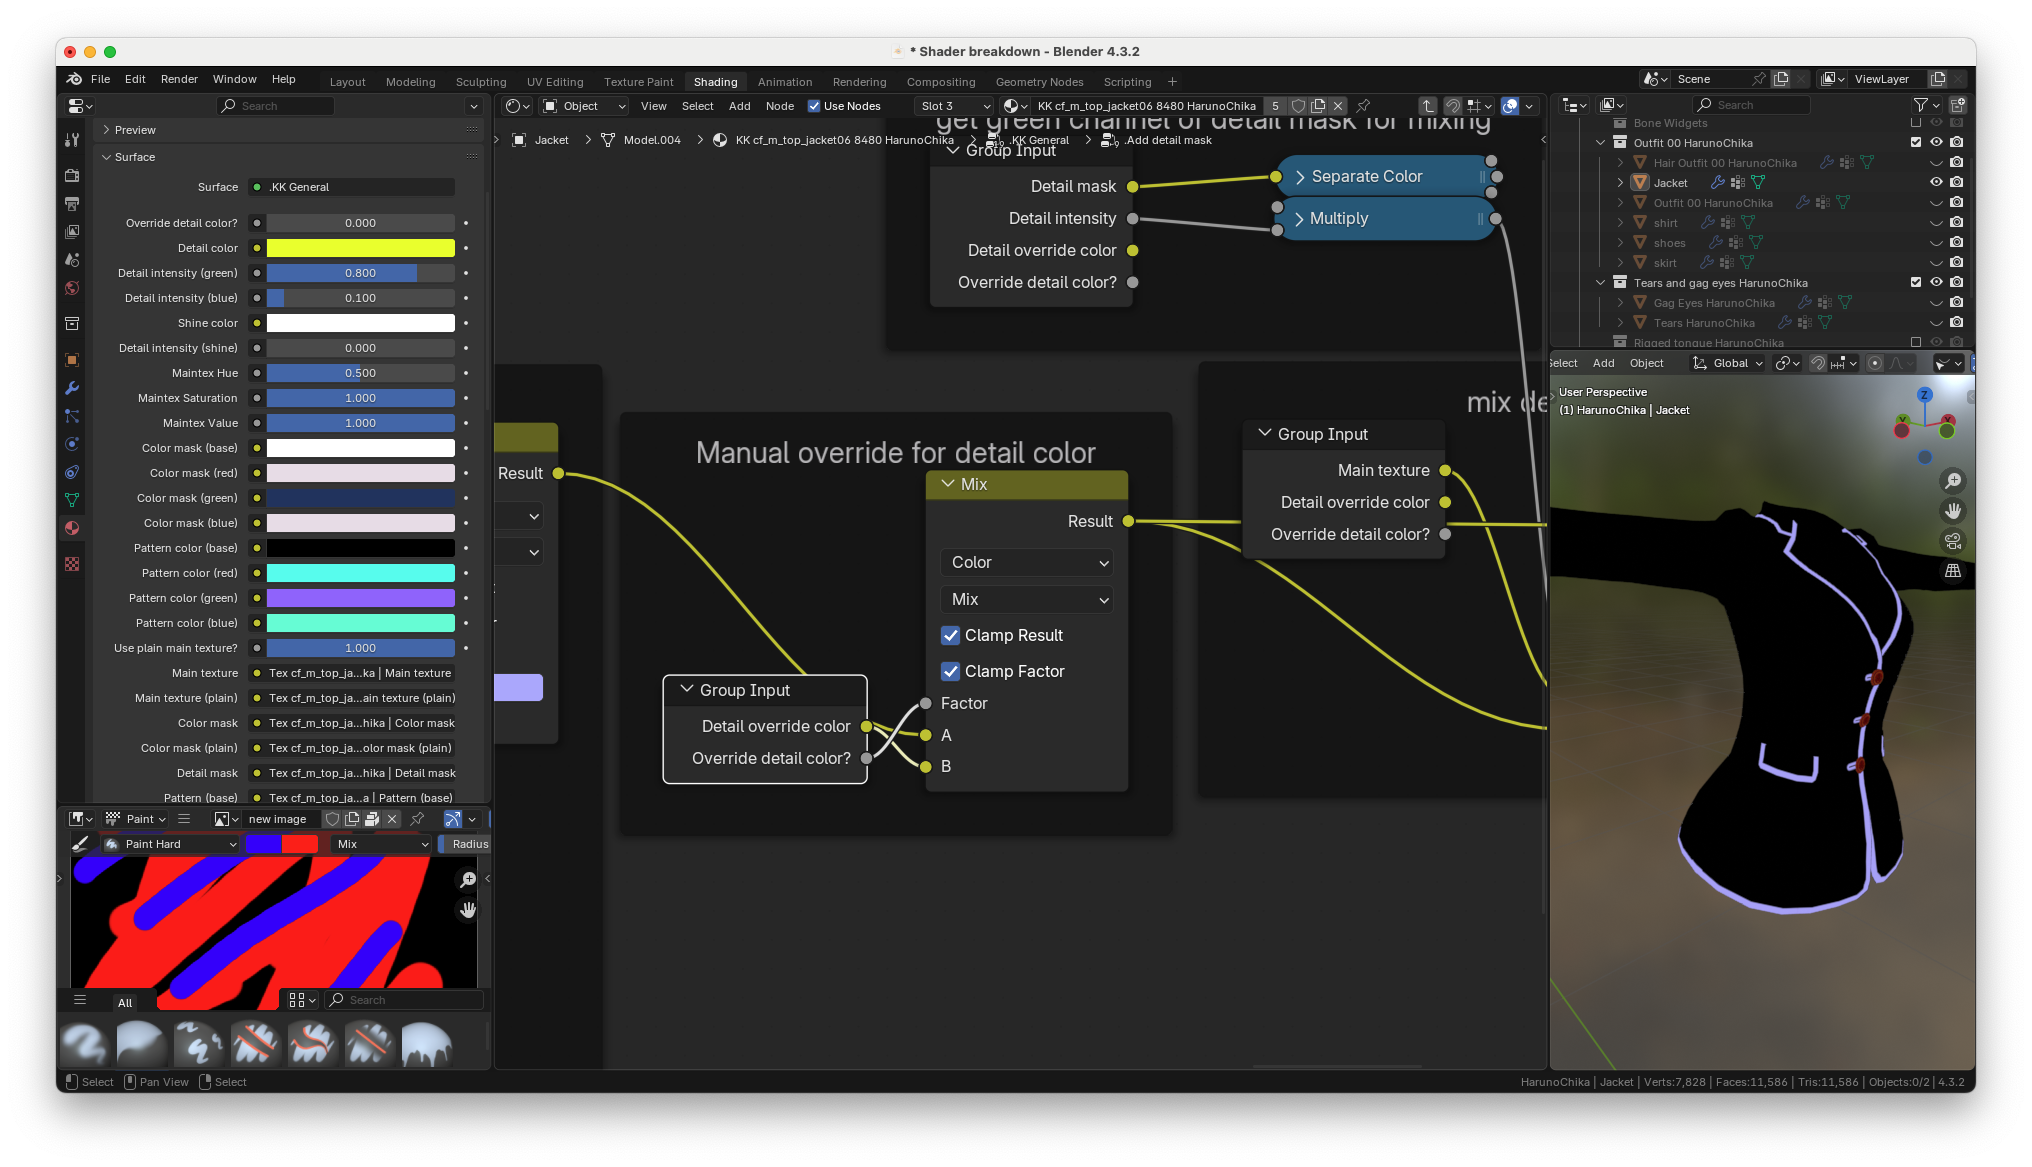
here's what it looks like with the override enabled
## Detail intensity
and finally, the shader needs to know where to put this detail color, so
the detail mask is brought in
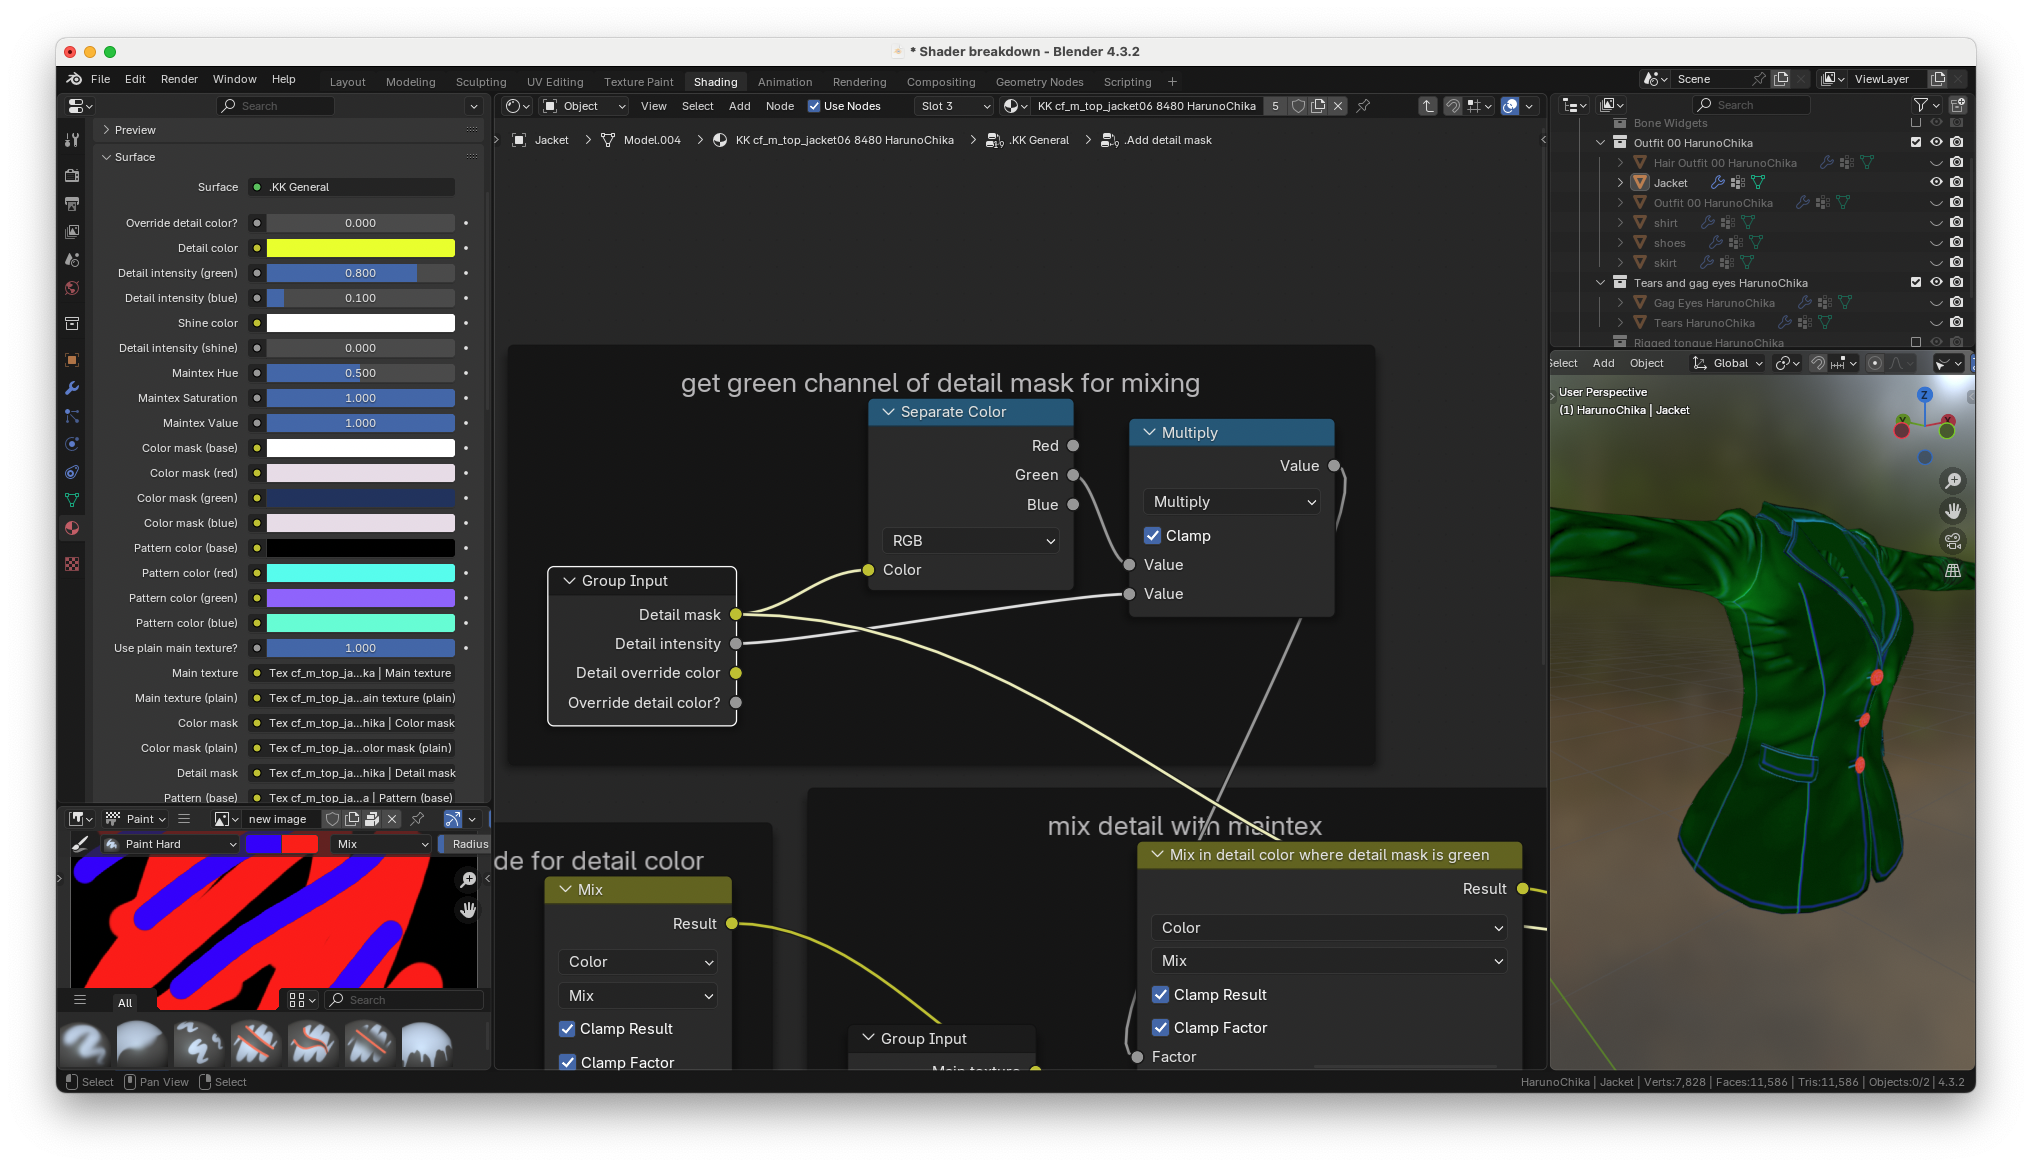
the green channel of the detail mask is used to locate where
to put the detail color.
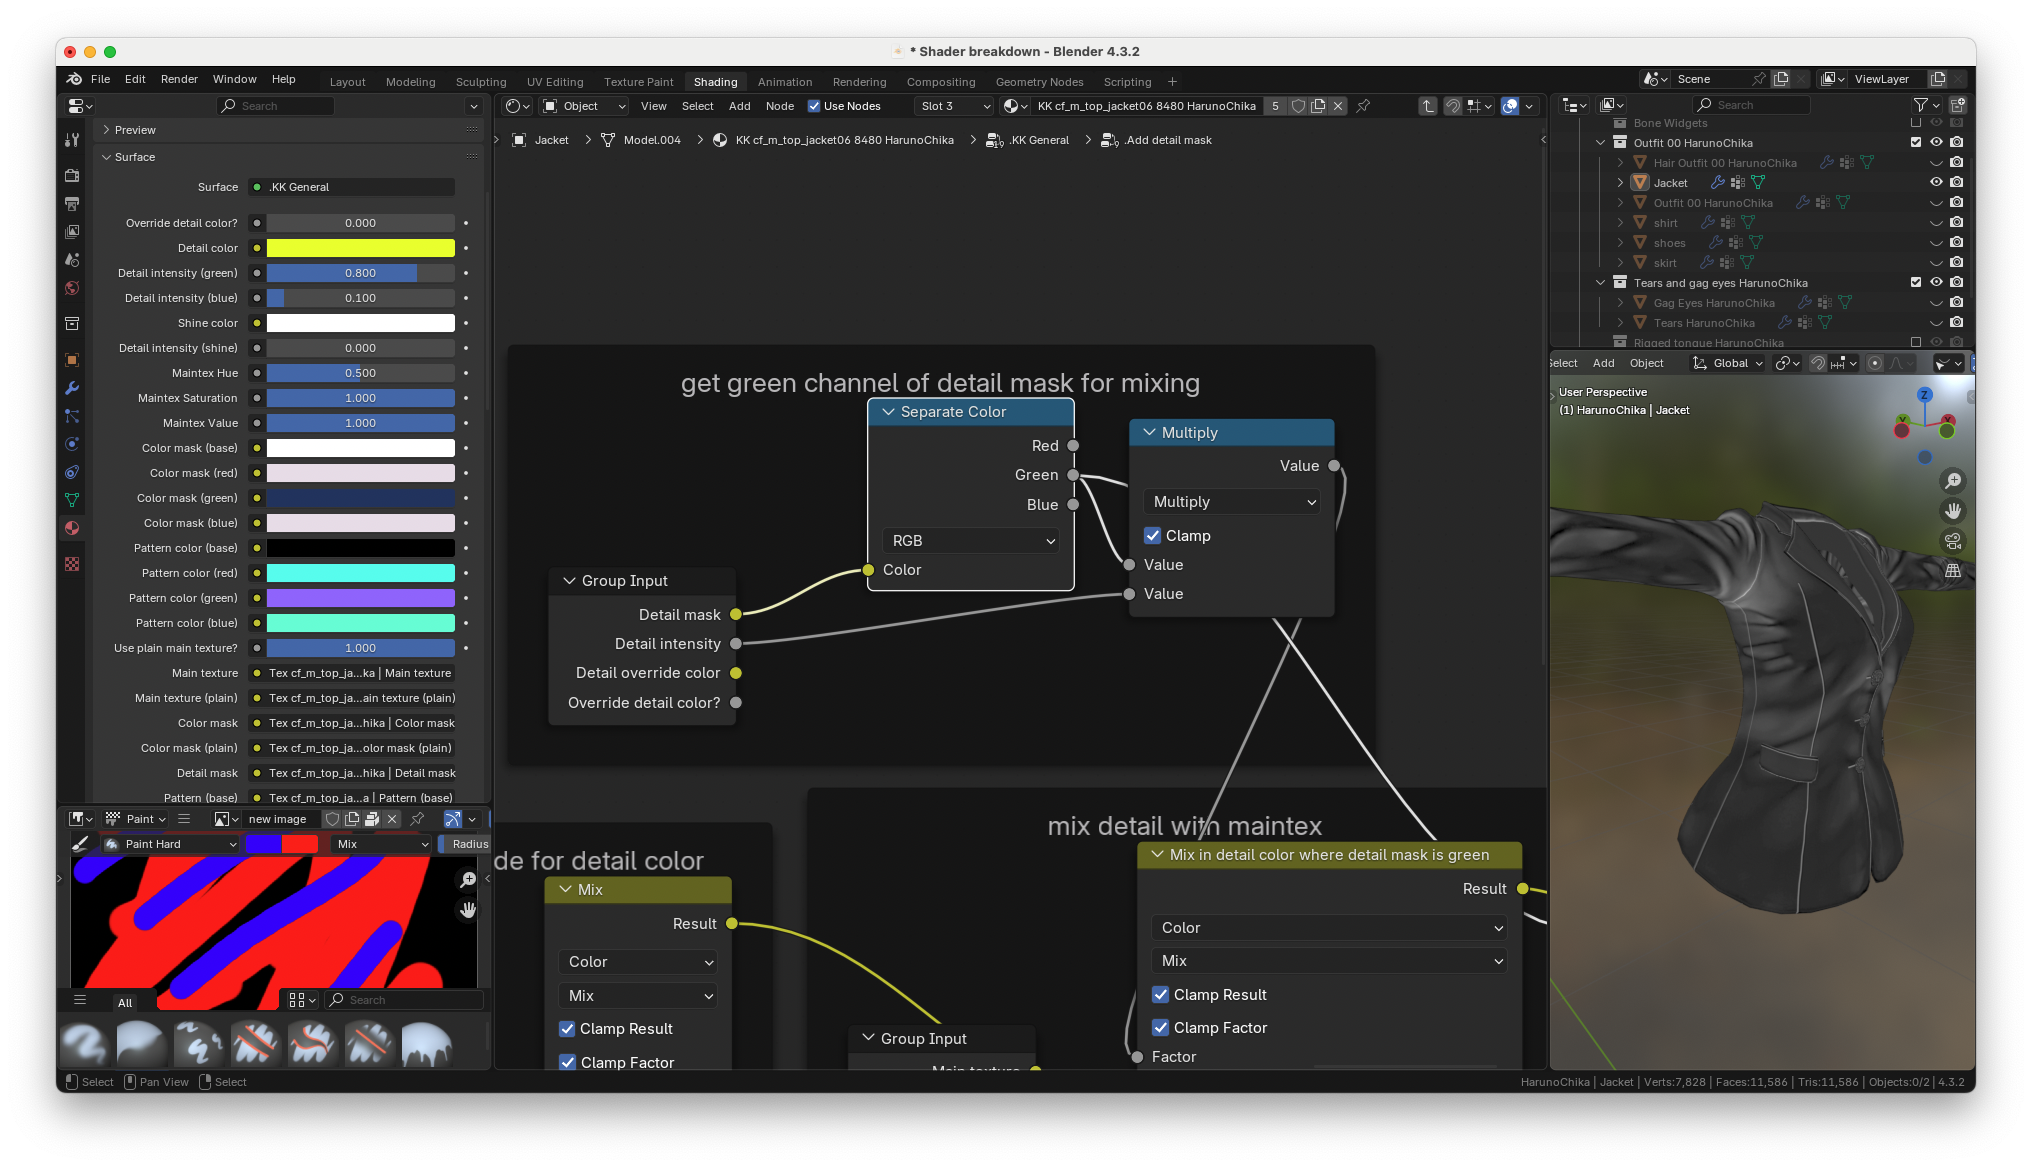
The strength of the detail mask can also be increased with this multiply
node. Here's what it looks like when it's set to the default of 0.8
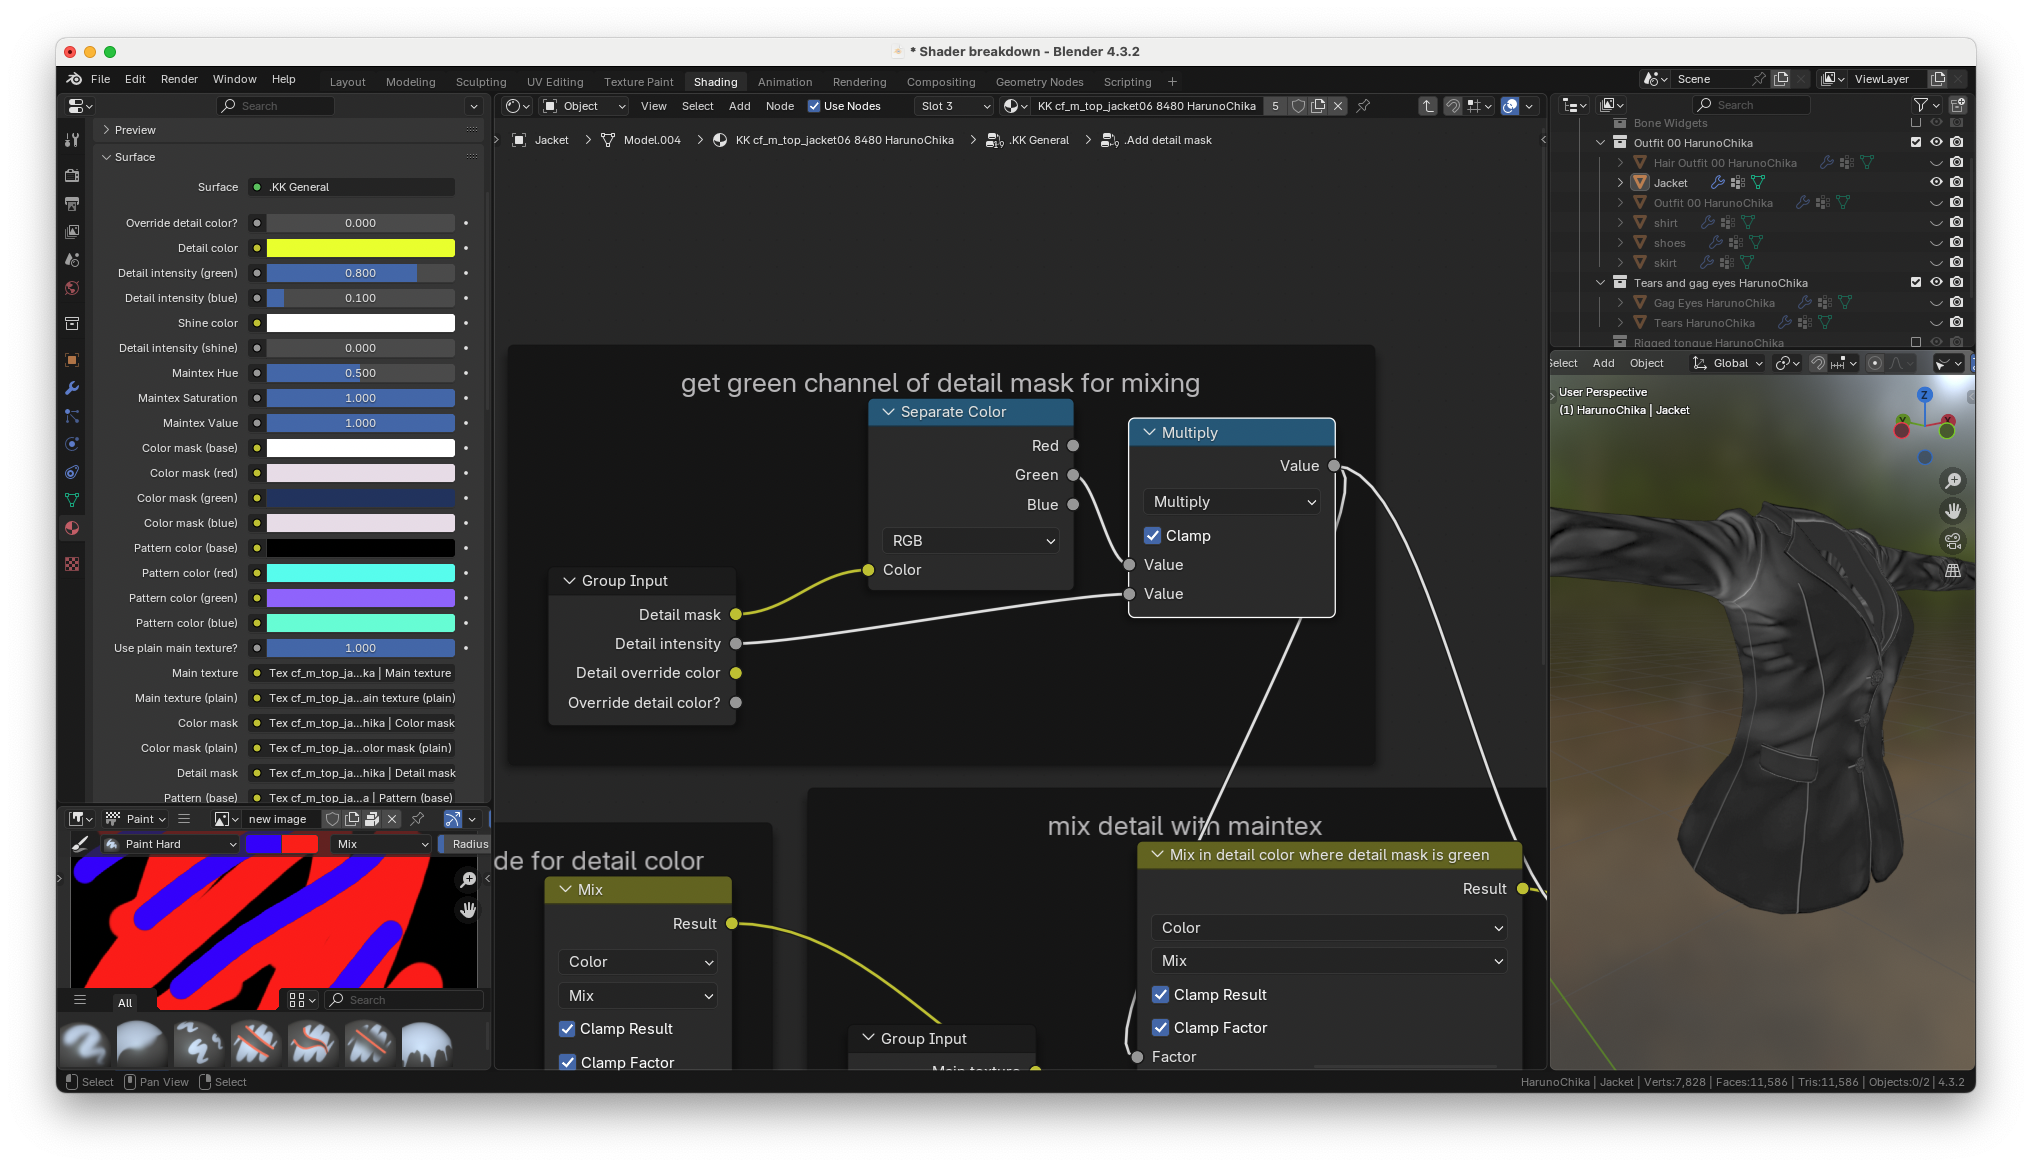
here's what it looks like when it's set to five
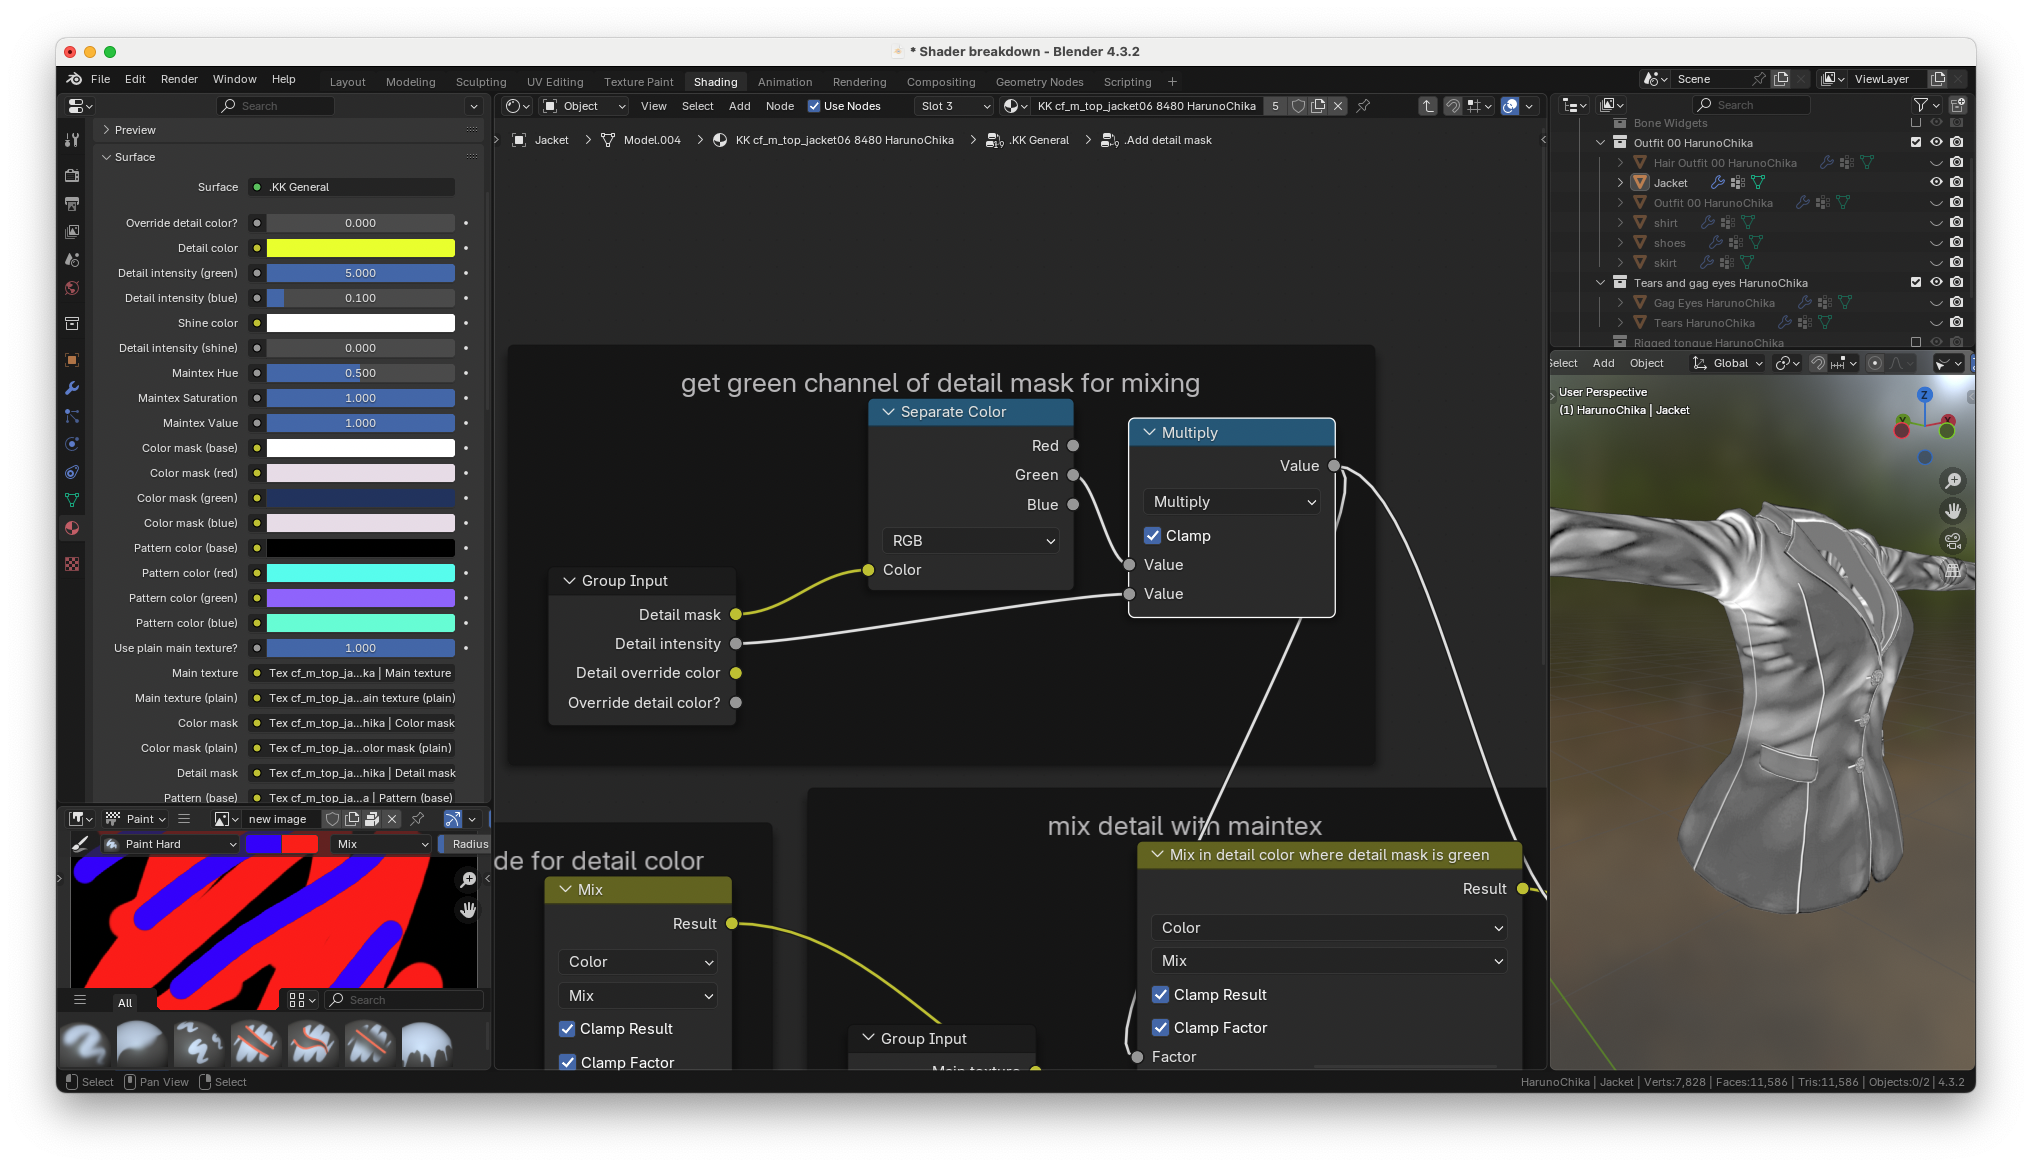
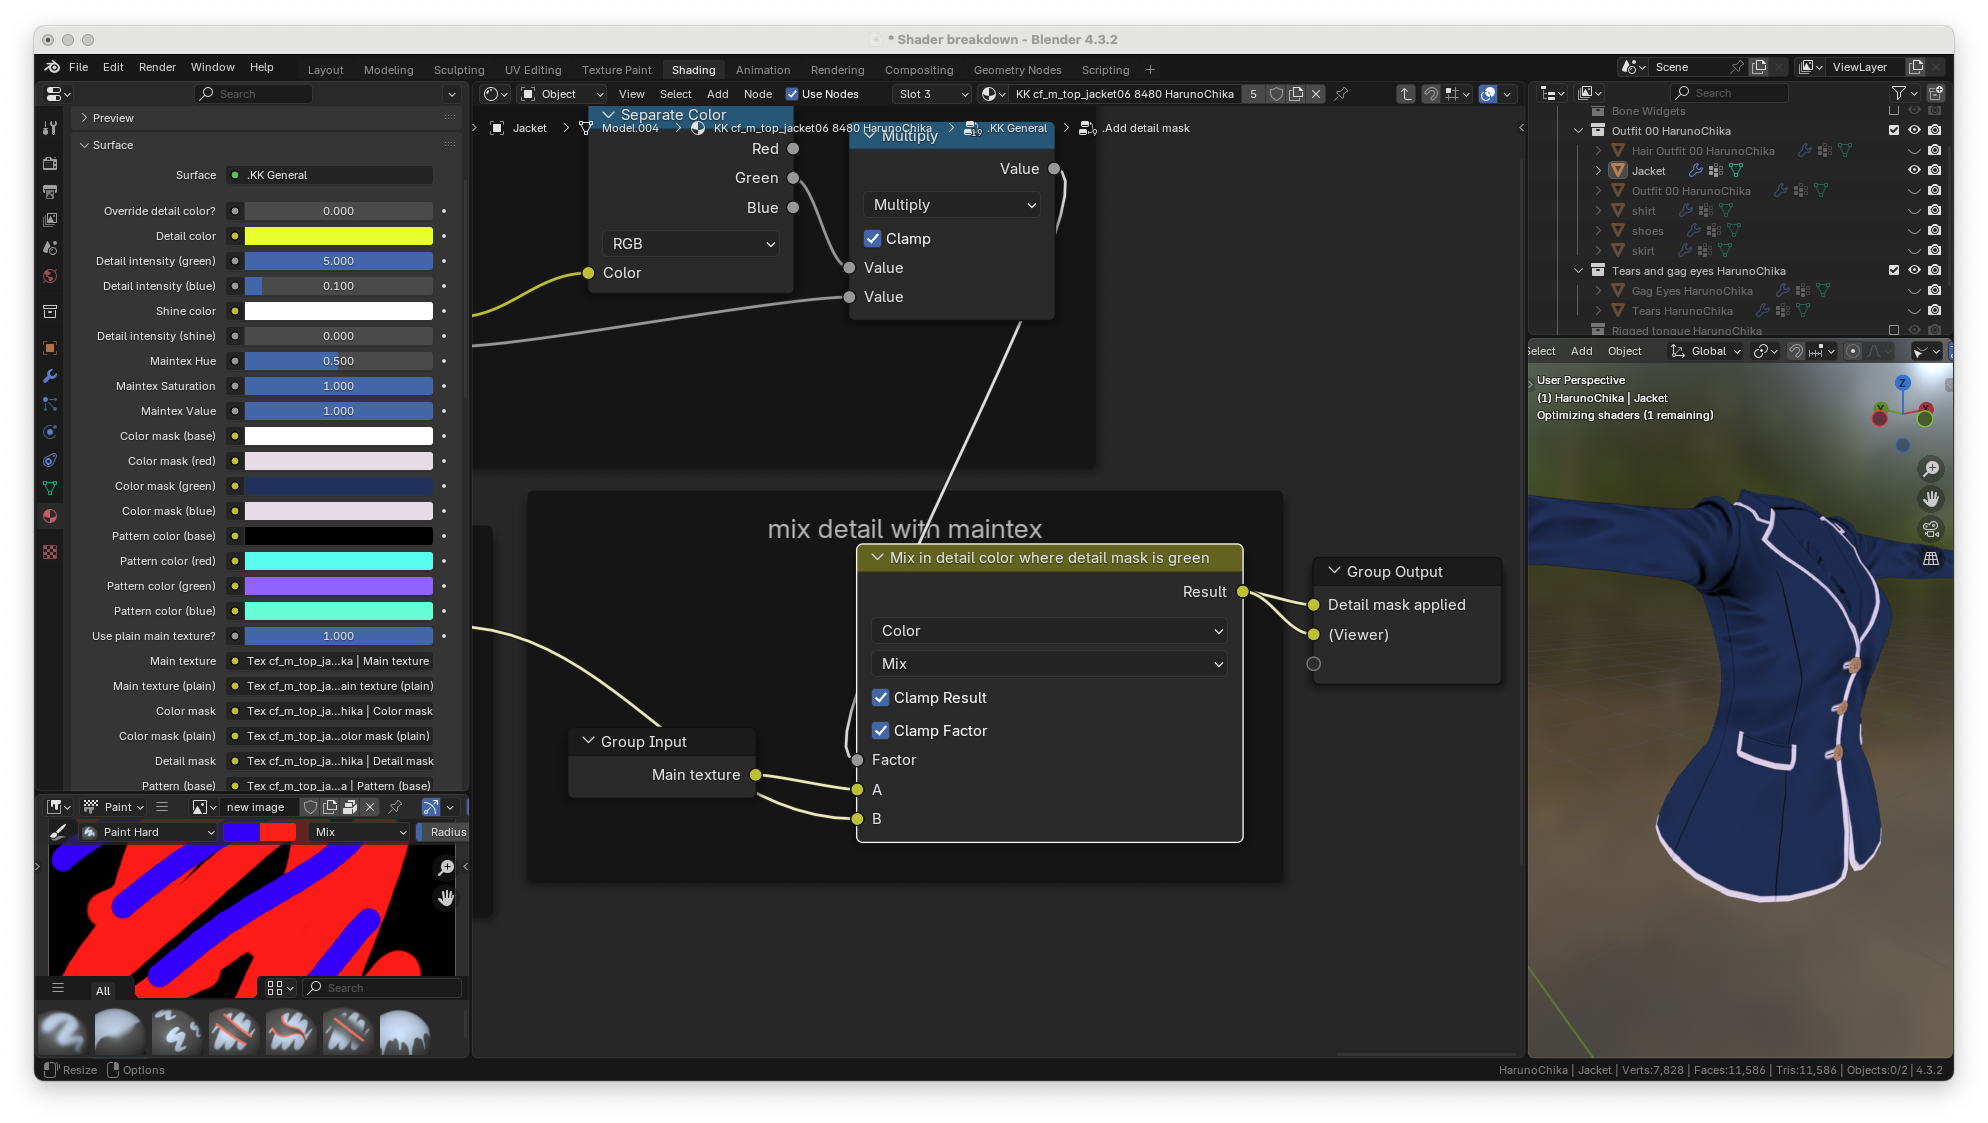
and here's what it looks like after the mix node, with the detail
color applied to the main texture (detail intensity still set to 5 for
clarity)
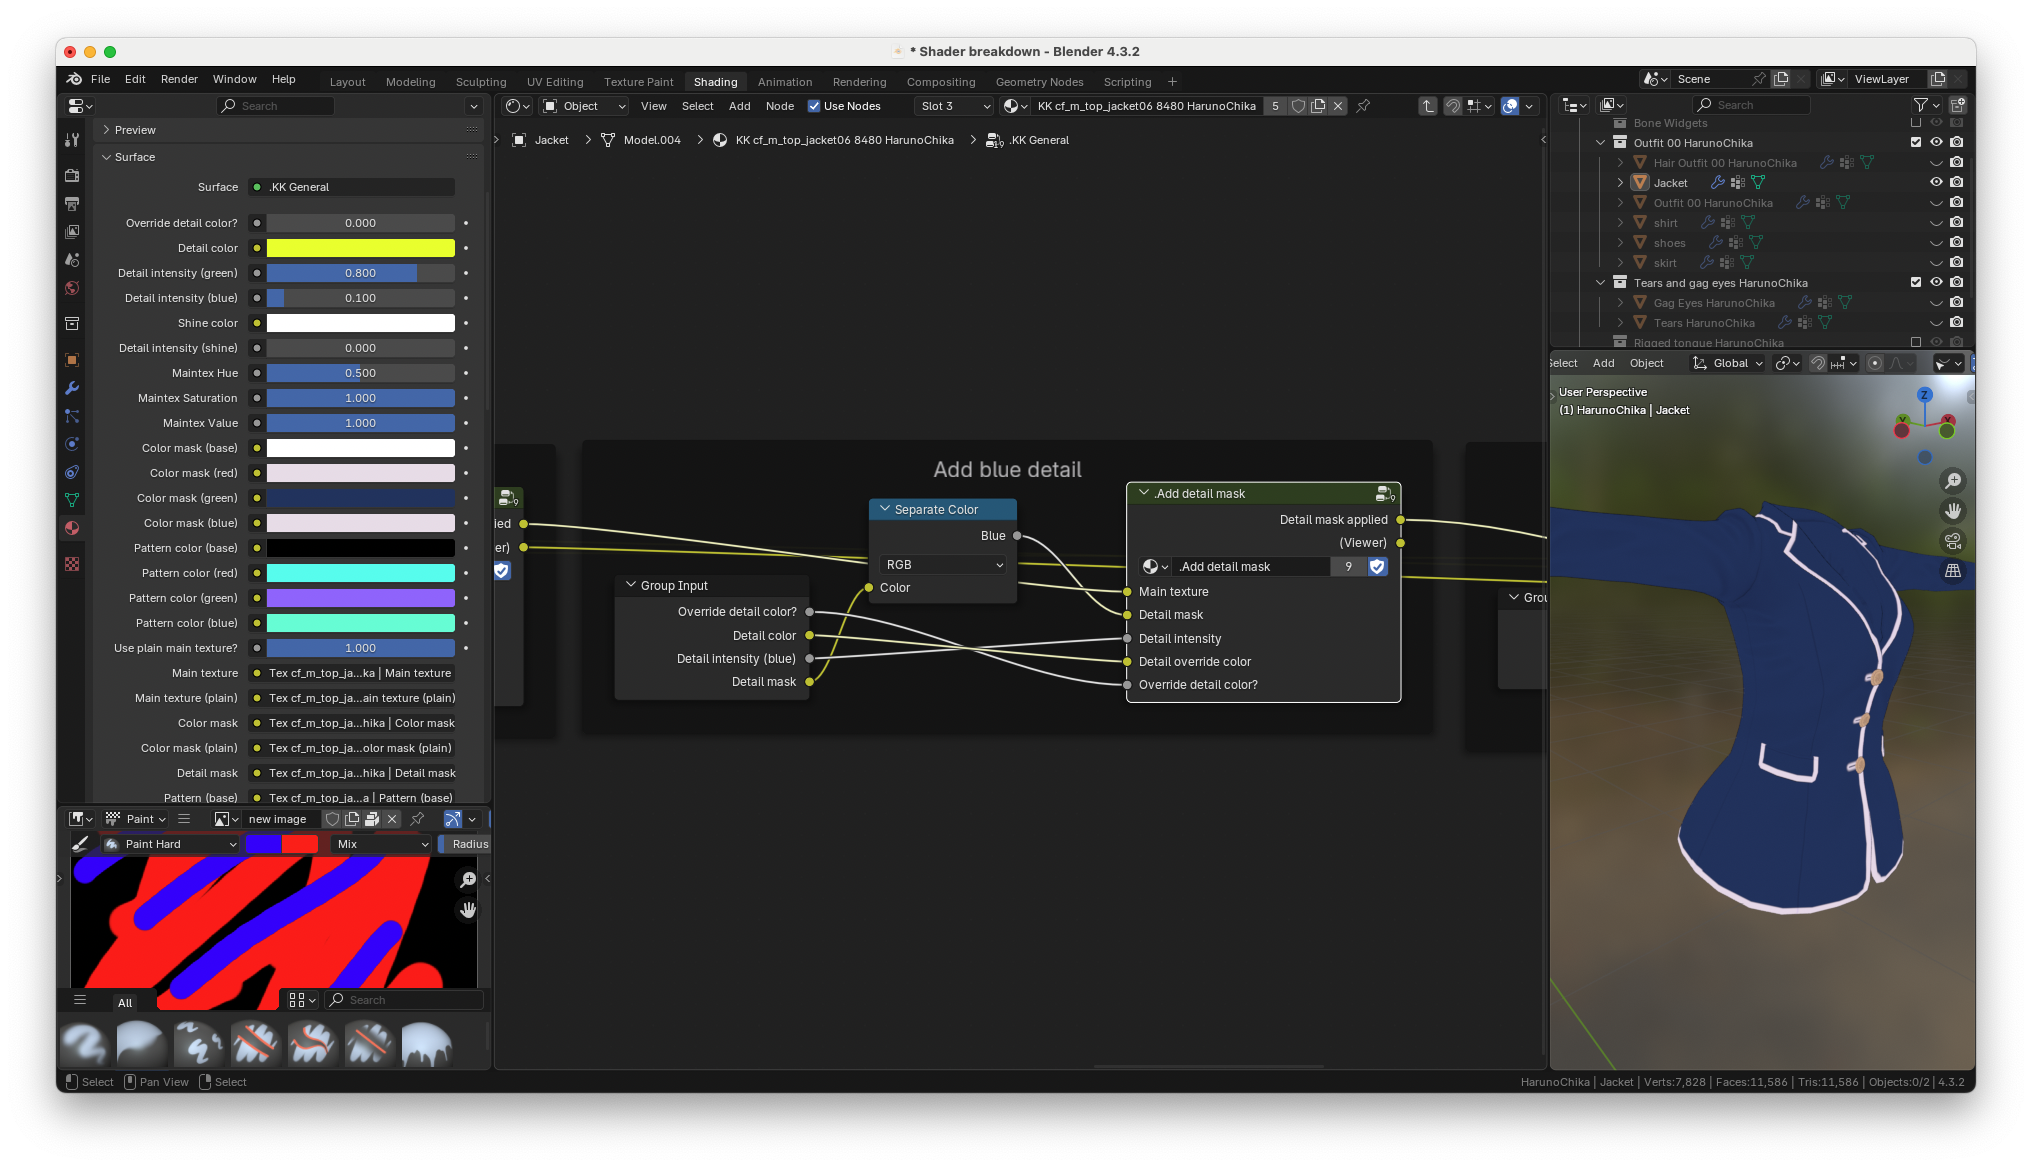
the same process is applied for the blue channel of the detail mask. In
order to ensure only the blue channel of the detail mask is used, the
"separate color" node is used to extract only the blue channel. This causes the blue channel to replace the RG and B channels of the detail mask so when the green channel is extracted later on, it's really just extracting the blue channel
## Detail shine
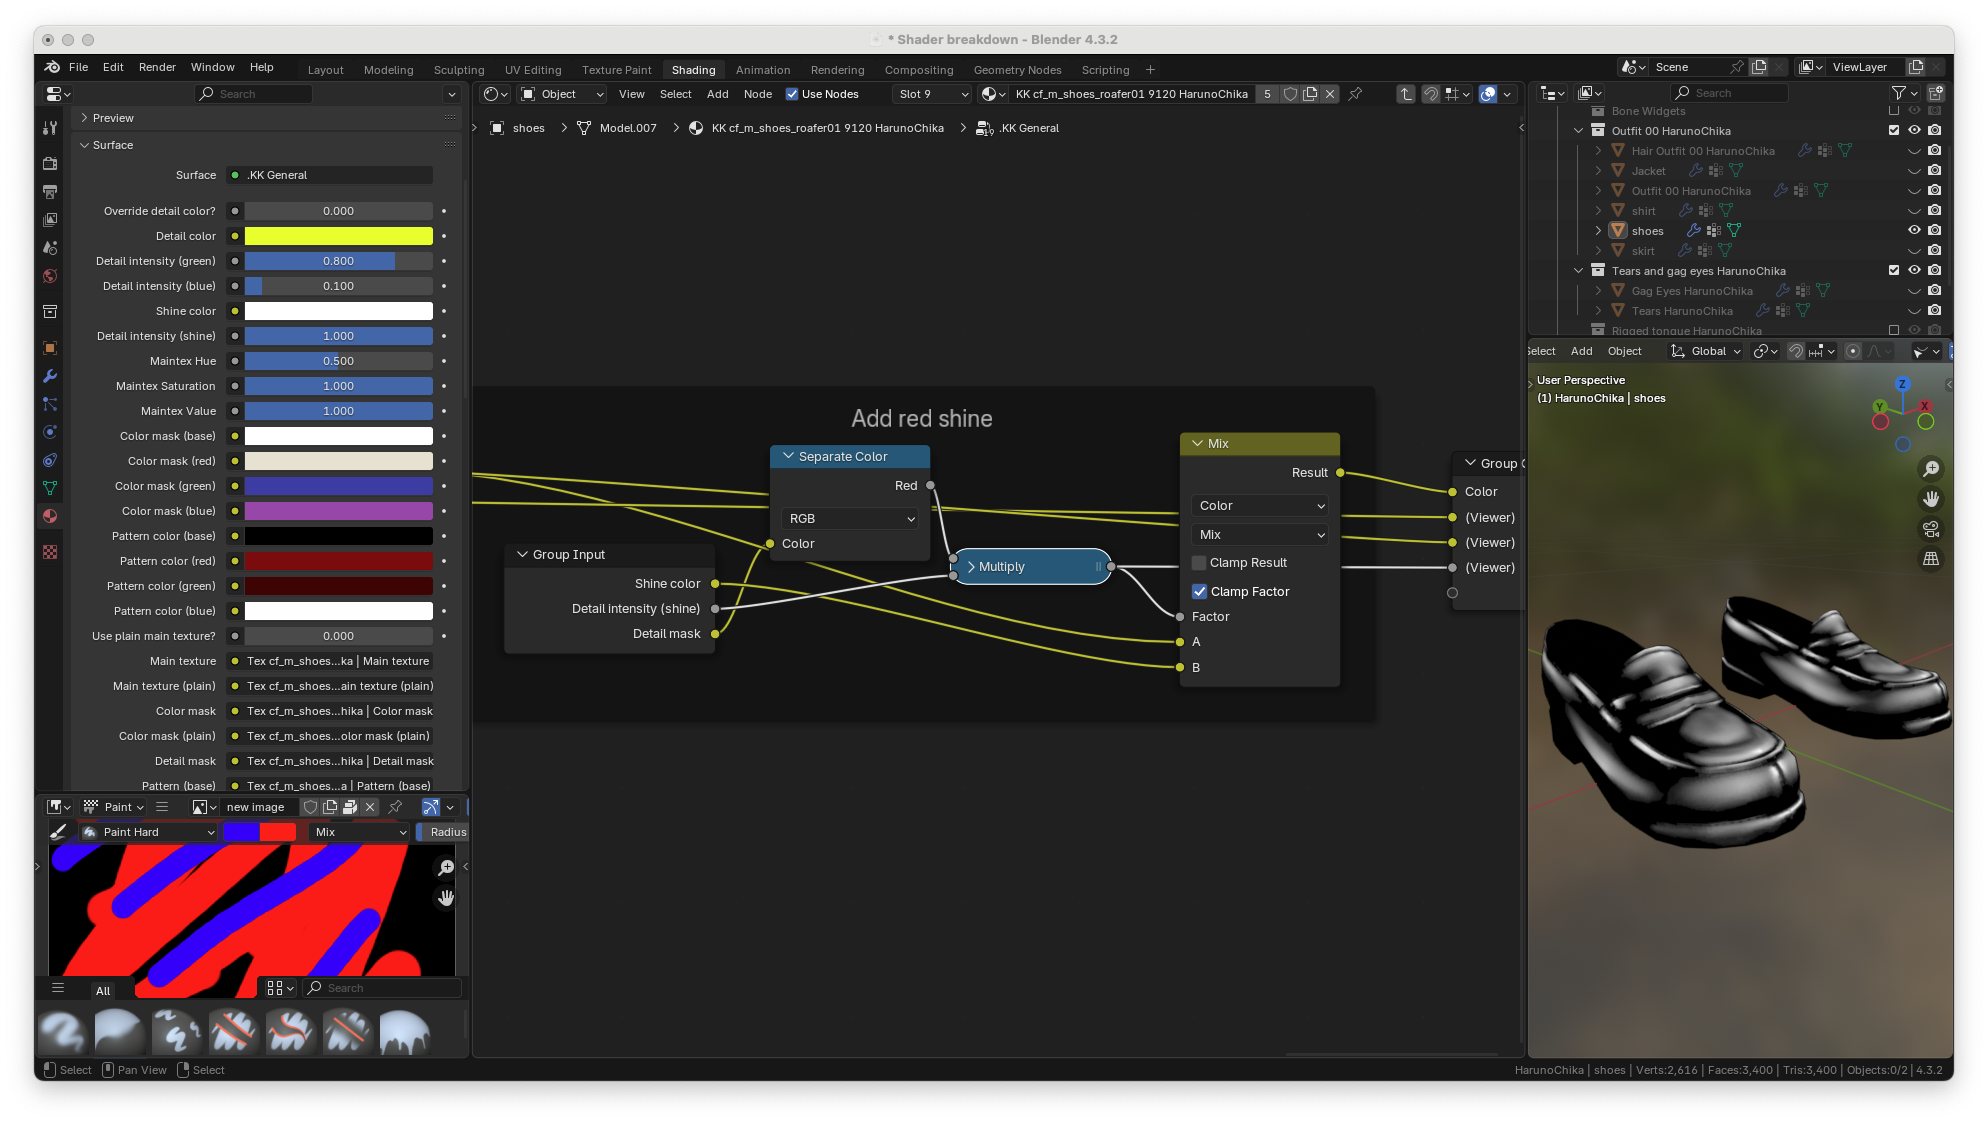
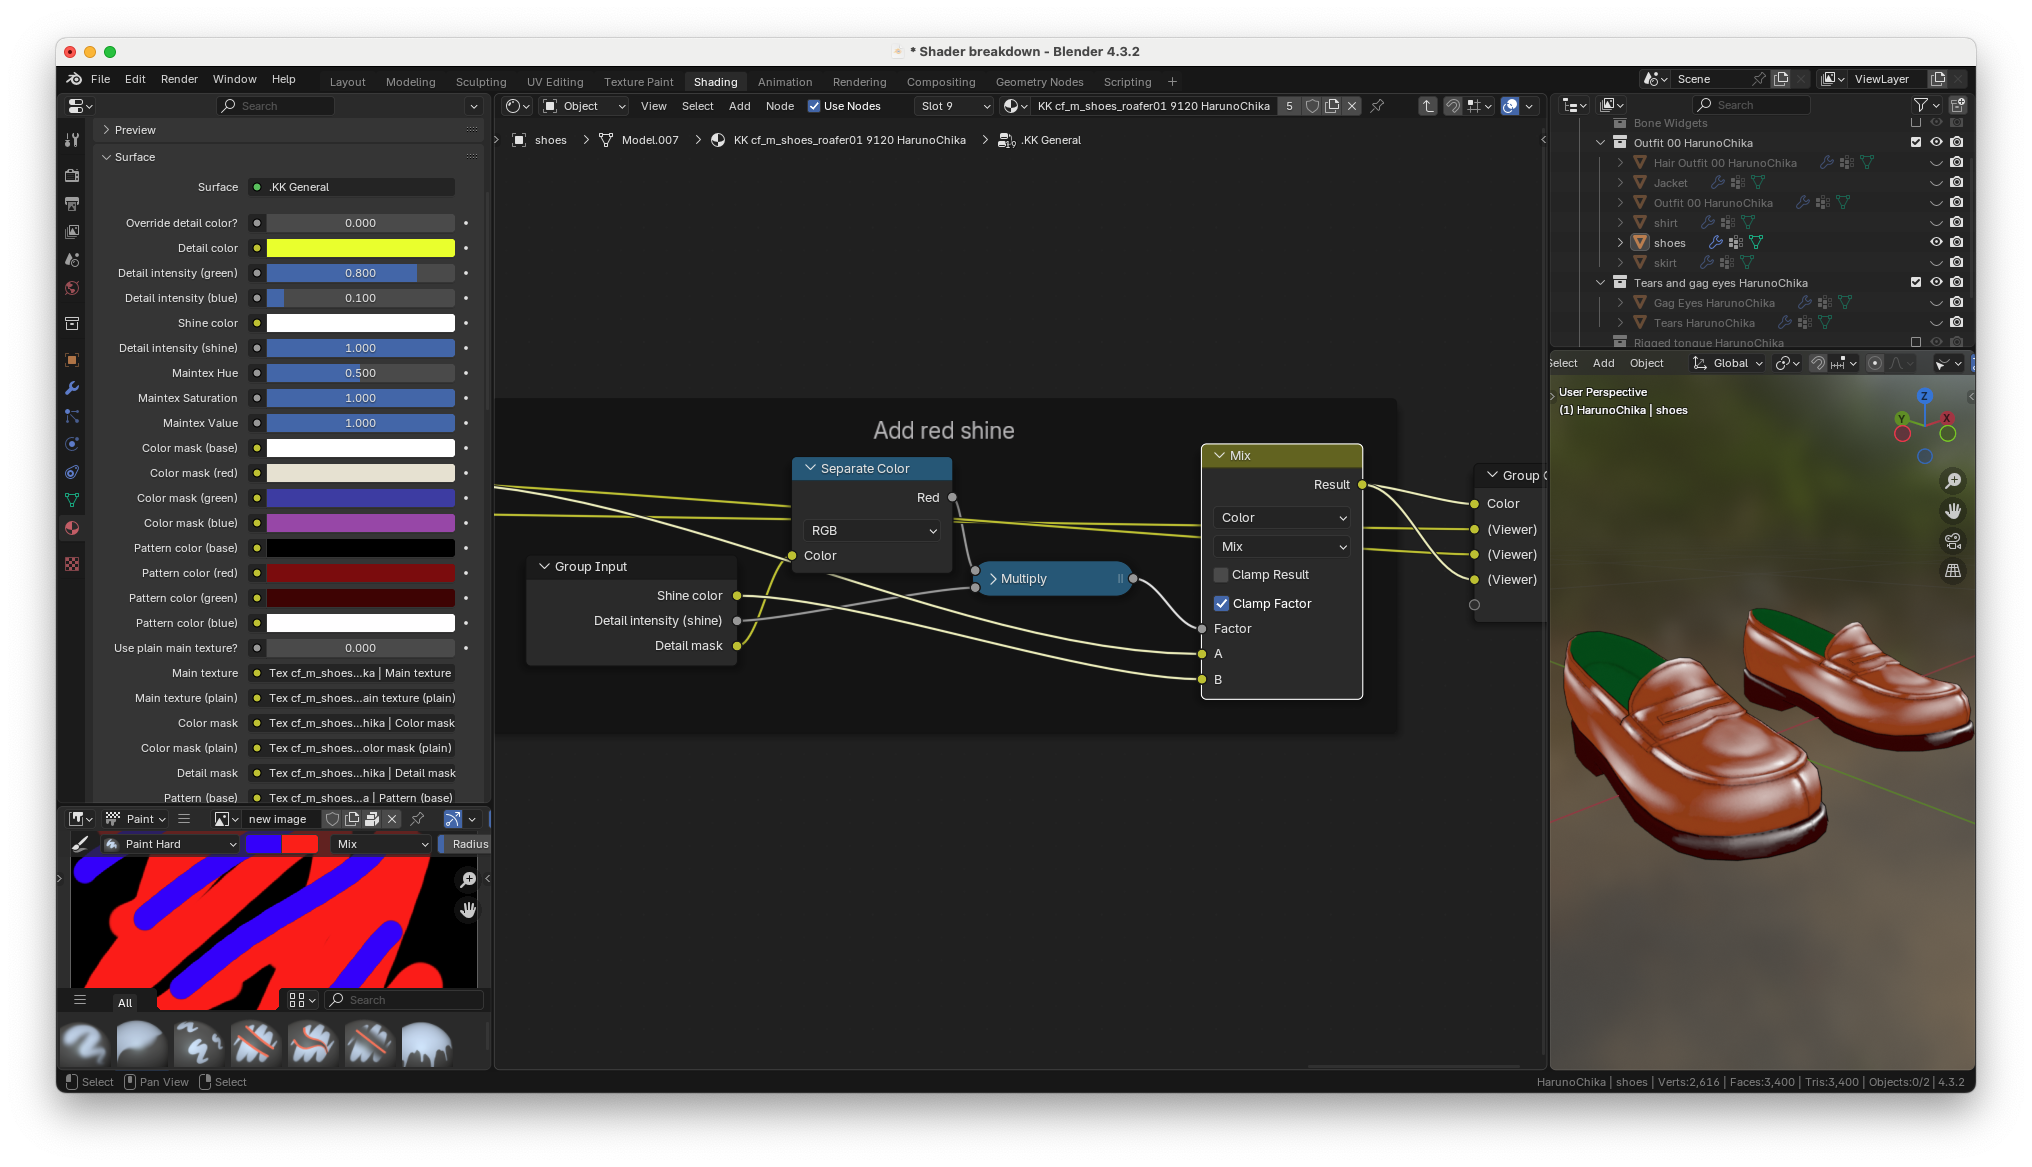
the final part of the KK general node group is the shine.
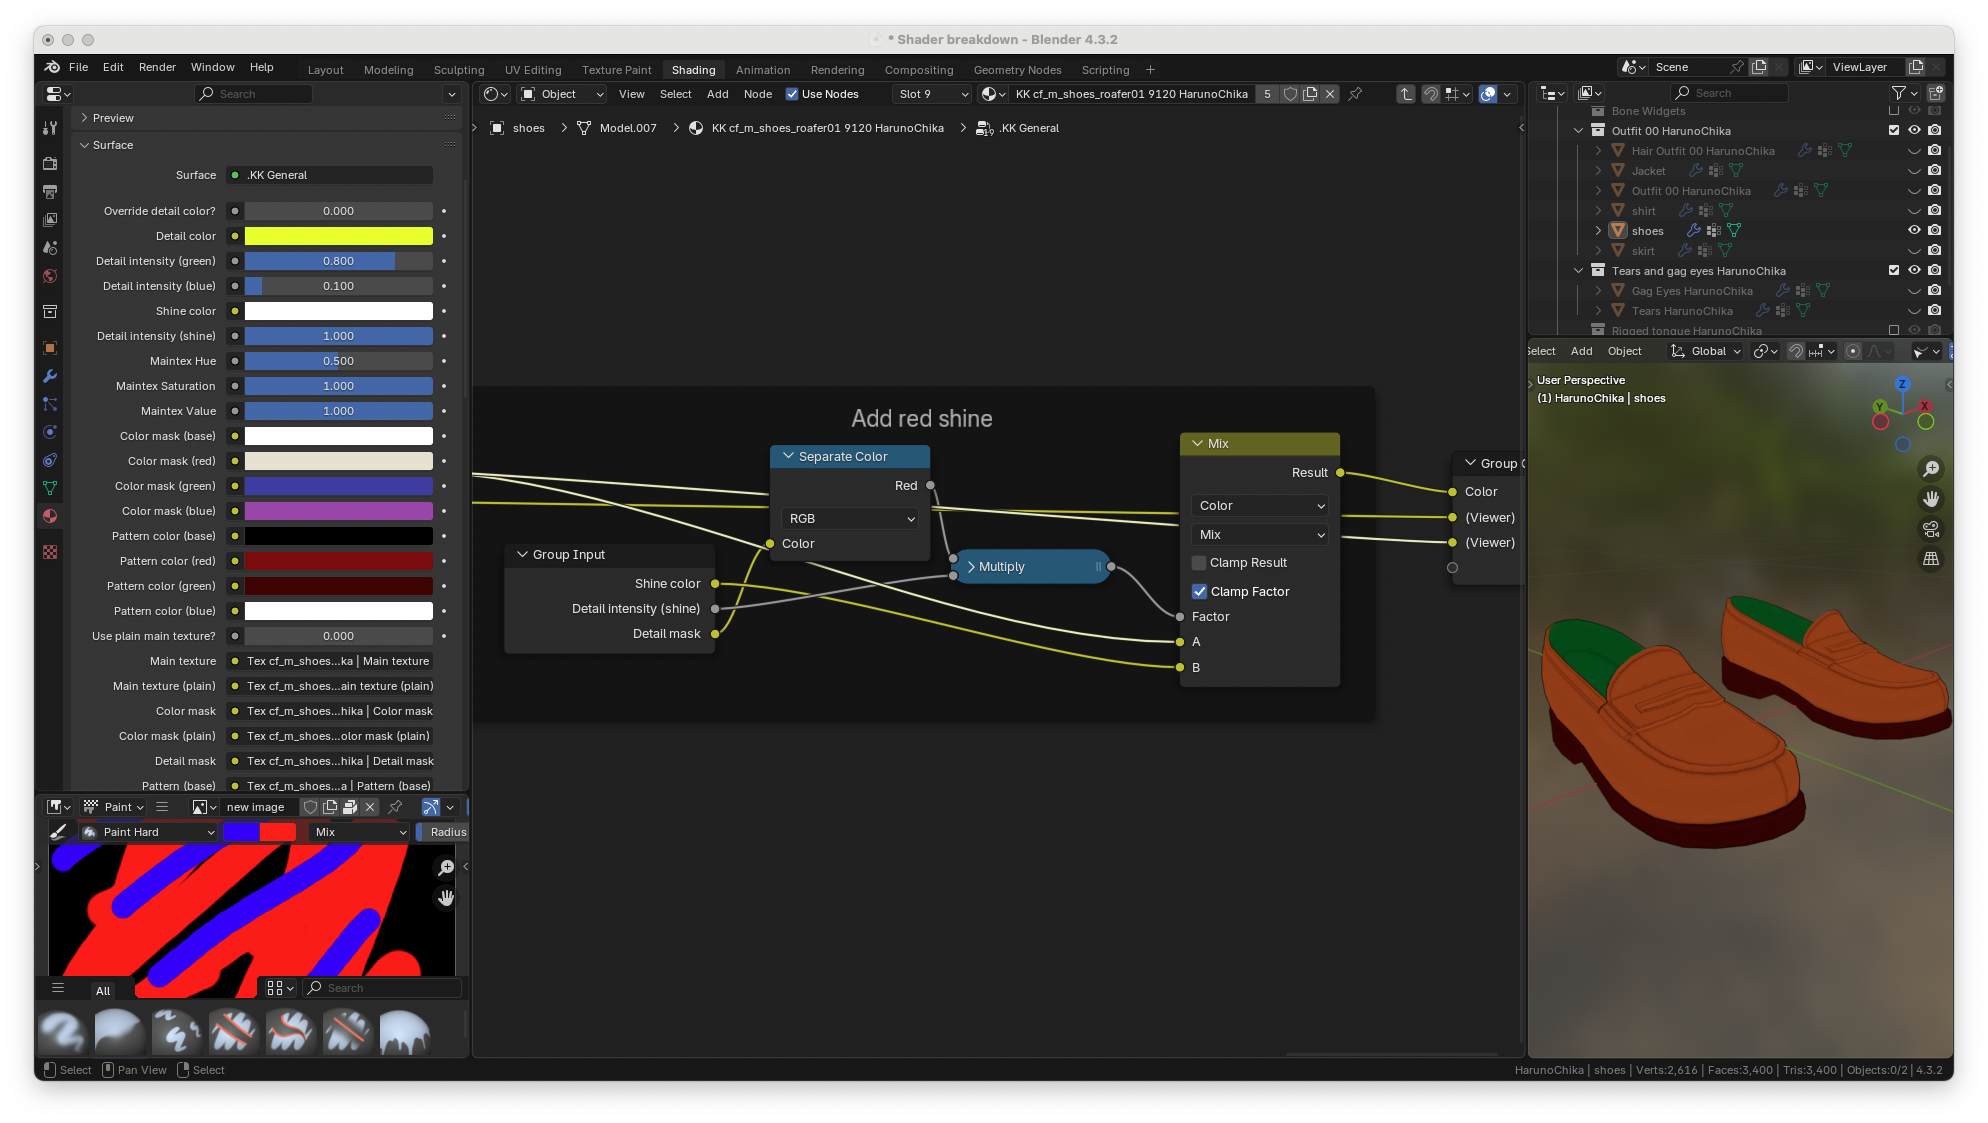
Just like before the detail mask is loaded in.
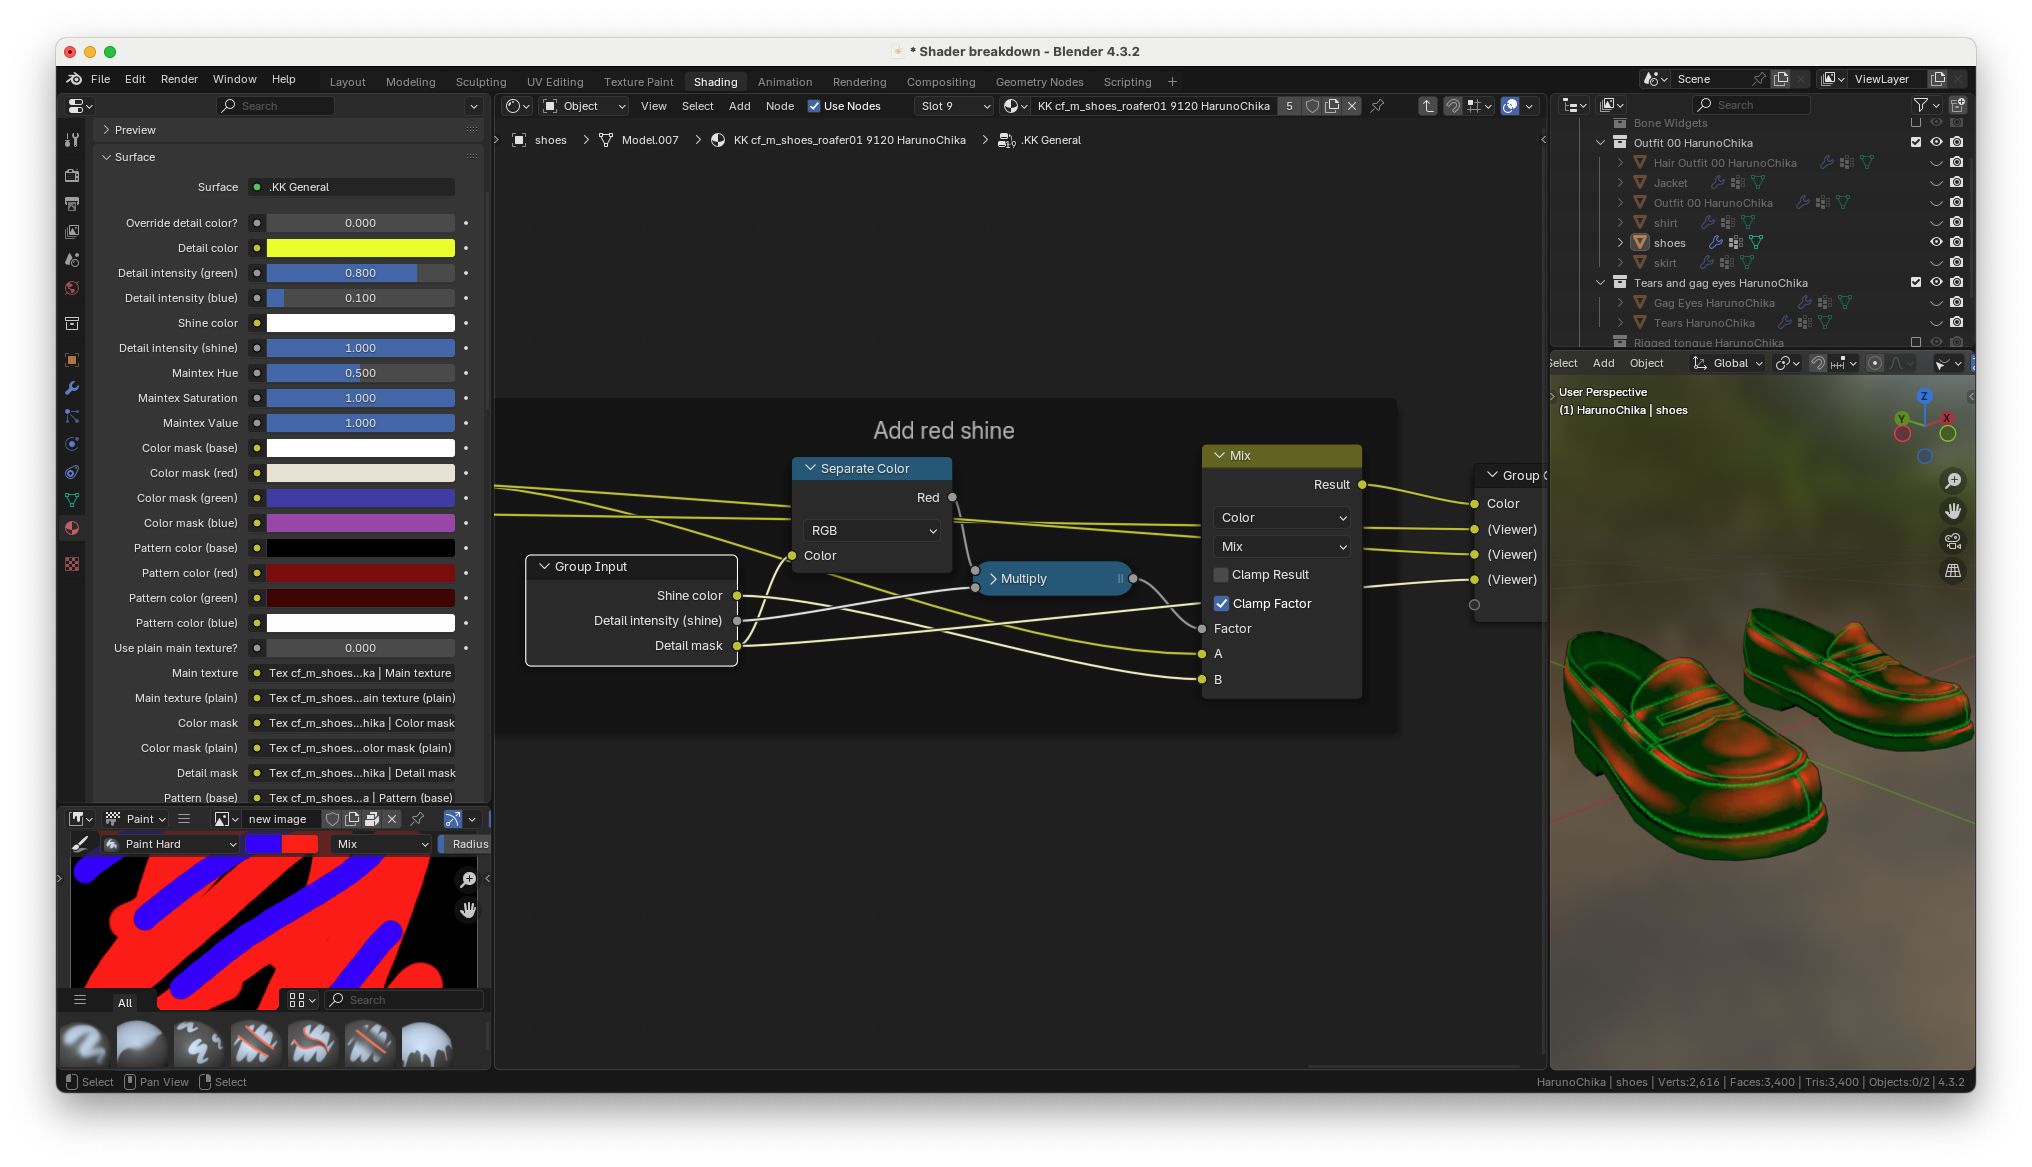
And the red channel is used along with the shine intensity to determine
where the shine color will be applied..
## Combine colors group
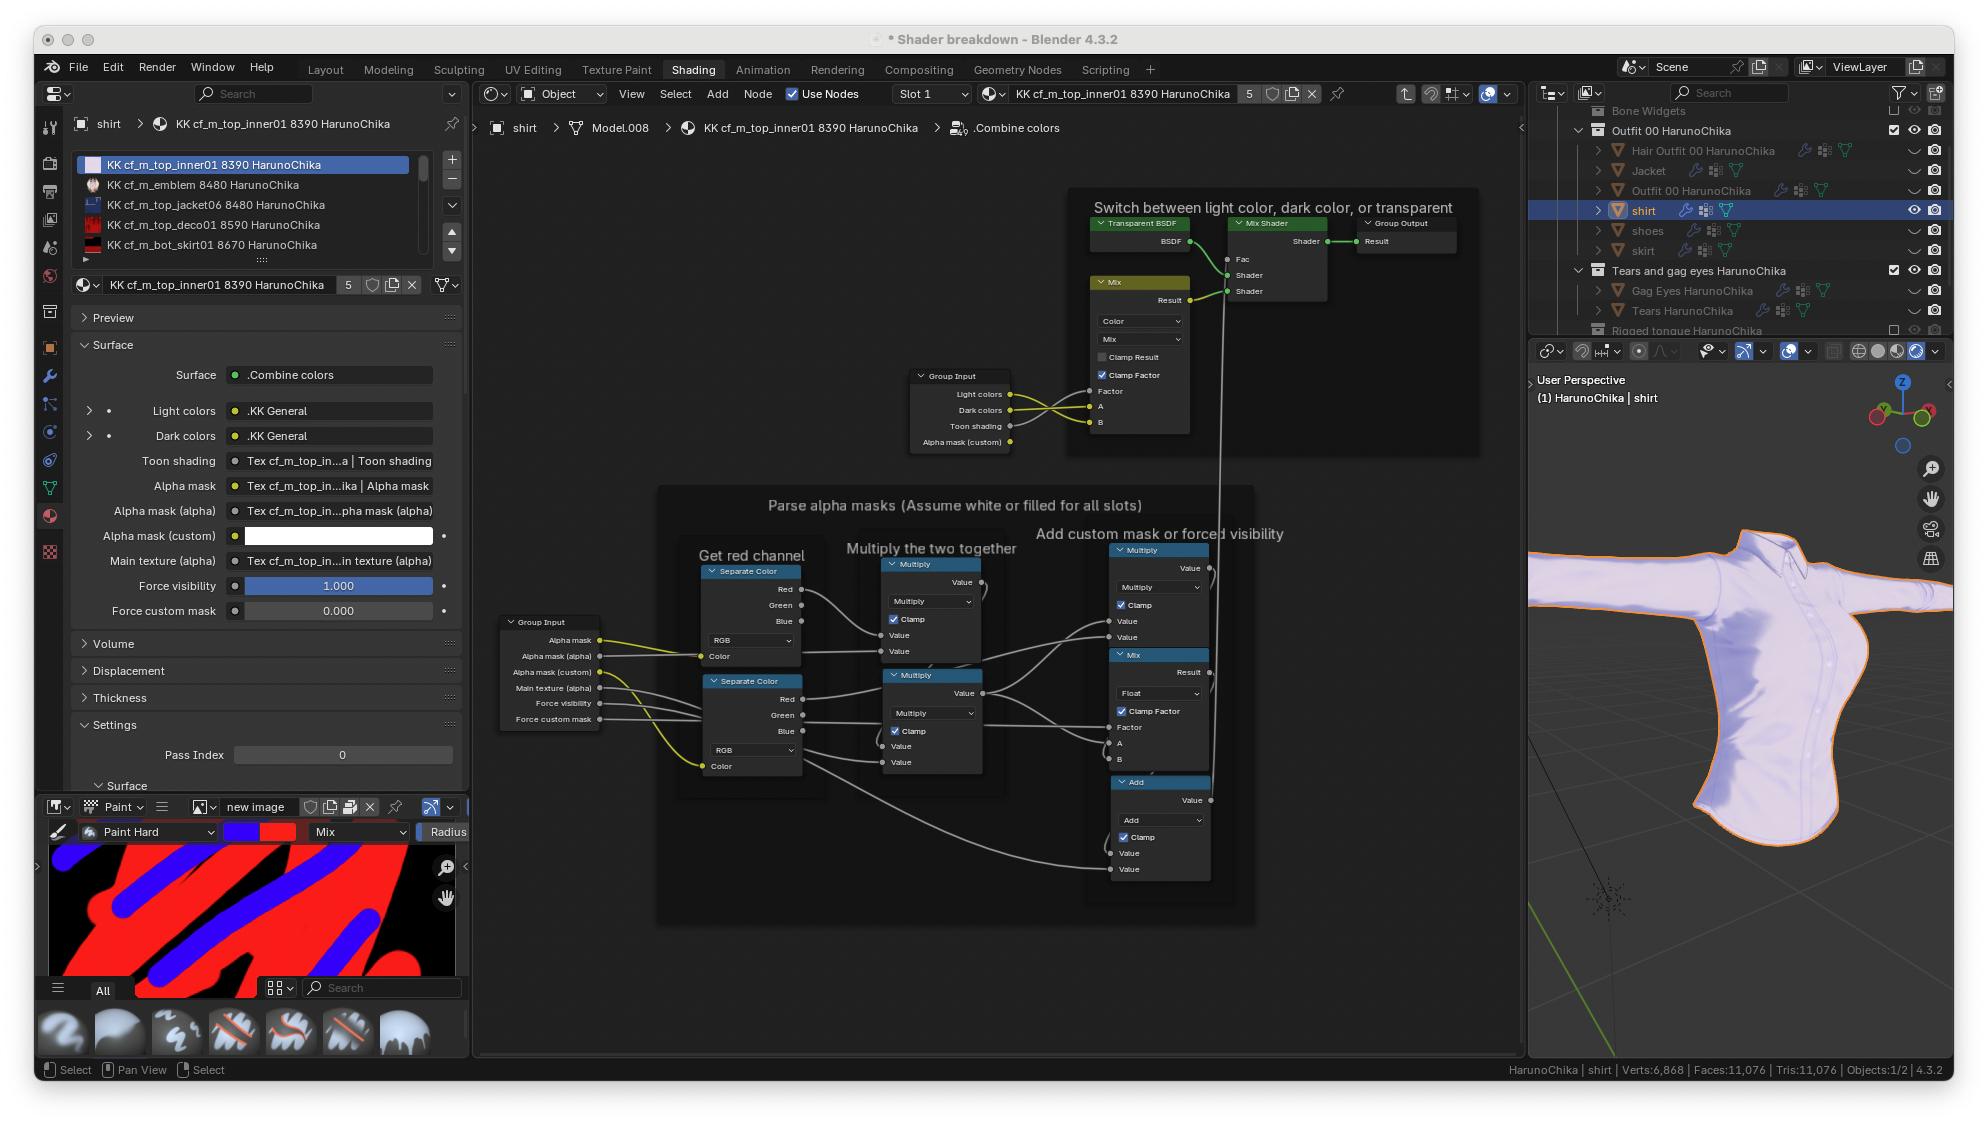
the final portion of the KK general material Is the combine colors
group. This group takes the light colors and the dark colors from the
previous shader groups and combines them using the black-and-white
mask from the toon shading group. This group also applies
transparency to the model if its main texture is semi transparent, or
if it has an alpha mask. Custom alpha masks can also be loaded in. You
can check the body material for an example of a custom alpha mask.
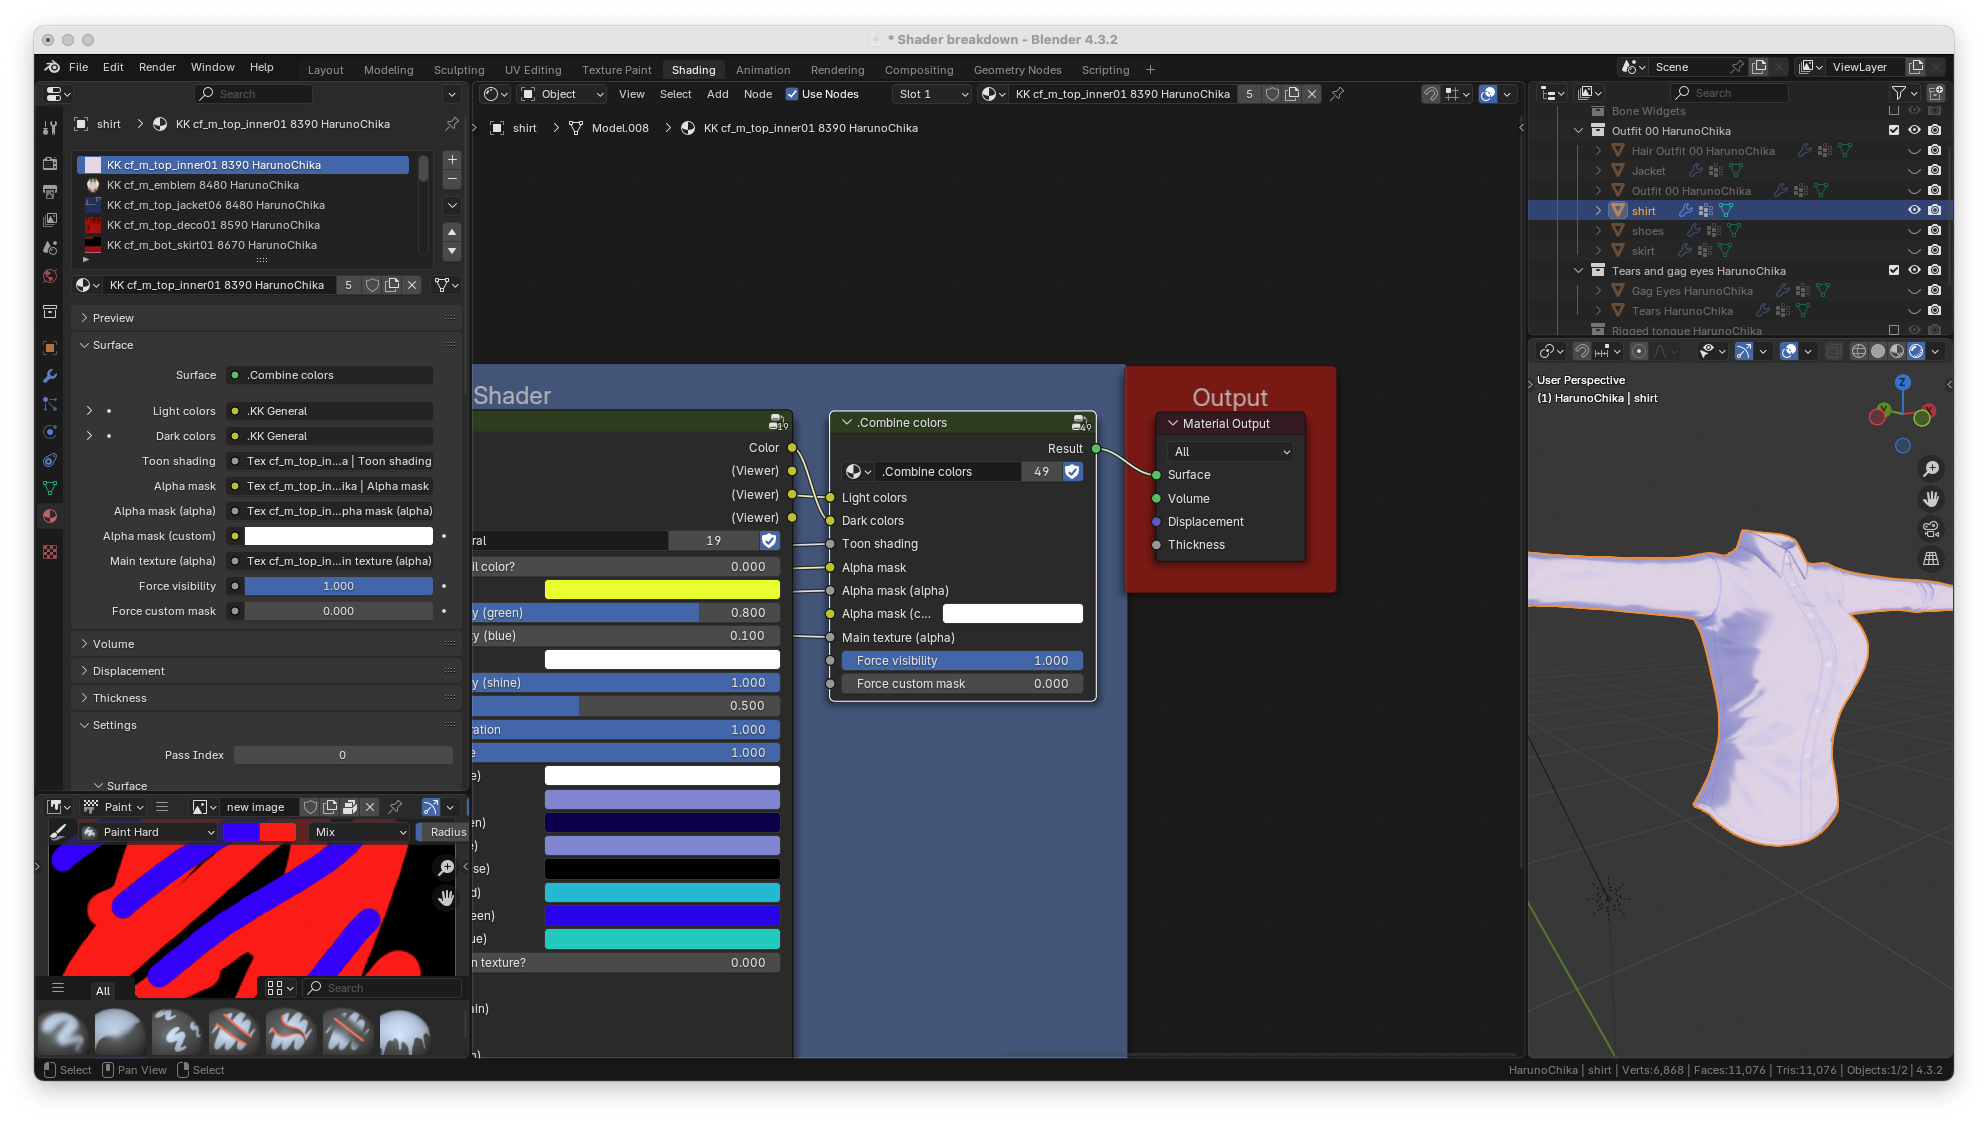
this is all there is inside of the combine colors group.
To keep things simple I'm going to remove the custom alpha mask from
the group, again you can check the body material if you want to see how
it works yourself.
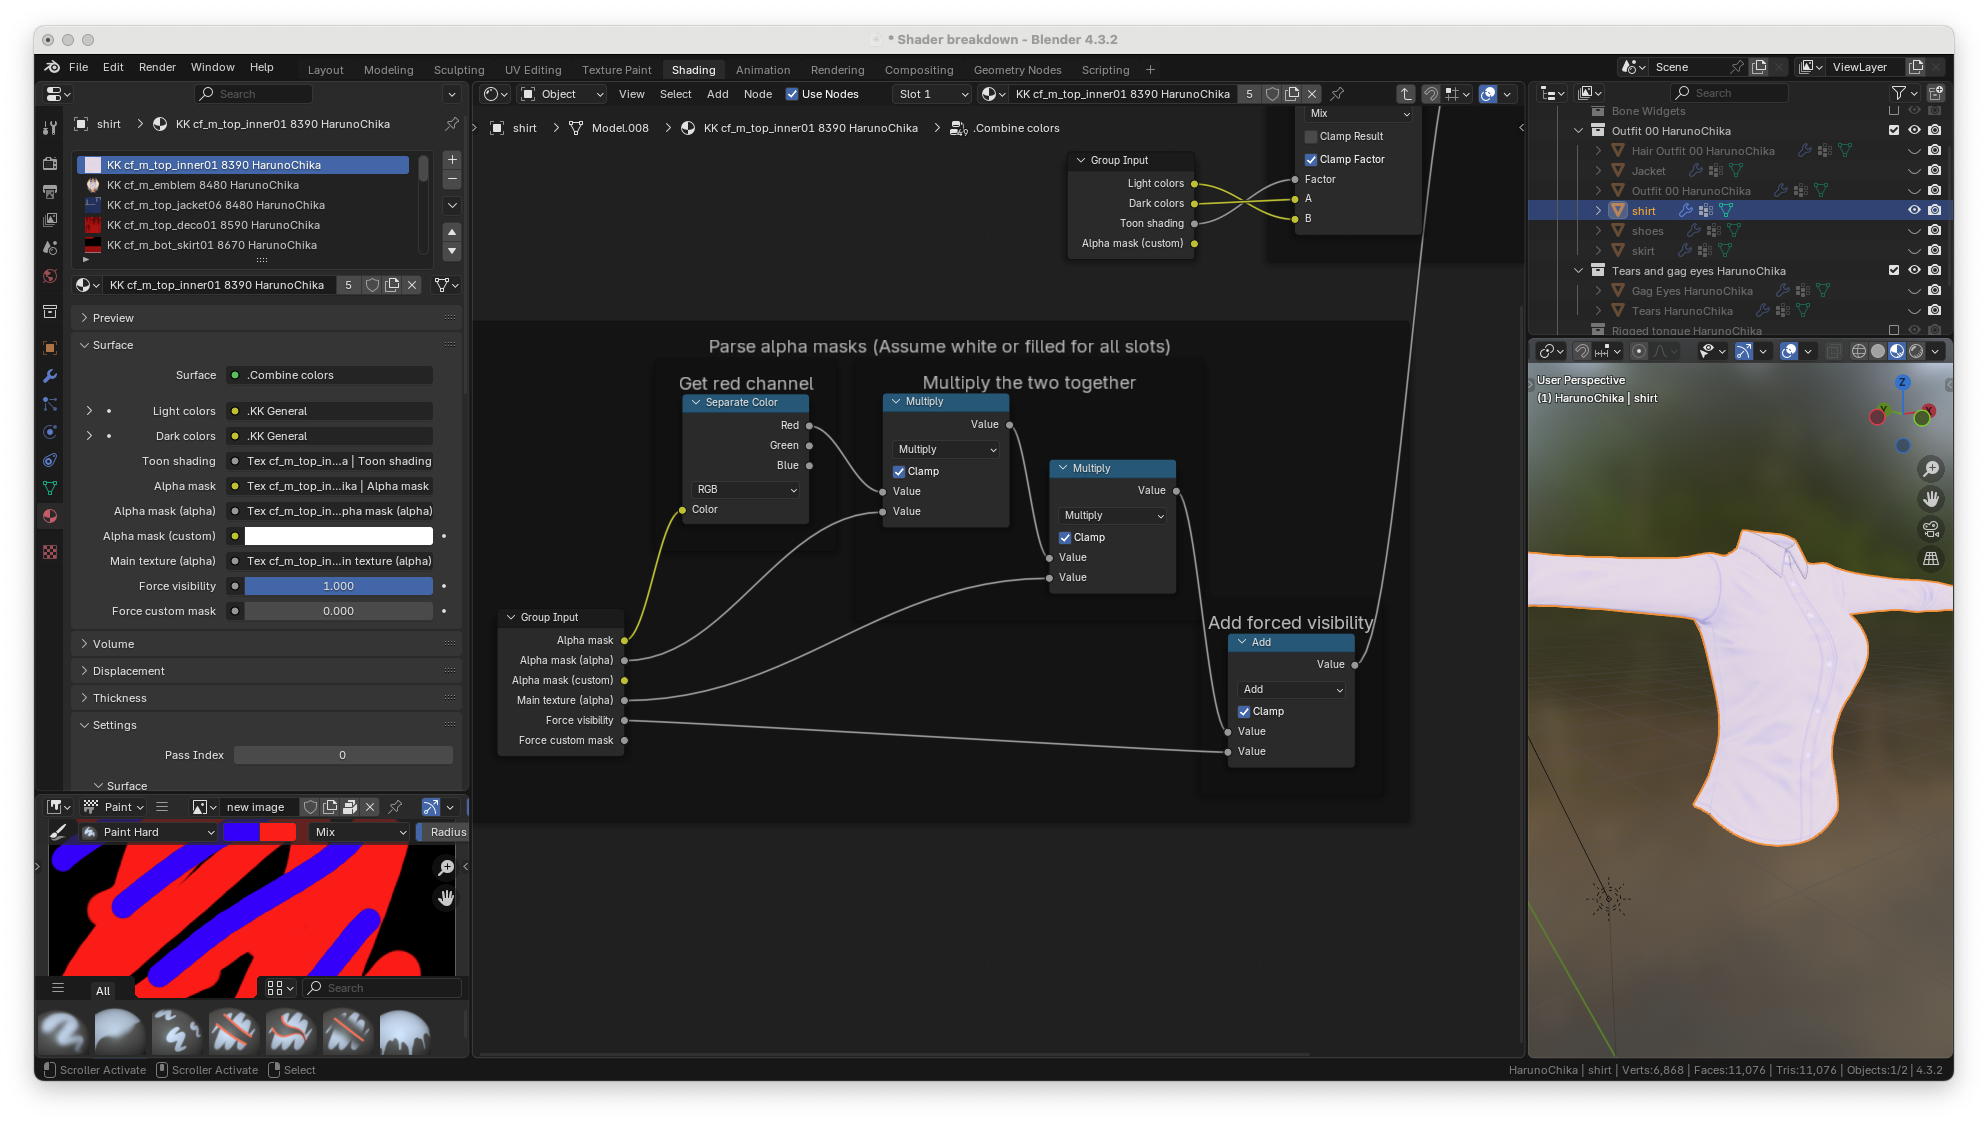
so let's start with the alpha mask
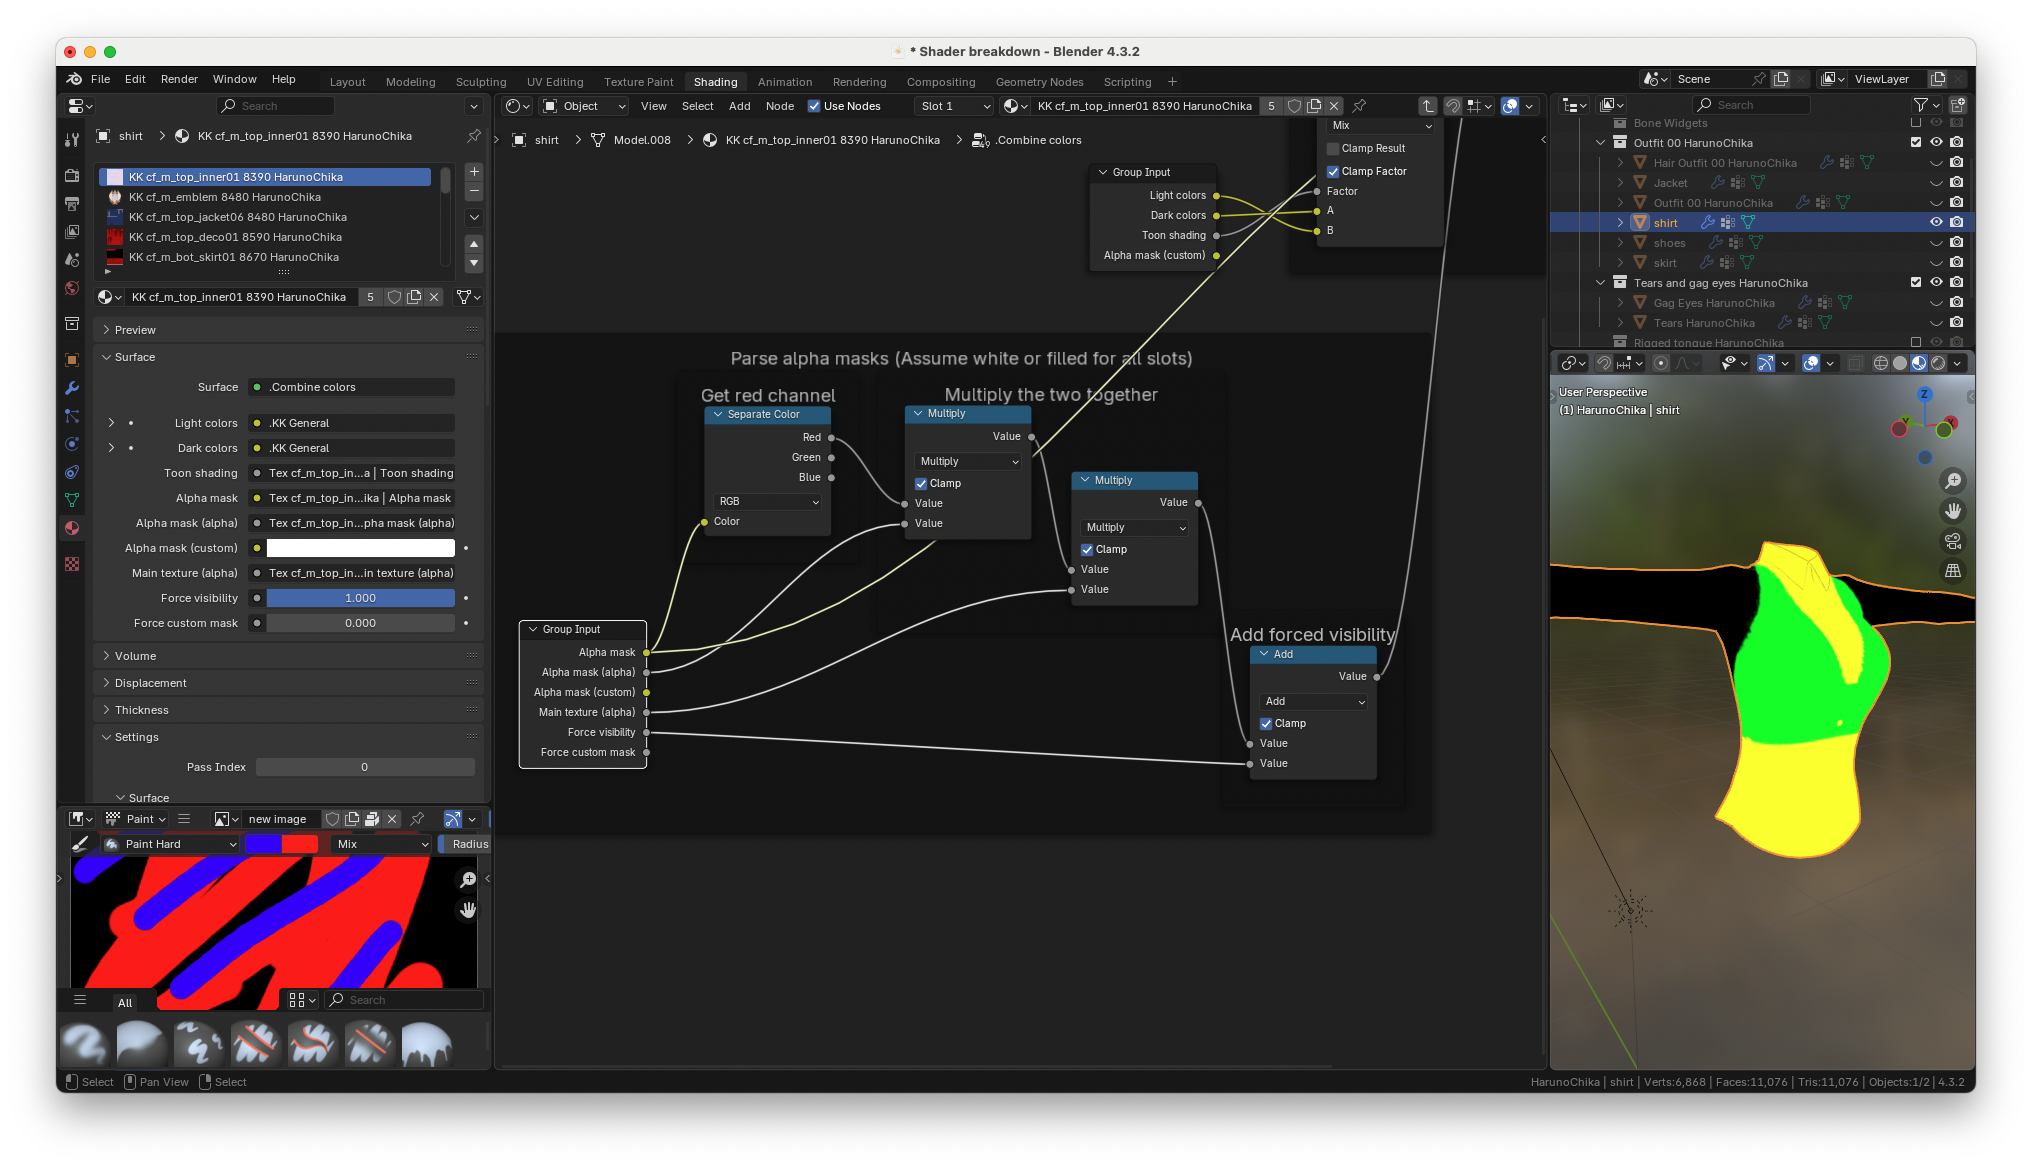
the red channel of the alpha mask is used to determine what parts of the
clothes should be visible
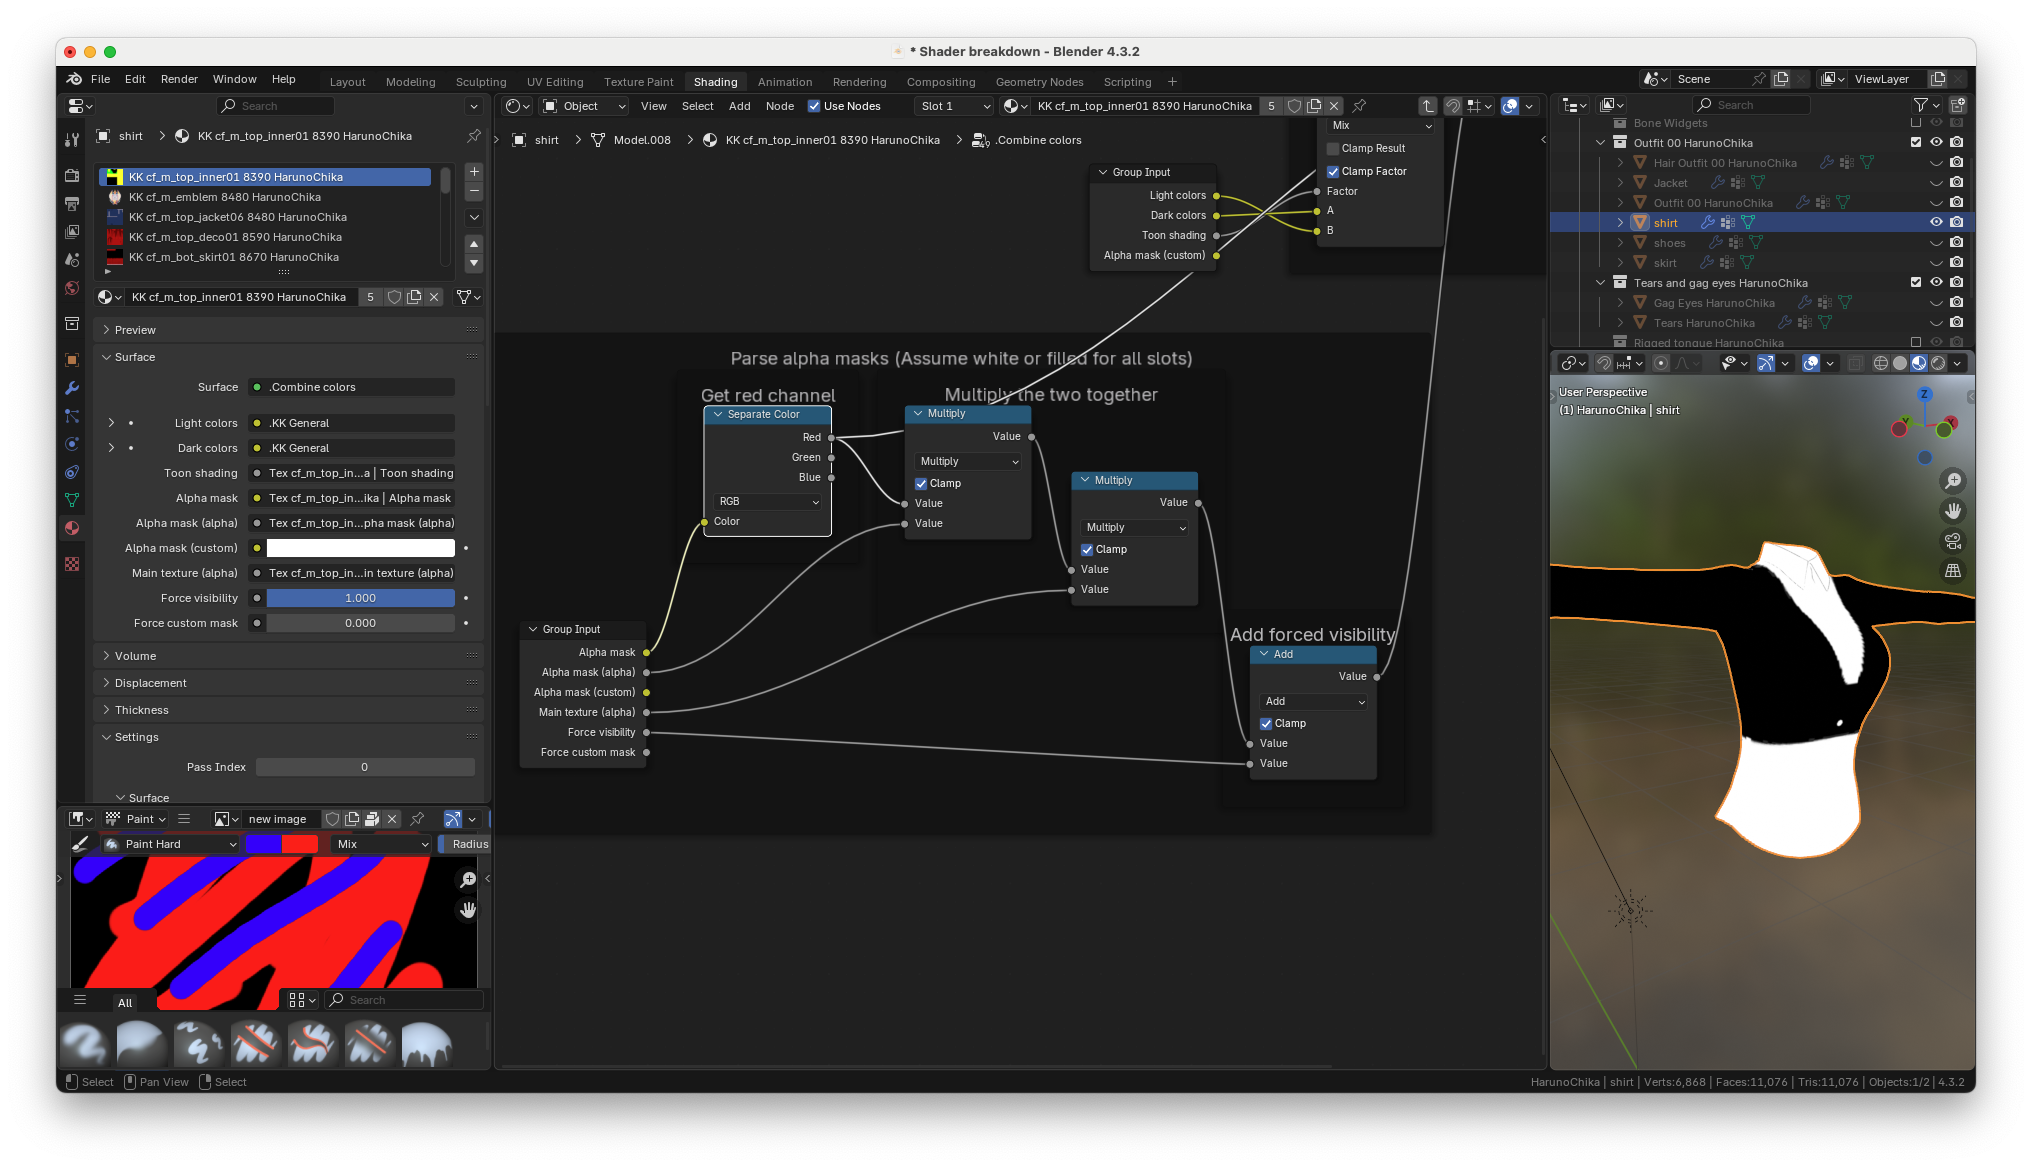
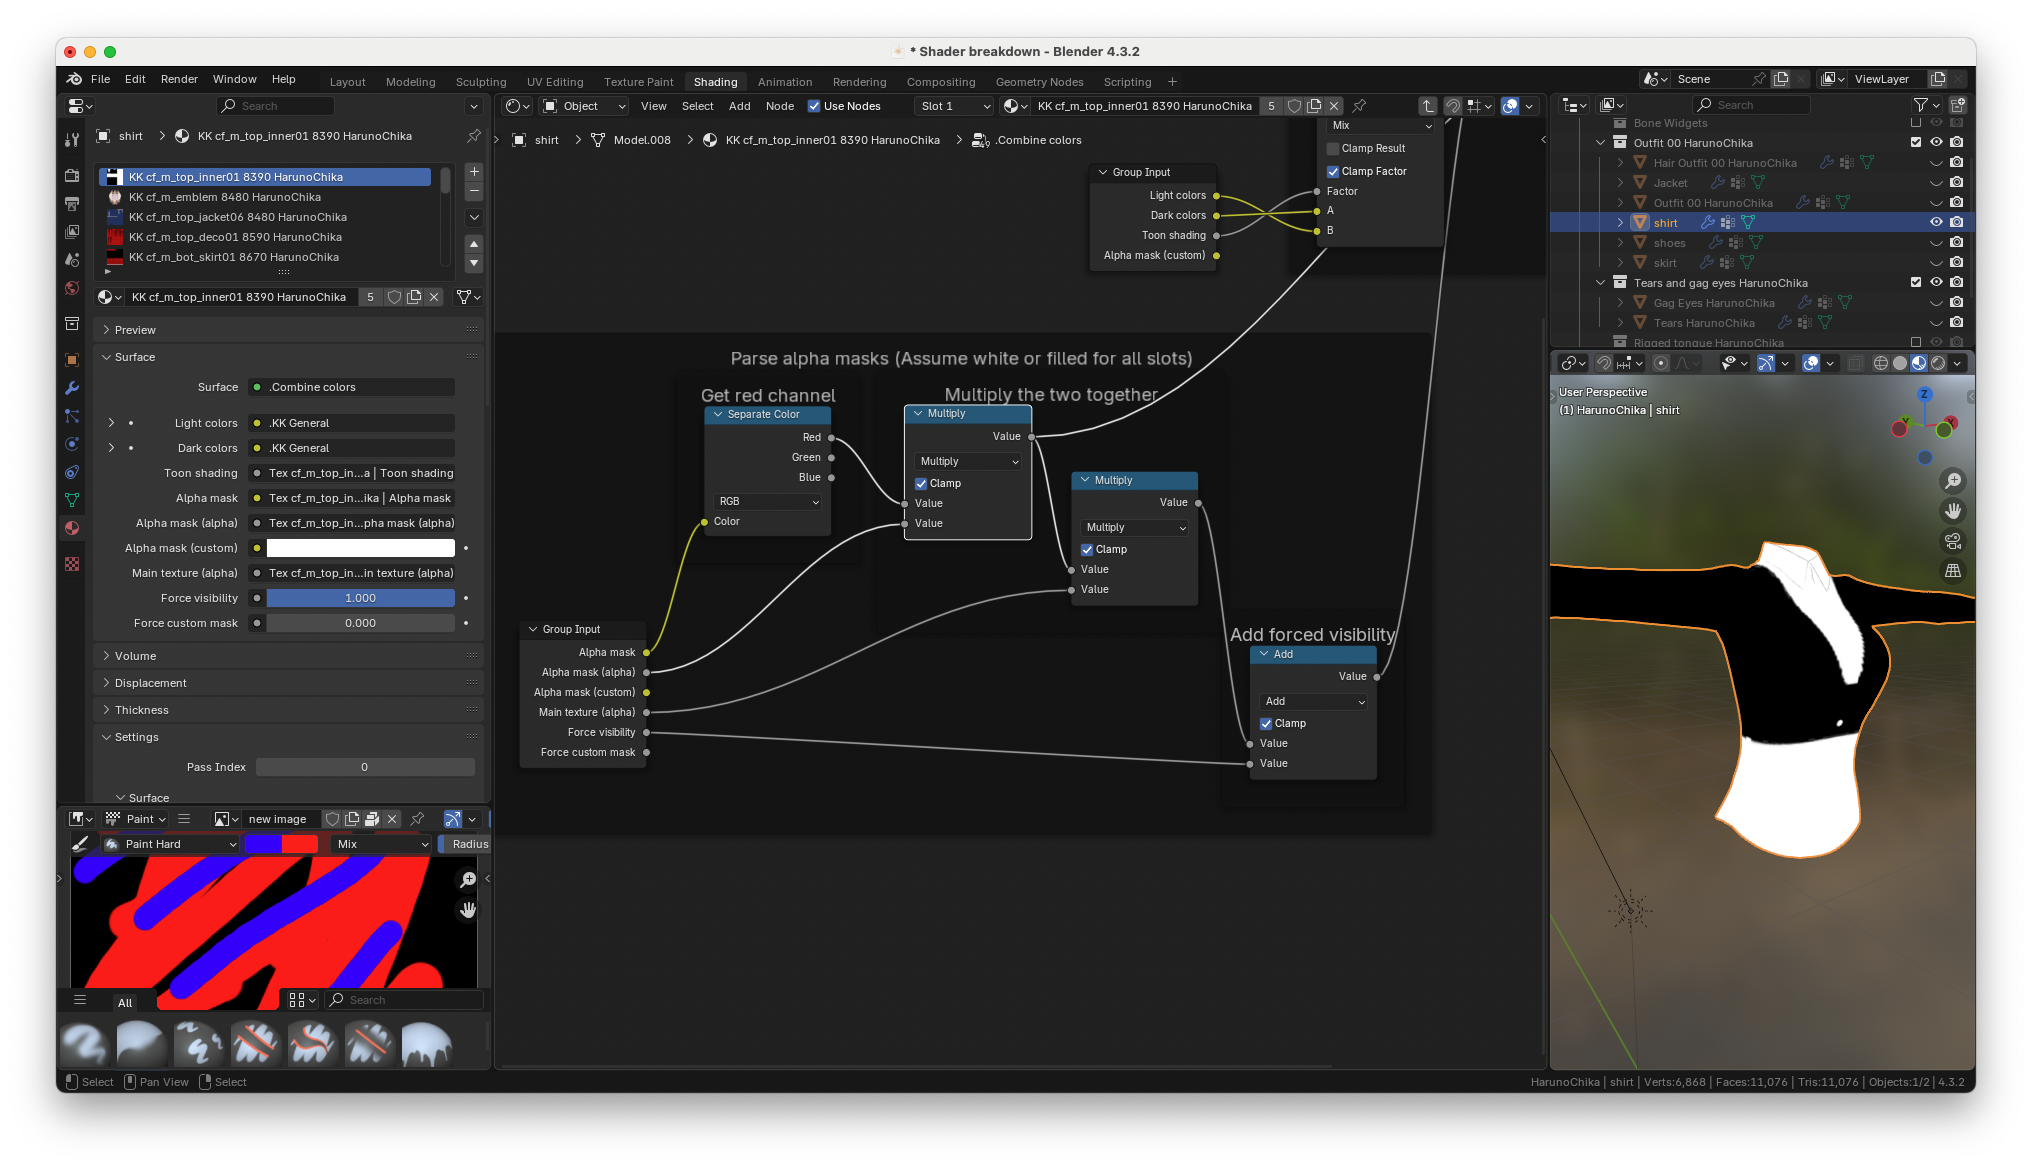
in some cases the alpha channel of the alpha mask is also used to
determine what parts of the clothes should be visible. In this case, the
alpha mask's alpha channel is pure white, so it does not affect the
clothes alpha
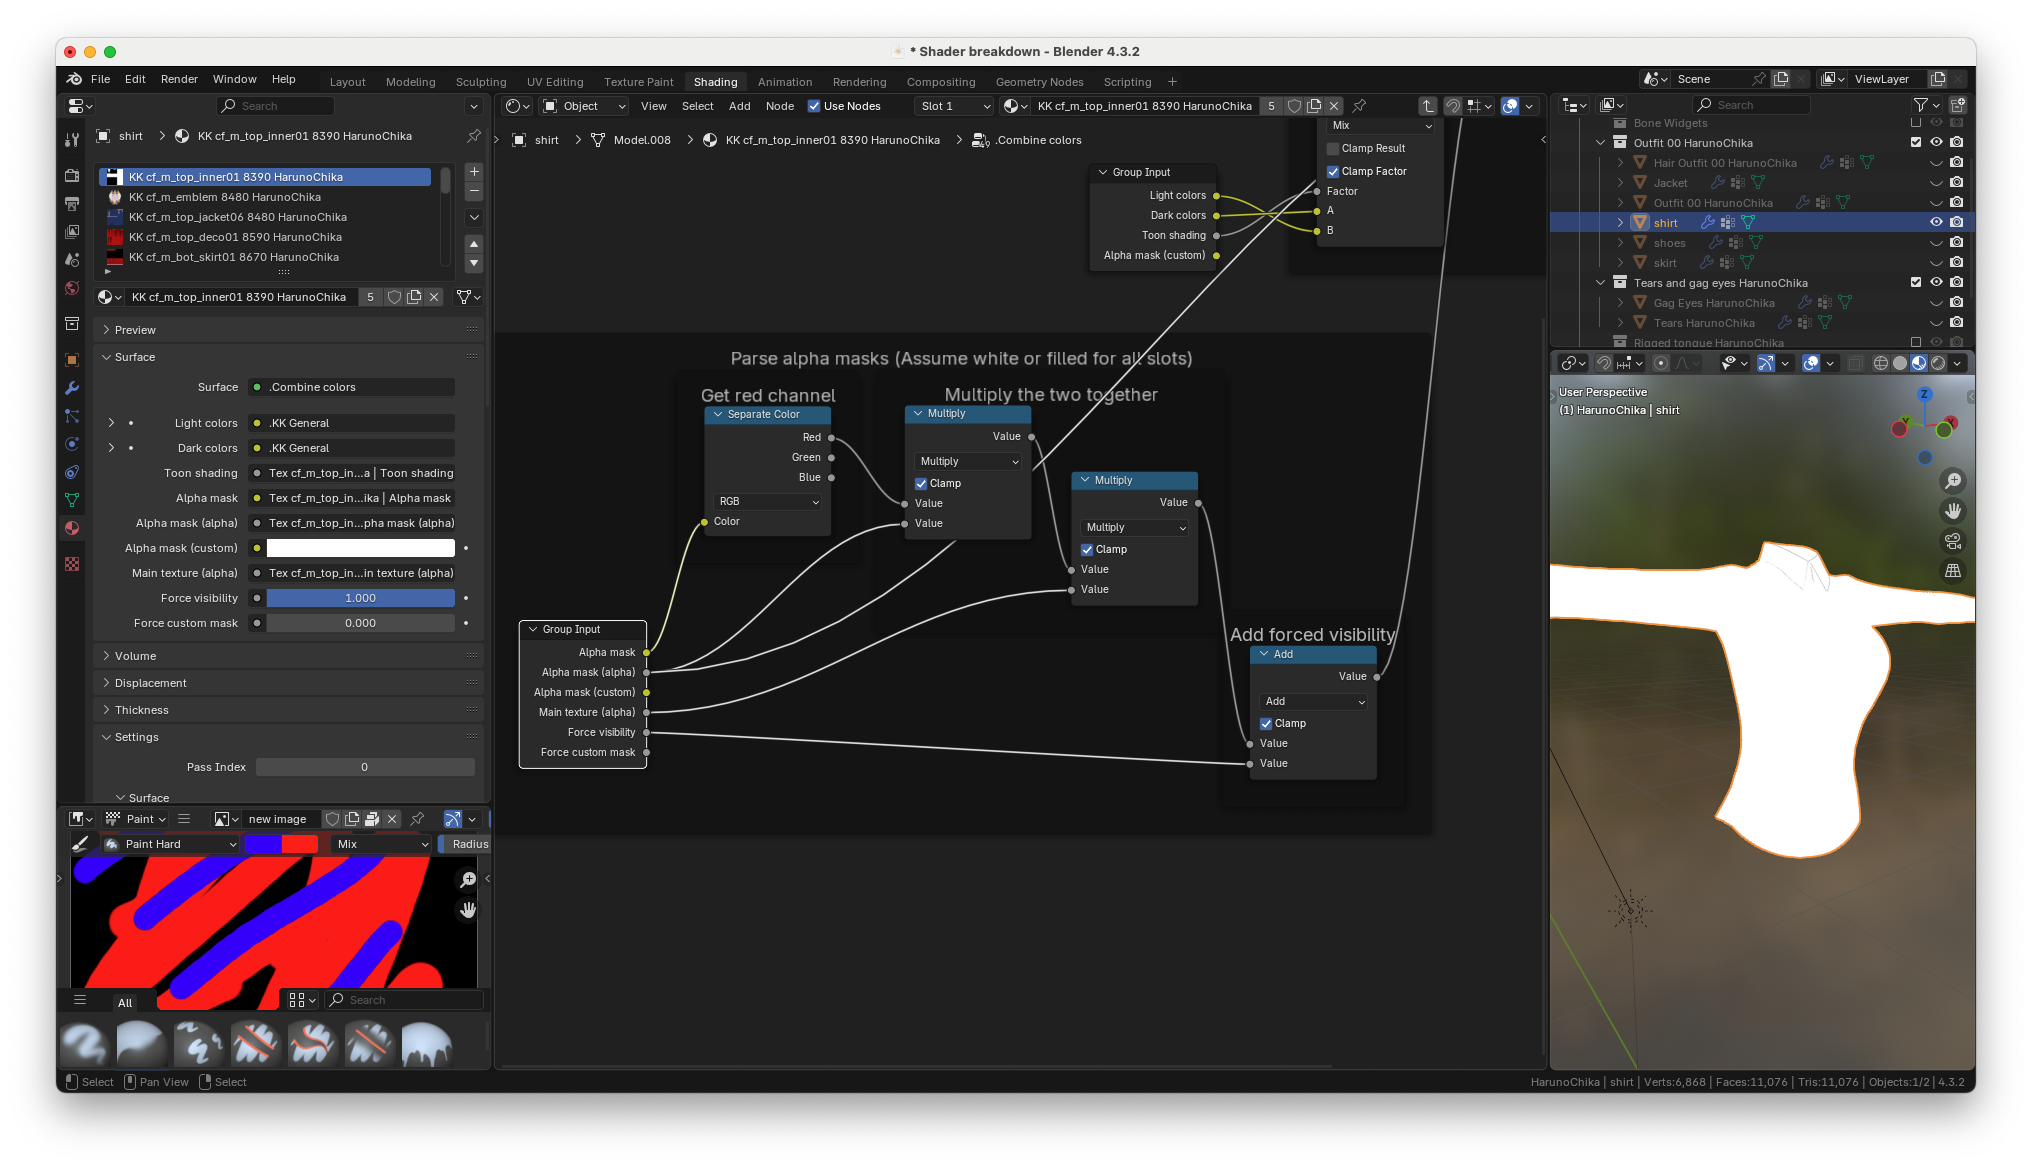
because the alpha channel is pure white, this is what it looks like when
the red channel of the alpha mask and the alpha channel of the alpha
mask are multiplied together.
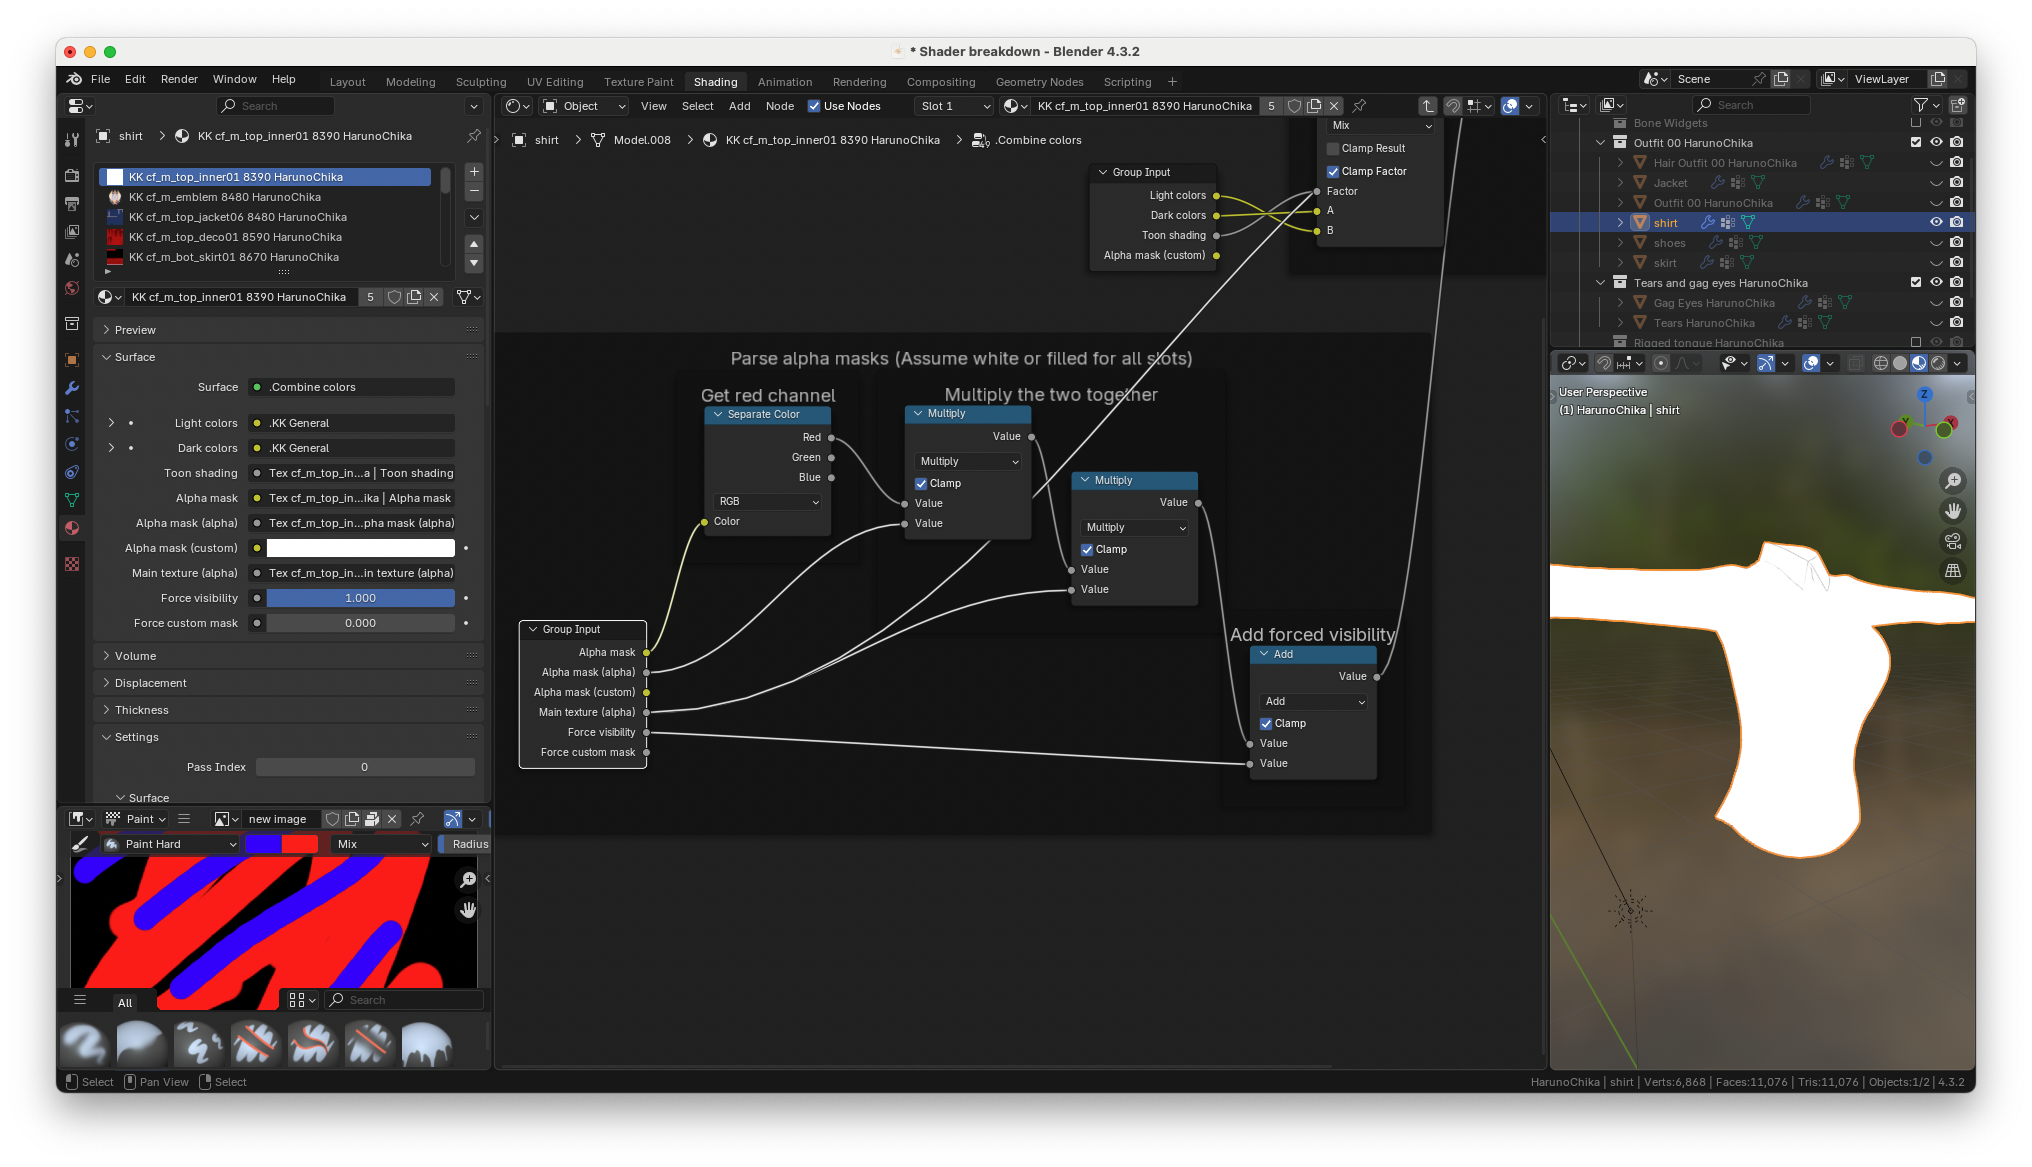
The alpha channel of the main texture can also determine the materials
visibility. In this case, the main textures alpha channel is pure white
so (again) it does not affect the materials visibility
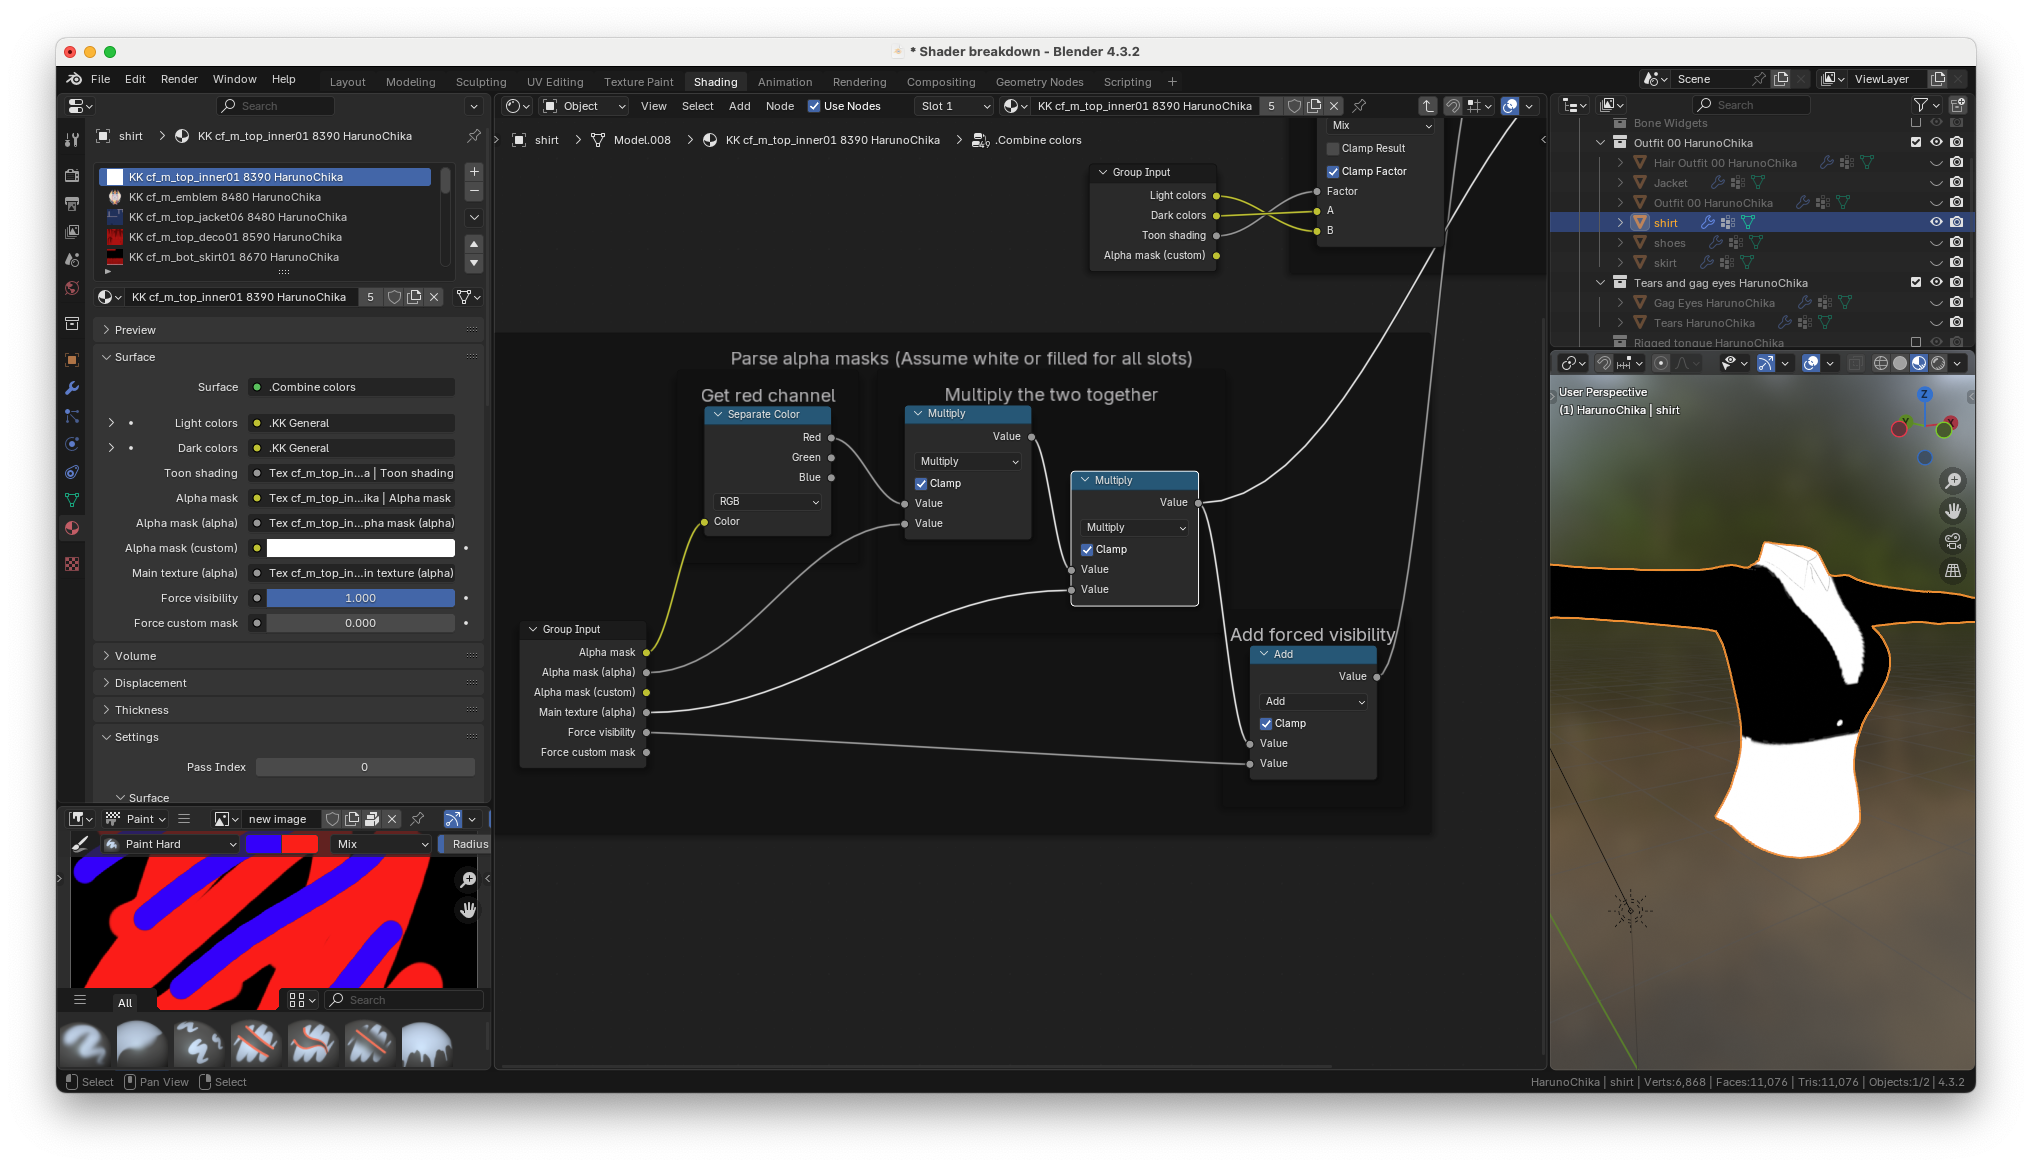
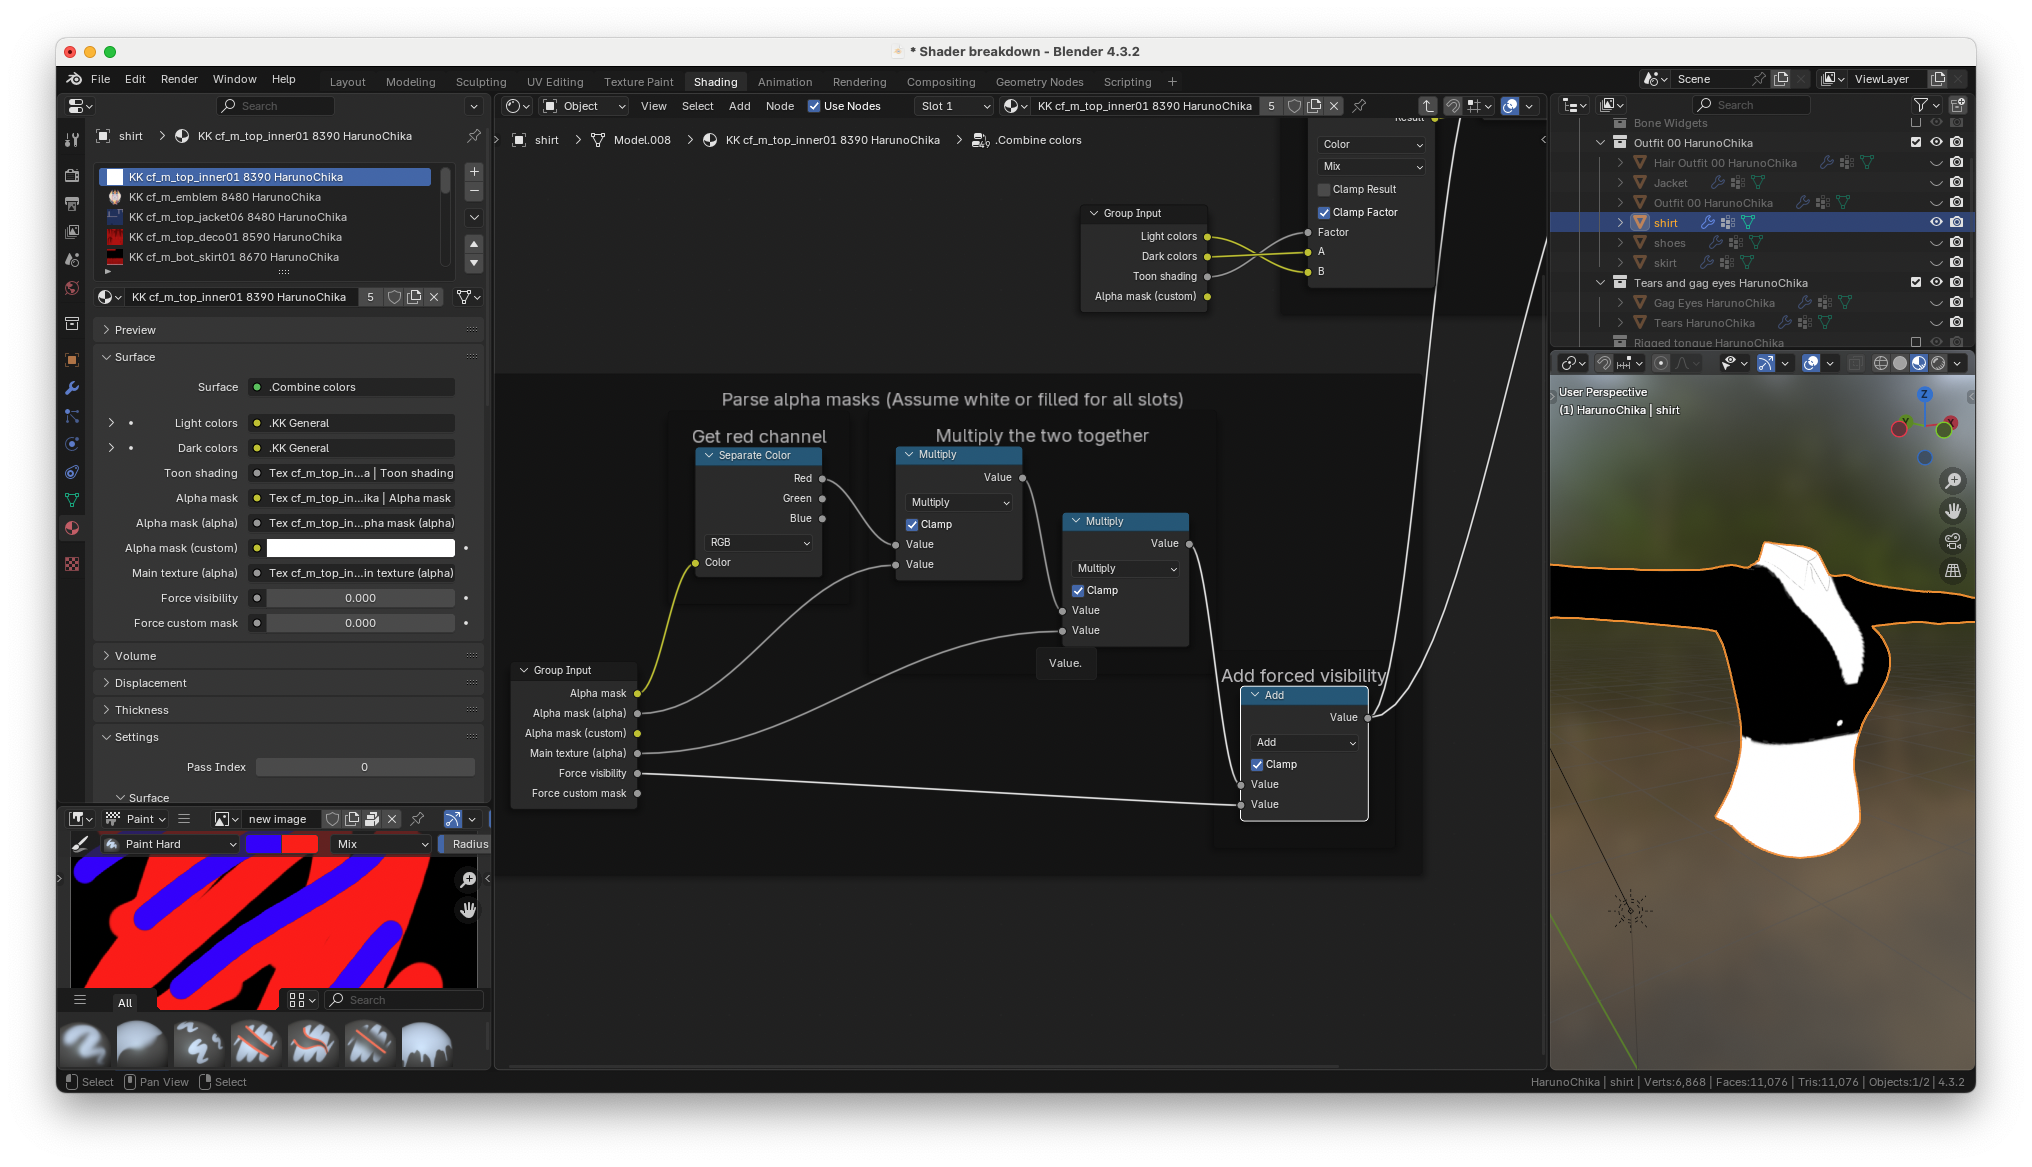
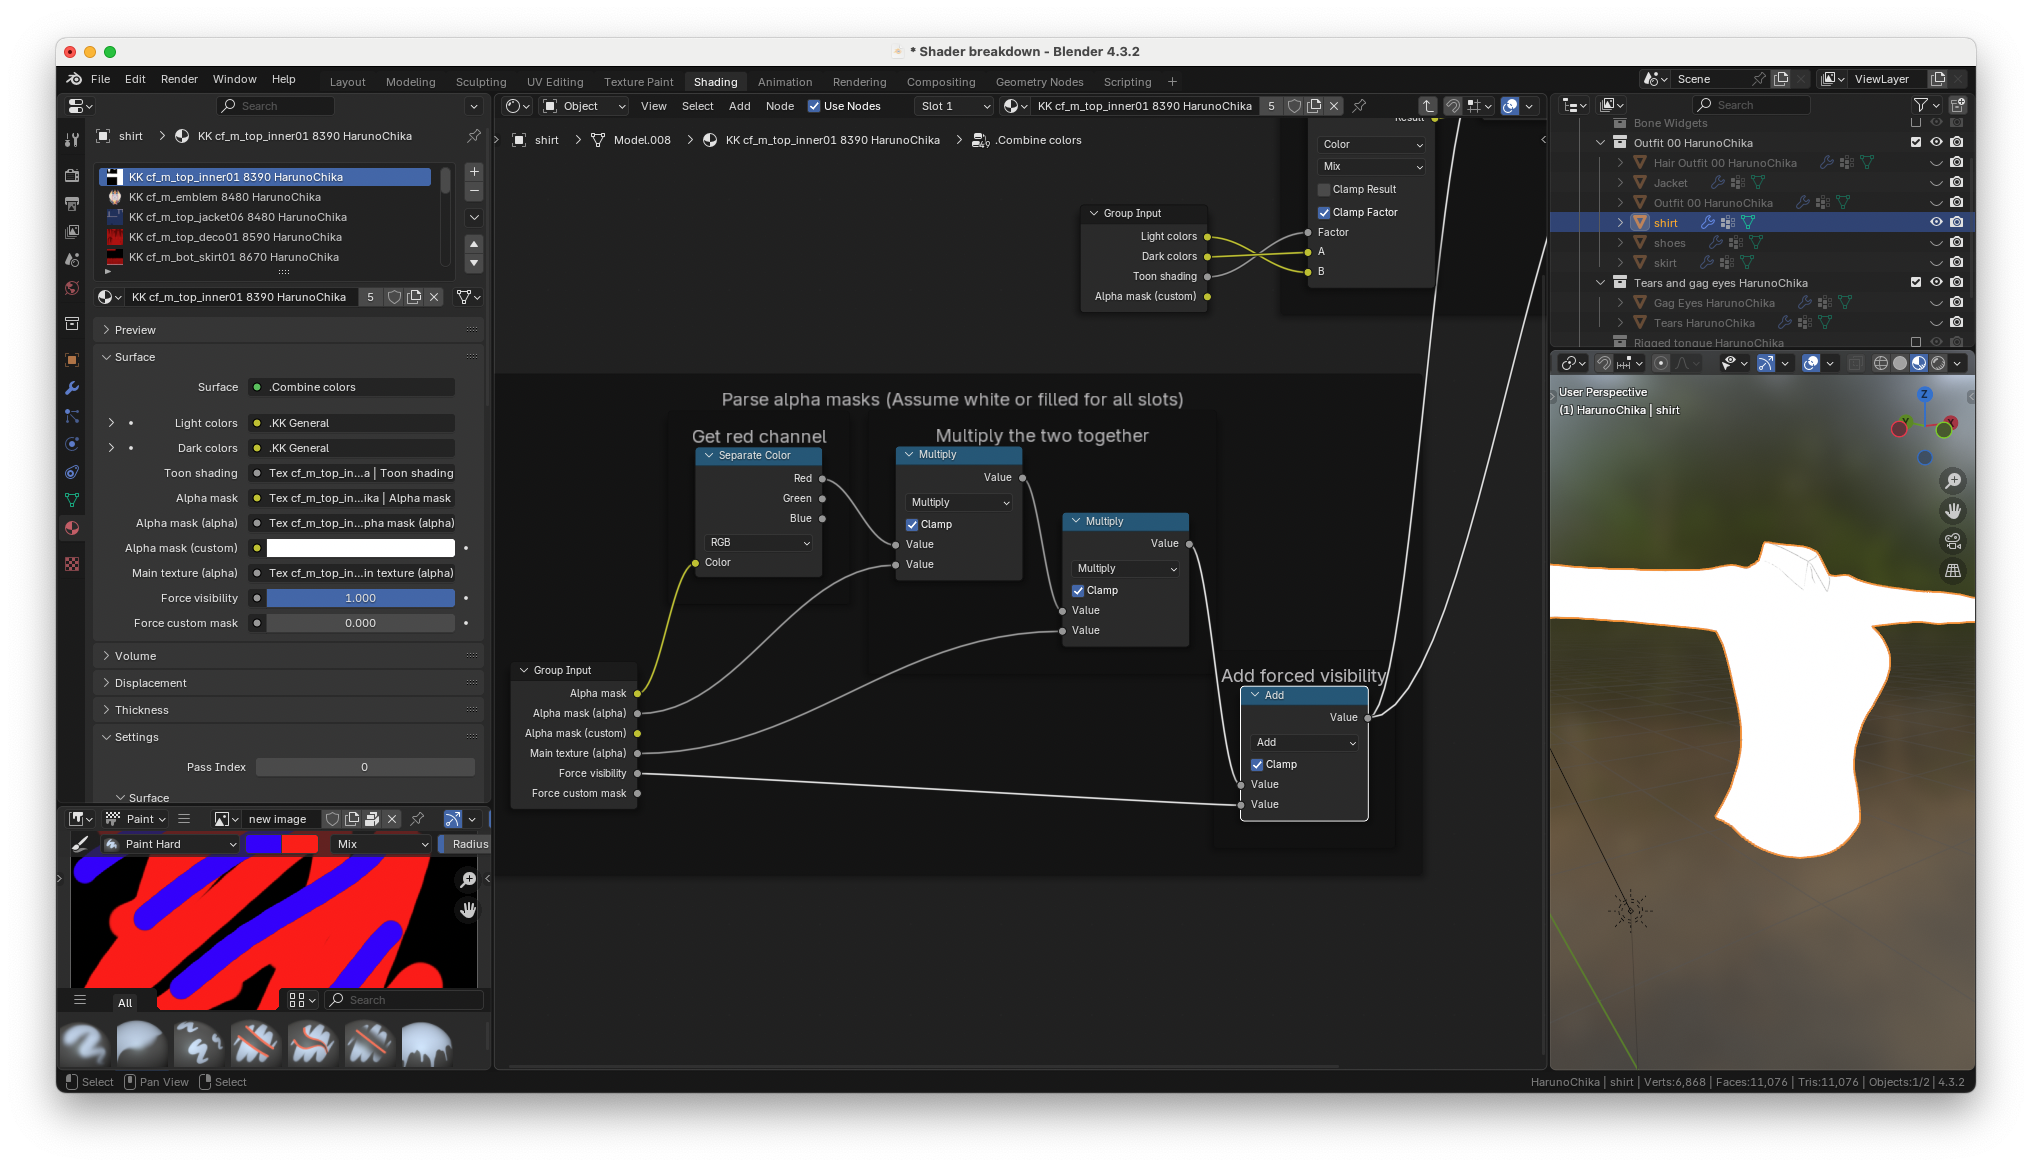
and finally if you want to force a material to be fully visible, then
you can use the force visibility slider to add white to the result.
Here's what it looks like when the slider is disabled
and here's what it looks like when it's enabled
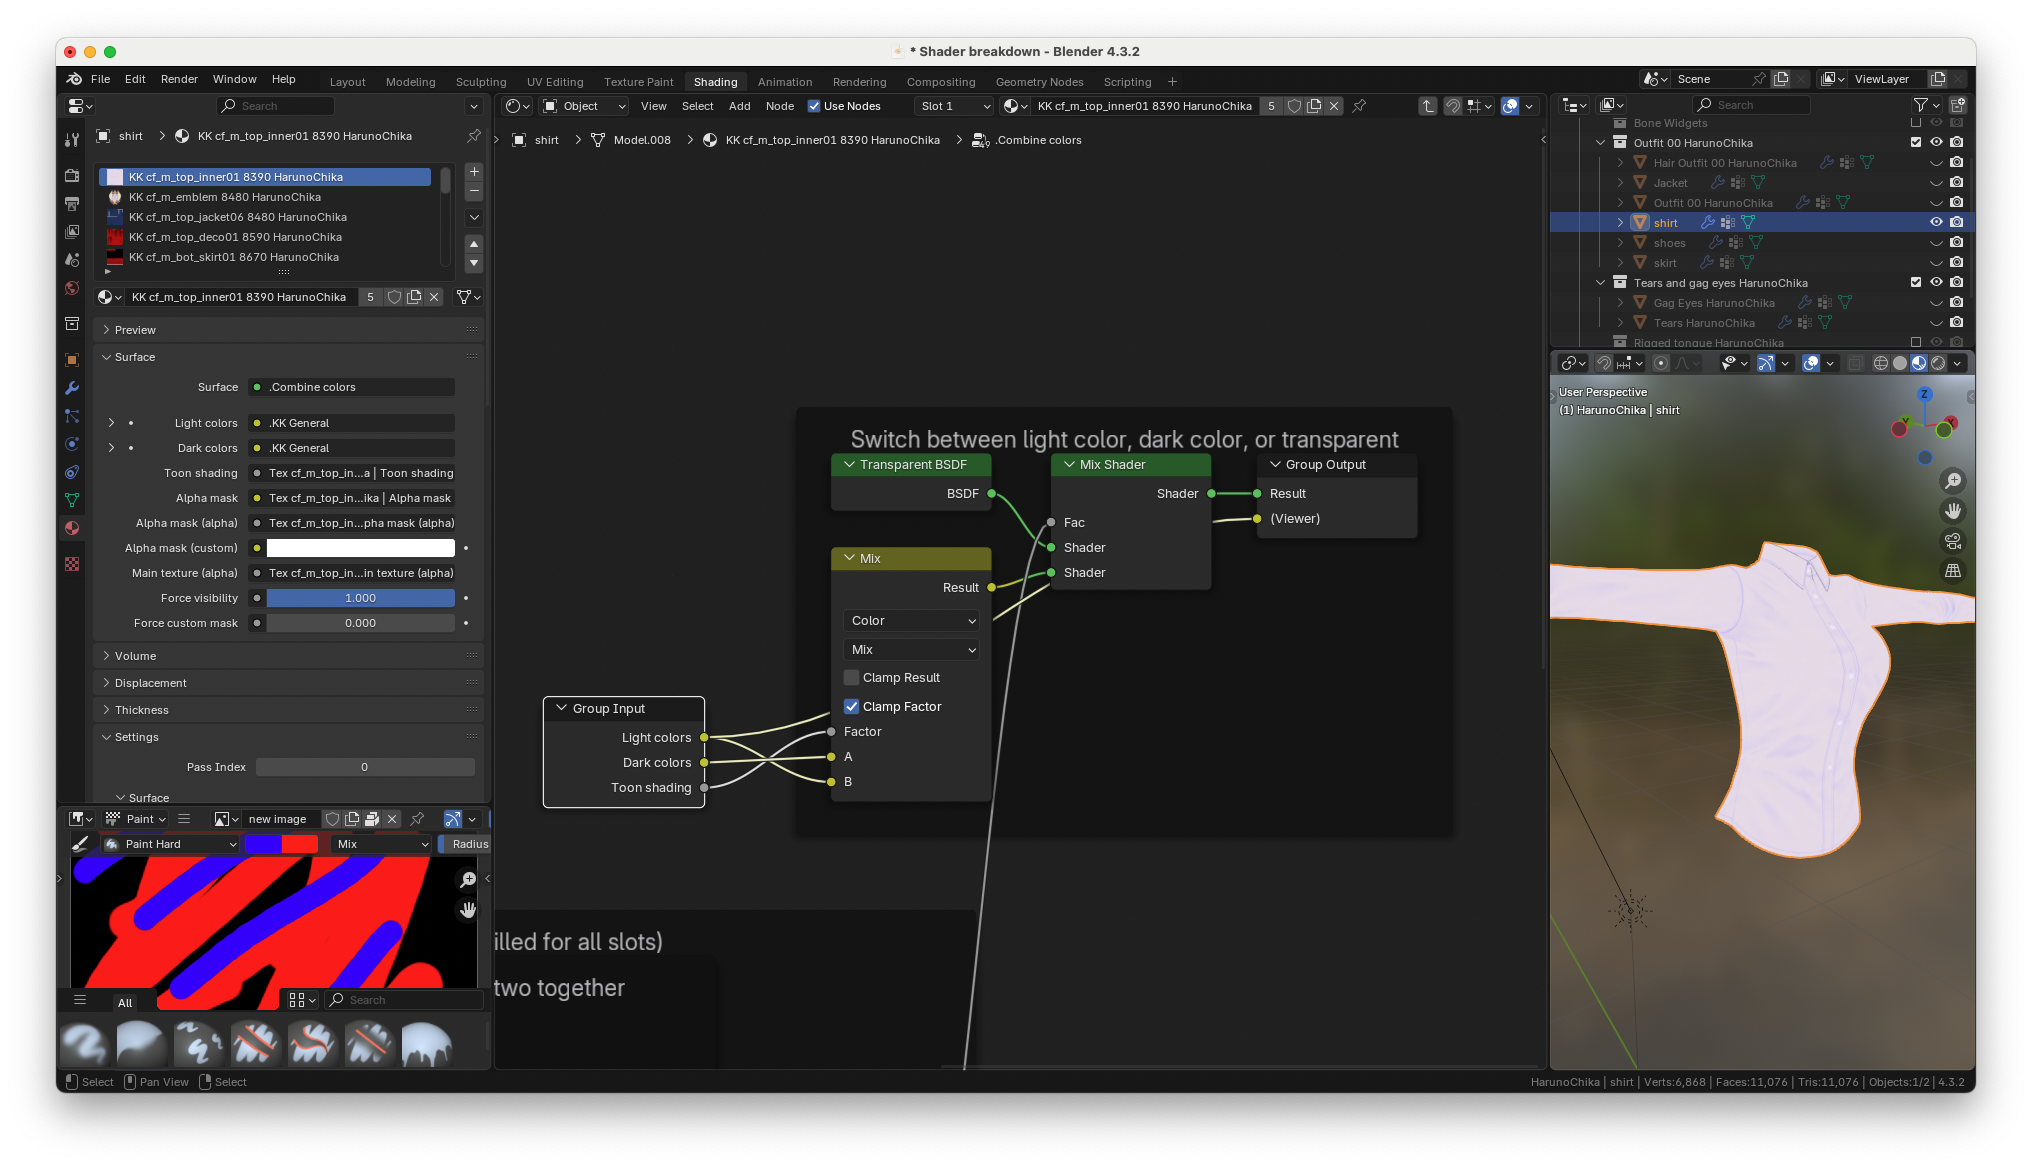
if we look at the top, we can see the light colors are fed in
through this node input
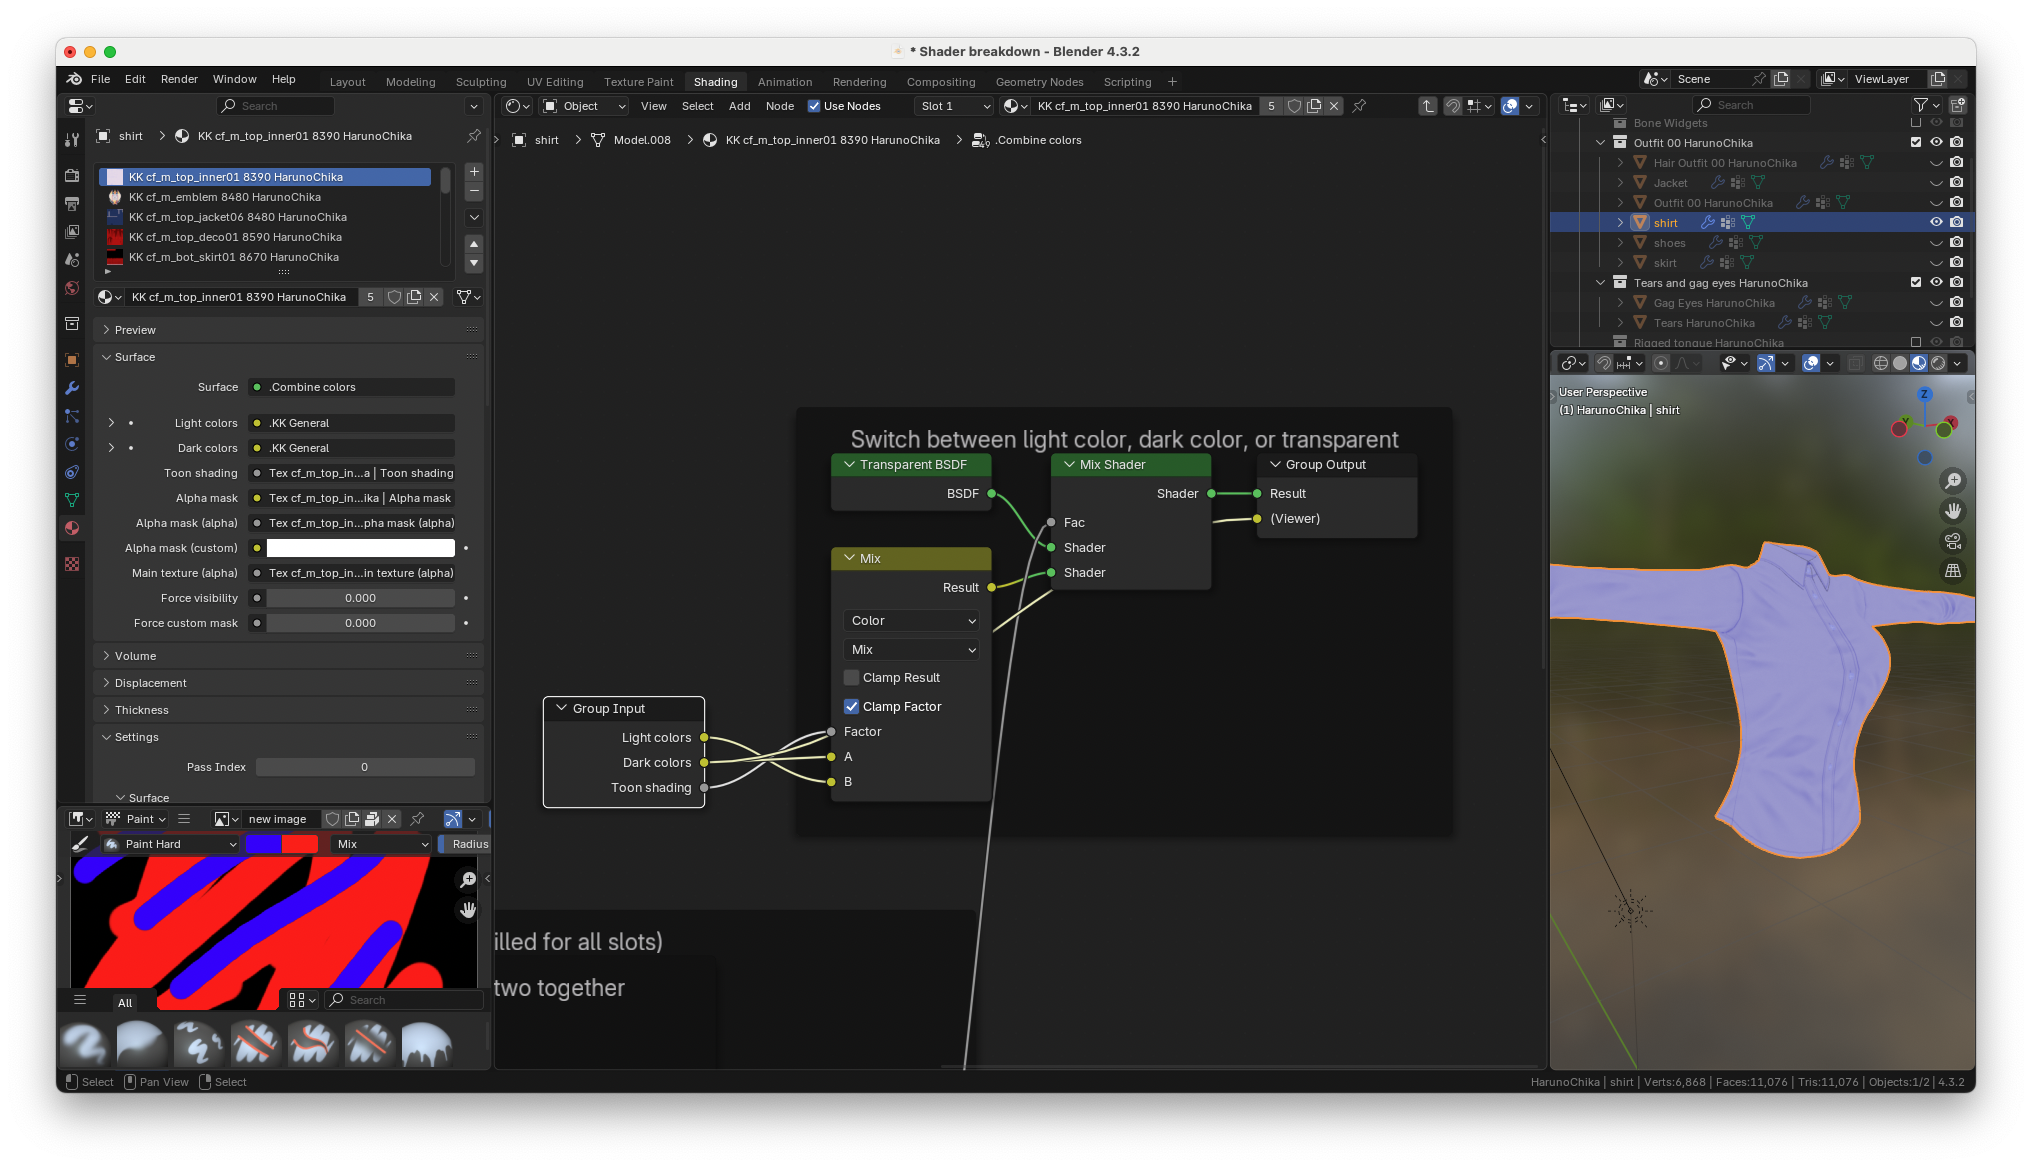
the dark colors are fed in through this node input
and the toon shading is loaded into this input
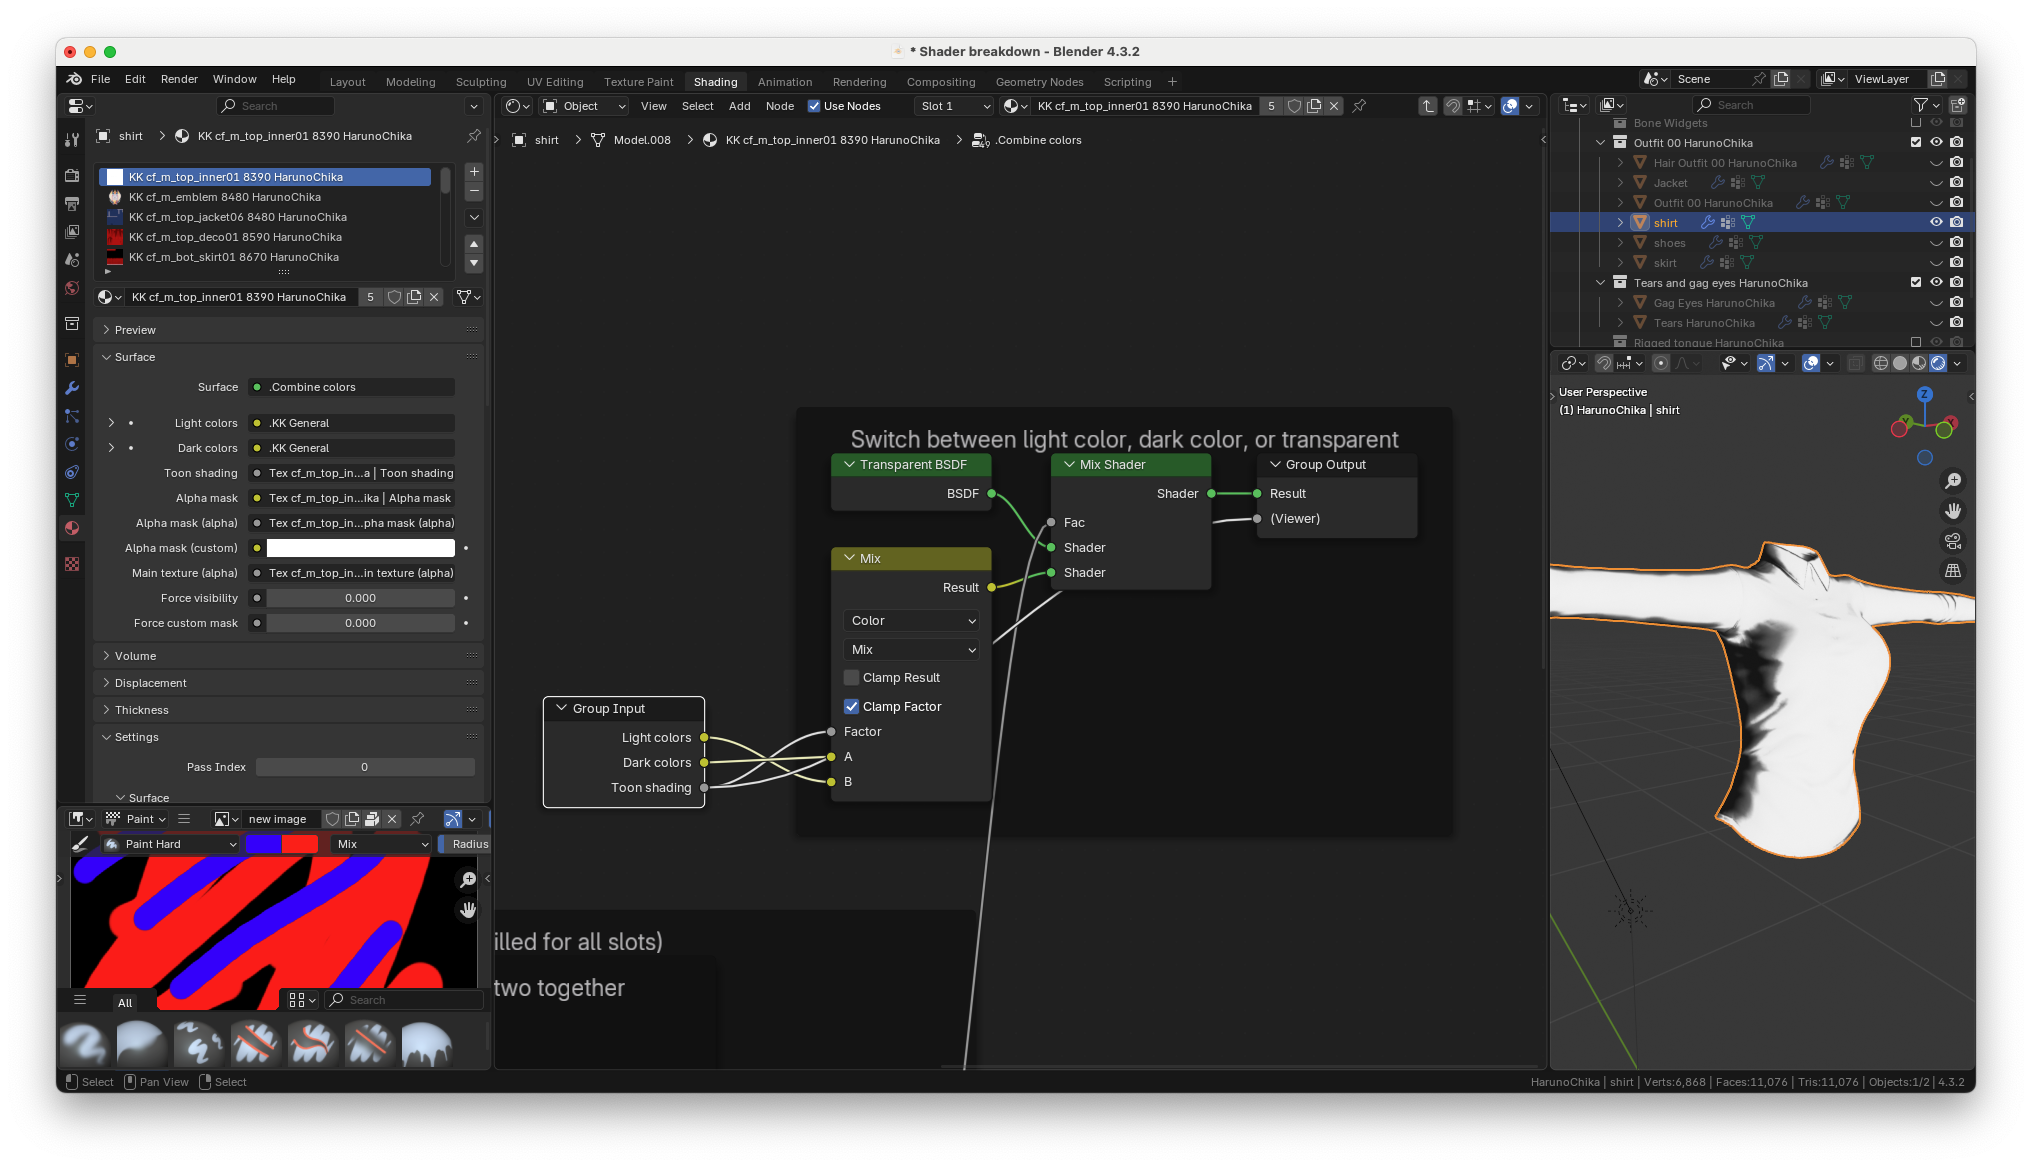
The portions of the toon shading that are white will get the light colors and
the portions that are dark will get the dark colors
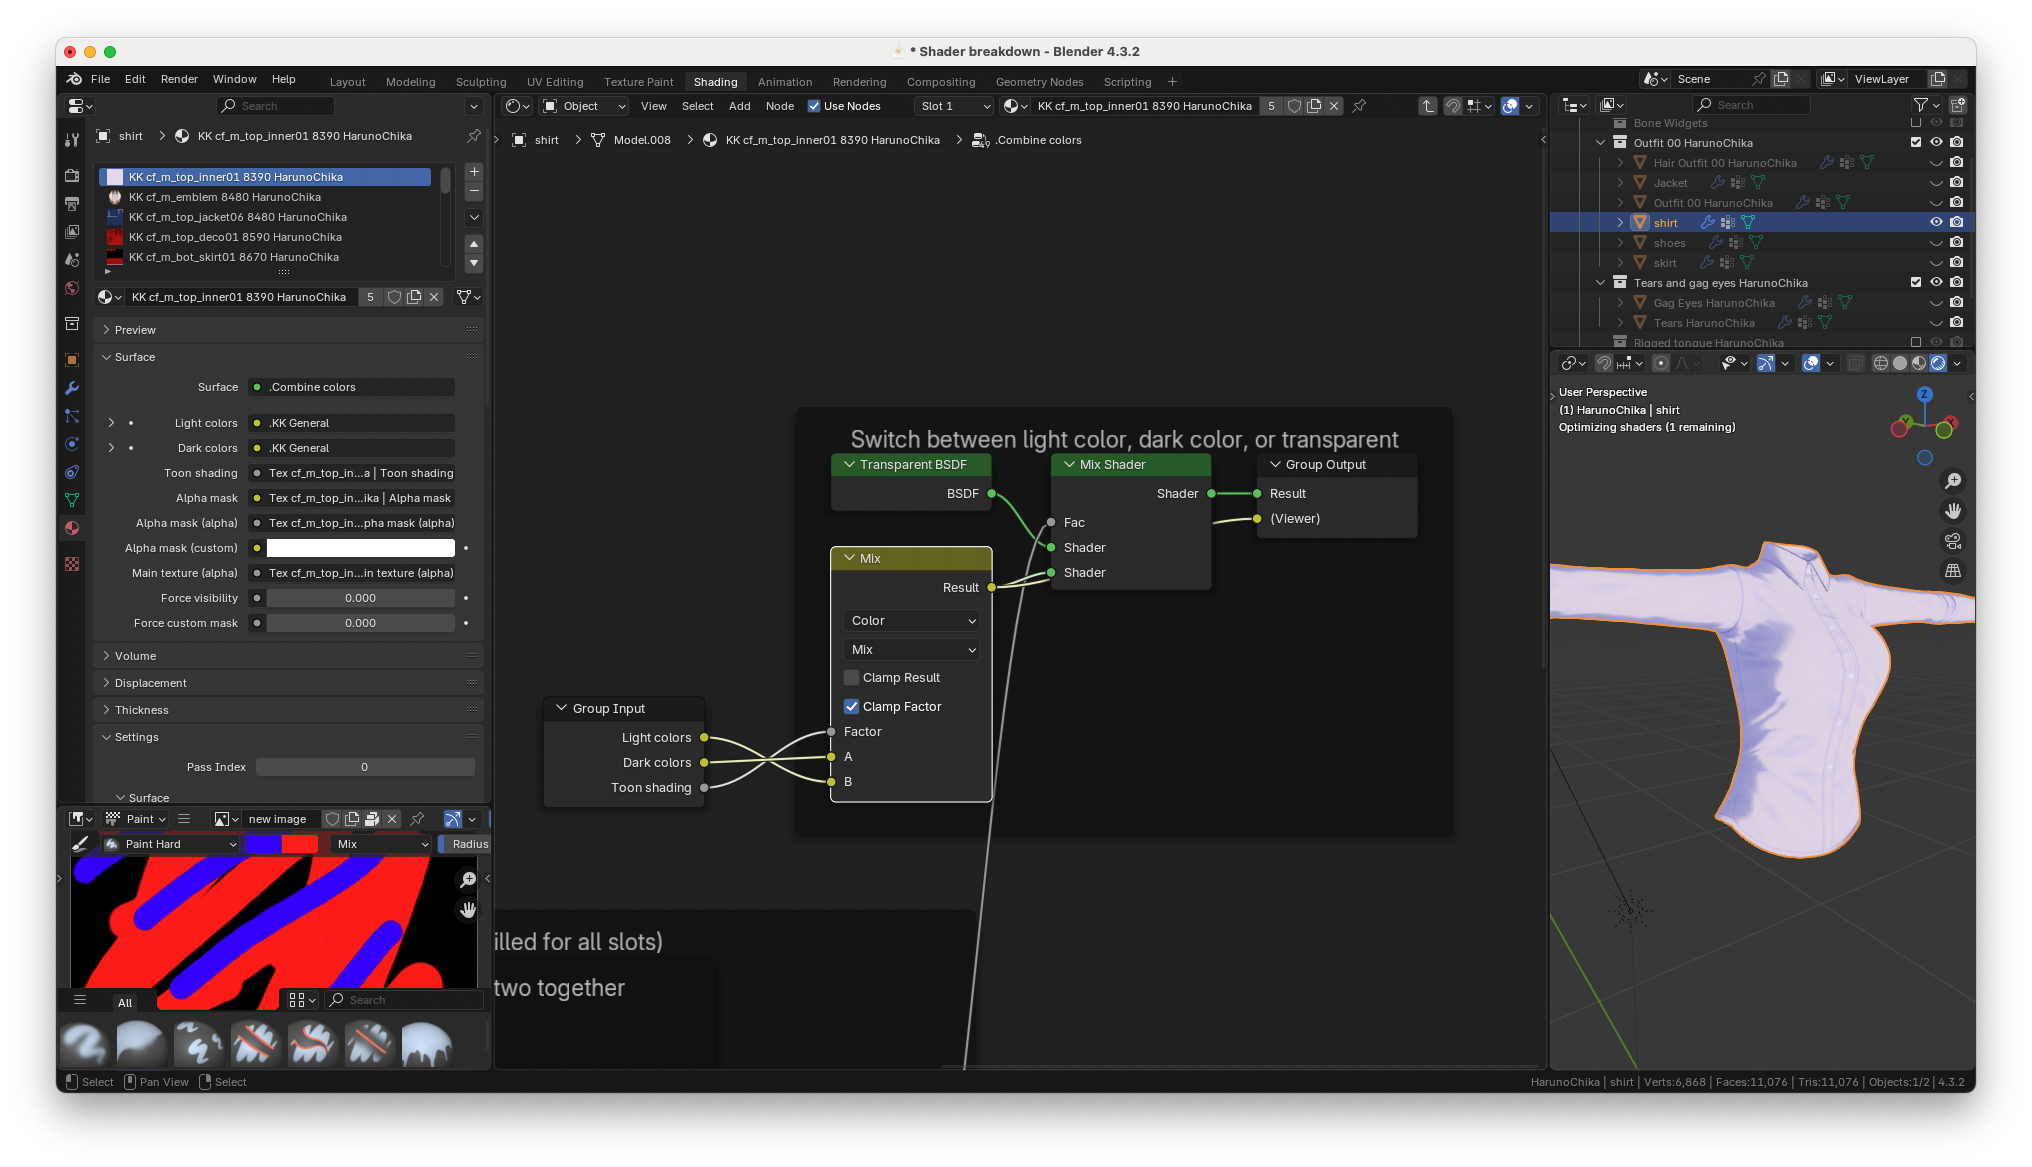
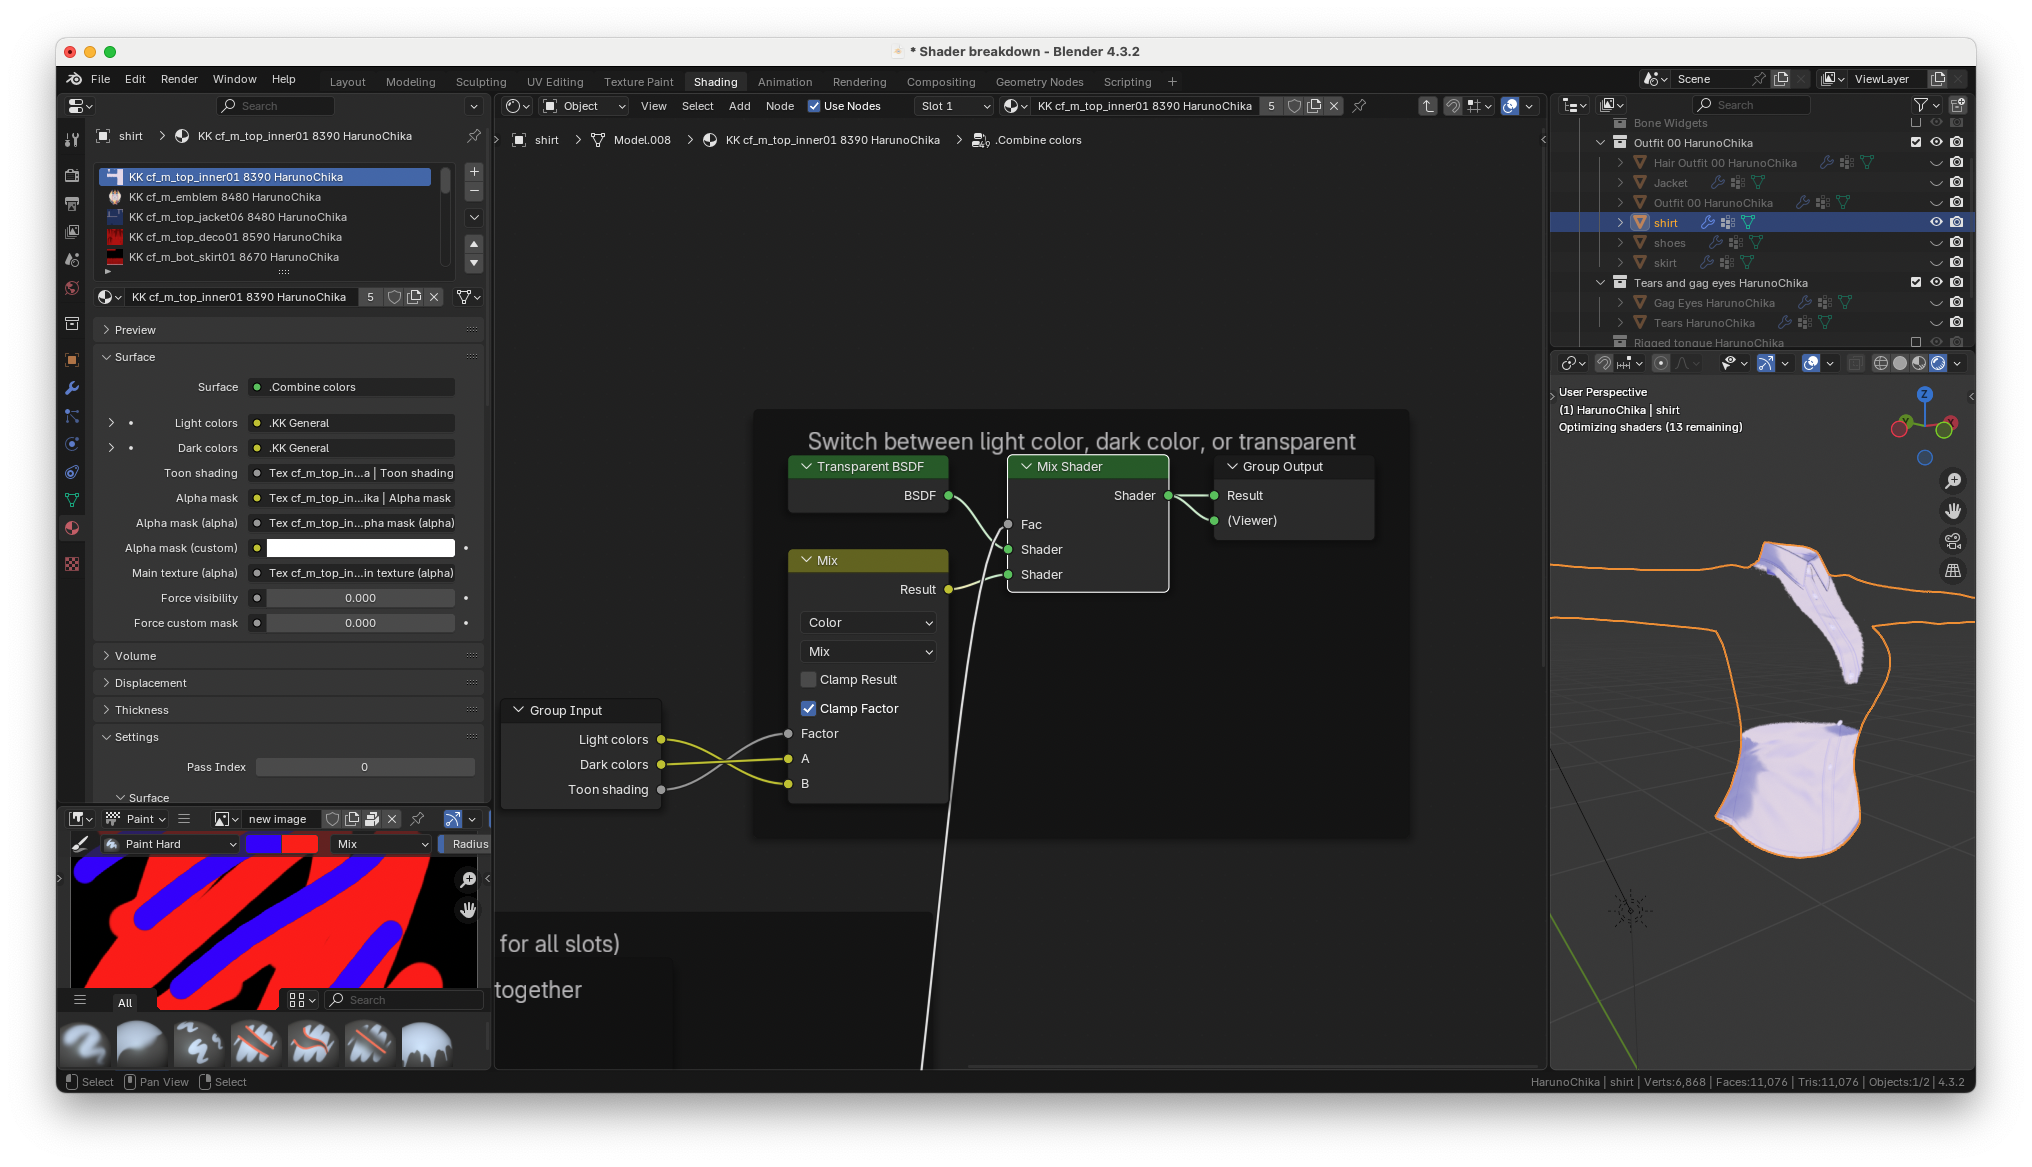
and finally the transparency mask from earlier is used to
determine if the color is passed through or if a transparent shader is
passed through to the material output
## Outro
and that was a complete walk-through of KKBP's KK general material node setup. If
you check the hair, skin, eyes and any other KKBP material, you'll find
that many of the node setups and simple masking strategies are reused
everywhere.